118
Connecting to a PC
Transferring Video Recordings to a
Computer
You can transfer recordings to a computer using the IEEE1394 (DV) terminal.
You can also use this camcorder to transfer through it recordings from an analog VCR or
8 mm camcorder to your computer using the USB terminal (see Converting Analog
Signals into Digital Signals (
100)).
Before starting the video transferring, make sure to prepare the following:
A computer equipped with a IEEE1394 (DV) terminal or a IEEE1394 (DV) capturing
board.
A DV cable (sold separately)
Video Editing Software
You can use the video editing software that came bundled with your computer or video
capturing board. You can also use the video editing software included with your
operating system (Windows Movie Maker with Windows XP and Windows ME, iMovie
with Mac OS 9 and later).
The appropriate driver
A driver is included with Windows operating systems later than Windows 98 Second
Edition and Mac operating systems later than Mac OS 9. The driver is installed
automatically when you connect the camcorder to the computer.
1. Start your computer.
2. Set the camcorder to
mode.
3. Check the [AV
DV] setting.
If you want to transfer your recordings from the tape, edit the video on the computer
and record it back on the tape, set [AV
DV] to [OFF]. If you want to convert an
analog recording to digital, set [AV
DV] to [ON].
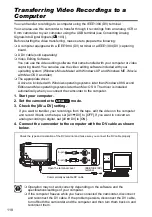
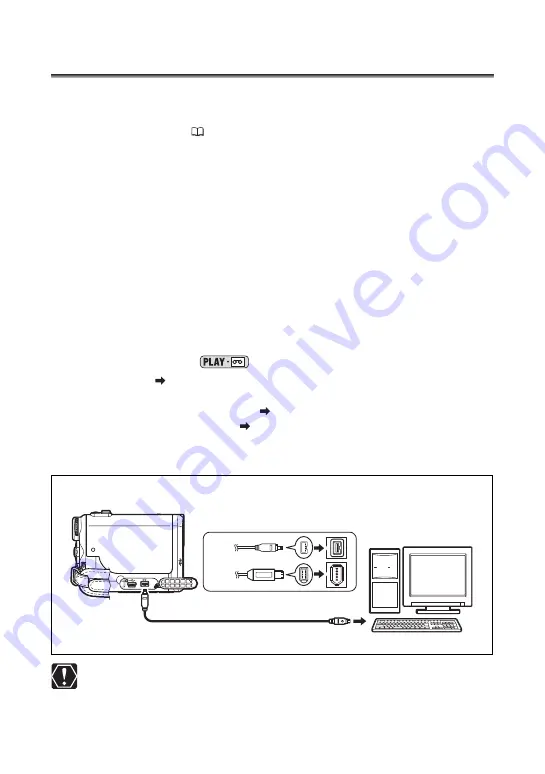
4. Connect the camcorder to the computer with the DV cable as shown
below.
Operation may not work correctly depending on the software and the
specifications/settings of your computer.
If the computer freezes while you have connected the camcorder, disconnect
and reconnect the DV cable. If the problem persists, disconnect the DV cable,
turn off both the camcorder and the computer and then turn them back on and
reconnect them.
6-pin
Commercially available DV cable
IEEE1394 (DV)
terminal
4-pin
Open the terminal cover
Check the type and orientation of the DV terminal and make sure you connect the DV cable properly


