About PictBridge (Wireless LAN) Print Settings
Settings on a PictBridge (Wireless LAN) Compliant Device
This section describes the PictBridge (Wireless LAN) function of the machine. For the print settings on a
PictBridge (Wireless LAN) compliant device, refer to the instructions given in the device's instruction
manual.
Note
• In the following description, names of setting items are given according to those used in Canon-brand
PictBridge (Wireless LAN) compliant devices. Setting item names may be different depending on the
brand or model of your device.
• Some setting items explained below may not be available on some devices. When you cannot
change print settings on a device, the printer prints images as follows:
Paper size: 4" x 6"/ 10 x 15 cm
Paper type: Photo
Layout: 1-up, Bordered
Date/File No. Print: Not printed
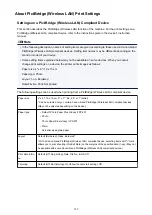
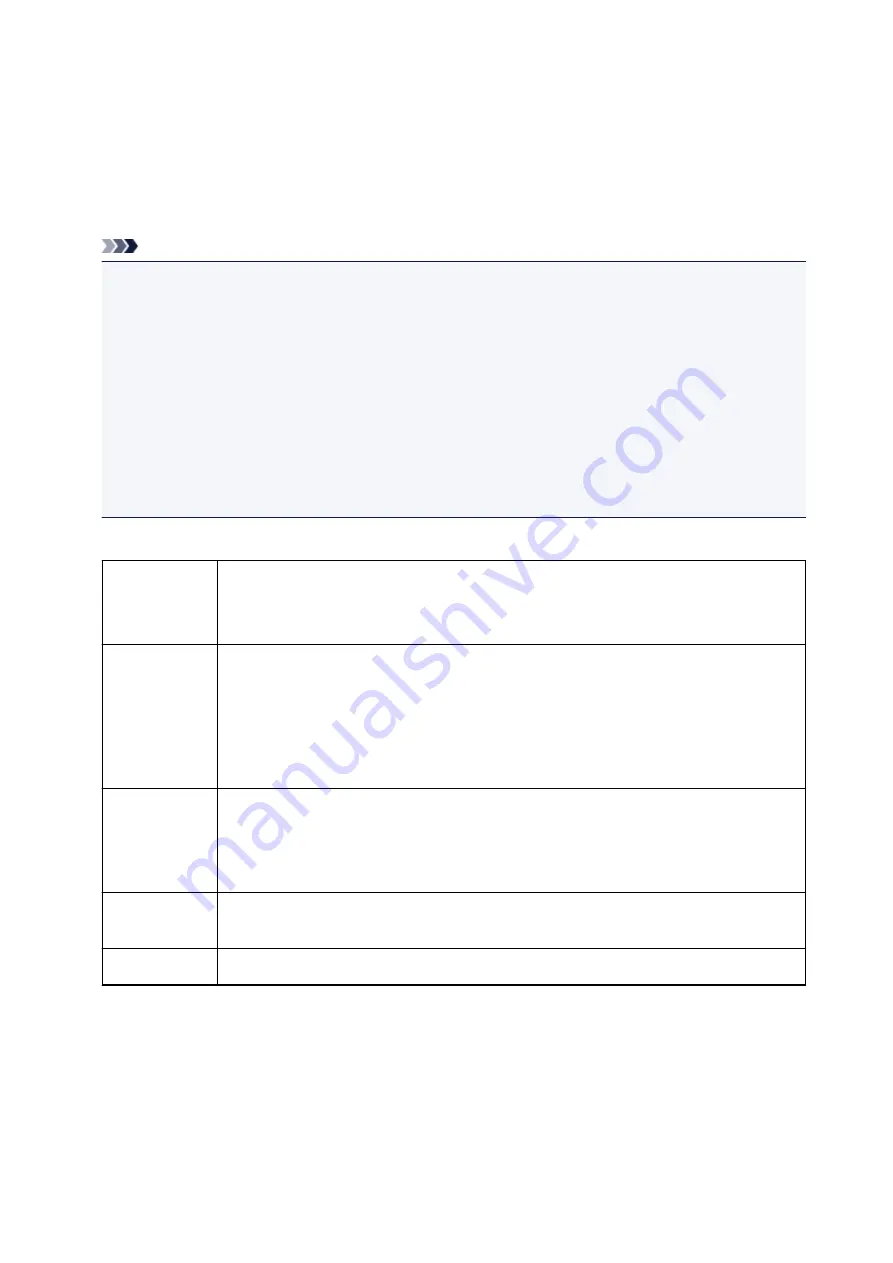
The following settings can be used when printing from a PictBridge (Wireless LAN) compliant device.
Paper size
4" x 6"/ 10 x 15 cm, 5" x 7"*, A4, 8.5" x 11"(Letter)
* Can be selected only on certain Canon-brand PictBridge (Wireless LAN) compliant devices.
(May not be selected depending on the device.)
Paper type
• Default: Photo Paper Plus Glossy II PP-201
• Photo:
Photo Paper Plus Glossy II PP-201
• Plain:
A4/Letter sized plain paper
Layout
Default (Bordered), Index, Bordered*
* With a Canon brand PictBridge (Wireless LAN) compliant device, selecting items with "i" mark
allows you to print shooting info (Exif Data) on the margins of the specified data (1-up). (May not
be available with some Canon-brand PictBridge (Wireless LAN) compliant devices.)
Print date & file
no.
Default (Off: No printing), Date, File No., Both, Off
Trimming
Default (Off: No trimming), On (follow the camera's setting), Off
299
Содержание MG2900 Series
Страница 61: ...61...
Страница 81: ...Safety Guide Safety Precautions Regulatory and Safety Information 81...
Страница 87: ...Main Components and Basic Operations Main Components About the Power Supply of the Machine 87...
Страница 88: ...Main Components Front View Rear View Inside View Operation Panel 88...
Страница 101: ...Loading Paper Originals Loading Paper Loading Originals 101...
Страница 113: ...Printing Area Printing Area Other Sizes than Letter Legal Envelopes Letter Legal Envelopes 113...
Страница 118: ...Loading Originals Loading Originals on the Platen Glass Originals You Can Load 118...
Страница 122: ...Replacing a FINE Cartridge Replacing a FINE Cartridge Checking the Ink Status 122...
Страница 127: ...Important Check if the FINE cartridge is installed correctly 127...
Страница 159: ...Important Be sure to turn off the power and unplug the power cord before cleaning the machine 159...
Страница 179: ...Information about Network Connection Useful Information about Network Connection 179...
Страница 187: ...About Network Communication Changing and Confirming Network Settings Appendix for Network Communication 187...
Страница 209: ...Appendix for Network Communication Using the Card Slot over a Network About Technical Terms Restrictions 209...
Страница 233: ...Information in this guide is subject to change without notice 233...
Страница 235: ...Printing Printing from a Computer Printing from a Digital Camera 235...
Страница 236: ...Printing from a Computer Printing with Application Software that You are Using Printer Driver 236...
Страница 241: ...Important In the Presets section click Save Current Settings as Preset Save As to register the specified settings 241...
Страница 248: ...Click Print When you execute print the document will be enlarged or reduced to fit to the page size 248...
Страница 262: ...Adjusting Color Balance Adjusting Brightness Adjusting Intensity Adjusting Contrast 262...
Страница 279: ...Related Topics Setting the Print Quality Level Custom Printing a Color Document in Monochrome 279...
Страница 300: ...Copying Making Copies Basic Switching the Page Size between A4 and Letter 300...
Страница 304: ...Scanning Scanning from a Computer 304...
Страница 319: ...5 Select Select Source according to the items to be scanned 6 Select Auto scan for Paper Size then click OK 319...
Страница 323: ...Note The default save folder is the Pictures folder 7 Click OK Scanned images are saved according to the settings 323...
Страница 337: ...Defaults You can restore the settings in the displayed screen to the default settings 337...
Страница 343: ...Instructions Opens this guide Defaults You can restore the settings in the displayed screen to the default settings 343...
Страница 347: ...Defaults You can restore the settings in the displayed screen to the default settings 347...
Страница 363: ...Instructions Opens this guide Defaults You can restore the settings in the displayed screen to the default settings 363...
Страница 382: ...Useful Information on Scanning Adjusting Cropping Frames in the Image Stitch Window Resolution Data Formats 382...
Страница 419: ...Problems with Printing Quality Print Results Not Satisfactory Ink Is Not Ejected 419...
Страница 436: ...Problems with Scanning Problems with Scanning Scan Results Not Satisfactory 436...
Страница 459: ...Problems with Installation Downloading Cannot Install the MP Drivers Uninstalling IJ Network Tool 459...
Страница 460: ...Cannot Install the MP Drivers Download the driver from the support page of our website then reinstall it 460...
Страница 465: ...Click Here to Search For details on how to resolve errors without Support Codes see A Message Is Displayed 465...
Страница 503: ...5B00 Cause Printer error has occurred Action Contact the service center 503...
Страница 504: ...5B01 Cause Printer error has occurred Action Contact the service center 504...

