background image

35

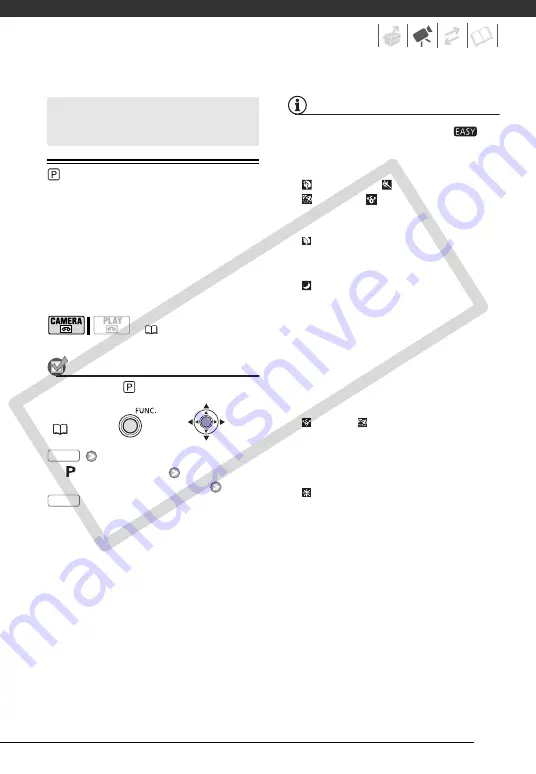
Advanced Function

: Special Scene Recording Programs

Recording in a very bright ski resort or 
capturing the full colors of a sunset or a 
fireworks display becomes as easy as 
selecting a Special Scene recording 
program. For details about the available 
options, refer to the sidebar on 
page 36.

POINTS TO CHECK

Mode switch: 


[

 PROGRAM AE] 


Desired recording program 

NOTES

• Do not set the mode switch to 


during the actual recording of a scene; 
the brightness of the picture may 
change abruptly.

• [

 PORTRAIT]/[

 SPORTS]/

[

 BEACH]/[

 SNOW]

- The picture may not appear smooth 

during playback.

• [

PORTRAIT]

- The blur effect of the background 

increases the more you zoom in (

T

).

• [

 NIGHT]

- Moving subjects may leave a trailing 

afterimage.

- Picture quality may not be as good as 

in other modes.

- White points may appear on the 

screen.

- Autofocus may not work as well as in 

other modes. In such case, adjust the 
focus manually.

• [

SNOW]/[

BEACH]

- The subject may become 

overexposed on cloudy days or in 
shaded places. Check the image on 
the screen.

• [

FIREWORKS]

- To avoid camcorder shake, we 

recommend using a tripod.

Advanced Functions

(

19)

FUNC.

(

20)

FUNC.

FUNC.

CO

PY

Содержание MD 215

Страница 1: ...PUB DIE 295 Digital Video Camcorder Instruction Manual PAL COPY ...

Страница 2: ...ette If the symptoms reappear shortly after the cleaning the videocassette may be defective Stop using it Availability differs from area to area Video heads may become dirty under the following conditions When using the camcorder in humid or hot places When using cassettes with damaged or dirty tapes When using the camcorder in dusty places When using the video heads for a long time without cleani...

Страница 3: ...pter CA 590E may damage the camcorder European Union and EEA only This symbol indicates that this product is not to be disposed of with your household waste according to the WEEE Directive 2002 96 EC and your national law This product should be handed over to a designated collection point e g on an authorized one for one basis when you buy a new similar product or to an authorized collection site ...

Страница 4: ...ging the Battery Pack 17 Installing the Backup Battery 17 Preparing the Wireless Controller only and Accessories 19 Basic Operation of the Camcorder 19 Operating Modes 19 Joystick and Joystick Guide 20 Using the Menus 22 First Time Settings 22 Changing the Language 22 Changing the Time Zone 23 Setting the Date and Time 23 Getting Ready to Start Recording 23 Opening the Lens Cover and Adjusting the...

Страница 5: ...eturning to a Pre marked Position 33 Locating the Beginning of a Recording Date 34 Locating the End of the Last Scene 34 On Screen Displays Data Code 35 Advanced Function 35 Special Scene Recording Programs 37 Flexible Recording Changing the Shutter Speed 38 LCD Video Light 38 Self Timer 39 Audio Recording Mode 40 Audio Playback Modes 41 Manual Focus Adjustment 42 Manual Exposure Adjustment 42 Whi...

Страница 6: ...__ 46 Connecting to a TV or VCR 47 Connection Diagrams 48 Playback on a TV Screen 48 Copying your Recordings to an External Video Recorder 49 Audio Dubbing 51 Connecting to a Computer 51 PC Connection Diagram 52 Transferring Video Recordings COPY ...

Страница 7: ...Mode TV Type etc 55 Audio Setup Audio Mode Wind Screen etc 56 Display Setup LCD Brightness Language etc 57 System Setup Beep Power Save etc 58 Date Time Setup 59 Trouble 59 Troubleshooting 61 List of Messages 63 Do s and Don ts 63 Handling Precautions 65 Maintenance Others 67 Using the Camcorder Abroad 68 General Information 68 System Diagram 69 Optional Accessories 72 Specifications 75 Index COPY...

Страница 8: ...nual are simulated pictures taken with a still camera Note that unless indicated otherwise illustrations in this manual refer to the model About this Manual Setting the Date and Time 1 Open the date and time setup screen MENU DATE TIME SETUP DATE TIME Blinking arrows will be displayed around the first field of the date 2 Change each field of the date and time with the joystick and move to the next...

Страница 9: ...d Accessories CA 590E Compact Power Adapter incl power cord BP 2L5 Battery Pack Lithium Button Battery CR1616 STV 250N Stereo Video Cable incl ferrite core WL D85 Wireless Controller Lithium Button Battery CR2025 for Wireless Controller COPY ...

Страница 10: ...xample Components Guide Left side view Front view Right side view Lens cover switch 26 open closed DV terminal 47 51 MIC microphone terminal 39 AV terminal 47 CHARGE indicator 15 Speaker Mode switch 27 Easy recording Recording programs Grip belt 18 Strap mount 71 Lock button switch 19 Stereo microphone FUNC COPY ...

Страница 11: ...EFFECTS button 44 Remote sensor 18 Viewfinder 28 Dioptric adjustment lever 28 QUICK START button 30 Start Stop button 26 DC IN terminal 15 Backup battery compartment 17 Serial number Battery attachment unit 15 LCD screen 23 Cassette compartment 25 Cassette compartment cover 25 Zoom lever 28 OPEN EJECT switch 25 Tripod socket 18 BATT battery release switch 15 FUNC COPY ...

Страница 12: ... STOP PHOTO ZOOM CARD DATE SEARCH REW PLAY FF STOP PAUSE SLOW AUDIO DUB ZERO SET MEMORY TV SCREEN START STOP button 26 CARD buttons DATE SEARCH buttons 33 REW button 31 button 31 PAUSE button 31 SLOW button 31 AUDIO DUB button 49 ZERO SET MEMORY button 33 PHOTO button Zoom buttons 28 PLAY button 31 FF button 31 STOP button 31 button 31 button 31 TV SCREEN button 57 COPY ...

Страница 13: ...41 Image stabilizer 54 Recording mode 55 Tape operation 14 Time code hours minutes seconds Remaining tape 14 Remaining battery charge 14 Wind screen off 56 Audio recording mode 39 Remote sensor off 57 Backup battery warning 17 Level marker 57 Recording reminder 14 Operating mode 19 Audio playback mode 40 Speaker volume 32 Search function display END SEARCH 34 DATE SEARCH 33 Playback time hours min...

Страница 14: ...reaches its end the display changes to END When the time left is less than 15 seconds the remaining tape time may not appear Depending on the type of tape the remaining time displayed may not be correct In any case you will be able to record on the tape the number of minutes that appears on the cassette s label for example 85 minutes Remaining battery charge When starts flashing in red replace the...

Страница 15: ...imes with a full battery pack refer to the tables on page 70 1 Turn off the camcorder 2 Attach the battery pack to the camcorder Press the battery pack lightly and slide it up until it clicks 3 Connect the power cord to the compact power adapter 4 Plug the power cord into a power outlet 5 Connect the compact power adapter to the camcorder s DC IN terminal The CHARGE indicator starts flashing The i...

Страница 16: ...r s DC IN terminal or to the compact power adapter any electrical equipment that is not expressly recommended for use with this camcorder To prevent equipment breakdowns and excessive heating do not connect the supplied compact power adapter to voltage converters for overseas travels or special power sources such as those on aircraft and ships DC AC inverters etc NOTES The CHARGE indicator also se...

Страница 17: ...up battery cover 3 Insert the backup battery with the side facing out 4 Close the cover NOTES The battery life of the backup battery is about one year flashes in red when the lithium button battery is not installed or when it needs to be replaced Preparing the Wireless Controller only and Accessories First insert the supplied lithium button battery CR2025 into the wireless controller 1 Press the t...

Страница 18: ...eless controller does not work check that WL REMOTE is not set to OFF 57 Otherwise replace the battery Accessories Fasten the grip belt Adjust the grip belt so that you can reach the zoom lever with your index finger and the button with your thumb Do not leave the viewfinder exposed to direct sunlight as it may melt due to concentration of the light by the lens Do not use tripods with fastening sc...

Страница 19: ...he joystick can also be used in combination with the joystick guide to operate additional functions Press to display hide the joystick guide when recording the joystick guide will appear only when the mode switch is set to The functions that appear on the joystick guide will change depending on the operating mode Operating mode switch Icon display Operation Recording movies 26 Playing movies 31 Ba...

Страница 20: ...items not available will appear grayed out 3 Select the desired setting from the available options at the bottom bar The selected option will be highlighted in light blue Menu items not available will appear grayed out With some settings you will need to make further selections and or press Follow the additional operation guides that will appear on the screen such as the joystick icon small arrows...

Страница 21: ...lose the menu at any time NOTES Instead of steps 1 and 2 you can also keep pressed down for more than 1 second to open the setup menus screen directly Abbreviation of Menu Selections in this Manual In this manual the arrow is used to abbreviate menu selections Below is an example of changing a setting using the setup menus MENU DISPLAY SETUP LANGUAGE Desired language For selections in the FUNC men...

Страница 22: ... match your location The default setting is Paris or Singapore depending on the region of purchase MENU DATE TIME SETUP T ZONE DST Desired time zone To adjust for daylight saving time select the time zone with the mark next to the area World Time Zones Once you have set the time zone date and time you do not need to reset the clock every time you travel to another time zone Select the time zone to...

Страница 23: ...mat 58 Getting Ready to Start Recording Opening the Lens Cover and Adjusting the LCD Screen Before you start recording open the lens cover Move the lens cover switch down to to open the lens cover Rotating the LCD Panel Open the LCD panel 90 degrees You can rotate the panel 90 degrees downward You can rotate the panel 180 degrees toward the lens allowing the subject to monitor the LCD screen while...

Страница 24: ...hniques with more than 99 99 of the pixels operating to specification Less than 0 01 of the pixels may occasionally misfire or appear as black red blue or green dots This has no effect on the recorded image and does not constitute a malfunction LCD Backlight You can set the brightness of the LCD screen to normal or bright MENU DISPLAY SETUP BACKLIGHT Desired option NOTES This setting does not affe...

Страница 25: ...ark on the cassette compartment until it clicks 4 Wait for the cassette compartment to retract automatically and close the cassette compartment cover IMPORTANT Do not interfere with the cassette compartment while it is opening or closing automatically or attempt to close the cover before the cassette compartment has fully retracted Be careful not to get your fingers caught in the cassette compartm...

Страница 26: ...ock button pressed down set the switch to CAMERA 3 Press to begin recording Press again to pause the recording 1 Close the lens cover and the LCD panel 2 Turn off the camcorder 3 Remove the tape 4 Disconnect the power source and remove the battery pack Basic Recording Before You Begin Recording Make a test recording first to check if the camcorder operates correctly If necessary clean the video he...

Страница 27: ...0 seconds To resume recording press About the Power Save mode To save power when the camcorder is powered by a battery pack the camcorder will automatically shut off if left without any operations for 5 minutes 58 To restore the power turn the camcorder off and then on again When recording in very loud places such as fireworks shows or concerts sound may become distorted or it may not be recorded ...

Страница 28: ...e LCD panel is turned 180 degrees to face the subject 23 19 OPTICAL 37x 32x The zoom range is limited to the optical magnification ratio of the lens ADVANCED Advanced Zoom In addition to the optical zoom range the camcorder processes the image digitally to obtain a larger zoom range without any deterioration in image quality When recording movies with a 16 9 aspect ratio the field of view picture ...

Страница 29: ...lose as 1 cm You can also use the T and W buttons on the wireless controller The zoom speed with the wireless controller will be the same as with the camcorder or fixed at SPEED 3 when VARIABLE is selected WIDESCREEN set to ON 16 9 45x 41x 36x The picture angle will be wider at both full telephoto and full wide angle The picture angle will be wider at full wide angle WIDESCREEN set to OFF 4 3 46x ...

Страница 30: ...e recording press again Within approx 1 second the camcorder is ready to record NOTES When you wake up the camcorder from standby mode the following settings will be changed automatically Manual focus returns to automatic focus AF Manual exposure adjustment returns to automatic exposure Zoom position returns to full wide angle W The camcorder will shut off if left in standby mode for 10 minutes re...

Страница 31: ...an also hold the joystick pressed toward or toward to play back the tape reverse or forward respectively in order to locate the point where you want to start recording Basic Playback Playing Back Video 1 Holding the lock button pressed down set the switch to PLAY 2 If the joystick guide does not appear on screen press to display it 3 Locate the point where you want to begin the playback Push the j...

Страница 32: ... VOLUME FUNC FUNC Special Playback Modes1 To enter most special playback modes you need to operate the buttons on the wireless controller2 12 There is no sound during the special playback modes 1 During some special playback modes you may notice some anomalies blocky video artifacts banding etc in the playback picture 2 The wireless controller is included only with the Special playback mode Initia...

Страница 33: ...counter shows a negative number press instead appears and the camcorder rewinds fast forwards the tape The tape stops at or near the zero mark disappears and the correct time code will be displayed again NOTES If there are blank sections between recordings the zero set memory may not work correctly Locating the Beginning of a Recording Date You can locate the change of the date time zone with the ...

Страница 34: ...k toward NOTES End search cannot be used once you remove the cassette If there are blank sections between recordings the end search may not work correctly You cannot use the end search to locate the end of a scene that was audio dubbed On Screen Displays Data Code The camcorder keeps a data code containing the date and time of recording You can select the data to be displayed Options Default value...

Страница 35: ...ess of the picture may change abruptly PORTRAIT SPORTS BEACH SNOW The picture may not appear smooth during playback PORTRAIT The blur effect of the background increases the more you zoom in T NIGHT Moving subjects may leave a trailing afterimage Picture quality may not be as good as in other modes White points may appear on the screen Autofocus may not work as well as in other modes In such case a...

Страница 36: ...n the subject while blurring other distracting details SUNSET Use this mode to record sunsets in vibrant colors SPORTS Use this mode to record sports scenes such as tennis or golf SPOTLIGHT Use this mode to record spotlit scenes NIGHT Use this mode to record in low light conditions FIREWORKS Use this mode to record fireworks SNOW Use this mode to record in bright ski resorts It prevents the subjec...

Страница 37: ... second etc NOTES Do not set the mode switch to during the actual recording of a scene the brightness of the picture may change abruptly PROGRAM AE When setting the shutter speed the number displayed will flash if the value selected is not appropriate for the recording conditions In such case select a different value If you use a slow shutter speed in dark places you can obtain a brighter image bu...

Страница 38: ...nder select LCD LIGHT OFF to turn the LCD video light off Self Timer POINTS TO CHECK Set the camcorder to record pause mode 1 Activate the self timer MENU CAMERA SETUP SELF TIMER ON 2 Press to close the menu appears Set SELF TIMER to OFF to cancel the self timer 3 Press on the camcorder to start recording The camcorder starts recording video after a 10 second countdown The countdown appears on the...

Страница 39: ... an External Microphone Connect the external microphone to the MIC terminal Use commercially available condenser microphones with their own power supply and a cable no longer than 3 m You can connect almost any stereo microphone with a 3 5 mm plug but audio recording levels may vary 19 16bit Records audio at the highest quality 12bit Records audio on 2 channels Stereo 1 leaving 2 free channels Ste...

Страница 40: ... to the original recorded audio Stereo 1 Options Default value MENU AUDIO SETUP 12bit AUDIO Desired option When you select MIX VAR adjust the mix balance with the MIX BALANCE setting 56 19 L R Left and right channels stereo Main and sub signals bilingual L L Left channel only stereo Main signal only bilingual R R Right channel only stereo Sub signal only bilingual FUNC 20 FUNC FUNC 19 STEREO1 Orig...

Страница 41: ...istance or push it toward for a closer focal distance Pushing the joystick toward FOCUS again will return the camcorder to autofocus 4 Push the joystick toward BACK to save the focus adjustment Infinity Focus Use this function when you wish to focus on faraway subjects such as mountains or fireworks POINTS TO CHECK Adjust the zoom before you start the procedure Mode switch 1 Keep the joystick push...

Страница 42: ...n the initial brightness of the picture Pushing the joystick toward EXP again will return the camcorder to automatic exposure 4 Push the joystick toward BACK to lock and save the exposure setting If you operate the zoom during exposure lock the brightness of the image may change White Balance The white balance function helps you accurately reproduce colors under different lighting conditions so th...

Страница 43: ...ay provide better results in the following cases Changing lighting conditions Close ups Subjects in a single color sky sea or forest Under mercury lamps and certain types of fluorescent lights Image Effects You can use the image effects to change the color saturation and contrast to record images with special color effects POINTS TO CHECK Recording program PROGRAM AE Options Default value IMAGE EF...

Страница 44: ...then press to start recording with a fade in in playback pause mode then push the joystick toward to fade in and start the playback 19 D EFFECT OFF Select this setting when you do not intend to use the digital effects FADE T fade trigger WIPE Select one of the faders to begin or end a scene with a fade from or to a black screen BLK WHT Records images in black and white SEPIA Records images in sepi...

Страница 45: ...der not only the picture but also the sound will fade in or out When you apply an effect the sound will be recorded normally The camcorder retains the last setting used even if you turn off the digital effects or change the recording program The digital effects are not available when TV TYPE is set to NORMAL TV and the stereo video cable is connected to the AV terminal TO FADE OUT TO ACTIVATE AN E...

Страница 46: ...d the plug to be connected to the camcorder of the STV 250N Stereo Video Cable Pass the cable through the centre of the core and wrap it around the core then close the unit until it clicks shut Connecting to a TV or VCR AV Terminal Sound from the built in speaker will be muted while the STV 250N Stereo Video Cable is connected to the camcorder DV Terminal Check the type and orientation of the term...

Страница 47: ...w to a high definition TV with a DV IEEE1394 terminal CV 150F CV 250F DV Cable optional 4 pin 6 pin Be careful to correctly insert the 6 pin plug into the DV terminal Inserting it in the wrong direction can result in damage to the camcorder 3 Output connection signal flow to a TV or VCR with a SCART terminal You will need to connect beforehand a commercially available SCART adapter to the SCART te...

Страница 48: ...powering the camcorder using the compact power adapter Copying your Recordings to an External Video Recorder You can copy your recordings by connecting the camcorder to a VCR or a digital video device When recording to a digital video recorder using the DV terminal you can copy recordings with virtually no generation loss in video and sound quality Connecting Connect the camcorder to a VCR or othe...

Страница 49: ...for all digital devices equipped with a DV terminal If the operation does not work use the AV terminal Audio Dubbing You can add sound to a recording using the built in or an external microphone POINTS TO CHECK You can only dub audio on tapes recorded in SP mode with 12bit audio 39 This function is operated with the wireless controller 1 Locate the point where you want to start dubbing audio Befor...

Страница 50: ...ubbing audio to a tape that was not recorded with this camcorder or after having dubbed audio over the same scene more than 3 times NOTES You can connect the camcorder to a TV to check the picture on the TV screen and check the sound through headphones connected to the TV You can select the audio track that will be played when playing back a tape that was audio dubbed 40 TO SELECT THE AUDIO TRACK ...

Страница 51: ... CV 250F 4 pin 6 pin DV cable Open the LCD panel to access Terminal on the Camcorder Connecting Cable Terminal on the Connected Device Output connection signal flow to a computer with a DV IEEE1394 terminal or a DV capture board CV 150F CV 250F DV Cable optional 4 pin 6 pin Be careful to correctly insert the 6 pin plug into the DV terminal Inserting it in the wrong direction can result in damage t...

Страница 52: ...mcorder to mode 4 Start the video editing software Refer to the instruction manual of the editing software IMPORTANT The video transfer may not work correctly depending on the software and the specifications settings of your computer If the computer freezes while the camcorder is connected to it disconnect the DV cable and turn off the camcorder and the computer After a short while turn them on ag...

Страница 53: ... page are explained below the tables FUNC Menu FUNC Menu 1 Option available only when the mode switch is set to Appendix Menu Options Lists Menu item Setting options CAMERA PLAY Recording programs1 PROGRAM AE PORTRAIT SPORTS NIGHT SNOW BEACH SUNSET SPOTLIGHT FIREWORKS z 35 White balance1 AUTO DAYLIGHT TUNGSTEN SET z 42 Image effects1 IMAGE EFFECT OFF VIVID NEUTRAL SOFT SKIN DETAIL z 43 LCD video l...

Страница 54: ...e The image stabilizer may also not be able to compensate for all movement when recording moving subjects The image stabilizer may not be effective when recording in dark places with A SL SHUTTER set to ON or using the NIGHT recording program The image stabilizer may not work well on subjects with low contrast with a recurring repetitive pattern or without vertical lines The image stabilizer canno...

Страница 55: ...orded in LP mode If you make recordings in both SP and LP modes on the same tape during playback you may notice some video anomalies in the picture at the point where the recording mode changes When playing back in this camcorder tapes recorded in LP mode with other devices or vice versa you may notice some anomalies in the playback picture or the sound may stop briefly TV TYPE In order to display...

Страница 56: ...off the camcorder 12bit AUDIO will be reset to STEREO1 Display Setup LCD Brightness Language etc DISPLAY SETUP 1 The default setting is BRIGHT when you power the camcorder using the compact power adapter 2 The list of languages available depends on the region of purchase Menu item Setting options CAMERA PLAY BRIGHTNESS z z BACKLIGHT NORMAL 1 BRIGHT z z 24 TV SCREEN ON OFF z ON OFF z MARKERS OFF LE...

Страница 57: ...seconds Warning messages and the data code if activated will appear even when set to OFF PLAYBK All on screen displays will appear while the playback image is magnified or a digital effect is activated 6SEC DATE When you start playing back a tape or when the date of the recording changes the date and time will be displayed for 6 seconds DEMO MODE The demonstration mode displays the camcorder s mai...

Страница 58: ...s Approximately 30 seconds before the camcorder shuts off the message AUTO POWER OFF will appear Date Time Setup DATE TIME SETUP DATE FORMAT Changes the date format for on screen displays Menu item Setting options CAMERA PLAY T ZONE DST List of world time zones z z 22 DATE TIME z z 23 DATE FORMAT Y M D 2008 1 1 AM 12 00 M D Y JAN 1 2008 12 00 AM D M Y 1 JAN 2008 12 00 AM z z COPY ...

Страница 59: ...Charge the battery pack in temperatures between 0 C and 40 C Battery packs become hot with use and may not charge When the battery pack is outside the charging temperature range the CHARGE indicator will flash irregularly The charging will start once the battery pack temperature is below 40 C The battery pack is damaged Use a different battery pack If you connect a faulty power adapter or battery ...

Страница 60: ...use mode for 4 minutes 30 seconds To resume the operation press when recording or push the joystick toward during playback Recording Image will not appear on the screen Set the camcorder to 26 SET THE TIME ZONE DATE AND TIME appears on the screen Set the time zone date and time 22 Replace the backup lithium battery and set the time zone date and time 17 Pressing will not start recording Set the ca...

Страница 61: ...ht protected tape Stop playback dubbing List of Messages in alphabetical order CHANGE THE BATTERY PACK Battery pack is exhausted Replace or charge the battery pack 15 CHECK THE CASSETTE AUDIO MODE You attempted to dub audio 49 on a tape recorded with an audio mode other than 12bit CHECK THE CASSETTE BLANK You attempted to dub audio 49 on a tape with a blank section CHECK THE CASSETTE INCORRECT TAP...

Страница 62: ...pped operating to protect the tape Remove the cassette and reinsert it 25 SET THE TIME ZONE DATE AND TIME You have not set the time zone date and time This message appears each time you turn the power on until you set the time zone date and time 22 TAPE END Tape reached the end Rewind the tape or replace the cassette THE TAPE IS SET FOR ERASURE PREVENTION Cassette is protected Replace the cassette...

Страница 63: ... Pack Charged battery packs continue to discharge naturally Therefore charge them on the day of use or the day before to ensure a full charge Attach the terminal cover whenever a battery pack is not in use Contact with metallic objects may cause a short circuit and damage the battery pack Dirty terminals may cause a poor contact between the battery pack and the camcorder Wipe the terminals with a ...

Страница 64: ...ore them upright Rewind tapes from time to time if they are stored for a long time Do not leave the cassette in the camcorder after use Do not use spliced tapes or nonstandard cassettes as they may damage the camcorder Do not use tapes that have been jammed as video heads may become dirty Do not insert anything into the small holes of the cassette or cover them with cellophane tape Handle cassette...

Страница 65: ...y form on the surface of the screen when the temperature changes suddenly Wipe it with a soft dry cloth WARNING The battery used in this device may present a fire or chemical burn hazard if mishandled Do not disassemble modify immerse in water heat above 100 C or incinerate the battery Backup battery Replace with a CR1616 battery made by Panasonic Hitachi Maxell Sony Toshiba Varta or Renata Use of...

Страница 66: ...e place the camcorder in an airtight plastic bag and let it adjust to temperature changes slowly before removing it from the bag The camcorder automatically shuts off the warning message CONDENSATION HAS BEEN DETECTED appears for approx 4 seconds and starts flashing If a cassette is loaded the warning message REMOVE THE CASSETTE appears and starts flashing Remove the cassette immediately and leave...

Страница 67: ...Indonesia Iran Iraq Ireland Israel Italy Jordan Kenya Kuwait Liberia Malaysia Malta Montenegro Mozambique the Netherlands New Zealand North Korea Norway Oman Pakistan Poland Portugal Qatar Romania Serbia Sierra Leone Singapore Slovakia Slovenia South Africa Spain Sri Lanka Swaziland Sweden Switzerland Tanzania Thailand Turkey Uganda Ukraine United Arab Emirates United Kingdom Yemen Zambia Trademar...

Страница 68: ... CBC NB2 Car Battery Charger STV 250N Stereo Video Cable CA 590E Compact Power Adapter CV 150F CV 250F DV Cable SC 2000 Soft Carrying Case WS 20 Wrist Strap SS 600 SS 650 Shoulder Strap TV VCR DVD recorder digital device with DV terminal MiniDV videocassette SCART adapter NB 2LH BP 2L5 BP 2L14 Battery Pack CB 2LWE Battery Charger WL 85 Wireless Controller COPY ...

Страница 69: ...d to achieve excellent performance when used with genuine Canon accessories Canon shall not be liable for any damage to this product and or accidents such as fire etc caused by the malfunction of non genuine Canon accessories e g a leakage and or explosion of a battery pack Please note that this warranty does not apply to repairs arising out of the malfunction of non genuine Canon accessories alth...

Страница 70: ...off CBC NB2 Car Battery Charger Use the car battery charger to charge battery packs on the move The car battery cable plugs into your car s cigarette lighter and runs off a 12 24 V DC negative ground battery Battery Pack BP 2L5 NB 2LH BP 2L14 Screen Used Viewfinder LCD Viewfinder LCD Viewfinder LCD Maximum Recording Time 90 min 85 min 125 min 120 min 270 min 260 min Typical Recording Time 45 min 4...

Страница 71: ...ap WS 20 Wrist Strap Use this for extra additional protection for active shooting SC 2000 Soft Carrying Case A handy camcorder bag with padded compartments and plenty of space for accessories This mark identifies genuine Canon video accessories When you use Canon video equipment we recommend Canon brand accessories or products bearing the same mark COPY ...

Страница 72: ...om types 550 000 pixels 4 3 Movies advanced zoom 440 000 T 690 000 W pixels other zoom types 690 000 pixels Effective pixels1 all figures are approximate values 16 9 Movies advanced zoom 440 000 T 540 000 W pixels other zoom types 440 000 pixels 4 3 Movies 400 000 pixels Compatible Tapes Videocassettes bearing the mark Tape Speed SP 18 83 mm s LP 12 57 mm s Maximum Recording Time 60 min tape SP 60...

Страница 73: ... 8 1 594 mm Lens Configuration 10 elements in 8 groups 1 double sided aspheric element AF system TTL autofocus manual focus available Minimum Focusing Distance 1 m 1 cm on maximum wide angle White Balance Auto white balance preset white balance DAYLIGHT TUNGSTEN or custom white balance Minimum Illumination NIGHT recording program Shutter speed at 1 6 1 7 lx 1 6 lx mode Auto slow shutter ON Shutter...

Страница 74: ...een normal brightness 2 2 W viewfinder 2 3 W LCD screen normal brightness Operating temperature 0 40 C Dimensions W x H x D 68 x 82 x 127 mm excluding the grip belt Weight camcorder body only 380 g Power input 100 240 V AC 50 60 Hz 0 14 0 08 A Rated output 8 4 V DC 0 6 A Operating temperature 0 40 C Dimensions 46 x 26 x 70 mm Weight 93 g Battery type Rechargeable Lithium Ion Battery Rated voltage ...

Страница 75: ...o a computer 51 to a TV VCR 46 D Data code 34 Date and time Date format 58 Daylight saving time 22 Time zone 22 Date search 33 Digital effects 44 DV terminal 47 51 E EASY recording program 27 End search 34 Error messages 61 Exposure 42 F Fireworks recording program 36 FUNC menu 20 53 G Grip belt 18 I Image effects 43 Image stabilizer 54 J Joystick 19 Joystick guide 19 L Language 22 LCD screen 23 L...

Страница 76: ...3 Self timer 38 Serial number 10 Setup menus 20 54 Shutter speed 37 Snow recording program 36 SP mode 55 Special scene recording programs 35 Sports recording program 36 Spotlight recording program 36 Sunset recording program 36 T Telephoto 28 Transferring movies to a computer 52 Tripod 18 Troubleshooting 59 V Video heads cleaning 2 Videocassettes 25 64 Viewfinder 28 Volume 32 W White balance 42 Wi...

Страница 77: ...mer Care 09 489 0470 www canon co nz Canon Singapore Pte Ltd 1 HarbourFront Avenue 04 01 Keppel Bay Tower Singapore 098632 Tel 65 6799 8888 Fax 65 6799 8882 Canon Hongkong Company Ltd 19 F The Metropolis Tower 10 Metropolis Drive Hunghom Kowloon Hong Kong Canon Latin America Inc Sales Enquiries 703 Waterford Way Suite 400 Miami FL 33126 USA The information on this manual is verified as of 1 Januar...

Отзывы: