background image

About the Administrator Password

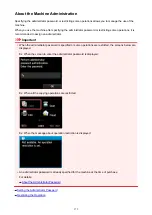
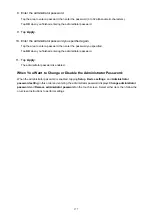
An administrator password "canon" is already specified for the printer at the time of purchase.

Important

• For security reasons, it is recommended to change the password before you use the printer.

• You can change the password using one of the tools below. (Some tools may not be available

depending on the printer you are using.)

• operation panel of the printer

• IJ Network Tool

• printer information screen displayed on some Canon application software

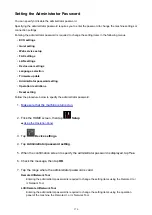
• When you change the password, use 0 to 32 alphanumeric characters.

• If the password has been changed while you are sharing the printer and you do not know the password,

ask the administrator of the printer you are using.

• The password reverts to the default setting by initializing the printer settings.

385

Содержание MAXIFY MB2350

Страница 1: ...MB2300 series Online Manual Read Me First Useful Functions Available on the Machine Overview of the Machine Printing Copying Scanning Faxing Troubleshooting English...

Страница 2: ...Cloud Link 42 Using MAXIFY Cloud Link from Your Printer 43 Before Using MAXIFY Cloud Link from Your Printer 44 Preparing to Use MAXIFY Cloud Link from Your Printer 45 Application Management 48 Using M...

Страница 3: ...h Windows RT 129 Overview of the Machine 130 Safety Guide 131 Safety Precautions 132 Regulatory and Safety Information 133 Main Components and Basic Operations 140 Main Components 141 Front View 142 R...

Страница 4: ...tus 199 Checking the Ink Status with the Touch Screen on the Machine 200 Maintenance 201 When Printing Becomes Faint or Colors Are Incorrect 202 Maintenance Procedure 203 Printing the Nozzle Check Pat...

Страница 5: ...settings 262 Language selection 264 Firmware update 265 Cassette settings 266 Administrator password setting 267 Operation restrictions 268 Reset setting 269 About ECO settings 271 About Quiet setting...

Страница 6: ...mation Screen 321 PSK Passphrase and Dynamic Encryption Setup Screen 322 Setup Information Confirmation Screen 323 Wired LAN Sheet 324 Admin Password Sheet 325 Network Information Screen 326 Access Co...

Страница 7: ...e Operation 378 Sharing the Printer on a Network 380 Setting Up a Shared Printer 381 Restrictions on Printer Sharing 383 About the Administrator Password 385 Printing 386 Printing from a Computer 387...

Страница 8: ...448 Adjusting Color Balance Using Sample Patterns Printer Driver 450 Adjusting Brightness 454 Adjusting Intensity 456 Adjusting Contrast 458 Adjusting Intensity Contrast Using Sample Patterns Printer...

Страница 9: ...rging a Copy 550 Two Sided Copying 552 About Special Copy Menu 554 Copying Thick Originals Such as Books 555 Copying Two Pages to Fit onto a Single Page 556 Copying Four Pages to Fit onto a Single Pag...

Страница 10: ...Colors with ScanGear Scanner Driver 667 Correcting Images Unsharp Mask Reduce Dust and Scratches Fading Correction etc 668 Adjusting Colors Using a Color Pattern 672 Adjusting Saturation and Color Bal...

Страница 11: ...Machine 764 Deleting Scanned Data on USB Flash Drive 767 Setting Items for Scanning Using the Operation Panel of the Machine 769 Network Scan Settings 771 Selecting a Response to Commands from the Op...

Страница 12: ...tility 840 Calling the Registered Information Up from Your Computer and Registering the Information to the Machine 841 Uninstalling Speed Dial Utility 842 Receiving Faxes 843 Receiving Faxes 844 Chang...

Страница 13: ...etup Check 1 917 Cannot Detect the Machine during Wireless LAN Setup Check 2 918 Cannot Detect the Machine during Wireless LAN Setup Check 3 919 Cannot Detect the Machine during Wireless LAN Setup Che...

Страница 14: ...rinted Surface Is Scratched 963 Back of the Paper Is Smudged 967 Colors Are Uneven or Streaked 968 Ink Is Not Ejected 970 Problems with Scanning 971 Problems with Scanning 972 Scanner Does Not Work 97...

Страница 15: ...uch Screen Cannot Be Seen At All 1008 An Unintended Language Is Displayed on the Touch Screen 1009 Print Head Holder Does Not Move to the Position for Replacing 1010 Printer Status Monitor Is Not Disp...

Страница 16: ...1688 1058 1700 1059 1701 1060 1754 1061 1755 1062 1872 1063 1873 1064 1874 1065 1890 1066 2001 1067 2002 1068 2111 1069 2112 1072 2113 1075 2121 1078 2122 1079 2500 1080 2700 1081 2802 1082 2803 1083...

Страница 17: ...5205 1099 5206 1100 5207 1101 5208 1102 5209 1103 5400 1104 5500 1105 5501 1106 5B00 1107 5B01 1108 5C01 1109 6000 1110 6500 1111 6502 1112 6800 1113 6801 1114 6900 1115 6901 1116 6902 1117 6910 1118...

Страница 18: ...1130 6940 1131 6941 1132 6942 1133 6943 1134 6944 1135 6945 1136 6946 1137 7100 1138 7200 1139 7201 1140 7202 1141 7203 1142 7204 1143 7205 1144 7300 1145 9000 1146 9500 1147 B202 1148 B203 1149 B204...

Страница 19: ...guide does not disclose the manuals of all the products sold by Canon See the manual supplied with the product when using a product that is not described in this guide How to Print Use the print funct...

Страница 20: ...operation Important Instructions including important information To avoid damage and injury or improper use of the product be sure to read these indications Note Instructions including notes for oper...

Страница 21: ...erved Redistribution and use in source and binary forms with or without modification are permitted provided that the following conditions are met 1 Redistributions of source code must retain the above...

Страница 22: ...bind by name to the interfaces of the Work and Derivative Works thereof Contribution shall mean any work of authorship including the original version of the Work and any modifications or additions to...

Страница 23: ...notices cannot be construed as modifying the License You may add Your own copyright statement to Your modifications and may provide additional or different license terms and conditions for use reprod...

Страница 24: ...fee for acceptance of support warranty indemnity or other liability obligations and or rights consistent with this License However in accepting such obligations You may act only on Your own behalf an...

Страница 25: ...ered for the search If you want to narrow down the search results add your product s model name or your application s name to the keywords Searching for Functions Enter your product s model name and a...

Страница 26: ...e search window and perform a search Searching for Reference Pages Enter your model name and a reference page title You can find reference pages more easily by entering the function name as well Examp...

Страница 27: ...Explanations In this guide most of the operations are described based on the windows displayed when Windows 8 1 operating system called Windows 8 1 below or Windows 8 operating system called Windows...

Страница 28: ...re Conveniently with Quick Toolbox Connection Methods Available on the Machine Notice for Web Service Printing Use MAXIFY Cloud Link Printing with Google Cloud Print Printing from AirPrint Compliant D...

Страница 29: ...martphone even in an environment without an access point or wireless LAN router Switch to access point mode with simple steps to enjoy scanning and printing wirelessly When you use the machine with th...

Страница 30: ...service where customers using models that support PREMIUM Contents can download exclusive printing materials PREMIUM Contents can be downloaded easily via Easy PhotoPrint Downloaded PREMIUM Contents c...

Страница 31: ...ng Easy PhotoPrint on the web from a computer or tablet By using Easy PhotoPrint you can create items in the latest environment without going through the trouble of installation Moreover you can use v...

Страница 32: ...unctions you want to use with one click After installing utilities compatible with Quick Toolbox they will be added to this menu The Quick Toolbox provides a convenient way to quickly launch added uti...

Страница 33: ...used at the same time If you have an access point or wireless network router it is recommended that you use the method described in Connection Using an Access Point When connecting another device whi...

Страница 34: ...oint will be disabled In that case the connection of the device may switch to a mobile data connection automatically depending on your device Transmission fees for connecting to the Internet using a m...

Страница 35: ...1 Press the HOME button A on the printer 2 Tap the bottom left B of the screen 3 Tap Access point mode active 4 Check the SSID displayed in the printer screen 5 Tap Details check the Password network...

Страница 36: ...rk Connection icon in the notification area of the taskbar on the computer then select View Available Wireless Networks 8 Select the network name SSID you want to use then click Connect 9 Enter the Pa...

Страница 37: ...10 When connection is complete click Back until the screen below appears Proceed with the setup 37...

Страница 38: ...ed while changing the setting Do not operate the screen of this guide until the setup is complete For office use consult your network administrator Take added care when connecting to a network that is...

Страница 39: ...gain Devices connected to the printer in access point mode cannot communicate with each other Firmware updates for the printer are not available while using the access point mode When a device has bee...

Страница 40: ...the machine to anyone or dispose of it delete your login name and password from the machine s memory in advance The account information will be sent to Canon Inc server located in Japan then forwarde...

Страница 41: ...e use of any of people or characters displayed on the web template printing service Except as otherwise permitted please see 2 below copying modifying or distributing all or a portion of any of the ma...

Страница 42: ...or low ink levels In addition you can use various functions by adding and registering apps that are linked with various cloud services Using MAXIFY Cloud Link from Your Printer Using MAXIFY Cloud Link...

Страница 43: ...Using MAXIFY Cloud Link from Your Printer Before Using MAXIFY Cloud Link from Your Printer Preparing to Use MAXIFY Cloud Link from Your Printer Using MAXIFY Cloud Link Cloud Troubleshooting 43...

Страница 44: ...the following conditions are met Redistributions of source code must retain the above copyright notice this list of conditions and the following disclaimer Redistributions in binary form must reprodu...

Страница 45: ...irmation screen select Next Note If multiple users will be using the printer after the initial registration select the login user name from the user selection screen enter the Security code and procee...

Страница 46: ...still use this service by selecting Agree from the registration screen later You can print the displayed information by pressing the Start button 6 On the Time zone screen select the time closest to y...

Страница 47: ...ist of apps is displayed See here for the description of the apps list screen After you complete the registration you can print photos and documents that have been uploaded to apps on the linked cloud...

Страница 48: ...Add apps You can add your favorite apps to the printer Follow the steps described below to add apps 1 From the printer home screen select Cloud 2 On the cloud s Main screen select Add delete 3 Select...

Страница 49: ...To end the app registration select Back and return to the cloud s Main screen Important Some apps may require a linked app account before you can use the app If this is the case set up an account bef...

Страница 50: ...model Can be used with genuine Canon ink 5 Select Delete When the deletion is finished the app will be deleted from the apps list on the main screen To delete another app repeat the procedure from st...

Страница 51: ...apps list select the app that you want to sort Note Description of displayed icons Cannot be used because it is not yet released not available in your region or does not support your model Can be used...

Страница 52: ...Sorting is complete To continue the sorting repeat the procedure from step 4 To end the sorting select Back and return to the cloud s Main screen 52...

Страница 53: ...rint check that printer is on and is connected to the network Then start Note You can use CANON iMAGE GATEWAY to print jpg and jpeg file formats 1 On the Main screen select the app to be used 2 Enter...

Страница 54: ...ntinue printing select Continue and perform the operation from Step 3 To end the printing select Apps The screen returns to the apps list screen Important If a print job is not printed within 24 hours...

Страница 55: ...history of this service from the Home window on the operation panel select Setup Web service setup Web service connection setup IJ Cloud Printing Center setup History setting for this service Save Clo...

Страница 56: ...nting photos and documents and adding starting and managing apps 1 Display area 2 Add delete button 3 Manage button Important Some apps may require you to have an account before using the app If this...

Страница 57: ...and sort apps Register apps Select this to add your favorite apps See here for details on how to add apps Delete apps Select this to delete registered apps See here for details on how to delete apps S...

Страница 58: ...one closest to your region Legal information This shows the License agreement and Privacy statement Press the Start button to print the displayed information Log out of all apps You can log out at the...

Страница 59: ...your computer to perform the print job and check whether the data can be printed normally on the printer If you still cannot print see the troubleshooting page for your model on the Home of the Online...

Страница 60: ...puter Before Using Canon Inkjet Cloud Printing Center Preparations Before Using Canon Inkjet Cloud Printing Center Using Canon Inkjet Cloud Printing Center Adding a Printer Adding a MAXIFY Cloud Link...

Страница 61: ...the web service to print documents be sure to check these precautions beforehand Printer specification Check that Canon Inkjet Cloud Printing Center supports the printer Network environment The printe...

Страница 62: ...rome Mac OS X v10 6 OS X Mavericks v10 9 Safari 5 1 6 7 When you use Internet Explorer 8 the web pages may not display correctly Canon recommends that you upgrade to Internet Explorer 9 or later or us...

Страница 63: ...In an in house network environment the 5222 port must be released For confirmation instructions contact the network administrator 63...

Страница 64: ...Web service setup Web service connection setup IJ Cloud Printing Center setup Register with this service 2 In the registration confirmation window Select Yes 3 In the print settings select the display...

Страница 65: ...es Access the URL on the printed page and then enter the e mail address and other necessary information Important Do not use the Back button of the web browser while an operation is processing The scr...

Страница 66: ...he Login screen select Create new account 3 Enter the E mail address and Printer registration ID of the printer s owner and then select OK The registration page URL is sent to the e mail address enter...

Страница 67: ...elete from this service You may not be able to receive the notification if you are using a spam filter If you have a setting to receive only the e mails from certain domains be sure to change the sett...

Страница 68: ...3 In the user information entry screen enter your Password and select Next Enter your password for logging in to the Canon Inkjet Cloud Printing Center 68...

Страница 69: ...assword needs to be between 8 and 32 characters long using single byte alphanumeric characters and symbols _ Alphabets are case sensitive 4 Enter the User name Enter the name that identifies the user...

Страница 70: ...gion on the list If you cannot find your region on the list select the one closest to your region Apply daylight saving time This appears only when there is a daylight saving time in the Time zone tha...

Страница 71: ...s The registration is complete A registration completion message is displayed When you select the OK button in the message the login screen is displayed Enter the registered e mail address and passwor...

Страница 72: ...2 From the home window select Setup Web service setup Web service connection setup IJ Cloud Printing Center setup Register with this service 3 In the registration confirmation window Select Yes 4 In...

Страница 73: ...able to log in for about the next hour You remain logged in for an hour after the last access Language Select the language you will be using E mail address Enter the e mail address that you entered i...

Страница 74: ...ation of Canon Inkjet Cloud Printing Center is displayed About this service This displays the descriptions of this service Description of the Main screen When you log in to the Canon Inkjet Cloud Prin...

Страница 75: ...2 Printer name area 3 Right context menu 4 Display area 5 Menu area 1 Left context menu When you select the Mng printer screen of the Manage users screen appears For general users the Select printer...

Страница 76: ...selected printer indicates that an error occurred on the printer Display update date time of the printer information This displays the date and time the printer information was last updated refreshes...

Страница 77: ...hen transferring the ownership of the printer select Clear the information saved on the printer Add printers Select this to add printers to be used in the Canon Inkjet Cloud Printing Center You need a...

Страница 78: ...he Administrator and Standard users 2 Printer name area The registered name of the printer selected is displayed The Administrator can change the printer name 3 Right context menu When you select the...

Страница 79: ...n You can change the registered e mail address password language time zone and other settings Help legal notices The description of the Canon Inkjet Cloud Printing Center screen and various reminders...

Страница 80: ...ist of registered apps in the Display area Config This displays the Register apps screen in the Display area The display can be toggled between Registered and Search apps The Registered screen lists r...

Страница 81: ...ayed by category When you select the details of the app are displayed When you select you can choose to register or unregister the app Note Description of displayed icons Cannot be used because it is...

Страница 82: ...me depending on the printer status Manage jobs This screen displays the print status and the print history You can check the print status by looking at Status list and the print history by looking at...

Страница 83: ...rmation registered to the Canon Inkjet Cloud Printing Center change printer names delete printers add printers and copy apps Check the printer information The registered printer name is displayed indi...

Страница 84: ...deleted from the Canon Inkjet Cloud Printing Center When transferring the ownership of the printer select Clear the information saved on the printer Add printers Select this to add printers to be used...

Страница 85: ...yourself To delete yourself cancel your membership from the user information screen Adding a user Select Add user The user registration screen appears Changing Administrator and Standard user setting...

Страница 86: ...in the Display area The display can be toggled between Registered and Search apps The Registered screen lists registered apps You can check the information of these apps or deregister them On the Sea...

Страница 87: ...You can check how much ink is remaining or details about an error that occurred You can also access the ink purchasing site and the Online Manual Important The Properties displayed may differ from th...

Страница 88: ...up to 40 items 6 Information area This display other information including the privacy statement and other companies licensing information 7 Global navigation area The User information Instructions an...

Страница 89: ...89...

Страница 90: ...ep login info When you select the check box the login screen is skipped for 14 days since the last day that the service screen was accessed Important If you fail to log in five straight times you will...

Страница 91: ...ormats that can be printed differ depending on the app Before you print check that printer is on and is connected to the network Then start This is available if you are using a smartphone or tablet No...

Страница 92: ...4 In the displayed image list select the image that you want to print and then select Next 5 Make the necessary print settings and then select Print 92...

Страница 93: ...nting select Apps The screen returns to the apps list screen Important If a print job is not printed within 24 hours after the print job is issued the print job will expire and cannot be printed With...

Страница 94: ...re for adding a printer is as follows 1 Print the registration information from the printer to be added 2 From the browser on your smartphone tablet or computer access the authentication site URL 3 Se...

Страница 95: ...Note When you access the service from Remote UI the Printer registration ID is entered automatically Printer addition is completed Adding a MAXIFY Cloud Link User 95...

Страница 96: ...r privileges Adding a user 1 On the service screen select Manage users 2 Select Add user Note When you select Add user the service first checks whether the maximum number of users has been reached If...

Страница 97: ...registration is then sent to the entered e mail address 4 Access the URL reported in the e mail 5 Read the terms displayed in the License agreement and Privacy statement screens If you agree to the t...

Страница 98: ...s for the password as shown below The password needs to be between 8 and 32 characters long using single byte alphanumeric characters and symbols _ Alphabets are case sensitive 7 Enter the User Name E...

Страница 99: ...t Select your region on the list If you cannot find your region on the list select the one closest to your region Apply daylight saving time This appears only when there is a daylight saving time in t...

Страница 100: ...user Note The user who is registered first becomes the Administrator The administrator can change the privileges of users from the Manage users screen An Administrator can change printer information a...

Страница 101: ...s list and you will be able to start register or unregister the app If the information is not updated when you press the Update button Because the Properties screen requires network connection with th...

Страница 102: ...o the Internet and consequently a print job is not processed within 24 hours after it was submitted the print job is automatically canceled If this happens check the printer power and the Internet con...

Страница 103: ...same printer Important If you do not set a Security code another user may use your account This code is valid only when you use MAXIFY Cloud Link from the printer operation panel You cannot use this c...

Страница 104: ...r services supporting Google Cloud Print 1 Preparations for Printing with Google Cloud Print 2 Printing from Computer or Smartphone with Google Cloud Print Important LAN connection with the printer an...

Страница 105: ...or the mobile device then register the required information The screen above may change without prior notice Registering the Printer with Google Cloud Print Register the printer with Google Cloud Pri...

Страница 106: ...tration is complete Registration from the Printer The authentication procedure using the web browser on the computer or the mobile device is required in the process of registering Because the authenti...

Страница 107: ...n process is not complete properly and the error message is displayed select OK When the confirmation message to print the authentication URL is displayed print the authentication URL then perform the...

Страница 108: ...the printer is turned on 2 From the Home screen select Setup 3 Select Web service setup Connection setup Google Cloud Print setup Delete from Google Cloud Print 4 When the confirmation screen to dele...

Страница 109: ...g with Google Cloud Print The screen differs depending on the applications or services supporting Google Cloud Print When the preparation for printing with Google Cloud Print is complete and when the...

Страница 110: ...e device sending the print data you may not select the print settings when sending the print data with Google Cloud Print When you want to print from Google Cloud Print immediately When the printer ca...

Страница 111: ...ion Environment To use AirPrint you will need one of the following Apple devices running the latest version of iOS iPad all models iPhone 3GS or later iPod touch 3rd generation or later Network Enviro...

Страница 112: ...el that you are using Important Because some app does not support AirPrint Printer Options may not be displayed If an app does not let you use printer options you cannot print from that app Note The P...

Страница 113: ...ing used on the Apple device and the region in which AirPrint is used When Apple s photo app is used the default paper size is L size in Japan and 4 x6 or KG in other countries and regions When docume...

Страница 114: ...Cancel Printing AirPrint Troubleshooting If the document does not print check the following 1 Check that the printer power is on If the printer power is on turn it off and then back on again and check...

Страница 115: ...connection Confirm that the printer is connected to the wireless LAN and then try printing If Bonjour on the printer is disabled AirPrint cannot be used Check the LAN settings on the printer and enabl...

Страница 116: ...ttings LAN settings Confirm LAN settings WLAN setting list or LAN setting list Then from the displayed window check the IP address 2 From your computer smartphone or tablet device open the Web browser...

Страница 117: ...s check print addresses and delete registered printers IJ Cloud Printing Center setup Allows you to register to IJ Cloud Printing Center or to delete a registration Security Allows you to set the Admi...

Страница 118: ...Manual Online This function displays the Online Manual 118...

Страница 119: ...loaded images can be browsed from other computers smartphones etc To use Evernote you need to create an account See the CREATE ACCOUNT page of Evernote for account creation Settings In the Settings Di...

Страница 120: ...ork environment This product needs to be connected to a LAN with an Internet connection Important The user will bear the cost of Internet access This function may not be available in some countries re...

Страница 121: ...cannot be printed Files other than Adobe PDF files JPEG files and doc docx xls xlsx ppt pptx files cannot be printed Supported Number of Files and File Sizes Up to 10 attachment files can be printed...

Страница 122: ...it off and then back on again and check whether the issue is resolved Check that the printer is connected to the network Check that the printer is connected to a LAN and the LAN has an Internet conne...

Страница 123: ...ailed to connect to Print from E mail Only the information on the printer was deleted is displayed it could be that the registration information on the service could not be deleted even though the Pri...

Страница 124: ...mail setup Register printer 3 Follow the instructions on the screen and print the printer registration URL and PIN code Important Do not turn off the power on the printer until the registration proces...

Страница 125: ...Enter any name The name that you enter is displayed at login Important The maximum number of characters that can be entered is 30 Language Select the language that you are using The language that you...

Страница 126: ...te the registration within 30 minutes 2 Enter the registered e mail address of the printer s owner the temporary password and select Log In 3 Set a password of your choice and select Register When the...

Страница 127: ...Zagreb Brussels Copenhagen Madrid Paris Belgrade Bratislava Budapest Ljubljana Prague West Central Africa UTC 02 00 Athens Bucharest Istanbul Amman Windhoek Jerusalem Cairo Harare Pretoria Beirut Hels...

Страница 128: ...MAXIFY Printing Solutions to easily print photos saved on a smartphone or tablet wirelessly You can also receive scanned data PDF or JPEG directly on a smartphone or tablet without using a computer MA...

Страница 129: ...sing this product from your computer smartphone or tablet device When the connection is complete the Canon Inkjet Print Utility software which allows you to specify detailed print settings is download...

Страница 130: ...puter Changing the Machine Settings Using the Operation Panel Registering the Favorite Settings Custom profiles Checking the Total Number of Uses of the Machine Information about Network Connection Us...

Страница 131: ...Safety Guide Safety Precautions Regulatory and Safety Information 131...

Страница 132: ...e s weight refer to the On screen Manual Do not place any object on the machine Especially do not place metal objects paper clips staples etc or containers of flammable solvents alcohol thinners etc o...

Страница 133: ...avabo d un vier de cuisine d un bac laver dans un sous sol humide ou pr s d une piscine 2 viter d utiliser l appareil pendant un orage lectrique Ceci peut pr senter un risque de choc lectrique caus pa...

Страница 134: ...ith minimum distance at least 20cm between the radiator and persons body excluding extremities hands wrists feet and ankles and must not be colocated or operated with any other antenna or transmitter...

Страница 135: ...ay temporarily disconnect service The telephone company also retains the right to make changes in facilities and services that may affect the operation of this equipment When such changes are necessar...

Страница 136: ...ion Avis Le pr sent mat riel est conforme aux sp cifications techniques applicables d Industrie Canada L indice d quivalence de la sonnerie IES sert indiquer le nombre maximal de terminaux qui peuvent...

Страница 137: ...resources For more information about where you can drop off your waste equipment for recycling please contact your local city office waste authority approved WEEE scheme or your household waste dispos...

Страница 138: ...reduce your electricity costs After the last print it switches to Ready Mode In this mode it can print again immediately if required If the product is not used for a time the device switches to its Po...

Страница 139: ...139...

Страница 140: ...Main Components and Basic Operations Main Components About the Power Supply of the Machine Using the Operation Panel Entering Numbers Letters and Symbols 140...

Страница 141: ...Main Components Front View Rear View Inside View Operation Panel 141...

Страница 142: ...5 document tray Open to load a document in the ADF You can load two or more sheets of document of the same size and thickness Load the document with the side you want to scan facing up 6 document out...

Страница 143: ...ant Do not touch the metal casing Do not use the USB cable longer than 10 feet 3 meters to connect to the machine since it may affect the operation of other peripheral devices 13 cassette 1 Accepts al...

Страница 144: ...Connect an external device such as telephone or answering machine 5 wired LAN connector Plug in the LAN cable to connect the machine to a LAN 6 USB port Plug in the USB cable to connect the machine w...

Страница 145: ...Inside View 1 ink tank eject lever Push up when removing an ink tank 2 print head holder The print head is pre installed Note For details on replacing an ink tank see Replacing an Ink Tank 145...

Страница 146: ...select a menu item or displayed button Basic Operation of the touch screen 5 Black button Starts black white copying scanning faxing etc 6 Stop button Cancels operation when print copy scan or fax tra...

Страница 147: ...About the Power Supply of the Machine Confirming that the Power Is On Turning the Machine On and Off Notice for the Power Plug Power Cord Notice for Unplugging the Power Cord 147...

Страница 148: ...10 seconds until you can operate the machine after you turn on its power Wait until the HOME screen is displayed on the touch screen The touch screen display will turn off if the machine is not opera...

Страница 149: ...flashes and an error message is displayed on the touch screen see A Message Is Displayed You can set the machine to automatically turn on at the specified day of week or time For details on Power cont...

Страница 150: ...achine is sending or receiving a fax or when unsent faxes are stored in the machine s memory You can set the machine to automatically turn off at the specified day of week or time For details on Power...

Страница 151: ...is hot The power plug power cord is rusty The power plug power cord is bent The power plug power cord is worn The power plug power cord is split Caution If you find anything unusual with the power pl...

Страница 152: ...g of the print head and print quality may be reduced If the power cord is unplugged the date time settings will be reset and all documents stored in the machine s memory will be lost Send or print a n...

Страница 153: ...arious functions or settings Important When operating the touch screen make sure to avoid the followings which may cause the machine to malfunction or damage the machine Strongly pressing the touch sc...

Страница 154: ...usly keep touching the forward or back mark Flick Flick your finger on the screen up down left or right Use to switch menus or move forward or backward through photos Drag While lightly touching the s...

Страница 155: ...andby screen Tap A to display the print settings menu Drag the screen up or down then tap the option you want to select After the list is displayed tap the setting to select Tap B to display the scree...

Страница 156: ...e sidebar D up or down to enlarge or reduce the zoom while viewing the preview image at left Tapping or E also changes the zoom Hold your finger on or to continuously change the magnification After th...

Страница 157: ...ching the Input Mode The machine has an alphabetic mode and number symbol mode To switch between them tap A at the bottom left To switch between lower and upper case modes in the alphabetic mode and t...

Страница 158: ...cursor under the character to delete then tap E Keep on touching to continue deleting characters To insert a space Tap F After entry is complete tap OK G Key assignments for multiple languages Repeat...

Страница 159: ...Loading Paper Originals Loading Paper Loading Originals Inserting the USB Flash Drive 159...

Страница 160: ...Loading Paper Paper Sources to Load Paper Loading Plain Paper Photo Paper Loading Envelopes Media Types You Can Use Media Types You Cannot Use Printing Area 160...

Страница 161: ...n both cassettes then set the machine to automatically switch the paper source and feed paper from the other cassette if paper in one cassette runs out Cassette settings Note When printing be sure to...

Страница 162: ...e but you can cover it by pulling out the paper output tray Set the cassette to this position for normal use F Lock position for paper larger than A4 or Letter size For paper larger than A4 size such...

Страница 163: ...eneral copy paper For the page size and paper weight you can use for this machine see Media Types You Can Use For loading envelopes see Loading Envelopes 1 Prepare paper Align the edges of paper If pa...

Страница 164: ...aper in the portrait orientation C Loading paper in the landscape orientation D can cause paper jams Note If paper has print side front or back such as photo paper load it with the whiter side or glos...

Страница 165: ...press down the lock G on the cassette then extend the cassette all the way out 5 Align the paper guide A in front with the paper stack For standard sizes set the paper guide A to where it clicks into...

Страница 166: ...e the paper information registration screen for the cassette is displayed on the touch screen Note When A4 or Letter sized paper or smaller is loaded the cassette stops at the same position as the ext...

Страница 167: ...played on the screen follow the directions in the message to complete registration Paper setting for Printing 9 Extend the output tray extension J then open the paper output support K Note When printi...

Страница 168: ...gummed flaps are already moistened and adhesive 1 Prepare envelopes Press down on all four corners and edges of the envelopes to flatten them If the envelopes are curled hold the opposite corners and...

Страница 169: ...of the cassette 1 The folded flap of the envelope will be faced up as shown in the figure below C C Rear side D Address side Up to 10 envelopes can be loaded at once Note Align the envelope stack wit...

Страница 170: ...envelopes The envelopes may not be fed properly Note Do not load envelopes higher than the load limit mark F Keep the envelope stack height below the tabs G of the paper guides 7 Insert the cassette 1...

Страница 171: ...e at Page size and Type then tap Register Paper setting for Printing 9 Extend the output tray extension H then open the paper output support I Note When printing select the size and type of the loaded...

Страница 172: ...to purchase some Canon genuine papers depending on the country or region of purchase Paper is not sold in the US by Model Number Purchase paper by name Paper for printing photos Glossy Photo Paper Ev...

Страница 173: ...279 4 mm Maximum size 8 50 x 14 00 inches 215 9 x 355 6 mm Paper Weight You can use paper in the following weight range 17 to 28 lb 64 to 105 g m2 plain paper except for Canon genuine paper Do not use...

Страница 174: ...II PP 201 4 10 sheets A4 Letter 5 x 7 13 x 18 cm and 8 x 10 20 x 25 cm 20 sheets 4 x 6 10 x 15 cm Photo Paper Pro Luster LU 101 4 10 sheets A4 and Letter Photo Paper Plus Semi gloss SG 201 4 10 sheet...

Страница 175: ...4 When loading paper in stacks the print side may become marked as it is fed or paper may not feed properly In this case load one sheet at a time 175...

Страница 176: ...28 lb 105 g m2 except for Canon genuine paper Paper thinner than a postcard including plain paper or notepad paper cut to a small size when printing on paper smaller than A5 Picture postcards Postcar...

Страница 177: ...Printing Area Printing Area Other Sizes than Letter Legal Envelopes Letter Legal Envelopes 177...

Страница 178: ...Recommended printing area Canon recommends that you print within this area Printable area The area where it is possible to print However printing in this area can affect the print quality or the paper...

Страница 179: ...90 x 9 80 inches 175 2 x 249 0 mm 4 x 6 10 x 15 cm 3 73 x 5 69 inches 94 8 x 144 4 mm 5 x 7 13 x 18 cm 4 73 x 6 69 inches 120 2 x 169 8 mm 8 x 10 20 x 25 cm 7 73 x 9 69 inches 196 4 x 246 0 mm Recomm...

Страница 180: ...tter 8 00 x 10 69 inches 203 2 x 271 4 mm Legal 8 00 x 13 69 inches 203 2 x 347 6 mm Recommended printing area A 1 80 inches 45 8 mm B 1 45 inches 36 8 mm Printable area C 0 12 inch 3 0 mm D 0 20 inch...

Страница 181: ...s 98 8 x 170 0 mm Envelope Com 10 3 68 x 8 24 inches 93 5 x 209 3 mm Recommended printing area Envelope DL A 0 83 inch 21 0 mm B 1 14 inches 29 0 mm C 0 22 inch 5 6 mm D 0 22 inch 5 6 mm Envelope Com...

Страница 182: ...Loading Originals Position to Load Originals Loading Originals on the Platen Glass Loading Documents in the ADF Auto Document Feeder How to Load Originals for Each Function Originals You Can Load 182...

Страница 183: ...o load the original according to the size type or usage Originals You Can Load Loading Documents Photos or Book on the platen glass Loading Two or More Sheets of Document of the Same Size and Thicknes...

Страница 184: ...for Each Function Important Be sure to observe the following when loading the original on the platen glass Do not place any objects weighing 4 4 lb 2 0 kg or more on the platen glass Do not put any pr...

Страница 185: ...ou hear a beep sound Load the document WITH THE SIDE TO SCAN FACING UP in the document tray Originals You Can Load Note When you set the alarm to be silent in Sound control of Device user settings the...

Страница 186: ...riginal WITH THE SIDE TO SCAN FACING DOWN on the platen glass and align it with the alignment mark Portions placed on the diagonally striped area cannot be scanned Important The machine cannot scan th...

Страница 187: ...pace between the edges diagonally striped area of the platen glass and the originals and between the originals Portions placed on the diagonally striped area cannot be scanned You can place up to 12 i...

Страница 188: ...x 148 mm Only A4 or Letter sized documents for two sided copy 2 on 1 copy and 4 on 1 copy Quantity A4 or Letter size Max 50 sheets 20 lb 75 g m2 paper up to 0 20 inch 5 mm in height Legal size Max 10...

Страница 189: ...Paper with sticky notes Carbon paper or carbon backed paper Surface treated paper Onion skin or thin paper Photo or thick paper 189...

Страница 190: ...Inserting the USB Flash Drive Inserting the USB Flash Drive Removing the USB Flash Drive 190...

Страница 191: ...ice incorporates exFAT technology licensed from Microsoft If your USB flash drive cannot be inserted into the USB flash drive port of the machine you may be required to use an extension cable for the...

Страница 192: ...ove the USB flash drive or turn off the power while the machine is reading or writing data from to it Note If your USB flash drive has the access lamp refer to the instruction manual supplied with the...

Страница 193: ...Replacing an Ink Tank Replacing an Ink Tank Checking the Ink Status 193...

Страница 194: ...place the ink tank properly Once an ink tank has been installed do not remove it from the machine and leave it out in the open This will cause the ink tank to dry out and the machine may not operate p...

Страница 195: ...he replacement position Removing it forcibly may cause the machine to malfunction or damage the machine Do not touch the metallic parts or other parts inside the machine If the front cover is left ope...

Страница 196: ...besides the ink tanks Discard the empty ink tank according to the local laws and regulations regarding disposal of consumables Handle the ink tanks carefully Do not drop or apply excessive pressure to...

Страница 197: ...to place 6 Tap Exit on the touch screen If Next is displayed on the screen it means there is another ink tank that can be replaced If you want to replace this ink tank tap Next and then repeat procedu...

Страница 198: ...the ink tanks the machine starts mixing the ink automatically Wait until the machine has stopped making operating noise This takes about 1 to 2 minutes Note If the error message appears on the touch...

Страница 199: ...Checking the Ink Status Checking the Ink Status with the Touch Screen on the Machine You can also check the ink status on the computer screen Checking the Ink Status from Your Computer 199...

Страница 200: ...ink level Example Ink tank is running low Prepare a new ink tank Note The above screen shows estimated ink levels The Current estimated ink levels screen can also be displayed by tapping Setup in the...

Страница 201: ...Maintenance When Printing Becomes Faint or Colors Are Incorrect Performing Maintenance from a Computer Cleaning the Machine 201...

Страница 202: ...r Colors Are Incorrect Maintenance Procedure Printing the Nozzle Check Pattern Examining the Nozzle Check Pattern Cleaning the Print Head Cleaning the Print Head Deeply Aligning the Print Head Alignin...

Страница 203: ...ine the nozzle check pattern If there are missing lines or horizontal white streaks in the pattern Step3 Clean the print head From the machine Cleaning the Print Head From the computer Cleaning the Pr...

Страница 204: ...be damaged Contact the service center When the Print Results Are Not Even such as the Ruled Lines Are Misaligned Step Align the print head From the machine Aligning the Print Head From the computer A...

Страница 205: ...e cassette into the machine the paper information registration screen is displayed on the touch screen Select A4 or Letter for Page size and Plain paper for Type then tap Register If a message is disp...

Страница 206: ...The confirmation screen will appear 7 Tap Yes The nozzle check pattern will be printed and two pattern confirmation screens will appear on the touch screen 8 Examine the nozzle check pattern 206...

Страница 207: ...rizontal white streaks B Lines are missing Horizontal white streaks are present E Number of sheets printed so far 2 Select the pattern that is closer to the printed nozzle check pattern on the confirm...

Страница 208: ...n both patterns The cleaning is required Tap Also B then tap Yes on the cleaning confirmation screen The machine starts cleaning the print head Cleaning the Print Head Note The total number of sheets...

Страница 209: ...t of A4 or Letter sized plain paper 1 Make sure that the power is turned on 2 Load a sheet of A4 or Letter sized plain paper in the cassette 1 After inserting the cassette into the machine the paper i...

Страница 210: ...ations until the machine completes the cleaning of the print head This takes about 2 minutes The pattern print confirmation screen will appear 8 Tap Yes The nozzle check pattern will be printed 9 Exam...

Страница 211: ...sheet of A4 or Letter sized plain paper 1 Make sure that the power is turned on 2 Load a sheet of A4 or Letter sized plain paper in the cassette 1 After inserting the cassette into the machine the pa...

Страница 212: ...utes The pattern print confirmation screen will appear 8 Tap Yes The nozzle check pattern will be printed 9 When the completion message appears tap OK 10 Examine the nozzle check pattern If the proble...

Страница 213: ...d plain paper in the cassette 1 After inserting the cassette into the machine the paper information registration screen is displayed on the touch screen Select A4 or Letter for Page size and Plain pap...

Страница 214: ...of the print head position has failed the error message appears on the touch screen A Message Is Displayed 8 When the completion message appears tap OK Note If the print results are still not satisfac...

Страница 215: ...fter inserting the cassette into the machine the paper information registration screen is displayed on the touch screen Select A4 or Letter for Page size and Plain paper for Type then tap Register If...

Страница 216: ...rinted 8 When the message Did the patterns print correctly appears confirm that the pattern is printed correctly tap Yes 9 Confirm the message then tap Next The input screen for the head position adju...

Страница 217: ...able vertical streaks 11 Repeat the same procedure until you finish inputting the pattern number for columns B to M then tap OK 12 Confirm the message then tap OK The second pattern is printed 13 Look...

Страница 218: ...ticeable horizontal streaks C Unnoticeable horizontal streaks D Noticeable horizontal streaks 1 Repeat the same procedure until you finish inputting the pattern number for columns O to T then tap OK F...

Страница 219: ...Performing Maintenance from a Computer Cleaning the Print Heads from Your Computer Aligning the Print Head Position from Your Computer Use Your Computer to Print a Nozzle Check Pattern 219...

Страница 220: ...ake sure that the printer is on and then click Execute Print head cleaning starts 4 Complete cleaning The Nozzle Check dialog box opens after the confirmation message 5 Check the results To check whet...

Страница 221: ...ck whether the print quality has improved click Print Check Pattern To cancel the check process click Cancel Important Deep Cleaning consumes a larger amount of ink than Cleaning Cleaning the print he...

Страница 222: ...cassette 1 Important The cassette 2 is not available for the print head alignment procedure Be sure to load paper in the cassette 1 Note The number of sheets to be used differs when you select the man...

Страница 223: ...Note To print and check the current setting open the Start Print Head Alignment dialog box and click Print Alignment Value 223...

Страница 224: ...error message may appear because the computer cannot collect the printer status If this happens click OK to display the most recent settings specified on your computer 3 Switch head alignment to manu...

Страница 225: ...east noticeable streaks in the associated boxes Even if the patterns with the least noticeable streaks are clicked in the preview window their numbers are automatically entered in the associated boxes...

Страница 226: ...essary values click OK Note If it is difficult to pick the best pattern pick the setting that produces the least noticeable horizontal stripes A Least noticeable horizontal stripes B Most noticeable h...

Страница 227: ...check pattern printing Be sure to load paper in the cassette 1 Note If the cassette paper information registered on the printer is not set to A4 size and plain paper an error may occur For instructio...

Страница 228: ...Related Topic Cleaning the Print Heads from Your Computer 228...

Страница 229: ...Exterior of the Machine Cleaning the Platen Glass and Document Cover Cleaning the ADF Auto Document Feeder Cleaning the Paper Feed Roller Cleaning the Inside of the Machine Bottom Plate Cleaning Clea...

Страница 230: ...tings will be reset and all documents stored in the machine s memory will be lost Send or print a necessary document or save it on a USB flash drive before unplugging the power cord Do not use tissue...

Страница 231: ...similar materials for cleaning so as not to scratch the surface Paper tissue powder or fine threads may remain inside the machine and cause problems such as print head blockage and poor printing resul...

Страница 232: ...ngs will be reset and all documents stored in the machine s memory will be lost Send or print a necessary document or save it on a USB flash drive before unplugging the power cord Do not use tissue pa...

Страница 233: ...4 After wiping close the document feeder cover by pushing it until it clicks into place 5 Close the document tray 233...

Страница 234: ...nel The setup menu screen will appear 3 Tap Maintenance The Maintenance screen will appear 4 Tap Roller cleaning The confirmation screen will appear 5 Tap Yes 6 Tap the paper source to clean Cassette...

Страница 235: ...ne starts cleaning The cleaning will be complete when the paper is ejected 12 When the completion message appears tap OK If the problem is not resolved after cleaning the paper feed roller contact the...

Страница 236: ...ower is turned on 2 Flick the HOME screen then tap Setup Using the Operation Panel The setup menu screen will appear 3 Tap Maintenance The Maintenance screen will appear 4 Tap Bottom plate cleaning Th...

Страница 237: ...ning again 12 When the completion message appears tap OK Note When performing Bottom Plate Cleaning again be sure to use a new piece of paper If the problem is not resolved after performing cleaning a...

Страница 238: ...d is unplugged the date time settings will be reset and all documents stored in the machine s memory will be lost Send or print a necessary document or save it on a USB flash drive before unplugging t...

Страница 239: ...cassette 1 or cassette 2 from the machine then remove all the paper 2 Clean the pad A sideways with a moistened cotton swab Important After cleaning the smeared pad dry it completely For an example of...

Страница 240: ...ine Settings Changing Machine Settings from Your Computer Changing the Machine Settings Using the Operation Panel Registering the Favorite Settings Custom profiles Checking the Total Number of Uses of...

Страница 241: ...ng Machine Settings from Your Computer Changing the Print Options Registering a Frequently Used Printing Profile Managing the Printer Power Reducing the Printer Noise Changing the Printer Operation Mo...

Страница 242: ...the driver settings or printing fails The procedure for changing the print options is as follows 1 Open the printer driver setup window 2 Click Print Options on the Page Setup tab The Print Options d...

Страница 243: ...m Commonly Used Settings on the Quick Setup tab select the printing profile to be used and if necessary change the settings after Additional Features You can also register necessary items on the Main...

Страница 244: ...ot be saved and preserved If a profile is deleted register the print settings again Deleting Unnecessary Printing Profile 1 Select the printing profile to be deleted Select the printing profile you wa...

Страница 245: ...off the printer When you use this function you will not be able to turn the printer on from the printer driver 1 Open the printer driver setup window 2 Execute power off Click Power Off on the Mainten...

Страница 246: ...ating noise Always use quiet mode Select this option when you wish to reduce the operating noise of the printer Use quiet mode during specified hours Select this option when you wish to reduce the ope...

Страница 247: ...ic head alignment but you can change it to manual head alignment If the printing results of automatic print head alignment are not satisfactory perform manual head alignment Check this check box to pe...

Страница 248: ...g the slider to the left decreases the time If the paper gets stained because the next page is ejected before the ink on the printed page dries increase the ink drying wait time Reducing the ink dryin...

Страница 249: ...the Operation Panel FAX settings Print settings LAN settings Device user settings Language selection Firmware update Cassette settings Administrator password setting Operation restrictions Reset sett...

Страница 250: ...s to specify Prevent paper abrasion as an example 1 Make sure that the machine is turned on 2 Flick the HOME screen then tap Setup Using the Operation Panel 3 Tap Device settings The Device settings s...

Страница 251: ...ting item authentication by the administrator password is required About the Machine Administration If you do not know the administrator password ask the administrator of the machine you are using Not...

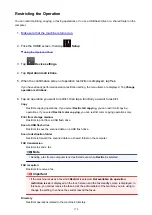
Страница 252: ...User Information Telephone line type Selects the telephone line type setting for the machine Setting the Telephone Line Type Note This setting may not be available depending on the country or region o...

Страница 253: ...you select ON you can select the image reduction direction Adv communication settings ECM TX Selects whether to send faxes in Error Correction Mode ECM Transmission Reception of Faxes Using ECM ECM RX...

Страница 254: ...you print RX REPORT select Print error only or Print for each RX Print when out of ink Sets whether to continue printing the received fax without storing it in the machine s memory when the ink has r...

Страница 255: ...reception from the sender If you select Yes on the subscribing confirmation screen you can specify the settings of rejection Using the Caller ID Service to Reject Calls Note This setting may not be su...

Страница 256: ...gs Prevent paper abrasion Use this setting only if the print surface becomes smudged Important Be sure to set this back to OFF after printing since it may result in lower printing speed or lower print...

Страница 257: ...an access point supporting a Wi Fi Protected Setup WPS push button method Follow the on screen instructions during setup Other setup Advanced setup Select when you perform settings for wireless LAN ma...

Страница 258: ...XXX XXXX XXXX MAC address XX XX XX XX XX XX IPsec settings Enable ESP Enable ESP AH Enable AH Disable Pre shared key XXXXXXXXXXXXXXXX Printer name XXXXXXXXXXXXXXX Bonjour service name XXXXXXXXXXXXX XX...

Страница 259: ...on the touch screen The following setting items are displayed Items Setting Connection Active Inactive SSID XXXXXXXXXXXXXXXX XXXXXXXXXXXXXXXX Password XXXXXXXXXX Communication mode Access point mode C...

Страница 260: ...inter name as that already used for other LAN connected devices You cannot use a hyphen for the initial or last character of the printer name TCP IP settings Performs IPv4 or IPv6 setting WSD setting...

Страница 261: ...epending on the access point you are using discontinuous reception may not be activated even though Enable is selected Discontinuous reception is activated only while the machine is on standby The tou...

Страница 262: ...y not be available depending on the country or region of purchase Start date time Sets the date and time that summer time starts Month Specify the month Week Specify the week DOW Specify the day of th...

Страница 263: ...ects the country or region where you are using the machine Note This setting may not be available depending on the country or region of purchase Device info sending setting Selects whether you will se...

Страница 264: ...Language selection Important This setting item is for the administrator Changes the language for the messages and menus on the touch screen 264...

Страница 265: ...ring the unprinted fax in machine s memory memory reception When the unsent faxes are stored in the machine s memory Note If the firmware update is not complete check the following and take an appropr...

Страница 266: ...can specify by the printer driver or on the touch screen Setting the Media Type with the Printer Driver and on the Printer Setting the Paper Size with the Printer Driver and on the Printer Detect pap...

Страница 267: ...te Administrator password setting Operation restrictions Reset setting When the confirmation screen to specify the administrator password is displayed tap Yes When the message is displayed tap OK The...

Страница 268: ...ive Scan to USB flash drive Restricts to save the scanned data on a USB flash drive Scan to destination folder Restricts to forward the scanned data to a shared folder on the computer FAX transmission...

Страница 269: ...setting items back to the default The LAN settings and the telephone fax number are not reverted Device info sending setting only Reverts only the device information sending settings FAX settings only...

Страница 270: ...User information settings screen Setting the Sender Information 2 Tap the user s name or the telephone number then delete all characters or numbers 3 Tap OK when you finished deleting all characters o...

Страница 271: ...lex Printing Follow the procedure below to use duplex printing 1 Make sure that the machine is turned on 2 Flick the HOME screen then tap ECO settings Using the Operation Panel 3 Tap Two sided printin...

Страница 272: ...hen tap ECO settings Using the Operation Panel 3 Tap Power control 4 Specify the settings as necessary When you specify the time and day to turn the machine on 1 Tap Power control ON settings 2 Tap ON...

Страница 273: ...to turn the machine off 1 Tap Power control OFF settings 2 Tap ON on the displayed screen The screen below is displayed 3 Tap the time The screen below is displayed 4 Tap the numbers to specify the t...

Страница 274: ...he Machine Administration If you do not know the administrator password ask the administrator of the machine you are using Follow the procedure below to perform setting 1 Make sure that the machine is...

Страница 275: ...as the Quiet setting menu icon Important Operating speed may be reduced compared to when the quiet mode is not selected This function may not be so effective depending on the machine s setting Further...

Страница 276: ...cess point mode confirm the usage restrictions then switch the machine to the access point mode Restrictions If you use the machine with the access point mode for the long time it is recommended that...

Страница 277: ...less LAN settings with an external device refer to the device s instruction manual When a WPA2 PSK AES password is valid on the machine entering the password is required to connect an external device...

Страница 278: ...ttings 6 Tap Access point mode settings The screen to enter the access point name SSID is displayed 7 Tap the touch screen 8 Enter the access point name up to 32 characters Enter the access point name...

Страница 279: ...K to finish entering the password 15 Tap OK to finish specifying the password setting Note If you change the access point mode setting of the machine also change the access point setting of the extern...

Страница 280: ...confirmation screen of Save profile is displayed tap Yes When the screen to enter the name of the setting is displayed enter the name then tap Register Note If you tap Register without entering the n...

Страница 281: ...e registered settings 1 Tap Rearrange 2 Tap the setting you want to move 3 Tap or to move the selected setting 4 Tap Apply 5 Tap Exit To change the name of the registered settings 1 Tap Rename 2 Tap t...

Страница 282: ...2 on 1 copying One sided Two sided or 4 on 1 copying One sided Two sided respectively No of sheets used for FAX Displays the total number of received or printed faxes You can check the total number of...

Страница 283: ...Information about Network Connection Useful Information about Network Connection 283...

Страница 284: ...t Factory Network Connecting the Machine to the Computer Using a USB Cable When Detecting the Printers Have the Same Name during Setup Connecting to Other Computer with LAN Changing the Connection Met...

Страница 285: ...e disable Bonjour Enable Service name Canon MB2300 series LPR protocol setting Enable Wireless LAN DRX setting Enable Wired LAN DRX setting Enable XX represents alphanumeric characters The default val...

Страница 286: ...Connecting the Machine to the Computer Using a USB Cable Connect the machine and the computer using a USB cable as the illustration below The USB port is located on the rear of the machine 286...

Страница 287: ...esult screen Note A serial number may not be displayed on the detection result screen To check the MAC address of the printer print out the network setting information using the operation panel of the...

Страница 288: ...tructions on our website Connecting to Other Computer with LAN To add the computer connecting the machine with LAN perform setup with the Setup CD ROM or perform it according to the instructions on ou...

Страница 289: ...gs 7 Tap Print LAN details 8 Tap Yes The machine starts printing the network setting information The following information on the machine s network setting is printed out Item Explanations of the item...

Страница 290: ...ontinuous reception wireless LAN Enable Disable Wired LAN Wired LAN Enable Disable Connection Status of the Wired LAN Active Inactive MAC Address MAC Address XX XX XX XX XX XX TCP IP Version TCP IP Ve...

Страница 291: ...Primary server address XXX XXX XXX XXX Secondary Server Secondary server address XXX XXX XXX XXX Proxy Server Proxy Server setting Enable Disable Proxy Port Specifying Proxy Port 1 to 65535 Proxy Add...

Страница 292: ...About Network Communication Changing and Confirming Network Settings Screens for Network Connection of IJ Network Tool Other Screens of IJ Network Tool Appendix for Network Communication 292...

Страница 293: ...AN Sheet Changing the WEP Detailed Settings Changing the WPA WPA2 Detailed Settings Changing the Settings in the Wired LAN Sheet Changing the Settings in the Admin Password Sheet Monitoring Wireless N...

Страница 294: ...upport Fast User Switching It is recommended to exit IJ Network Tool when switching users Starting up IJ Network Tool 1 Start up IJ Network Tool as shown below In Windows 8 1 or Windows 8 select IJ Ne...

Страница 295: ...ings in the Wireless LAN sheet 1 Start up IJ Network Tool 2 Select the printer in Printers When the printer is connected to the computer with a USB cable temporarily select the printer with USBnnn whe...

Страница 296: ...cryption type of the printer was switched make sure that encryption types for the computer and the access point match that set to the printer If you connect to a network that is not protected with sec...

Страница 297: ...with a USB cable temporarily select the printer with USBnnn where n is a number appearing in the Port Name column 3 Select Configuration from the Settings menu 4 Click the Wireless LAN tab 5 Select U...

Страница 298: ...to specify the method manually select Open System or Shared Key according to the setting of the access point 7 Click OK Important If the printer cannot communicate with the computer after the encrypt...

Страница 299: ...shots in this section refer to the WPA detailed settings 1 Start up IJ Network Tool 2 Select the printer in Printers When the printer is connected to the computer with a USB cable temporarily select t...

Страница 300: ...u do not know the access point passphrase refer to the instruction manual provided with the access point or contact its manufacturer The dynamic encryption method is selected from either TKIP basic en...

Страница 301: ...ion type of the printer was switched make sure that encryption types for the computer and the access point match that set to the printer Note Changing the network settings with the USB cable temporari...

Страница 302: ...s menu 4 Click the Wired LAN tab The Wired LAN sheet is displayed For details on the Wired LAN sheet see Wired LAN Sheet 5 Change the settings or confirm Set the IP address of the printer to be used o...

Страница 303: ...use an administrator password select the Use admin password check box and enter a password Important The password should consist of alphanumeric characters and be no longer than 32 characters The pas...

Страница 304: ...Status from the View menu The Status screen is displayed and you can check the printer status and connection performance Important If the indicated value is low move your printer closer to the wireles...

Страница 305: ...ns to avoid such situations Check that there are no sources of radio interference near the printer and the access point The wireless connection may use the same frequency band as microwave ovens and o...

Страница 306: ...above finish the measurement then restart the IJ Network Tool to start over the measurement 7 Click Finish Note If any messages appear on Overall Network Performance move the machine and access point...

Страница 307: ...nce screen is displayed 4 Click Initialize 5 When the confirmation screen is displayed click Yes The network settings of the printer is initialized Do not turn off the printer during initialization Cl...

Страница 308: ...gs The Confirmation screen is displayed when you modified the printer settings on the Configuration screen When you click Yes on the Confirmation screen the following screen is displayed for confirmin...

Страница 309: ...ils Screen Authentication Type Confirmation Screen PSK Passphrase and Dynamic Encryption Setup Screen Setup Information Confirmation Screen Wired LAN Sheet Admin Password Sheet Network Information Scr...

Страница 310: ...on if the target printer is not displayed Important To change the printer s network settings using IJ Network Tool it must be connected via a LAN If No Driver is displayed for the name associate the p...

Страница 311: ...layed from the Canon IJ Network Tool screen 1 File menu Exit Exits IJ Network Tool 2 View menu Status Displays the Status screen to confirm the printer connection status and wireless communication sta...

Страница 312: ...nformation Screen Display Warning Automatically Enables or disables automatic display of the instruction screen When this menu is selected the instruction screen is displayed if one or more ports are...

Страница 313: ...int mode settings Perform settings following the message on the screen If you change the Encryption Method setting and the Password setting on the Set up printer s wireless LAN screen the changed sett...

Страница 314: ...ick the tab to select the sheet to change the settings The following screen is the example to change the setting on the Wireless LAN sheet Note This screen is not available depending on the printer yo...

Страница 315: ...ing it as an access point Note When Access point mode is displayed on Network Type you cannot change the settings on the Wireless LAN sheet or the Admin Password sheet You can perform setting from Set...

Страница 316: ...e Authentication Type Confirmation screen is displayed automatically To change WPA WPA2 settings set before click Configuration to display the WPA WPA2 Details screen Changing the WPA WPA2 Detailed Se...

Страница 317: ...h as your personal information to a third party Note Signal strength is displayed as follows Good Fair Poor Type of encryption is displayed as follows Blank No encryption WEP WEP is set WPA WPA2 WPA W...

Страница 318: ...ails screen appears if the selected access point is encrypted In this case configure the details to use the same encryption settings set to the access point Access points that cannot be used by this m...

Страница 319: ...mber of characters and character type that can be entered differ depending on the combination of the key length and key format Key Length 64bit 128bit Key Format ASCII 5 characters 13 characters Hexad...

Страница 320: ...en differs depending on the present settings 1 Authentication Type Displays the type of authentication used for client authentication This machine supports the PSK authentication method 2 Dynamic Encr...

Страница 321: ...he printer you are using Type of authentication used for client authentication is displayed 1 Authentication Type Type of authentication used for client authentication is displayed PSK This machine su...

Страница 322: ...hrase set to the access point The passphrase should be a string of 8 to 63 alphanumeric characters or a 64 digit hexadecimal value If you do not know the access point passphrase refer to the instructi...

Страница 323: ...up Information Confirmation Screen Note This screen is not available depending on the printer you are using Displays the settings used for client authentication Confirm the settings and click Finish 3...

Страница 324: ...ess of the printer to be used over the LAN Specify a value appropriate for your network environment Get IP address automatically Select this option to use an IP address automatically assigned by a DHC...

Страница 325: ...een 1 Use admin password Set an administrator password with privileges to set up and change detailed options To use this feature select this check box and enter a password 2 Password Enter the passwor...

Страница 326: ...s set for the printers and the computers To display the Network Information screen select Network Information from the View menu 1 OK Returns to the Canon IJ Network Tool screen 2 Copy All Information...

Страница 327: ...en 1 Printer Access Control Type Select the type of access control with which to limit access of computers or network devices to the printer over a network The setting items may differ depending on th...

Страница 328: ...and any comments 3 Edit The Edit Accessible MAC Address screen is displayed to edit the settings selected in Accessible MAC Addresses Edit Accessible MAC Address Screen Add Accessible MAC Address Scr...

Страница 329: ...ows the registered IP addresses and any comments 3 Edit The Edit Accessible IP Address screen is displayed to edit the settings selected in Accessible IP Addresses Edit Accessible IP Address Screen Ad...

Страница 330: ...5 Delete Deletes the selected IP address from the list 330...

Страница 331: ...xample screenshots in this section refer to the Add Accessible MAC Address Screen 1 MAC Address Enter the MAC address of a computer or a network device to allow access 2 Comment Optionally enter any i...

Страница 332: ...ethod An IP address is expressed as four values ranging from 0 to 255 Start IP Address Enter the first IP address in the range of addresses of the computers or network devices to allow access when you...

Страница 333: ...of IJ Network Tool Canon IJ Network Tool Screen Status Screen Connection Performance Measurement Screen Maintenance Screen Network Setup of the Card Slot Screen Associate Port Screen Network Informati...

Страница 334: ...on if the target printer is not displayed Important To change the printer s network settings using IJ Network Tool it must be connected via a LAN If No Driver is displayed for the name associate the p...

Страница 335: ...layed from the Canon IJ Network Tool screen 1 File menu Exit Exits IJ Network Tool 2 View menu Status Displays the Status screen to confirm the printer connection status and wireless communication sta...

Страница 336: ...nformation Screen Display Warning Automatically Enables or disables automatic display of the instruction screen When this menu is selected the instruction screen is displayed if one or more ports are...

Страница 337: ...int mode settings Perform settings following the message on the screen If you change the Encryption Method setting and the Password setting on the Set up printer s wireless LAN screen the changed sett...

Страница 338: ...he device status is displayed as Available or Unavailable 2 Signal Strength Indicates the strength of the signal received by the printer ranging from 0 to 100 3 Link Quality Indicates the signal quali...

Страница 339: ...ection performance measurement Connection Performance Measurement Screen Initial Screen Connection Performance Measurement Screen Completion Screen Connection Performance Measurement Screen Initial Sc...

Страница 340: ...he printer and the access point Good connection performance Unstable connection performance Cannot connect Measurement is canceled or cannot measure 2 Remeasurement Measures the connection performance...

Страница 341: ...gs of the printer Do not turn off the printer during initialization Click OK when initialization is complete Performing initialization when connected over wireless LAN will break the connection so per...

Страница 342: ...een Note You can change the network settings of the printer using IJ Network Tool with USB connection after initializing the LAN settings To change the network settings using IJ Network Tool activate...

Страница 343: ...o the card slot 2 Retry Returns to Network Setup of the Card Slot screen and re executes the network drive mapping 3 Cancel Cancels the card slot setup When IJ Network Tool is running over LAN the Can...

Страница 344: ...You cannot print with the printer unless the printer driver is associated with the port 1 Model Displays the name of device specified as a destination port It is blank if the name of device is not de...

Страница 345: ...s set for the printers and the computers To display the Network Information screen select Network Information from the View menu 1 OK Returns to the Canon IJ Network Tool screen 2 Copy All Information...

Страница 346: ...Appendix for Network Communication Using the Card Slot over a Network When the Printer Driver Is Not Associated with a Port About Technical Terms Restrictions About Firewall 346...

Страница 347: ...work Mounting the Card Slot as the Network Drive The card slot must be mounted to use it over a network To mount the card slot as the network drive follow the procedure below 1 Insert a memory card in...

Страница 348: ...le only from a USB connected computer you cannot access the network drive of the card slot On the other hand when you enable it to be writable only from a LAN connected computer the card slot is not d...

Страница 349: ...nter driver follow the procedure below 1 Start up IJ Network Tool 2 Select the printer displayed as No Driver on Name 3 Select Associate Port on the Settings menu The Associate Port screen is displaye...

Страница 350: ...AN router is available You can connect up to 5 devices to the machine using the access point mode Ad hoc Client computer and machine setting where wireless communication occurs on a peer to peer basis...

Страница 351: ...rating system to detect the connectable devices on a network automatically C Channel Frequency channel for wireless communication In the infrastructure mode the channel is automatically adjusted to ma...

Страница 352: ...influenced by the connected apparatus At the maximum transfer rate of 600 Mbps it is possible to communicate with multiple computer terminals within a dozen or so metre radius Compatible with 802 11b...

Страница 353: ...s not supported bidirectional communication M MAC Address Also known as the physical address A unique and permanent hardware identifier that is assigned to network devices by its manufacturer MAC addr...

Страница 354: ...itself by not broadcasting its SSID The client must specify the SSID set to the access point to detect it Subnet Mask IP address has two components the network address and the host address Subnet Mask...

Страница 355: ...been strengthened more than WEP Authentication WPA defines the following authentication methods PSK that can be used without an authentication server plus WPA 802 1x that do require an authentication...

Страница 356: ...t of a wireless network There are 2 primary methods used in the Wi Fi Protected Setup PIN entry a mandatory method of setup for all WPS certified devices Push button configuration PBC an actual push b...

Страница 357: ...ems you should set a network key WEP or WPA WPA2 to the access point to encrypt wireless transmission Wireless communication with a product that does not comply with the Wi Fi standard cannot be guara...

Страница 358: ...ion of the security software or operation system Important If you disabled the firewall function disconnect your network from the Internet Some applications like the network configuration software ove...

Страница 359: ...t Ink Key Points to Successful Printing Be Sure to Check Paper Settings before Printing Be Sure to Set Cassette Paper Information after Loading Paper Canceling a Print Job Key to Enjoying Consistent P...

Страница 360: ...ty To keep printer s performance Canon printer performs cleaning automatically according to its condition When the printer performs cleaning a small amount of ink is consumed In this case all colors o...

Страница 361: ...antities of paper the area where papers go through may get smeared with ink Clean the inside of your machine with Bottom Plate Cleaning Check how to load the paper correctly Is the paper loaded in the...

Страница 362: ...hotos at optimal quality and paper suitable for documents Each media type has specific preset settings how ink is used and sprayed distance from nozzles etc that allow you to print to that type with o...

Страница 363: ...achine has a function that detects whether the information set for the paper loaded in the cassette matches the paper settings Before printing make paper settings in accordance with the cassette paper...

Страница 364: ...press the ON button If you press the ON button while printing is in progress the print data sent from the computer queues in the machine and you may not be able to continue to print Press the Stop bu...

Страница 365: ...ments stored in the machine s memory will be lost Send or print a necessary document or save it on a USB flash drive before unplugging the power cord Print periodically Just as the tip of a felt pen b...

Страница 366: ...so may cause the ink to leak during transport and cause damage to the machine When a shipping agent is handling transport of the machine have its box marked THIS SIDE UP to keep the machine with its...

Страница 367: ...ers on the machine to keep them from opening and to prevent the cassettes from falling out during transportation Then pack the machine in the plastic bag 8 Attach the protective material to the machin...

Страница 368: ...y orders Certificates of deposit Postage stamps canceled or uncanceled Identifying badges or insignias Selective service or draft papers Checks or drafts issued by governmental agencies Motor vehicle...

Страница 369: ...ronment Temperature 41 to 95 F 5 to 35 C Humidity 10 to 90 RH no condensation The performance of the printer may be reduced under certain temperature and humidity conditions Recommended conditions Tem...

Страница 370: ...8 5 x 14 0 216 x 356 mm Scanning resolution Optical resolution horizontal x vertical max 1200 x 1200 dpi 1 Interpolated resolution max 19200 x 19200 dpi 2 1 Optical Resolution represents the maximum...

Страница 371: ...utomatic redialing Manual redialing max 10 destinations Others Activity report after every 20 transactions Sequential broadcasting max 101 destinations Rejected numbers max 10 destinations Network Spe...

Страница 372: ...PS driver is not supported Browser Internet Explorer 8 or later Hard Disk Space 2 5 GB Note For bundled software installation The necessary amount of hard disk space may be changed without notice Disp...

Страница 373: ...Windows Media Center Windows NET Framework 4 or 4 5 must be installed to use the Windows software Windows XPS Essentials Pack is required to print on Windows XP Windows The TWAIN driver ScanGear is b...

Страница 374: ...Administrator Settings About the Machine Administration Setting the Administrator Password Restricting the Operation Sharing the Printer on a Network 374...

Страница 375: ...ortant When the administrator password is specified or some operations are restricted the screens below are displayed Ex When the screen to enter the administrator password is displayed Ex When all th...

Страница 376: ...procedure below to specify the administrator password 1 Make sure that the machine is turned on 2 Flick the HOME screen then tap Setup Using the Operation Panel 3 Tap Device settings 4 Tap Administra...

Страница 377: ...cified Tap OK when you finished entering the administrator password 11 Tap Apply The administrator password is enabled When You Want to Change or Disable the Administrator Password When the administra...

Страница 378: ...select Restrict color copying you can restrict color copying operations only Print from storage medium Restricts to print from a USB flash drive Scan to USB flash drive Restricts to save the scanned d...

Страница 379: ...selected are enabled Note If you disable all restrictions tap Cancel operation restrictions in step 5 When the confirmation screen is displayed tap Yes To disable each operation restriction tap the it...

Страница 380: ...that share a single printer Setting Up a Shared Printer This section describes how to set up the print server and the client Note The Windows versions of the computers connected to the network do not...

Страница 381: ...and Faxes The Printers and Faxes window is displayed 3 Click the icon for the model name of printer to be shared If you are using Windows 8 1 Windows 8 Windows 7 Windows Server 2012 R2 Windows Server...

Страница 382: ...003 R2 or Windows Server 2003 from the File menu open Server Properties and select the Drivers tab 3 Click Add 4 When the Add Printer Driver Wizard window is displayed click Next 5 If the print server...

Страница 383: ...isplayed To disable the message display follow the procedure below If you are using Windows 8 1 Windows 8 Windows Server 2012 R2 or Windows Server 2012 In the Devices and Printers window of the client...

Страница 384: ...t use Canon IJ Preview When the functions on the Maintenance tab cannot be set properly from a client system they may be grayed out In this case change the settings from the print server When you chan...

Страница 385: ...tools may not be available depending on the printer you are using operation panel of the printer IJ Network Tool printer information screen displayed on some Canon application software When you chang...

Страница 386: ...Printing Printing from a Computer Printing Using the Operation Panel of the Machine Paper setting for Printing 386...

Страница 387: ...Printing from a Computer Printing with Application Software that You are Using Printer Driver 387...

Страница 388: ...re that You are Using Printer Driver Printing with Easy Setup Basic Various Printing Methods Changing the Print Quality and Correcting Image Data Overview of the Printer Driver Printer Driver Descript...

Страница 389: ...3 Open the printer driver setup window 4 Select a frequently used profile In Commonly Used Settings on the Quick Setup tab select a printing profile suited for the purpose When you select a printing p...

Страница 390: ...ng on a printing profile 6 Select the paper source Select Cassette Auto Select Cassette 1 or Cassette 2 that matches your purpose for Paper Source Important The paper source settings that can be selec...

Страница 391: ...mmonly Used Settings window click Save to register the specified settings Note If the paper settings on the printer driver differ from the cassette paper information registered on the printer an error...

Страница 392: ...uine papers Photo Printing Media name Model No Media Type in the printer driver Cassette paper information registered on the printer Photo Paper Plus Glossy II PP 201 Photo Paper Plus Glossy II Plus G...

Страница 393: ...ter Printer Paper Size in the printer driver Cassette paper information registered on the printer Letter 8 5 x11 22x28cm Letter Legal 8 5 x14 22x36cm Legal A5 A5 A4 A4 B5 B5 4 x6 10x15cm KG 4 x6 10x15...

Страница 394: ...ing Poster Printing Booklet Printing Duplex Printing Stamp Background Printing Registering a Stamp Registering Image Data to be Used as a Background Setting Up Envelope Printing Printing on Postcards...

Страница 395: ...the printer driver setup window 2 Select the paper size Select a page size from the Page Size list on the Page Setup tab 3 Set Orientation Select Portrait or Landscape for Orientation Check Rotate 180...

Страница 396: ...of copies to be printed 3 Specify the print order Check the Print from Last Page check box when you want to print from the last page in order and uncheck the check box when you want to print from the...

Страница 397: ...oftware and this printer driver the number of copies may be multiplied numbers of the two settings or the specified printing order may not be enabled Print from Last Page appears grayed out and is una...

Страница 398: ...e stapled Check the position of the stapling margin from Stapling Side on the Page Setup tab The printer analyzes the Orientation and Page Layout settings and automatically selects the best staple pos...

Страница 399: ...b When you execute print the data is printed with the specified staple side and margin width Important Stapling Side and Specify Margin appear grayed out and are unavailable when Tiling Poster or Book...

Страница 400: ...r size of the document Using Page Size select the page size that is set with your application software 4 Select the print paper size Select the size of the paper loaded in the printer from the Printer...

Страница 401: ...5 Complete the setup Click OK When you execute print the document will be enlarged or reduced to fit to the page size 401...

Страница 402: ...Page Setup tab 3 Select the paper size of the document Using Page Size select the page size that is set with your application software 4 Set the scaling rate by using one of the following methods Sel...

Страница 403: ...rinter driver 5 Complete the setup Click OK When you execute print the document will be printed with the specified scale Important When the application software which you used to create the original h...

Страница 404: ...Note Selecting Scaled changes the printable area of the document 404...

Страница 405: ...ct Page Layout from the Page Layout list on the Page Setup tab The current settings are displayed in the settings preview on the left side of the printer driver 3 Select the print paper size Select th...

Страница 406: ...o change the page arrangement order select a placement method from the list Page Border To print a page border around each document page check this check box 5 Complete the setup Click OK on the Page...

Страница 407: ...ng poster printing is as follows Setting Tiling Poster Printing 1 Open the printer driver setup window 2 Set tiling poster printing Select Tiling Poster from the Page Layout list on the Page Setup tab...

Страница 408: ...ecifies the printing range Select All under normal circumstances To reprint only a specific page select Pages and enter the page number you want to print To specify multiple pages enter the page numbe...

Страница 409: ...select Print all pages or Delete all pages 2 Complete the setup After completing the page selection click OK When you execute print only specified pages will be printed Important Since tiling poster p...

Страница 410: ...et printing is as follows 1 Open the printer driver setup window 2 Set booklet printing Select Booklet from the Page Layout list on the Page Setup tab The current settings are displayed in the setting...

Страница 411: ...each document page check the check box 5 Complete the setup Click OK on the Page Setup tab When you execute print the document is automatically printed first on one side of a sheet of paper and then...

Страница 412: ...er driver setup window 2 Set automatic duplex printing Check the Duplex Printing check box on the Page Setup tab and confirm that Automatic is checked 3 Select the layout Select Normal size Fit to Pag...

Страница 413: ...ther stapling side from the list 6 Set the margin width If necessary click Specify Margin and set the margin width and then click OK 7 Complete the setup Click OK on the Page Setup tab When you execut...

Страница 414: ...ing to the message Then click Start Printing to print the opposite side Important When a media type other than Plain Paper is selected from the Media Type list on the Main tab Duplex Printing appears...

Страница 415: ...Related Topic Changing the Printer Operation Mode 415...

Страница 416: ...you to print a light illustration behind the document data The procedure for performing stamp background printing is as follows Printing a Stamp CONFIDENTIAL IMPORTANT and other stamps that are used o...

Страница 417: ...the XPS printer driver is used When the XPS printer driver is used the stamp is normally printed in the foreground of the document Print semitransparent stamp Check this check box to print a semi tran...

Страница 418: ...first page check this check box 5 Complete the setup Click OK on the Page Setup tab When you execute print the data is printed with the specified background Note The stamp and background are not print...

Страница 419: ...ry stamps can be deleted at any time The procedure for registering a new stamp is as follows Registering a New Stamp 1 Open the printer driver setup window 2 Click Stamp Background Stamp on the Page S...

Страница 420: ...Type Font Style Size and Outline You can select the color of the stamp by clicking Select Color Important Stamp Text appears grayed out and is unavailable when Date Time User Name is selected Placemen...

Страница 421: ...verwrite on the Save settings tab When you want to save the stamp with a different title type a new title in the Title box and click Save Click OK when the confirmation message appears 5 Complete the...

Страница 422: ...ting background An unnecessary background can be deleted The procedure for registering image data to be used as a background is as follows Registering New Background 1 Open the printer driver setup wi...

Страница 423: ...er to the left lightens the background To print the background at the original bitmap intensity move the slider to the rightmost position 6 Save the background Click the Save settings tab and enter a...

Страница 424: ...e the setup Click OK then it returns to Stamp Background dialog box The registered title appears in the Background list Deleting an Unnecessary Background 1 Click Select Background in the Stamp Backgr...

Страница 425: ...ct the paper size When the Envelope Size Setting dialog box is displayed select Envelope Com 10 Envelope DL Yougata 4 4 13 x9 25 or Yougata 6 3 86 x7 48 and then click OK 5 Set the orientation To prin...

Страница 426: ...splay Guide Message of the Option menu to enable the setting Note If the paper settings on the printer driver differ from the cassette paper information registered on the printer an error may occur Fo...

Страница 427: ...about the cassette paper information to be registered on the printer see the following Paper Settings on the Printer Driver and the Printer Media Type Paper Settings on the Printer Driver and the Pri...

Страница 428: ...e messages to be displayed To display guide messages again open the Maintenance tab and click View Printer Status to start the Canon IJ Status Monitor On the Option menu choose Display Guide Message a...

Страница 429: ...ce From the Paper Source list select the paper source that matches your purpose Cassette Auto Select Based on the paper settings on the printer driver and the cassette paper information registered on...

Страница 430: ...ssette paper information registered on the printer an error may occur For instructions on what to do if an error occurs see Paper setting for Printing For details about the cassette paper information...

Страница 431: ...lts display on the Quick Setup tab 1 Open the printer driver setup window 2 Set the preview Check the Preview before printing check box on the Main tab 3 Complete the setup Click OK When you execute p...

Страница 432: ...custom size in Printer Paper Size on the Quick Setup tab 1 Open the printer driver setup window 2 Select the paper size Select Custom for Page Size on the Page Setup tab The Custom Paper Size dialog...

Страница 433: ...size of the specified user defined media For information about printable sizes for user defined media see Media Types You Can Use Note If the paper settings on the printer driver differ from the casse...

Страница 434: ...eve the document print history to print the document The procedure for using the Canon IJ XPS Preview is as follows Print Combine Documents Delete Document Reset Documents View Thumbnails Move Documen...

Страница 435: ...ocuments selected before the combining are deleted from the list and the combined document is added to the list Changing the sequence of print documents or print pages To change the sequence of the pr...

Страница 436: ...s of the print document some functions may not be available in the Canon IJ XPS preview Note You can rename Document Name to any name 5 Executing print Click Print When you execute print the printer u...

Страница 437: ...Optimal Photo Printing of Image Data Adjusting Colors with the Printer Driver Printing with ICC Profiles Adjusting Color Balance Adjusting Color Balance Using Sample Patterns Printer Driver Adjusting...

Страница 438: ...x on the Main tab 3 Complete the setup Click OK When you execute print the document is converted to grayscale data It allows you to print the color document in monochrome Important When the Grayscale...

Страница 439: ...Note During Grayscale Printing inks other than black ink may be used as well 439...

Страница 440: ...to use an application software to specify a printing ICC profile select None The procedure for specifying color correction is as follows You can also set color correction on the Quick Setup tab by ch...

Страница 441: ...an application software to print data 4 Complete the setup Click OK on the Main tab When you execute print the document data is printed with the specified color correction Important When ICM is disabl...

Страница 442: ...or the application software to be used There are two typical printing methods Check the color space Adobe RGB or sRGB of the image data and the application software to be used and then select the prin...

Страница 443: ...ws 1 Open the printer driver setup window 2 Select the manual color adjustment On the Main tab select Manual for Color Intensity and click Set The Manual Color Adjustment dialog box opens 3 Select col...

Страница 444: ...Adjusting Intensity Adjusting Contrast 444...

Страница 445: ...e your application software to select color management items and specify an input ICC profile and a printing ICC profile in the image data Even if you print using a printing ICC profile that you creat...

Страница 446: ...rint the data with the Adobe RGB color space even if the application software does not support Adobe RGB 1 Open the printer driver setup window 2 Select the manual color adjustment On the Main tab sel...

Страница 447: ...displayed 5 Set the other items If necessary click Color Adjustment tab and adjust Cyan Magenta Yellow Brightness Intensity and Contrast settings and then click OK 6 Complete the setup Click OK on th...

Страница 448: ...e case when color balance is used to intensify cyan and to diminish yellow so that the overall colors are more uniform No adjustment Adjust color balance The procedure for adjusting color balance is a...

Страница 449: ...in the settings preview on the left side of the printer driver After adjusting each color click OK 4 Complete the setup Click OK on the Main tab When you execute print the document is printed with the...

Страница 450: ...list together with the adjustment values Described below is the procedure for adjusting the color balance while looking at the pattern 1 Open the printer driver setup window 2 Select the manual color...

Страница 451: ...le Printer Paper Size Select the paper size to be used for pattern printing Note Depending on the paper size selected on the Page Setup tab there may be sizes that cannot be selected Amount of Pattern...

Страница 452: ...ect OK and then execute printing The printer then prints a pattern in which the color balance that you set is the center value 6 Adjusting the color balance Look at the print results and select the im...

Страница 453: ...tab the following items are grayed out and cannot be set Preview before printing on the Main tab Stapling Side and Specify Margin on the Page Setup tab When Duplex Printing is set only Stapling Side c...

Страница 454: ...htness is as follows You can also set brightness on the Quick Setup tab by choosing Photo Printing under Commonly Used Settings and then choosing Color Intensity Manual Adjustment under Additional Fea...

Страница 455: ...e setup Click OK on the Main tab When you execute print the data is printed at the specified brightness Related Topics Specifying Color Correction Adjusting Color Balance Adjusting Intensity Adjusting...

Страница 456: ...then choosing Color Intensity Manual Adjustment under Additional Features 1 Open the printer driver setup window 2 Select the manual color adjustment On the Main tab select Manual for Color Intensity...

Страница 457: ...ata is printed with the adjusted intensity Related Topics Specifying Color Correction Adjusting Color Balance Adjusting Color Balance Using Sample Patterns Printer Driver Adjusting Brightness Adjustin...

Страница 458: ...choosing Photo Printing under Commonly Used Settings and then choosing Color Intensity Manual Adjustment under Additional Features 1 Open the printer driver setup window 2 Select the manual color adju...

Страница 459: ...te print the image is printed with the adjusted contrast Related Topics Specifying Color Correction Adjusting Color Balance Adjusting Color Balance Using Sample Patterns Printer Driver Adjusting Brigh...

Страница 460: ...a list together with the adjustment values Described below is the procedure for adjusting the intensity contrast while looking at the pattern 1 Open the printer driver setup window 2 Select the manua...

Страница 461: ...tab there may be sizes that cannot be selected Amount of Pattern Instances Select Largest Large or Small to set the number of patterns to be printed Note Largest and Large cannot be selected when cer...

Страница 462: ...h the intensity contrast that you set is the center value 6 Adjusting the intensity contrast Look at the print results and select the image that you like best Then enter the intensity contrast numbers...

Страница 463: ...int a pattern for color adjustment is selected on the Color Adjustment tab the following items are grayed out and cannot be set Preview before printing on the Main tab Stapling Side and Specify Margin...

Страница 464: ...er Canon IJ Printer Driver How to Open the Printer Driver Setup Window Canon IJ Status Monitor Checking the Ink Status from Your Computer Canon IJ Preview Deleting the Undesired Print Job Instructions...

Страница 465: ...PS printer driver the standard printer driver must already be installed on your computer Installing the Printer Driver To install the regular printer driver load the Setup CD ROM that comes with the p...

Страница 466: ...ad cleaning or to configure a printing profile that is common to all application software 1 Select as described below If you are using Windows 8 1 or Windows 8 from the Desktop charms select Settings...

Страница 467: ...sk bar Click the button of the status monitor displayed on the task bar The Canon IJ Status Monitor appears Note To open the Canon IJ Status Monitor when the printer is not printing open the printer d...

Страница 468: ...ation displayed on the Canon IJ Status Monitor may differ depending on the country or region where you are using your printer 3 If necessary click Ink Details You can check the ink related information...

Страница 469: ...mber of pages You can also change the media type and paper source settings When you want to display a preview before printing open the printer driver setup window click the Main tab and check the Prev...

Страница 470: ...displayed on the task bar The Canon IJ Status Monitor appears 2 Display the print jobs Click Display Print Queue The print queue window opens 3 Delete the print jobs Select Cancel All Documents from...

Страница 471: ...rinting on the Main tab Prevention of Print Data Loss in the Print Options dialog box on the Page Setup tab Page Layout Tiling Poster Booklet Duplex Printing Specify Margin Print from Last Page Collat...

Страница 472: ...per size that you specified in Word 3 Set the Page Layout that you want and then click OK to close the window 4 Without starting printing close the Print dialog box 5 Open Word s Print dialog box agai...

Страница 473: ...escription Quick Setup tab Description Main tab Description Page Setup tab Description Maintenance tab Description Canon IJ Preview Description Canon IJ XPS Preview Description Canon IJ Status Monitor...

Страница 474: ...g the individual profiles or by holding down the Ctrl key and pressing the up or down arrow keys Standard These are the factory settings If Page Size Orientation and Copies were set from the applicati...

Страница 475: ...f paper You can check an overall image of the layout Preview before printing Shows what the print result will look like before you actually print the data Check this check box to display a preview bef...

Страница 476: ...e size of paper actually loaded into the printer Normally the paper size is set automatically according to the output paper size setting and the document is printed with no scaling When you set 2 on 1...

Страница 477: ...n the printer driver However if the print results are not acceptable specify the function settings on the application software Always Print with Current Settings Prints documents with the current sett...

Страница 478: ...e specified with the application software Save the orientation setting Saves the Orientation to the printing profile in Commonly Used Settings To apply the saved print orientation when the printing pr...

Страница 479: ...h the Purpose Displaying the Print Results before Printing Setting Paper Dimensions Custom Size Printing a Color Document in Monochrome Specifying Color Correction Adjusting Color Balance Adjusting Co...

Страница 480: ...matches the paper that is loaded in the printer This ensures that printing is carried out properly for the specified paper Paper Source Shows the source from which paper is supplied You may be able to...

Страница 481: ...e an ICC profile to adjust colors use the Manual Color Adjustment dialog box to set the profile Grayscale Printing This function converts the data to monochrome data when printing your document Check...

Страница 482: ...balance slightly Important When Grayscale Printing is checked on the Main tab Cyan Magenta and Yellow appear grayed out and are unavailable Brightness Selects the brightness of your print You cannot c...

Страница 483: ...e Setup tab there may be sizes that cannot be selected Amount of Pattern Instances Sets the number of patterns to be printed You can select from Largest Large and Small When you select a pattern size...

Страница 484: ...he printer may not be able to print the image data properly None Disables color adjustment with the printer driver Input Profile Specifies the input profile to be used when you select ICM ICC Profile...

Страница 485: ...Printing a Color Document in Monochrome Displaying the Print Results before Printing 485...

Страница 486: ...d within the application If you select Custom the Custom Paper Size dialog box opens and allows you to specify any vertical and horizontal dimensions for the paper size Orientation Selects the printin...

Страница 487: ...rints the document Check this check box to reduce the size when printing the document Fit to Page This function enables you to automatically enlarge or reduce documents to fit to the paper size loaded...

Страница 488: ...f copies you want to print You can specify a value from 1 to 999 Important If the application used to create your document has a similar function specify the number of copies with the application with...

Страница 489: ...document pages to be placed on one sheet of paper the page order and whether a page border line is to be printed around each document page The settings specified in this dialog box can be confirmed i...

Страница 490: ...printed well specify the pages that do not need to be printed by clicking them in the settings preview of the Page Setup tab Only the pages shown on the screen will be printed this time Booklet Printi...

Страница 491: ...dialog box Makes changes to print data that is sent to the printer Depending on the type of printer driver you are using and the environment this function may not be available Disable ICM required fro...

Страница 492: ...up clear the check box Do not allow application software to compress print data Compression of the application software print data is prohibited If the print result has missing image data or unintende...

Страница 493: ...river Stamp Background Stamp dialog box The Stamp Background Stamp dialog box allows you to print a stamp and or background over or behind the document pages In addition to the pre registered ones you...

Страница 494: ...as a background and change layout method and intensity of the selected background Background first page only Selects whether to print the background on the first page only or print on all pages when...

Страница 495: ...ed as a stamp Moving the slider to the right increases the size moving the slider to the left decreases the size Transparent white area Specifies whether to make white filled areas of the bitmap trans...

Страница 496: ...cessary stamp from the Stamps list and click this button Background Tab The Background tab allows you to select a bitmap file bmp to be used as a background or determine how to print the selected back...

Страница 497: ...er the title to save the background image you specified Up to 64 characters can be entered Note Spaces tabs and returns cannot be entered at the beginning or end of a title Backgrounds Shows a list of...

Страница 498: ...empts do not resolve the print head problem Note Deep Cleaning consumes a larger amount of ink than Cleaning Cleaning the print heads frequently will rapidly deplete your printer s ink supply Therefor...

Страница 499: ...g box and returns to the Maintenance tab Cleaning Performs print head cleaning Print head cleaning removes any blockage in the print head nozzles Perform cleaning when printing becomes faint or if a s...

Страница 500: ...About dialog box The version of the printer driver plus a copyright notice can be checked In addition the language to be used can be switched Initial Check Items Before running Cleaning or Deep Clean...

Страница 501: ...k that the printer power is on and open the cover of the printer Check the following items for each ink Check the amount of ink remaining in the tank Make sure that you push in the ink tank completely...

Страница 502: ...ange the rotation direction of the Landscape in the Orientation To rotate the document 90 degrees to the left when printing select the check box Don t detect mismatch of paper settings when printing f...

Страница 503: ...ystem the characters will be garbled Related Topics Cleaning the Print Heads from Your Computer Aligning the Print Head Position from Your Computer Use Your Computer to Print a Nozzle Check Pattern Ma...

Страница 504: ...t is displayed on the preview screen This command has the same function as the Start Printing on the toolbar Cancel Printing Ends the Canon IJ Preview and cancels the printing of the document that is...

Страница 505: ...alog box This command allows you to specify the page number of the page to be displayed Zoom Menu Selects the ratio of the actual size printed on the paper to the preview display size You can also sel...

Страница 506: ...t setup information for each page at the left side of the preview screen This screen also allows you to change the media type and paper source settings Important If the media type and paper source are...

Страница 507: ...ortant To use the Canon IJ XPS Preview you must have Microsoft NET Framework 4 Client Profile installed on your computer File Menu Selects print operation and print history settings Print Prints the d...

Страница 508: ...on the toolbar Reset Documents Returns the document selected in the document list to their status before they were added to the Canon IJ XPS Preview The combined documents are separated and the origi...

Страница 509: ...Delete Page Deletes the currently selected page If page layout printing is set the pages enclosed with red frame will be deleted This command has the same function as the Delete Page on the toolbar Re...

Страница 510: ...in the document list If the currently selected document is the last document this command is grayed out and cannot be selected Pages Use the following command to select the page to be displayed Note I...

Страница 511: ...the same function as the View Thumbnails on the toolbar View Document List Displays the print document list at the top of the preview window View Print Settings Area Displays the print settings area a...

Страница 512: ...ve Up One Moves the selected print document one up from its current position If the currently selected document is the first document this command is grayed out and cannot be selected Move Down One Mo...

Страница 513: ...ed Paper Source Allows you to select the paper source of the document to be printed Page Layout Displays the page layout of the document to be printed Layout tab You can specify settings for page layo...

Страница 514: ...alues Clicking this button restores all the settings on this tab to their default values factory settings Grayscale Printing Allows you to change the monochrome print settings Duplex Printing Selects...

Страница 515: ...allows you to check the status of the printer and ink with graphics and messages You can check the information on the printing document and the printing progress during printing When a printer error o...

Страница 516: ...lay Guide Message in the Option menu and enable this setting Hagaki Printing Displays the guide message before the printer begins hagaki printing To hide this guide message select the Do not show this...

Страница 517: ...s Ink Model Number Shows the ink tank types for your printer Close Closes the Ink Details dialog box to return to Canon IJ Status Monitor Help Menu When you select this menu item the Help window for C...

Страница 518: ...Updating the MP Drivers Obtaining the Latest MP Drivers Deleting the Unnecessary MP Drivers Before Installing the MP Drivers Installing the MP Drivers 518...

Страница 519: ...esolved problems may be solved You can access our website and download the latest MP Drivers for your model Important You can download the MP Drivers for free but any Internet access charges incurred...

Страница 520: ...From the program list select XXX MP Drivers where XXX is your model name and then click Remove The confirmation window for uninstalling the model appears Important In Windows 8 1 Windows 8 Windows 7...

Страница 521: ...Drivers cannot be installed Checking the Printer Status Turn off the printer Checking the Personal Computer Settings Terminate all running applications Log on as a user who has the administrator accou...

Страница 522: ...to continue In such cases switch to an administrator account and restart the operation from the beginning 3 Install the MP Drivers Take the appropriate action as described on the screen 4 Complete the...

Страница 523: ...Printing Using the Operation Panel of the Machine Printing Photo Data Printing Documents PDF File Saved on a USB Flash Drive 523...

Страница 524: ...Printing Photo Data Printing Photographs Saved on a USB Flash Drive Setting Items for Photo Printing Using the Operation Panel of the Machine Using Useful Display Functions 524...

Страница 525: ...oto selection screen is displayed Note If both photo files and PDF files are saved on USB flash drive the confirmation screen to select which file you print is displayed Tap Print photos in the displa...

Страница 526: ...number of copies for each photo B Number of copies Tap to specify the number of copies 1 Flick vertically to specify the number of copies Tap to display the photo selection screen 2 Tap to specify th...

Страница 527: ...e media type and print quality and so on For details on the setting items Setting Items for Photo Printing Using the Operation Panel of the Machine E Zooming in Tap to zoom in on the photo For details...

Страница 528: ...e Stop button While processing the print job you can add the print job Reserve photo print Adding the Print Job Adding the Print Job You can add the print job Reserve photo print while printing photos...

Страница 529: ...print job you cannot display the HOME screen change the print menu or print from the computer or other devices While processing the print job the photo in other group is not selected If you press the...

Страница 530: ...page size media type etc are retained even if another print menu is selected or the machine is turned off 1 Page size Select the page size of the loaded paper 2 Type Media type Select the media type...

Страница 531: ...Device user settings 531...

Страница 532: ...n the photo selection screen A Tap the photo you want to print the touch screen returns to single photo display B Tap to display photo with specifying the date Specifying Date to Select Photo C Tap to...

Страница 533: ...isplayed by tapping on the photo selection screen A Tap to switch the display magnification B Drag to move the display position Switching the Photo Group Note If more than 2 000 photo data are saved o...

Страница 534: ...faxes onto a USB flash drive Saving a Document in Machine s Memory to USB Flash Drive Saving Received Faxes Automatically on a USB Flash Drive PDF files made using Canon IJ Scan Utility application so...

Страница 535: ...mpatible characters On the preview screen the first page of each PDF file is displayed on the touch screen In addition if a document is in landscape format it will be displayed rotated by 90 degrees F...

Страница 536: ...e to feed paper from the cassette 2 when the cassette 1 runs out of paper under the following conditions A4 Letter or Legal sized plain paper is loaded in the cassette 1 and cassette 2 Yes is selected...

Страница 537: ...to print more than 250 pages of a PDF file print them from a computer Depending on the PDF file it may be printed rotated by 90 degrees If the document size is larger than the page size specified on t...

Страница 538: ...mbination of paper settings you can specify by the printer driver or on the touch screen Setting the Media Type with the Printer Driver and on the Printer Setting the Paper Size with the Printer Drive...

Страница 539: ...g or copying with B5 on the paper loaded in the cassette Replace the paper and print Select if you want to print after replacing the paper of the cassette For example when the paper setting for printi...

Страница 540: ...r settings specified for printing or copying Change the paper settings then try printing again Note You can disable the message which prevents misprinting When you disable the message the machine star...

Страница 541: ...ing Making Copies Basic Reducing or Enlarging a Copy Two Sided Copying About Special Copy Menu Copying Two Pages to Fit onto a Single Page Copying Four Pages to Fit onto a Single Page Collated Copying...

Страница 542: ...document on the platen glass or in the ADF 5 Specify the settings as necessary A The copy layout is displayed Switch the layout single sided 2 on 1 two sided B Tap to specify the number of copies 1 T...

Страница 543: ...ts copying Remove the original on the platen glass or from the document output slot after copying is complete Important If you load the original on the platen glass do not open the document cover or r...

Страница 544: ...s set High or you load the original in the ADF you cannot add the copying job When you add the copying job the number of copies or the settings such as the page size or media type cannot be changed If...

Страница 545: ...nto a Single Page Copying Four Pages to Fit onto a Single Page Collated Copying The original will be scanned to display the preview image Therefore do not open the document cover until the preview scr...

Страница 546: ...specify the magnification If you keep touching the magnification is changed by 10 E Tap to return to the Copy standby screen F The magnification currently specified is displayed Tap to select Fit to...

Страница 547: ...ouch screen In this case tap on the upper left on the touch screen to confirm the message then change the setting The settings of the page size media type etc are retained even if the machine is turne...

Страница 548: ...ized plain paper is loaded in the cassette 1 and cassette 2 Yes is selected for Auto feed switch in Cassette settings 6 Print qlty Print quality Adjust print quality according to the original Importan...

Страница 549: ...10 Frame erase copy When copying thick originals such as books you can make a copy without black margins around the image and gutter shadows Copying Thick Originals Such as Books 549...

Страница 550: ...gnification 2 Tap to confirm the magnification B Flick to specify the magnification C Tap to confirm the magnification Reduction enlargement Method Note Some of the reduction enlargement methods are n...

Страница 551: ...5 B5 A4 141 A5 A4 156 5x7 LTR 183 4x6 LTR Note Some of the preset ratios are not available depending on the country or region of purchase Ratio specified copy You can specify the copy ratio as a perce...

Страница 552: ...rt side bind When you select Orientation Landscape and Output Long side bind When you select Orientation Landscape and Output Short side bind After selecting the stapling side you can select whether y...

Страница 553: ...CD A Tap to rotate the original by 180 degrees B Tap to start scanning the original C Tap to rescan the original After scanning The screen below appears after scanning each sheet of original A Tap to...

Страница 554: ...About Special Copy Menu Copying Thick Originals Such as Books 554...

Страница 555: ...ver When the Copy standby screen is displayed tapping allows you to preview an image of the printout on the preview screen Displaying the Preview Screen There may be a narrow black margin that appears...

Страница 556: ...ht to left When you select Orientation Landscape and Top to bottom When you select Orientation Landscape and Bottom to top After selecting the order you can select whether you use the preview screen I...

Страница 557: ...The screen below appears after scanning each sheet of original A Tap to start scanning the original Remove the sheet of original from the platen glass after scanning and load the next sheet on the pla...

Страница 558: ...r different layouts are available Select 4 on 1 copy then tap OK If you tap Advanced with 4 on 1 copy selected you can specify the orientation and the order of the original Note The order is the same...

Страница 559: ...ng side of print paper on the Print settings screen For details on two sided copy function Two Sided Copying When Loading the Original on the platen glass Before scanning When the preview function is...

Страница 560: ...pying job while printing Adding the Copying Job Reserve copy If you use this function in combination with Two sided copy the screen above is displayed after scanning the fourth sheet of original is co...

Страница 561: ...be used in combination with Two sided copy If you use this function in combination select the two sided copy setting for 2 sidedPrintSetting and the stapling side of print paper on the Print settings...

Страница 562: ...See Two Sided Copying for two sided copying 562...

Страница 563: ...Scanning Scanning from a Computer Scanning from the Operation Panel of the Machine 563...

Страница 564: ...h IJ Scan Utility Scanning with Application Software that You are Using ScanGear Useful Information on Scanning IJ Network Scanner Selector EX Menu and Setting Screen Other Scanning Methods Placing It...

Страница 565: ...tos Scanning with Favorite Settings Scanning Items Larger than the Platen Image Stitch Extracting Text from Scanned Images OCR Sending Scanned Images via E mail Scanning Multiple Items at One Time Sca...

Страница 566: ...e item type or your purpose Note Refer to IJ Scan Utility Main Screen for details on the IJ Scan Utility main screen Save Scanned Images Automatically Scanned images are automatically saved in a prese...

Страница 567: ...Note Refer to Settings Dialog Box for how to set the applications to integrate with 567...

Страница 568: ...ings Follow the steps below to start IJ Scan Utility Windows 8 1 Windows 8 Select IJ Scan Utility on the Start screen to start IJ Scan Utility If IJ Scan Utility is not displayed on the Start screen s...

Страница 569: ...then set the paper size resolution etc in the Settings Document Scan dialog box as required When setting is completed click OK 4 Click Document Scanning starts Note Click Cancel to cancel the scan Sc...

Страница 570: ...ings then set the paper size resolution etc in the Settings Photo Scan dialog box as required When setting is completed click OK 4 Click Photo Scanning starts Note Click Cancel to cancel the scan Scan...

Страница 571: ...Custom Scan dialog box as required When setting is completed click OK Note Once the settings are made you can scan with the same settings from the next time 3 Place the item on the platen Placing Ite...

Страница 572: ...the platen are supported Note The following explains how to scan from the item to be placed on the left side 1 Start IJ Scan Utility 2 Click Settings then set the item type resolution etc in the Sett...

Страница 573: ...elected in Scan Direction 6 Place the item that is to be displayed on the left side of the screen face down on the platen 7 Click Start Scanning Image 1 The first item is scanned and appears in 1 Note...

Страница 574: ...en face down on the platen 9 Click Start Scanning Image 2 The second item is scanned and appears in 2 Note Click Cancel to cancel the scan 10 Adjust the scanned images as required Use the Toolbar to r...

Страница 575: ...n the Preview area or the thumbnail at the top of the screen then click Delete The selected image is deleted allowing you to scan the item again 11 Click Save The combined image is saved Note Refer to...

Страница 576: ...d on Document Language in the Settings General Settings dialog box Select the language you want to extract in Document Language and scan You can add the application from the pull down menu 3 Click OCR...

Страница 577: ...Documents with colors in the background of text Documents containing multiple languages 577...

Страница 578: ...a Computer 4 Click E mail Scanning starts When scanning is completed the specified e mail client starts and the images will be attached to a new message Note Click Cancel to cancel the scan The scanne...

Страница 579: ...at have a whitish background Items printed on white paper hand written documents business cards etc Thin items Thick items Refer to Scanning Multiple Documents at One Time with ScanGear Scanner Driver...

Страница 580: ...5 Select Select Source according to the items to be scanned 6 Select Auto scan for Paper Size then click OK 580...

Страница 581: ...n Dialog Box Settings Custom Scan Dialog Box Settings OCR Dialog Box Settings E mail Dialog Box 7 Click Custom Multiple items are scanned at one time Note Click Cancel to cancel the scan Scanned image...

Страница 582: ...ScanGear OCR or E mail Refer to Scanning with Application Software that You are Using ScanGear for your model from Home of the Online Manual for how to scan using ScanGear scanner driver The screens f...

Страница 583: ...ocument select Document ADF Manual Duplex 6 Set the color mode document size and scanning resolution as required Click Document Scan Orientation Settings to specify the orientation of the documents to...

Страница 584: ...x Settings Document Scan Dialog Box Settings Custom Scan Dialog Box Settings OCR Dialog Box Settings E mail Dialog Box 7 Click Document Scanning starts Note Click Cancel to cancel the scan When Docume...

Страница 585: ...inding Side in Document Scan Orientation Settings Place the documents after rotating the output documents 180 degrees When Short edge is Selected for Binding Side in Document Scan Orientation Settings...

Страница 586: ...Scanned images are saved in the folder set for Save in in the corresponding Settings dialog box displayed by clicking Settings In each Settings dialog box you can also make advanced scan settings 586...

Страница 587: ...not check the scan results before saving when scanned using the operation panel Note The screens for scanning photos are used as examples in the following descriptions 1 Start IJ Scan Utility 2 Click...

Страница 588: ...s Document Scan Dialog Box Settings Photo Scan Dialog Box Settings Custom Scan Dialog Box Settings Scan and Stitch Dialog Box Settings ScanGear Dialog Box Settings OCR Dialog Box Settings E mail Dialo...

Страница 589: ...options in the Save Settings dialog box Note The default save folders are as follows Windows 8 1 Documents folder Windows 8 My Documents folder Windows 7 My Documents folder Windows Vista Documents fo...

Страница 590: ...Settings Scan and Stitch Dialog Box Settings ScanGear Dialog Box Settings OCR Dialog Box Settings E mail Dialog Box Settings Save to PC Photo Dialog Box Settings Save to PC Document Dialog Box Settin...

Страница 591: ...displayed product is not the one you want to use select the desired product from the list In addition for network connection select one with Network after the product name Note Refer to Network Scan S...

Страница 592: ...ustments when scanning Scan save settings and applications can be specified in the Settings ScanGear dialog box OCR Scan text in scanned magazines and newspapers and display it in a specified applicat...

Страница 593: ...functions on each tab Scanning from a Computer Tab You can specify how to respond when scanning from IJ Scan Utility Settings Document Scan Dialog Box Settings Photo Scan Dialog Box Settings Custom Sc...

Страница 594: ...h to E mail Photo Dialog Box Settings Attach to E mail Document Dialog Box General Settings Tab You can set the product to use file size restriction on e mail attachment language to detect text in ima...

Страница 595: ...vanced scan settings to scan items as documents 1 Scan Options Area 2 Save Settings Area 3 Application Settings Area 1 Scan Options Area Select Source Select the type of item to be scanned Scanning do...

Страница 596: ...nd then click OK Note Click Defaults to restore the specified settings to the default settings Resolution Select the resolution of the item to be scanned The higher the resolution value the more detai...

Страница 597: ...d materials are displayed as a collection of fine dots Moire is a phenomenon where uneven gradation or a stripe pattern appears when such photos or pictures printed with fine dots are scanned Note Sca...

Страница 598: ...he orientation may not be detected for the following types of settings or documents since the text cannot be detected correctly Resolution is outside the range of 300 dpi to 600 dpi Font size is outsi...

Страница 599: ...ltiple Pages is selected in Data Format When Black and White is selected in Color Mode this option does not appear JPEG Image Quality You can specify the image quality of JPEG files Important This app...

Страница 600: ...r than the one specified in Save in You can specify the folder from the pull down menu Attach to e mail Select this when you want to send e mails with the scanned images attached You can specify the e...

Страница 601: ...to scan items as photos 1 Scan Options Area 2 Save Settings Area 3 Application Settings Area 1 Scan Options Area Select Source Photo is selected Color Mode Select the color mode in which to scan the i...

Страница 602: ...e date and four digits are appended to the set file name in the _20XX0101_0001 format Note When you select the Save to a subfolder with current date checkbox the date and four digits are appended to t...

Страница 603: ...n application Select this when you want to enhance or correct the scanned images You can specify the application from the pull down menu Send to an application Select this when you want to use the sca...

Страница 604: ...Defaults You can restore the settings in the displayed screen to the default settings 604...

Страница 605: ...Save Settings Area 3 Application Settings Area 1 Scan Options Area Select Source Select the type of item to be scanned Select Auto to detect the item type automatically and to set Color Mode Paper Si...

Страница 606: ...Source instead of selecting Auto To reduce moire set Select Source to Magazine Color Mode Select the color mode in which to scan the item Note Only Color is available when Select Source is Auto Paper...

Страница 607: ...commended image correction Applies suitable corrections automatically based on the item type Important The color tone may differ from the source image due to corrections In that case deselect the chec...

Страница 608: ...oklets Important This function is available only when scanning from the platen Note Use ScanGear scanner driver s Advanced Mode tab to correct gutter shadows when scanning non standard size items or s...

Страница 609: ...at case select the Check scan results checkbox and rotate the image in the Save Settings dialog box 2 Save Settings Area File Name Enter the file name of the image to be saved When you save a file the...

Страница 610: ...n Black and White is selected in Color Mode this option does not appear Create a PDF file that supports keyword search Select this checkbox to convert text in images into text data and create PDF file...

Страница 611: ...You can specify the folder from the pull down menu Attach to e mail Select this when you want to send e mails with the scanned images attached You can specify the e mail client you want to start from...

Страница 612: ...canning items larger than the platen 1 Scan Options Area 2 Save Settings Area 3 Application Settings Area 1 Scan Options Area Select Source Select the type of item to be scanned Scanning photos Photo...

Страница 613: ...uneven gradation or a stripe pattern appears when such photos or pictures printed with fine dots are scanned Note Scanning takes longer than usual when you enable Reduce moire 2 Save Settings Area Fi...

Страница 614: ...le that supports keyword search Select this checkbox to convert text in images into text data and create PDF files that support keyword search Important This appears only when PDF or PDF Multiple Page...

Страница 615: ...ation from the pull down menu Send to a folder Select this when you also want to save the scanned images to a folder other than the one specified in Save in You can specify the folder from the pull do...

Страница 616: ...hen you save a file the date and four digits are appended to the set file name in the _20XX0101_0001 format Note When you select the Save to a subfolder with current date checkbox the date and four di...

Страница 617: ...ompresses the file size when saving allowing you to reduce the load on your network server Important This appears only when PDF or PDF Multiple Pages is selected in Data Format Create a PDF file that...

Страница 618: ...om the pull down menu Send to a folder Select this when you also want to save the scanned images to a folder other than the one specified in Save in You can specify the folder from the pull down menu...

Страница 619: ...ument or Document ADF Platen Scanning magazines Magazine Scanning documents from the ADF Auto Document Feeder Document ADF Simplex Document ADF Manual Duplex or Document ADF Platen Note When Document...

Страница 620: ...only 300 dpi or 400 dpi can be set Document Scan Orientation Settings This appears when you select ADF for Select Source Click to display the Document Scan Orientation Settings dialog box in which yo...

Страница 621: ...platen Reduces gutter shadows that appear between pages when scanning open booklets Important This function is available only when scanning from the platen Note Use ScanGear scanner driver s Advanced...

Страница 622: ...erned backgrounds In that case select the Check scan results checkbox and rotate the image in the Save Settings dialog box 2 Save Settings Area File Name Enter the file name of the image to be saved W...

Страница 623: ...in it The folder will be created with a name such as 20XX_01_01 Year_Month_Date If this checkbox is not selected files are saved directly in the folder specified in Save in Check scan results Display...

Страница 624: ...elect Auto to detect the item type automatically and to set Color Mode Paper Size and Resolution automatically as well Important Item types supported by Auto are photos postcards business cards magazi...

Страница 625: ...a screen in which you can specify the paper size appears Select a Unit then enter the Width and Height and then click OK Note Only Auto is available when Select Source is Auto Click Defaults in the sc...

Страница 626: ...t the checkbox and scan Note Scanning takes longer than usual when you enable this function When Select Source is Photo Important When Color Mode is Black and White Image Processing Settings is not av...

Страница 627: ...correct gutter shadows when scanning non standard size items or specified areas Refer to Gutter Shadow Correction for your model from Home of the Online Manual for details When you enable this functi...

Страница 628: ...he image to be saved When you save a file the date and four digits are appended to the set file name in the _20XX0101_0001 format Note When you select the Save to a subfolder with current date checkbo...

Страница 629: ...ars only when PDF PDF Multiple Pages or Auto is selected in Data Format Note PDF files that are searchable in the language selected in Document Language on the General Settings tab of the Settings dia...

Страница 630: ...Instructions Opens this guide Defaults You can restore the settings in the displayed screen to the default settings 630...

Страница 631: ...operation panel 1 Scan Options Area 2 Save Settings Area 3 Application Settings Area 1 Scan Options Area Paper Size Set from the operation panel Resolution Set from the operation panel 2 Save Settings...

Страница 632: ...ted files are saved directly in the folder specified in Save in 3 Application Settings Area Open with an application Select this when you want to enhance or correct the scanned images You can specify...

Страница 633: ...anning them from the operation panel 1 Scan Options Area 2 Save Settings Area 3 Application Settings Area 1 Scan Options Area Paper Size Set from the operation panel Resolution Set from the operation...

Страница 634: ...with extremely large or small fonts Documents with small amount of text Documents containing figures images Hand written text Documents containing both vertical and horizontal lines tables Note Scann...

Страница 635: ...files Create a PDF file that supports keyword search Select this checkbox to convert text in images into text data and create PDF files that support keyword search Note PDF files that are searchable i...

Страница 636: ...pull down menu Do not start any application Saves to the folder specified in Save in Note Specify the application or folder in the Select Application or Select Destination Folder dialog box displayed...

Страница 637: ...hem from the operation panel 1 Scan Options Area 2 Save Settings Area 3 Application Settings Area 1 Scan Options Area Paper Size Set from the operation panel Resolution Set from the operation panel 2...

Страница 638: ...der with current date Select this checkbox to create a current date folder in the folder specified in Save in and save scanned images in it The folder will be created with a name such as 20XX_01_01 Ye...

Страница 639: ...operation panel 1 Scan Options Area 2 Save Settings Area 3 Application Settings Area 1 Scan Options Area Paper Size Set from the operation panel Resolution Set from the operation panel Image Processin...

Страница 640: ...Documents containing both vertical and horizontal lines tables Note Scanning takes longer than usual when you enable Correct slanted text document Detect the orientation of text document and rotate i...

Страница 641: ...data and create PDF files that support keyword search Note PDF files that are searchable in the language selected in Document Language on the General Settings tab of the Settings dialog box are creat...

Страница 642: ...e With network connection Select appears on the right side of the product name Click Select to display IJ Network Scanner Selector EX from which you can change the scanner to use Refer to Network Scan...

Страница 643: ...review Operation Buttons Rotate Left 90 Rotate Right 90 Rotates scanned images 90 degrees counter clockwise or clockwise Select the image you want to rotate then click Rotate Left 90 or Rotate Right 9...

Страница 644: ...ed images You can select JPEG Exif TIFF PNG PDF or PDF Multiple Pages Important You cannot select PDF or PDF Multiple Pages in the following cases When scanned by clicking Photo in the IJ Scan Utility...

Страница 645: ...s only when PDF or PDF Multiple Pages is selected in Data Format Note PDF files that are searchable in the language selected in Document Language on the General Settings tab of the Settings dialog box...

Страница 646: ...y depending on the select source and view 1 Settings and Operation Buttons Select Output Size B4 B5 x 2 Scans the left and right halves of a B4 size item separately A3 A4 x 2 Scans the left and right...

Страница 647: ...rames You can adjust the scan area in preview If no area is specified the image of the size selected in Select Output Size will be saved If an area is specified only the image in the cropping frame wi...

Страница 648: ...ayed image Rotate Left Rotates the preview image 90 degrees counter clockwise Invert Vertically Rotates the preview image 180 degrees Rotate Right Rotates the preview image 90 degrees clockwise Open G...

Страница 649: ...ng the first item by clicking Start Scanning Image 1 The image is scanned in the direction specified in Scan Direction and 2 appears next to it After scanning the second item by clicking Start Scannin...

Страница 650: ...Related Topic Scanning Items Larger than the Platen Image Stitch 650...

Страница 651: ...nning Multiple Documents from the ADF Auto Document Feeder in Advanced Mode Scanning Multiple Documents at One Time with ScanGear Scanner Driver Correcting Images and Adjusting Colors with ScanGear Sc...

Страница 652: ...ware This software enables you to preview scan results or set document type and output size etc when scanning documents It is useful when you want to scan in a specific color tone as it allows you to...

Страница 653: ...Advanced Mode Use the Advanced Mode tab to specify the color mode output resolution image brightness color tone etc when scanning 653...

Страница 654: ...canner Driver Starting ScanGear Scanner Driver Scanning in Basic Mode Scanning in Advanced Mode Scanning Multiple Documents from the ADF Auto Document Feeder in Advanced Mode Scanning Multiple Documen...

Страница 655: ...y Refer to Starting IJ Scan Utility for your model from Home of the Online Manual for how to start IJ Scan Utility 2 Click ScanGear in the IJ Scan Utility main screen The ScanGear screen appears Start...

Страница 656: ...w and scan Photos that have a whitish background Documents printed on white paper hand written text business cards etc Thin documents Thick documents The following types of documents may not be scanne...

Страница 657: ...ype is selected for Select Source Note Colors are adjusted based on the document type selected in Select Source 4 Set Destination Note Skip ahead to Step 7 when an ADF type is selected for Select Sour...

Страница 658: ...a dialog box in which you can check the current scan settings document type etc A response of ScanGear after scanning can be specified in Status of ScanGear dialog after scanning on the Scan tab of t...

Страница 659: ...be scanned correctly In that case click Thumbnail on the Toolbar to switch to whole image view and scan Photos that have a whitish background Documents printed on white paper hand written text busine...

Страница 660: ...as required Adjusting Cropping Frames ScanGear Image Settings Color Adjustment Buttons 7 Click Scan Scanning starts Note Click Information to open a dialog box in which you can check the current scan...

Страница 661: ...1 Place the documents on the ADF of the machine then start ScanGear scanner driver Placing Documents ADF Auto Document Feeder Starting ScanGear Scanner Driver 2 Click the Advanced Mode tab and select...

Страница 662: ...which you can check the current scan settings document type etc A response of ScanGear after scanning can be specified in Status of ScanGear dialog after scanning on the Scan tab of the Preferences d...

Страница 663: ...c Thin documents Thick documents Scanning Multiple Documents in Whole Image View The following types of documents may not be scanned correctly Documents smaller than 1 2 inches 3 cm square Photos that...

Страница 664: ...t Output Size according to purpose 6 Adjust the cropping frames and set Image corrections as required Note You can correct each image separately Select the frame you want to correct In thumbnail view...

Страница 665: ...itions of slanted documents are not corrected in whole image view 1 After previewing images click Thumbnail on the Toolbar Switch to whole image view Note When the whole image is displayed the icon ch...

Страница 666: ...e document size Auto Crop If an area is specified only the portion in the specified area will be scanned Adjusting Cropping Frames ScanGear 5 Set Image corrections as required 6 Click Scan Areas frame...

Страница 667: ...Driver Correcting Images Unsharp Mask Reduce Dust and Scratches Fading Correction etc Adjusting Colors Using a Color Pattern Adjusting Saturation and Color Balance Adjusting Brightness and Contrast Ad...

Страница 668: ...w of a function and select an item from the pull down menu Important Do not apply these functions to images without moire dust scratches or faded colors The color tone may be adversely affected Refer...

Страница 669: ...ng the base color in recycled paper newspapers etc when scanning documents Set Reduce Show through to ON OFF ON Sharpening slightly out of focus images Set Unsharp Mask to ON OFF ON Reducing gradation...

Страница 670: ...ow Medium or High according to the degree of dust and scratches None Medium Correcting photos that have faded with time or due to colorcast Set Fading Correction to Low Medium or High according to the...

Страница 671: ...671...

Страница 672: ...ects the entire picture due to the weather or ambient strong colors Click an arrow in Color Adjustment to emphasize the corresponding color Cyan red magenta green and yellow blue are complementary col...

Страница 673: ...nts are applied only to the cropping frames scan areas or the frame selected in thumbnail view You can select multiple frames or cropping frames by clicking them while pressing the Ctrl key You can al...

Страница 674: ...ave faded with time etc Move Slider under Saturation to the left to decrease the saturation darken the image and to the right to increase the saturation brighten the image You can also enter a value 1...

Страница 675: ...e by reducing the cast color and increasing the complementary color It is usually difficult to correct the image completely by adjusting only one color pair It is recommended that you find a portion i...

Страница 676: ...to return to the previous view Click Defaults to reset all adjustments in the current window Channel Each dot of an image is a mixture of Red Green and Blue in various proportions gradation These colo...

Страница 677: ...tween the brighter and darker parts of an image Increasing contrast will increase the difference thus sharpening the image Decreasing contrast will decrease the difference thus softening the image Mov...

Страница 678: ...re of Red Green and Blue in various proportions gradation These colors can be adjusted individually as a channel Master Adjust the Red Green and Blue combined Red Adjust the Red channel Green Adjust t...

Страница 679: ...ween the black point and white point All parts to the right of White point Slider will turn white level 255 When Image Adjustment is set to anything but None the adjustments shown below are performed...

Страница 680: ...er toward the shadow side Adjusting Histograms Using the Droppers When you select a Channel and click the Black point Mid point or White point Dropper the mouse pointer on the preview image changes to...

Страница 681: ...r Gray Balance and click the area you want to adjust the color in the preview image The clicked point will be set as the achromatic color reference and the rest of the image is adjusted accordingly Fo...

Страница 682: ...mixture of Red Green and Blue in various proportions gradation These colors can be adjusted individually as a channel Master Adjust the Red Green and Blue combined Red Adjust the Red channel Green Adj...

Страница 683: ...he output side resulting in a bright toned image when viewed on a monitor Underexposure Concave curve The midtone data of the input side is stretched toward the shadow of the output side resulting in...

Страница 684: ...Edit custom curve You can drag specific points on the Tone Curve to freely adjust the brightness of the corresponding areas 684...

Страница 685: ...nt window Adjusting Threshold The brightness of color and grayscale images is expressed in a value between 0 and 255 However in creating black and white images all colors are mapped to either black 0...

Страница 686: ...r Scanner Driver Screens Basic Mode Tab Advanced Mode Tab Input Settings Output Settings Image Settings Color Adjustment Buttons Preferences Dialog Box Scanner Tab Preview Tab Scan Tab Color Settings...

Страница 687: ...n Buttons Select Source Photo Color Scan color photos Magazine Color Scan color magazines Document Color Scan documents in color Document Grayscale Scan documents in black and white Document Color ADF...

Страница 688: ...eview Performs a trial scan Note When using the machine for the first time scanner calibration starts automatically Wait a while until the preview image appears Destination Select what you want to do...

Страница 689: ...rtion within the cropping frame will be scanned You can drag the cropping frame to enlarge reduce it while maintaining the aspect ratio Add Delete Opens the Add Delete the Output Size dialog box in wh...

Страница 690: ...ly Auto Document Fix and Correct fading are available when Recommended is selected on the Color Settings tab of the Preferences dialog box Note Available functions vary by the document type selected i...

Страница 691: ...iew In whole image view Thumbnail Whole Image Switches the view in the Preview area 3 Preview Area Rotate Left Rotates the preview image 90 degrees counter clockwise The result will be reflected in th...

Страница 692: ...ping frames into thick broken lines and applies the settings to all of them Remove Cropping Frame Removes the selected cropping frame Information Displays the version of ScanGear and the current scan...

Страница 693: ...pplied Double click a frame to zoom in on the image Click Frame Advance at the bottom of the screen to display the previous or next frame Double click the frame again to return the display to its non...

Страница 694: ...Related Topic Scanning in Basic Mode 694...

Страница 695: ...iew The preview function is not available when scanning from the ADF Auto Document Feeder 1 Settings and Operation Buttons Favorite Settings You can name and save a group of settings Input Settings Ou...

Страница 696: ...or contrast and adjustments to its highlight and shadow values histogram or balance tone curve Zoom Zooms in on a frame or zooms in on the image in the area specified with a cropping frame scan area W...

Страница 697: ...ime to process the images if the total size of the scanned images exceeds a certain size In that case a warning message appears it is recommended that you reduce the total size To continue scan in who...

Страница 698: ...age 90 degrees clockwise The result will be reflected in the scanned image The image returns to its original state when you preview again Auto Crop Displays and adjusts the cropping frame automaticall...

Страница 699: ...e and thumbnails of scanned images are displayed Only the images with the checkbox selected will be scanned Note When multiple images are previewed different outlines indicate different selection stat...

Страница 700: ...l view you can only create one cropping frame per image In whole image view you can create multiple cropping frames Adjusting Cropping Frames ScanGear Related Topic Scanning in Advanced Mode Scanning...

Страница 701: ...anned This setting is available in whole image view only When scanning both sides of the documents automatically from the ADF select A4 or Letter When you select a size the Preview area size changes a...

Страница 702: ...os and documents in black and white This mode renders the image in black and white The contrast in the image is divided at certain levels threshold level into black and white and is rendered in two co...

Страница 703: ...minimum size is 96 pixels x 96 pixels when Output Resolution is 600 dpi scaled at 100 When Auto Crop is performed in whole image view the aspect ratio will not be maintained since the size will be pr...

Страница 704: ...When Select Source is Document ADF Simplex or Document ADF Duplex You can enter a value within the range of 25 dpi to 600 dpi Output Size Select an output size Select Flexible to set custom sizes or...

Страница 705: ...e Add Delete the Output Size dialog box in which you can specify custom output sizes In the Add Delete the Output Size dialog box you can specify multiple output sizes and save them at one time Saved...

Страница 706: ...Available when Output Size is set to anything but Flexible Click this button to rotate the cropping frame Click again to return it to the original orientation Data Size The data size when scanned with...

Страница 707: ...Image Adjustment is set the brightness of the specified portion of the image is optimized Images can be adjusted according to the automatically detected document type or the specified document type Th...

Страница 708: ...eferences dialog box and Document or Magazine is selected for Image Adjustment Unsharp Mask Emphasizes the outline of the subjects to sharpen the image when scanning photos OFF Unsharp Mask will not b...

Страница 709: ...w Select this to correct a small amount of fading and colorcast Medium It is recommended that you normally select this setting High Select this to correct a large amount of fading and colorcast This c...

Страница 710: ...t place objects that weigh 4 4 lbs 2 0 kg or more on the platen Also do not press on the document with a force exceeding 4 4 lbs 2 0 kg If you press heavily the scanner may not work correctly or you m...

Страница 711: ...If the shadow is not corrected properly adjust the cropping frame scan area on the preview image Adjusting Cropping Frames ScanGear 711...

Страница 712: ...olor Adjustment Buttons the results will be reflected in the preview image Click a Color Adjustment Button to set the following items Saturation Color Balance Adjust the saturation vividness and color...

Страница 713: ...no settings to make in this screen For a color image select a color in Channel to check either Red Green or Blue or select Master to check three colors together If you place the cursor on the preview...

Страница 714: ...s List and click Delete Click Save to save the settings displayed in Tone Curve Settings List or Threshold Settings List You can load and apply the saved tone curve threshold settings to a preview ima...

Страница 715: ...ode specify the folder in which to save images temporarily and set the music file to play during or at the end of a scan Preview Tab Allows you to select what to do with Preview when ScanGear is start...

Страница 716: ...tion is disabled a message may appear because the computer cannot collect the machine status In that case click OK to exit ScanGear scanner driver Auto Power On Select Enable to turn on the machine au...

Страница 717: ...Use quiet mode during specified hours Select this option when you wish to reduce the operating noise of the machine during a specified period of time Set the Start time and End time during which quiet...

Страница 718: ...me before previewing and scanning to reproduce correct color tones in scanned images Note Even when Execute at Every Scan is set to OFF the scanner may be calibrated automatically in some cases such a...

Страница 719: ...No preview image will be displayed at startup Note Select None if you do not want to save the preview image Cropping Frame on Previewed Images Select how to display cropping frames after previewing im...

Страница 720: ...er Displays 95 in width and height of the area displayed for the standard size Note When you change the Cropping Size for Thumbnail View setting the preview images will be refreshed and cropped to the...

Страница 721: ...original application when scanning is completed Do not close ScanGear automatically Select this to return to the ScanGear screen for another scan when scanning is completed Display the dialog to selec...

Страница 722: ...nter colors thus reducing time and trouble to manually match the monitor and printer colors Source Scanner Select scanner profile Target Select target profile Monitor Select this checkbox to display p...

Страница 723: ...ual for the monitor printer and application settings Monitor Gamma By setting the gamma value of a monitor you can adjust the input data to the brightness characteristics of the monitor Adjust the val...

Страница 724: ...driver align an upper corner of the item with the corner at the arrow alignment mark of the platen Photos that have been cut to various shapes and items smaller than 1 2 inches 3 cm square cannot be c...

Страница 725: ...dialog box of IJ Scan Utility With network connection items may not be scanned correctly when five or more items are placed In that case reduce the number of items placed on the platen to four or less...

Страница 726: ...document guides to the width of the documents Insert the documents face up until a beep sounds Note When scanning duplex documents place the front sides facing up They will not be scanned in the corre...

Страница 727: ...specified You can drag the mouse over a thumbnail to specify a cropping frame In whole image view An active cropping frame is automatically specified around the preview image You can drag the cropping...

Страница 728: ...ccordingly The cursor will change into Crosshair Arrow when it is positioned within a cropping frame Click and drag the mouse to move the entire cropping frame Note On the Advanced Mode tab you can sp...

Страница 729: ...so select multiple cropping frames by clicking them while pressing the Ctrl key If you select multiple cropping frames and change the settings on a tab at the right of ScanGear the settings will be ap...

Страница 730: ...select it and click Remove Cropping Frame on the Toolbar Alternatively press the Delete key When there are multiple cropping frames all the selected cropping frames active cropping frame and selected...

Страница 731: ...e computers at the same time When using a network compatible model by connecting to a network scanning takes longer than usual Make sure that you have adequate disk space available when scanning large...

Страница 732: ...image size is too large such as when scanning large images at high resolution your computer may not respond or the progress bar may remain at 0 depending on the application In that case cancel the ac...

Страница 733: ...Useful Information on Scanning Adjusting Cropping Frames in the Image Stitch Window Resolution Data Formats Color Matching 733...

Страница 734: ...the Adjust cropping frames checkbox an active cropping frame is automatically specified around the image in the Preview area You can drag the cropping frame to specify the area When you perform a scan...

Страница 735: ...a Computer tab of the Settings dialog box ScanGear Scanner Driver Output Resolution in Output Settings on the Advanced Mode tab Appropriate Resolution Settings Set the resolution according to the use...

Страница 736: ...processing speed will slow down significantly and you will experience inconvenience such as lack of memory Set the minimum required resolution according to the use of the image Note When you will be...

Страница 737: ...every time they are saved and cannot be returned to their original state JPEG is not available for black and white images TIFF Standard File Extension tif A data format featuring a relatively high co...

Страница 738: ...ut profile target The image s color space is converted from the scanner s color space to sRGB by ScanGear When displaying on a monitor the image s color space is converted from sRGB to the monitor s c...

Страница 739: ...etwork Scanner Selector EX is not displayed on the Start screen select the Search charm then search for IJ Network Scanner Selector EX Windows 7 Windows Vista Windows XP From the Start menu click All...

Страница 740: ...to your computer over a network Important When using a model with which you cannot scan over a network from the operation panel that model does not appear in Scanners and the setting is not available...

Страница 741: ...printer still does not appear refer to Problems with Network Communication for your model from Home of the Online Manual You do not need to use this software when scanning via USB Refer to Uninstalli...

Страница 742: ...elector EX Note If the User Account Control screen appears click Continue Windows 7 Windows Vista 1 From the Start menu select Control Panel Programs Programs and Features 2 Select Canon IJ Network Sc...

Страница 743: ...Other Scanning Methods Scanning with WIA Driver Scanning Using the Control Panel Windows XP Only 743...

Страница 744: ...Windows 8 Select the Search charm then click Network displayed by searching for Network Windows 7 From the Start menu select Computer Network Windows Vista From the Start menu select Network 2 Right c...

Страница 745: ...nd right to brighten the image You can also enter a value 100 to 100 Contrast Move the slider to adjust the contrast Moving it to the left will decrease the contrast of the image thus softening the im...

Страница 746: ...n using the scanner or printer with network connection the options for the type of picture may differ from those displayed with USB connection To scan with the values previously set in Adjust the qual...

Страница 747: ...review the image The preview image appears on the right Drag to specify the scan area Important With network connection scan without preview when scanning documents from the ADF If you preview place t...

Страница 748: ...meras then double click Canon XXX series where XXX is the model name The Scanner and Camera Wizard dialog box appears 3 Click Next 4 Select Picture type according to the item to be scanned To scan fro...

Страница 749: ...image Moving it to the right will increase the contrast of the image thus sharpening the image You can also enter a value 127 to 127 Resolution DPI Enter the resolution Specify a value between 50 dpi...

Страница 750: ...ner driver align an upper corner of the item with the corner at the arrow alignment mark of the platen Photos that have been cut to various shapes and items smaller than 1 2 inches 3 cm square cannot...

Страница 751: ...items 10 degrees or less are corrected automatically Placing Documents ADF Auto Document Feeder Important Do not leave thick items on the platen when scanning from the ADF May result in paper jam Plac...

Страница 752: ...752...

Страница 753: ...Machine Saving Scanned Data on the USB Flash Drive Using the Operation Panel of the Machine Forwarding Scanned Data to Shared Folder on the Computer Using the Operation Panel of the Machine Deleting...

Страница 754: ...p or standby mode If you perform scanning via a network connection make sure that all the required settings have been specified Network Scan Settings The destination and the file name are specified in...

Страница 755: ...y A Tap to select the document type Note When you forward the scanned data to the computer searched using WSD you cannot select the document type Document Scans the original on the platen glass or in...

Страница 756: ...een asking you if you continue scanning is displayed after scanning is complete If you continue scanning load the original on the platen glass and start scanning If you do not continue scanning tap En...

Страница 757: ...addition you can edit or print the scanned images using the compatible application software to make better use of them Scanning with IJ Scan Utility Note You can use a WIA compliant application softw...

Страница 758: ...de If you perform scanning via a network connection make sure that all the required settings have been specified Network Scan Settings The mail software and the file name are specified in Canon IJ Sca...

Страница 759: ...etails on the setting items Setting Items for Scanning Using the Operation Panel of the Machine C Tap to register the current scan settings as a custom setting Registering the Favorite Settings Custom...

Страница 760: ...orwarded to the computer and attached to an e mail according to the settings specified in Canon IJ Scan Utility For the settings or how to send an e mail refer to the mail software s instruction manua...

Страница 761: ...ssume no responsibility for damage to or loss of data for whatever reason even within the warranty period 1 Make sure that the machine is turned on 2 Flick the HOME screen then tap Scan Using the Oper...

Страница 762: ...rent scan settings as a custom setting Registering the Favorite Settings Custom profiles D Tap to display the screen to select the destination 7 Load the original document on the platen glass or in th...

Страница 763: ...ash drive in one PDF file When you scan the originals continuously you can save up to 100 pages of images in one PDF file Remove the original on the platen glass or from the document output slot after...

Страница 764: ...fy the destination folder in Canon Quick Toolbox For details on settings of Canon Quick Toolbox Destination Folder Settings Follow the procedure below to forward scanned data to the shared folder on t...

Страница 765: ...s on the setting items Setting Items for Scanning Using the Operation Panel of the Machine C Tap to register the current scan settings as a custom setting Registering the Favorite Settings Custom prof...

Страница 766: ...g screen the machine starts scanning and scanned data is saved on the shared folder of the computer When you select PDF or Compact PDF for Format on the scan setting screen the confirmation screen ask...

Страница 767: ...USB flash drive Note When the message informing you that the operation restriction is enabled ask the administrator of the machine you are using For details on the operation restriction of the machine...

Страница 768: ...F data is displayed on the touch screen C Tap to switch the file type displayed on the touch screen D Flick to display the data then tap to delete the data E Tap to display the file name list 7 Tap Ye...

Страница 769: ...elected for Doc type or the scan menu on the screen for selecting to which you save the data If the setting which cannot be specified in combination is selected and Error details are displayed on the...

Страница 770: ...ing item is not available when Photo is selected for Doc type 7 Descreen A printout consists of minute dots to make characters or graphs Interfering with each dot may result in uneven shades or a stri...

Страница 771: ...n panel also changes If your scanner or printer is not selected in IJ Scan Utility check that it is selected with IJ Network Scanner Selector EX Refer to IJ Network Scanner Selector EX Menu and Settin...

Страница 772: ...the Scan from Operation Panel Settings screen as well Setting for Scanning with IJ Scan Utility To scan from IJ Scan Utility using a scanner or printer connected to a network specify your scanner or p...

Страница 773: ...rch for IJ Network Scanner Selector EX Windows 7 Windows Vista Windows XP From the Start menu click All Programs Canon Utilities IJ Network Scanner Selector EX IJ Network Scanner Selector EX The icon...

Страница 774: ...is completed after installing the MP Drivers Network communication between your scanner or printer and computer is enabled If your scanner or printer still does not appear refer to Problems with Netw...

Страница 775: ...ify how to respond when scanning from the operation panel Note The screens for scanning photos from the operation panel are used as examples in the following descriptions 1 Start IJ Scan Utility 2 Cli...

Страница 776: ...ings Save to PC Photo Dialog Box Settings Save to PC Document Dialog Box Settings Attach to E mail Photo Dialog Box Settings Attach to E mail Document Dialog Box 4 Set Scan Options 5 Specify the file...

Страница 777: ...ct the application you want to start after scanning in Application Settings 7 Click OK The responses will be executed according to the specified settings when you start scanning from the operation pan...

Страница 778: ...Faxing Preparing for Faxing Sending Faxes Using the Operation Panel of the Machine Registering Recipients Receiving Faxes Other Useful Fax Functions Sending Faxes from a Computer 778...

Страница 779: ...upon your telephone line or telephone Setting Up the Machine The machine must be set up depending on your telephone line and use of the faxing function Follow the procedure below to set up the machin...

Страница 780: ...llel during fax transmission or reception the fax image may be corrupted or a communication error may occur Such services as Caller ID etc may not operate properly on the telephone If you cannot avoid...

Страница 781: ...t the B T adapter to the external device jack Connecting Various Lines This section introduces how to connect various lines These are examples and could not be guaranteed to suit every connecting cond...

Страница 782: ...r is not built in to the modem do not branch the telephone line before the splitter wall side And also do not connect splitters in parallel The machine may not be able to operate properly Note When co...

Страница 783: ...e type will not appear in countries or regions where Rotary pulse is not supported You can print USER S DATA LIST to check the current setting Summary of Reports and Lists 1 Make sure that the machine...

Страница 784: ...calls you need to connect a telephone or an answering machine to the external device jack of this machine For details on how to connect the telephone or the answering machine to the machine Basic Con...

Страница 785: ...iving voice calls with a telephone or answering machine connected to the machine and subscribing to a ring pattern detection service provided by your telephone company When a call incomes the telephon...

Страница 786: ...t to specify the number of times the external device rings in TEL priority mode select FAX only mode on the Receive mode settings screen specify the number of times the external device rings with Ring...

Страница 787: ...ern and will automatically receive the fax if the ring pattern is a fax call To use DRPD follow the procedure below to set the fax ring pattern that matches the pattern assigned by your telephone comp...

Страница 788: ...registered recipient s name is printed when sending faxes E Page number Note You can print USER S DATA LIST to confirm the sender information you have registered Summary of Reports and Lists When send...

Страница 789: ...Panel 3 Tap Device settings 4 Tap Device user settings 5 Tap Date time setting 6 Set the date 1 Tap a setting item to change 2 Tap the number to enter Enter only the last two digits of the year 3 Tap...

Страница 790: ...et your machine to automatically change the time by registering the date and time that daylight saving time summer time begins and ends Important Not all the latest information of all countries or reg...

Страница 791: ...tem to change then specify the setting Tap OK again when all settings are completed 2 Set the time in 24 hour format when summer time starts Tap a setting item to change then specify the setting Tap O...

Страница 792: ...egister the user information Note Before sending a fax be sure to enter your name and fax telephone number in Unit name and Unit TEL on the User information settings screen for US only 1 Make sure tha...

Страница 793: ...3 Tap OK Note You can enter the name up to 24 characters including spaces For details on how to enter or delete characters Entering Numbers Letters and Symbols 8 Enter the unit fax telephone number 1...

Страница 794: ...e You can enter the fax telephone number up to 20 digits including spaces For details on how to enter or delete characters Entering Numbers Letters and Symbols 9 Tap Register to finalize registration...

Страница 795: ...xes Using the Operation Panel of the Machine Sending Faxes by Entering Fax Telephone Number Basic Resending Faxes Redialing a Busy Number Setting Items for Sending Faxes Sending Faxes Using Useful Fun...

Страница 796: ...he machine is turned on 2 Load documents on the platen glass or in the ADF Important When sending a double sided document load the document on the platen glass Double sided documents cannot be automat...

Страница 797: ...stered Recipient H Current state The current state is displayed I Scan contrast and resolution Setting Items for Sending Faxes Note If you have not set up the machine for sending receiving faxes yet t...

Страница 798: ...tering the Favorite Settings Custom profiles 5 Press the Color button for color transmission or the Black button for black white transmission The machine starts scanning the document Important Color t...

Страница 799: ...d the next page and tap Scan After scanning all pages tap Send now to start sending Note To cancel sending the fax press the Stop button Note When your machine is connected to a PBX Private Branch Exc...

Страница 800: ...Number Automatic Redialing You can enable or disable automatic redialing If you enable automatic redialing you can specify the maximum number of redial attempts and the length of time the machine wait...

Страница 801: ...when the recipient s fax machine supports color faxing Note For manual redialing the machine memorizes up to 10 recent recipients dialed by entering the fax telephone numbers Note that the machine doe...

Страница 802: ...ty documents If the recipient s fax machine is not compatible with Extra fine 300 x 300 dpi the fax will be sent in the Standard or Fine resolution Photo Suitable for photographs Note When sending a c...

Страница 803: ...ions Sending a Fax after Speaking on Telephone Sending a Fax to the Registered Recipient Sending the Same Document to Several Recipients Sequential Broadcasting Preventing Mistransmission of Faxes Usi...

Страница 804: ...Sending Faxes by Entering Fax Telephone Number To speak to the recipient before sending a fax you need to connect a telephone to the machine For details on how to connect the telephone to the machine...

Страница 805: ...pports color faxing 9 Hang up the handset Note To cancel a fax transmission press the Stop button To cancel a fax transmission while it is in progress press the Stop button then follow the instruction...

Страница 806: ...ng a Fax after Speaking on Telephone Note For details on the basic sending operations Sending Faxes by Entering Fax Telephone Number 1 Make sure that the machine is turned on 2 Load documents on the p...

Страница 807: ...smission Important Color transmission is available only when the recipient s fax machine supports color faxing Note To cancel a fax transmission press the Stop button To cancel a fax transmission whil...

Страница 808: ...the misdialing or incorrect registration of fax telephone numbers When you send important documents it is recommended that you send them one by one after speaking on the telephone Sending a Fax after...

Страница 809: ...Tap the entry field of fax telephone numbers and enter the number Sending Faxes by Entering Fax Telephone Number Note If FAX number re entry in Security control under FAX settings is set to ON enter...

Страница 810: ...g the fax telephone number or by selecting a number from the outgoing call logs If you want to delete the recipient tap a recipient that you want to delete from the list After the confirmation screen...

Страница 811: ...in in the ADF after the Stop button is pressed while scanning is in progress Document in ADF Tap OK to eject document is displayed on the touch screen By tapping OK the remaining documents are automat...

Страница 812: ...he machine checks whether the recipient s fax machine information matches the dialed number Sending Faxes after Checking Information Checking the Recipient s Information Sending Faxes after Dialing Tw...

Страница 813: ...Fax after Speaking on Telephone 1 Make sure that the machine is turned on 2 Flick the HOME screen then tap Setup Using the Operation Panel 3 Tap Device settings 4 Tap FAX settings 5 Tap Security cont...

Страница 814: ...u can use the on hook dial function only when Hook key setting in Security control under FAX settings is set to Enable Security control For details on the basic sending operations Sending Faxes by Ent...

Страница 815: ...smission or the Black button for black white transmission Important Color transmission is available only when the recipient s fax machine supports color faxing Note To cancel a fax transmission press...

Страница 816: ...Registering Recipients Registering Recipients Using the Operation Panel of the Machine Registering Recipients Using Speed Dial Utility 816...

Страница 817: ...u can send the same document to all the registered recipients in the group Registering Recipients in Group Dial You can register up to 100 recipients in total of individual recipients and group dials...

Страница 818: ...tion list screen is displayed 4 Tap TEL number registration 5 Tap Directory registration The screen to select an ID number is displayed Note If you already registered the recipients the recipients nam...

Страница 819: ...ll log When you select this registration method the screen to select the fax telephone number or the name from the incoming call logs is displayed Select a fax telephone number or name from the incomi...

Страница 820: ...f you do not change the fax telephone number go to next step 1 Tap the entry field of fax telephone numbers The screen to enter the number is displayed 2 Enter the recipient s fax telephone number 3 T...

Страница 821: ...er and name select an unregistered ID number and operate in the same procedure You can check the recipient s numbers and names you have registered by printing RECIPIENT TELEPHONE NUMBER LIST Printing...

Страница 822: ...isplayed 3 Tap Function list The Function list screen is displayed 4 Tap TEL number registration 5 Tap Directory registration The screen to select an ID number is displayed Note If you already registe...

Страница 823: ...2 Enter the group name 3 Tap OK Note You can enter the name up to 16 characters including spaces Entering Numbers Letters and Symbols 9 Register the members 1 Tap Add member The machine s directory i...

Страница 824: ...cipients are displayed in order from the recipient of the ID number selected D The recipients that can be registered are displayed 2 Tap a recipient to register as group member The member to register...

Страница 825: ...te to finalize registration Note To register another group select an unregistered ID number and operate in the same procedure You can check the recipients you have registered to the group dial by prin...

Страница 826: ...ed 2 Tap the entry field of name or the entry field of fax telephone numbers The each edit screen is displayed 3 Change the name or the fax telephone numbers 4 Tap OK The touch screen returns to the r...

Страница 827: ...een is displayed 3 Tap Function list The Function list screen is displayed 4 Tap TEL number registration 5 Tap Directory registration 6 Tap a recipient or a group dial to delete 7 Delete the registere...

Страница 828: ...t screen is displayed 5 Tap Print reports lists 6 Tap Directory list 7 Tap an item to print If you selected Recipient The confirmation screen to select whether to print the list in alphabetical order...

Страница 829: ...ons it is recommended that you backup the registered data on the computer using Speed Dial Utility Starting Up Speed Dial Utility Speed Dial Utility Dialog box Saving Registered Information on the Mac...

Страница 830: ...r machine is compatible with LAN connection make sure that the machine is connected to the computer with LAN connection to use Speed Dial Utility via LAN connection Follow the procedure below to start...

Страница 831: ...registered information for editing Choose one item from TEL Number Registration User Information Setting and Rejected Number Setting 4 Registered information list Displays the registered information...

Страница 832: ...gistered or edited using Speed Dial Utility is neither saved on the computer nor registered on the machine 9 Save to PC Saves information edited using Speed Dial Utility on the computer 10 Register to...

Страница 833: ...ephone number group dial user s name user s fax telephone number or rejected numbers that registered on the machine to the computer 1 Start up Speed Dial Utility 2 Select the machine from the Printer...

Страница 834: ...Printer Name list box then click Display Printer Settings 3 Click TEL Number Registration from Setting Item List The list of registered fax telephone numbers is displayed 4 Select an unoccupied code...

Страница 835: ...gistering fax telephone numbers or a group dial repeat steps 4 to 6 To save the registered information on the computer 1 Click Save to PC 2 Enter the file name on the displayed screen then click Save...

Страница 836: ...elect the machine from the Printer Name list box then click Display Printer Settings 3 Click TEL Number Registration from Setting Item List The list of registered fax telephone numbers is displayed 4...

Страница 837: ...ue changing fax telephone numbers or group dials repeat steps 4 and 5 To save the edited information on the computer 1 Click Save to PC 2 Enter the file name on the displayed screen then click Save To...

Страница 838: ...The list of registered fax telephone numbers is displayed 4 Select a code to delete from the list then click Delete The selected fax telephone number is deleted To continue deleting fax telephone num...

Страница 839: ...nformation is displayed 4 Select an item to change then click Edit The User Information dialog box is displayed 5 Enter the new user s name on User Name and new fax telephone number in TEL Number then...

Страница 840: ...To register a rejected number 1 Select an unoccupied code from the list then click Edit 2 Enter the fax telephone number in the Rejected Number dialog box then click OK To change a rejected number 1 S...

Страница 841: ...and rejected numbers saved on the computer to the machine 1 Start up Speed Dial Utility 2 Select the machine from the Printer Name list box then click Display Printer Settings 3 Click Load from PC 4...

Страница 842: ...ontinue In Windows 7 or Windows Vista 1 Click Start Control Panel Programs Programs and Features 2 Select Canon Speed Dial Utility from the program list then click Uninstall If the User Account Contro...

Страница 843: ...Receiving Faxes Receiving Faxes Changing the Paper Settings Memory Reception Receiving Faxes Using Useful Functions 843...

Страница 844: ...Make sure of the receive mode setting Make sure of the receive mode setting displayed on the Fax standby screen Note For details on how to change the receive mode Setting the Receive Mode 4 Load pape...

Страница 845: ...fax The telephone will ring when a call incomes Pick up the handset If you hear the fax tone wait for at least 5 seconds after it stops then hang up the handset The machine will receive the fax Note I...

Страница 846: ...setting we recommend that you call the answering machine using a mobile phone etc to confirm that messages are recorded successfully in the answering machine Set your answering machine to answering mo...

Страница 847: ...tected Note You can change the number of times to ring the telephone Advanced Settings of Receive Mode When the call is a voice call The telephone will ring when a call incomes When the machine does n...

Страница 848: ...The name of this service varies depending on the country or region of purchase This setting may not be also available depending on the country or region of purchase 848...

Страница 849: ...e s Memory If no paper is loaded or paper has run out while printing is in progress the received faxes are stored in the machine s memory and the error message for no paper is displayed on the touch s...

Страница 850: ...ed in the cassette 1 and cassette 2 Yes is selected for Auto feed switch in Cassette settings D 2 sidedPrintSetting Select two sided printing or single sided printing Two sided printing is available f...

Страница 851: ...o print settings under FAX settings Auto print settings An error has occurred on the machine If you select Print for Received documents in Auto print settings under FAX settings a received fax will be...

Страница 852: ...ing of the fax Note The machine can store up to max 250 pages max 30 documents of faxes in the machine s memory When using ITU T No 1 chart Standard mode If the machine s memory becomes full during me...

Страница 853: ...Functions Saving Received Faxes Automatically on a USB Flash Drive Forwarding Received Faxes Automatically to Shared Folder on the Computer Remote Reception Rejecting Fax Reception Using the Caller ID...

Страница 854: ...rocessing is displayed on the Fax standby screen and the faxes are stored in the machine s memory when the received faxes are not saved on the USB flash drive because the USB flash drive is not insert...

Страница 855: ...older and file name of faxes saved on the USB flash drive is as follows Folder name CANON_SC FAXDOC 0001 File name file extension PDF Running numbers starting from FAX_0001 File date The date and time...

Страница 856: ...received faxes are not forward to the shared folder because the machine is not connected with the computer or because the shared folder setting is changed You can forward the faxes stored in the mach...

Страница 857: ...an forward up to 2000 PDF files to the shared folder on the computer If the machine is disconnected with the computer or if the writing error occurs on the computer while saving faxes is in progress t...

Страница 858: ...to tone dialing For details on how to switch to tone dialing refer to your telephone s instruction manual If you have an answering machine connected to the machine that can carry out remote control op...

Страница 859: ...tings 5 Tap Security control 6 Tap FAX reception reject 7 Tap ON 8 Select a condition of rejecting fax reception No sender info Rejects faxes with no caller identification Not in directory Rejects fax...

Страница 860: ...telephone numbers to display the screen to enter the fax telephone number Enter the fax telephone number you want to register then tap OK From outgoing call log When you select this registration meth...

Страница 861: ...a registered rejected number you want to change 2 Tap Edit 3 Tap the entry field of fax telephone numbers The screen to change the registered rejected number is displayed 4 Change the registered reje...

Страница 862: ...gs 4 Tap FAX settings 5 Tap Security control 6 Tap Caller rejection 7 Tap Yes The Caller rejection conditions screen is displayed 8 Specify the rejection conditions Tap a setting item and select Accep...

Страница 863: ...Note Even if you select Reject the machine rings once The machine may not ring depending on the country or region of purchase 863...

Страница 864: ...Other Useful Fax Functions Using the Information Services Transmission Reception of Faxes Using ECM Document Stored in Machine s Memory Summary of Reports and Lists 864...

Страница 865: ...y Using the On Hook Dial Function Note You can use the on hook dial function only when Hook key setting in Security control under FAX settings is set to Enable Security control 1 Make sure that the ma...

Страница 866: ...FAX settings is set to Enable Security control 1 Make sure that the machine is turned on 2 Flick the HOME screen then tap FAX Using the Operation Panel The Fax standby screen is displayed 3 Tap 4 Dia...

Страница 867: ...tch to tone dialing When you dial the number of the information service using the telephone connected to the machine you cannot use the machine to switch to tone dialing For instructions on how to swi...

Страница 868: ...sender s or recipient s fax machine is not compatible with ECM the fax will be sent received without automatic error correction To receive color faxes make sure that ECM RX in Adv communication setti...

Страница 869: ...unplug the power cord refer to Notice for Unplugging the Power Cord You can print or delete the faxes stored in the machine s memory You can also save the received faxes stored in the machine s memor...

Страница 870: ...standby screen is displayed 4 Tap Function list The Function list screen is displayed 5 Tap Memory reference The memory list is displayed A Date and time of transaction and fax telephone number B Tran...

Страница 871: ...here is no document that can be printed is displayed Tap OK to return to the previous screen The confirmation screen to select whether to print only the first page of the document is displayed If you...

Страница 872: ...n Panel The Fax standby screen is displayed 3 Tap Function list The Function list screen is displayed 4 Tap Memory reference The memory list is displayed A Date and time of transaction and fax telepho...

Страница 873: ...ent that can be deleted is displayed Tap OK to return to the previous screen The confirmation screen is displayed If you select Yes the specified document is deleted from machine s memory To delete al...

Страница 874: ...data for whatever reason even within the warranty period Note When saving a specified document you specify it by its transaction number If you do not know the transaction number for your target docum...

Страница 875: ...at can be saved is displayed Tap OK to return to the previous screen Tap USB flash drive as the destination The specified document is saved on the USB flash drive To save all the received documents st...

Страница 876: ...File date The date and time of saving as set in the machine For details on how to set the date and time Setting the Date and Time 876...

Страница 877: ...Canon Quick Toolbox in advance For details on how to register the destination folder Destination Folder Settings When forwarding a specified document you specify it by its transaction number If you do...

Страница 878: ...not stored in the machine s memory There is no document that can be forwarded is displayed Tap OK to return to the previous screen Tap Destination folder as the destination Tap a destination folder t...

Страница 879: ...tion number when Save all RX documents is selected If the machine is disconnected with the computer or if the writing error occurs on the computer while forwarding faxes is in progress the error messa...

Страница 880: ...can print the lists of the recipient and group dial For details on the procedure to print see Printing Report or List USER S DATA LIST Lists the current settings of the machine and the registered send...

Страница 881: ...after each fax reception At the time of purchase the machine is set so that RX REPORT is not printed at all You can set the machine to print RX REPORT each time it receives a document or only when an...

Страница 882: ...mes in alphabetical order If you select No the machine prints RECIPIENT TELEPHONE NUMBER LIST with the registered entries in numerical order If you select Group dial the confirmation screen is display...

Страница 883: ...ory is full Delete contents in memory then send a fax again Document Stored in Machine s Memory 059 Transmission has been canceled due to a fax information mismatch Transmission has been canceled beca...

Страница 884: ...7 Memory is full The machine could not receive a fax because its memory is full Delete contents in memory then ask the sender to resend the fax See Document Stored in Machine s Memory 046 Reception ha...

Страница 885: ...g an Address Book Fax Driver Edit or Remove a Recipient from an Address Book Fax Driver Search for a Recipient in an Address Book Fax Driver Troubleshooting Problems Sending Faxes Fax Driver How to Op...

Страница 886: ...le menu 3 In Select Printer or Name in the Print dialog box select Canon XXX series FAX where XXX is the model name 4 Click Print or OK Print dialog box in Notepad Note Click Preferences or Properties...

Страница 887: ...s book see Creating an Address Book Fax Driver If the recipient s fax telephone number is entered incorrectly or the registered fax telephone number is incorrect the fax may be sent to an unexpected r...

Страница 888: ...r is 0 and the fax number is XXX XXXX enter 0XXX XXXX 7 Click Send Now When a confirmation message is displayed click OK Important If you cannot send a fax due to line failure etc see Troubleshooting...

Страница 889: ...p Windows Address Book dialog box will be displayed Refer to Setup when Opening the Address Book for the First Time Windows XP for details In Windows 8 1 Windows 8 Windows 7 Windows Vista you can regi...

Страница 890: ...fy the Contact one recipient You cannot specify a Distribution List 5 Enter the First Middle and Last of the contact in the Name and E mail tab Name tab when using Windows XP on the Properties dialog...

Страница 891: ...the outside line access number is 0 and the fax number is XXX XXXX enter 0XXX XXXX If you upgrade from Windows XP to Windows Vista the address book you created in Windows XP may not be reflected in W...

Страница 892: ...Data Roaming Canon MP5 to open the folder 4 Double click the wab file The address book will be reflected in Windows Vista automatically Related Topic Edit or Remove a Recipient from an Address Book Fa...

Страница 893: ...ated Note You can also change the setting by clicking Address Book Profile in the print settings dialog box of the fax driver so as to use another Windows Address Book You can import the entries from...

Страница 894: ...n Windows 8 1 Windows 8 1 Click the Settings charm Control Panel Hardware and Sound Devices and Printers 2 Right click the Canon XXX series Printer icon or Canon XXX series FAX icon and select Printin...

Страница 895: ...l name Windows 7 1 From the Start menu select Control Panel Hardware and Sound Devices and Printers 2 Right click the Canon XXX series Printer icon or Canon XXX series FAX icon and select Printer Prop...

Страница 896: ...s registered in the address book Editing Recipients in an address book 1 Open the print settings dialog box of the fax driver 2 Click Address Book in the displayed dialog box 3 Select the recipient yo...

Страница 897: ...rom an address book 1 Open the print settings dialog box of the fax driver 2 Click Address Book in the displayed dialog box 3 Select the recipient you want to delete from the Address Book dialog box t...

Страница 898: ...4 When a confirmation message is displayed click Yes 898...

Страница 899: ...int command The command is Print on the File menu 2 In Select Printer or Name in the Print dialog box select Canon XXX series FAX where XXX is the model name 3 Click Print or OK Print dialog box in No...

Страница 900: ...s found the recipient will be displayed in the contact list with its name selected While the name is selected click Set as Recipient to enter it as the recipient Important You cannot search by criteri...

Страница 901: ...lugging the power cord the list of the faxes deleted from the machine s memory will be printed after turning the machine on Check 2 Is a document being sent from memory or a fax being received into me...

Страница 902: ...yed for your model from Home of the Online Manual If you are in a hurry press the Stop button to close the message then send the fax Check 8 Is the telephone line connected correctly Reconnect the tel...

Страница 903: ...luetooth port you cannot send a fax from the computer You can use the following characters for Fax Number Character Explanation 0 9 For use in telephone and fax numbers p To place a pause between numb...

Страница 904: ...ed Paper Jams If an Error Occurs Problems Sending Faxes Problems Receiving Faxes Search Each Function Problems with Network Communication Problems with Printing Problems with Printing Quality Problems...

Страница 905: ...Problems with Network Communication Problems with the Machine While Using with Network Cannot Detect a Machine on a Network Other Problems with Network 905...

Страница 906: ...ng with Network The Machine Stopped Working Suddenly Ink Remaining Level Is Not Displayed on Printer Status Monitor of the Machine Printing Speed Is Slow Cannot Use the Machine on Replacing an Access...

Страница 907: ...ntical with those of the access point Refer to the instruction manual provided with the access point or contact its manufacturer to check the access point settings and then modify the machine settings...

Страница 908: ...ways allow access If using any programs that switch the network environment check their settings Some programs will enable a firewall by default Check11 When using a router connect the machine and com...

Страница 909: ...no obstruction Wireless communication between different rooms or floors is generally poor Adjust the location of the devices Check7 Make sure that there is no source of radio wave interference in your...

Страница 910: ...your computer or contact its manufacturer Check2 If the MP Drivers are not installed install them Install the MP Drivers with the Setup CD ROM or install them from our website Check3 When using wirele...

Страница 911: ...ter Status Monitor of the Machine Use the printer driver with bidirectional communication Select Enable bidirectional support in the Ports sheet of the properties dialog box of the printer driver How...

Страница 912: ...different rooms or floors is generally poor The metal concrete or timber including the metallic material mud wall or insulator may interrupt a wireless communication If the machine cannot communicate...

Страница 913: ...al provided with the access point or contact its manufacturer to confirm the access point setting Make sure that the computer and the access point can communicate with each other under this setting Ch...

Страница 914: ...achine cannot communicate with the computer after the encryption type of the machine was switched make sure that encryption types for the computer and the access point matches that set to the machine...

Страница 915: ...annot Detect the Machine When Setting up Network Communication The Machine Cannot Be Detected in the Wireless LAN The Machine Cannot Be Detected in the Wired LAN Note You cannot use the wireless LAN a...

Страница 916: ...firm the network settings before redetecting the machine Cannot Detect the Machine during Wireless LAN Setup Check 1 Cannot Detect the Machine during Wired LAN Setup Check 1 Note You can set up the ne...

Страница 917: ...machine or the network device it may take some time until ready for use After a while just turning on the machine or the network device click Redetect on the Check Printer Settings screen When the ma...

Страница 918: ...e icon is not displayed The wireless LAN setting of the machine is disabled Enable the wireless LAN setting of the machine After enabling the wireless LAN setting click Back to Top on the Check Printe...

Страница 919: ...emporarily then click Redetect on the Check Printer Settings screen When the machine is detected follow the instructions on the screen to continue to set up the network communication If the machine ca...

Страница 920: ...nected to your computer In Windows 8 1 Windows 8 Windows 7 or Windows Vista confirm the SSID from the wireless network communication icon of the notification area on the desktop Note If the SSID of th...

Страница 921: ...software to allow access Then click Redetect on the Check Printer Settings screen When the machine is detected follow the instructions on the screen to continue to set up the network communication Whe...

Страница 922: ...on how to check the settings of the access point refer to the instruction manual supplied with the access point or contact its manufacturer After checking the settings of the access point click Redete...

Страница 923: ...on the machine or the network device it may take some time until ready for use After a while just turning on the machine or the network device click Redetect on the Check Printer Settings screen When...

Страница 924: ...screen to cancel to set up the network communication After that configure the computer and network device For the procedures refer to the instruction manuals supplied with the computer and network de...

Страница 925: ...icon is not displayed The wired LAN setting of the machine is disabled Enable the wired LAN setting of the machine After enabling the wired LAN setting click Back to Top on the Check Printer Settings...

Страница 926: ...ngs LAN settings Confirm LAN settings LAN setting list Make sure that Connection on the touch screen is set to Active If Connection is set to Inactive The machine is not connected to the router Connec...

Страница 927: ...software to allow access Then click Redetect on the Check Printer Settings screen When the machine is detected follow the instructions on the screen to continue to set up the network communication Whe...

Страница 928: ...to the instruction manual supplied with the router or contact its manufacturer After checking the settings of the router click Redetect on the Check Printer Settings screen When the machine is detect...

Страница 929: ...achine over a network make sure that the machine is associated with the port When No Driver is displayed under Name in IJ Network Tool there is no association Select Associate Port on the Settings men...

Страница 930: ...box of the printer driver Check13 Make sure that the firewall of the security software is disabled If the firewall function of your security software is turned on a message may appear warning that Can...

Страница 931: ...ice settings set to Disable LAN LAN settings Check3 Make sure that the LAN cable is connected properly Make sure that the machine is connected to the router with the LAN cable If the LAN cable is loos...

Страница 932: ...Network Key The Message Is Displayed on the Computer Screen During Setup The Administrator Password Set to the Machine Was Forgotten Checking Information about the Network Packets Are Sent Steadily Ho...

Страница 933: ...e settings of the access point using IJ Network Tool When using WEP The key length key format the key to use one of 1 to 4 and the authentication method must match among the access point the machine a...

Страница 934: ...or AES secure encryption is selected automatically for the dynamic encryption method For details see Changing the WPA WPA2 Detailed Settings Note This machine supports WPA WPA2 PSK WPA WPA2 Personal a...

Страница 935: ...set Note An administrator password is already specified for the machine at the time of purchase For details About the Administrator Password For improving security it is recommended to change the admi...

Страница 936: ...he machine can still be used so continue the setup procedure to complete it Important If you connect to a network that is not protected with security measures there is a risk of disclosing data such a...

Страница 937: ...n Initialize the machine settings Select Reset all then the administrator password reverts to the default Reset setting After initializing the machine settings perform setup with the Setup CD ROM or p...

Страница 938: ...lect Network Information on the View menu Canon IJ Network Tool Screen Checking the IP Address or the MAC Address of the Computer To check the IP address or MAC address assigned to the computer follow...

Страница 939: ...hine or the target access point and then press the Enter key ping XXX XXX XXX XXX XXX XXX XXX XXX is the IP address of the target device If the communication is available a message such as the followi...

Страница 940: ...icate with the machine over the network When using the computer in a network environment other than the one used to set up the machine disable IJ Network Scanner Selector EX To disable IJ Network Scan...

Страница 941: ...s on the machine and printing scanning or faxing operation from a computer over network may become impossible To use the machine over network perform setup with the Setup CD ROM or perform it accordin...

Страница 942: ...ms with Printing Printing Does Not Start Paper Jams Paper Does Not Feed Properly No Paper Error Occurs Cannot Print Properly with Automatic Duplex Printing Copying Printing Stops Before It Is Complete...

Страница 943: ...s normally there is a problem with the relay device Consult the reseller of the relay device for details There could also be a problem with the USB cable Replace the USB cable and try printing again W...

Страница 944: ...ck the Canon XXX series Printer icon where XXX is your machine s name then select Properties 4 Click the Ports tab to confirm the port settings Make sure that a port named USBnnn where n is a number w...

Страница 945: ...the port with the printer using Associate Port in the Settings menu If the problem is not resolved reinstall the MP Drivers with the Setup CD ROM or install them from our website Check8 Is the size of...

Страница 946: ...essage are displayed on the computer screen When a Support Code and a message are displayed on the touch screen For details on how to remove the jammed paper refer to Support Code List When Paper Is J...

Страница 947: ...cases reduce the sheets of paper you load at a time to less than half of the paper load limit Always load the paper in portrait orientation regardless of the printing orientation Loading Paper Importa...

Страница 948: ...ing the Paper Feed Roller Note Cleaning the paper feed roller will wear the roller so perform this procedure only when necessary Check7 If two or more sheets of paper feed from the cassette at once cl...

Страница 949: ...may not be available depending on the version of the application software Check4 Make sure that the media type setting is correct Make sure that the media type setting matches the actual size of the...

Страница 950: ...e Note If you are printing a document with a large printing area or printing multiple copies of a document printing may pause to allow the ink to dry Check3 Has the machine been printing continuously...

Страница 951: ...Problems with Printing Quality Print Results Not Satisfactory Ink Is Not Ejected 951...

Страница 952: ...tems for Copying To print from your USB flash drive by operating the machine Confirm by using the operation panel on the machine Setting Items for Photo Printing Using the Operation Panel of the Machi...

Страница 953: ...Back of the Paper Is Smudged Colors Are Uneven or Streaked 953...

Страница 954: ...not allow application software to compress print data check box then click OK Deselect the check box after printing is complete Check2 Is the size of the print data extremely large Click Print Options...

Страница 955: ...e printed To prevent this select the setting to reduce printing from the printer driver Important Reduced printing may affect the layout depending on your document Apply the print setting specified wi...

Страница 956: ...No Printing Results Printing Is Blurred Colors Are Wrong White Streaks No Printing Results Printing Is Blurred Colors Are Wrong 956...

Страница 957: ...rint Head Cleaning and try printing the Nozzle Check Pattern again If the problem is not resolved after performing the Print Head Cleaning twice Perform the Print Head Deep Cleaning If the problem is...

Страница 958: ...the ADF Loading Originals Check7 Is the original document is loaded with the proper side facing up down When loading the original on the platen glass the side to be copied should be face down When loa...

Страница 959: ...igning the Print Head Note If the problem is not resolved after performing the Print Head Alignment perform Print Head Alignment manually referring to Aligning the Print Head Manually Check3 Increase...

Страница 960: ...function is being used thin lines may not be printed Try thickening the lines in the document Check2 Is the size of the print data extremely large Click Print Options on the Page Setup sheet on the pr...

Страница 961: ...n the Page Setup sheet on the printer driver Select the Do not allow application software to compress print data check box then click OK Deselect the check box after printing is complete Check2 Is the...

Страница 962: ...int images with high intensity the paper may absorb too much ink and become wavy causing paper abrasion When printing from your computer You can confirm the intensity using the printer driver Adjustin...

Страница 963: ...ing its curl When using Photo Paper Plus Semi gloss even if the sheet is curled load one sheet at a time as it is If you roll up this paper to flatten this may cause cracks on the surface of the paper...

Страница 964: ...h the media type set correctly to match the loaded paper set the machine to prevent paper abrasion by using the operation panel or the computer Print speed may be reduced if you apply the setting to p...

Страница 965: ...ting paper the lower edge of the paper may become stained with ink Resize your original document in your application software Printing Area Check7 Is the platen glass or the glass of ADF dirty Clean t...

Страница 966: ...ce enough time to dry so that paper smudged and scratched are prevented 1 Make sure that the machine is turned on 2 Open the printer driver setup window How to Open the Printer Driver Setup Window 3 C...

Страница 967: ...ty settings Print Results Not Satisfactory Check2 Perform the Bottom Plate Cleaning to clean the inside of the machine Cleaning the Inside of the Machine Bottom Plate Cleaning Note When performing dup...

Страница 968: ...s properly from the print head nozzles Refer to When Printing Becomes Faint or Colors Are Incorrect for the Nozzle Check Pattern printing Print Head Cleaning and Print Head Deep Cleaning If the Nozzle...

Страница 969: ...rom the power supply If the problem is not resolved after performing the Print Head Deep Cleaning twice If Print Head Deep Cleaning does not resolve the problem the print head may be damaged Contact t...

Страница 970: ...ar color s ink tank is not empty If the Nozzle Check Pattern is not printed correctly though ink is sufficient perform the Print Head Cleaning and try printing the Nozzle Check Pattern again If the pr...

Страница 971: ...Problems with Scanning Problems with Scanning Scan Results Not Satisfactory Software Problems 971...

Страница 972: ...sage Appears and the ScanGear Scanner Driver Screen Does Not Appear Cannot Scan Multiple Items at One Time Slow Scanning Speed There is not enough memory Message Is Displayed Computer Stops Operating...

Страница 973: ...ner or printer is turned on Check 2 Connect the USB cable to a different USB port on the computer Check 3 If the USB cable is connected to a USB hub remove it from the USB hub and connect it to a USB...

Страница 974: ...inter name is displayed multiple times select the one that does not include WIA Note The operation may differ depending on the application Use the WIA driver when scanning from a WIA compliant applica...

Страница 975: ...ected to a USB hub remove it from the USB hub and connect it to a USB port on the computer Check 5 Make sure that MP Drivers is installed If not installed install MP Drivers from the Setup CD ROM or t...

Страница 976: ...k 1 Make sure that the items are placed correctly Placing Items When Scanning from a Computer Check 2 Check if you can properly scan one item Some applications do not support multiple image scanning I...

Страница 977: ...Set Fading Correction Grain Correction etc to None Refer to Image Settings for your model from Home of the Online Manual for details Check 3 In IJ Scan Utility deselect the Correct slanted text docum...

Страница 978: ...There is not enough memory Message Is Displayed Check 1 Exit other applications and try again Check 2 Reduce the resolution or output size and scan again Resolution 978...

Страница 979: ...ent free hard disk space then scan again Error message may appear if there is not enough hard disk space to scan and save when the image size is too large such as when scanning a large item at high re...

Страница 980: ...administrative rights are required to perform a task If you are logged on to an administrator account follow the on screen instructions Windows 7 Windows Vista 1 From the Start menu select Control Pan...

Страница 981: ...Step 3 Reinstall MP Drivers and IJ Scan Utility Reinstall MP Drivers and IJ Scan Utility from the Setup CD ROM or the web page 981...

Страница 982: ...format is not supported by the application scan the image again and select a popular data format such as JPEG when saving it Refer to the application s manual for details If you have any questions co...

Страница 983: ...s Poor Scanned Image Is Surrounded by Extra White Areas Cannot Scan at the Correct Size Position or Size of the Image Cannot be Detected Correctly When Scanning from the Operation Panel Item Is Placed...

Страница 984: ...Color Select the Reduce moire checkbox in Image Processing Settings Settings Document Scan Dialog Box Settings Custom Scan Dialog Box Settings Scan and Stitch Dialog Box Settings OCR Dialog Box Settin...

Страница 985: ...d Stitch Dialog Box On the Basic Mode tab of ScanGear scanner driver select Magazine Color in Select Source Refer to Basic Mode Tab for your model from Home of the Online Manual for details On the Adv...

Страница 986: ...ings to None Refer to Image Settings for your model from Home of the Online Manual for details On the Color Settings tab in the Preferences dialog box of ScanGear set Color Matching Refer to Color Set...

Страница 987: ...he item size You can also manually specify the scan area in thumbnail view or when there are white margins along the item for example in photos or when you want to create custom cropping frames Adjust...

Страница 988: ...Cannot Scan at the Correct Size Check Make sure that the items are placed correctly Placing Items When Scanning from a Computer 988...

Страница 989: ...scanned If you cannot scan properly by automatically detecting the item type specify the item type and size When Scanning from the Operation Panel Refer to Setting Items for Scanning Using the Operat...

Страница 990: ...Scanned Image Is Slanted Check When Document or Magazine is selected for Select Source deselect the Correct slanted text document checkbox and scan the item again Settings Document Scan Dialog Box Set...

Страница 991: ...r details If you have any questions contact the manufacturer of the application Note You cannot reduce the image size in Paint To reduce the display size open the images in an application Check 2 Chan...

Страница 992: ...Software Problems The E mail Client You Want to Use Does Not Appear in the Screen for Selecting an E mail Client 992...

Страница 993: ...Check Check that the e mail client s MAPI is enabled Refer to the e mail client s manual for how to set MAPI If the problem is not solved even when MAPI is enabled select None Attach Manually in the s...

Страница 994: ...Problems with Faxing Problems Sending Faxes Problems Receiving Faxes Cannot Send a Fax Clearly Telephone Problems 994...

Страница 995: ...wer cord If a power failure occurs or you unplug the power cord all faxes stored in the machine s memory are deleted For details on how to unplug the power cord refer to Notice for Unplugging the Powe...

Страница 996: ...f Reports and Lists Check8 Does an error occur during transmission Ensure that a message is displayed on the Fax standby screen When a message is displayed on the Fax standby screen check the cause A...

Страница 997: ...ent by selecting from the redial history or by entering the fax telephone numbers as the recipient of sequential broadcasting If you already have dialed by selecting from the redial history or by ente...

Страница 998: ...fore unplugging the power cord then unplug the power cord If a power failure occurs or you unplug the power cord all faxes stored in the machine s memory are deleted For details on how to unplug the p...

Страница 999: ...e machine was receiving faxes in the fax mode printing will start automatically after the ink tank is replaced Replacing an Ink Tank When the machine receives black white faxes in the machine s memory...

Страница 1000: ...the answering machine answers Setting the Receive Mode 1 This setting is available only in the US and Canada 2 This setting may not be available depending on the country or region of purchase Quality...

Страница 1001: ...X set to OFF If OFF is select for ECM RX in Adv communication settings in Advanced FAX settings under FAX settings the machine cannot receive color faxes The machine will disconnect the telephone line...

Страница 1002: ...e scan contrast setting suitable for the document On the touch screen select an image quality setting and a scan contrast setting that are suitable for the document Setting Items for Sending Faxes Che...

Страница 1003: ...k the telephone line type setting and change it as necessary Setting the Telephone Line Type Telephone Disconnects During a Call Check Is the telephone line cable or the telephone or a peripheral devi...

Страница 1004: ...USB Cable Properly Cannot Communicate with the Machine with USB Connection The Display on the Touch Screen Cannot Be Seen At All An Unintended Language Is Displayed on the Touch Screen Print Head Hol...

Страница 1005: ...is securely plugged into the power cord connector of the machine then turn it back on Check3 Unplug the machine from the power supply then plug the machine back in and turn the machine back on after...

Страница 1006: ...ts Hi Speed USB connection Does the USB port on your computer support Hi Speed USB connection Does the USB cable or the USB hub support Hi Speed USB connection Be sure to use a certified Hi Speed USB...

Страница 1007: ...ing the Machine to the Computer Using a USB Cable to connect the USB cable properly Check3 Do not start up IJ Network Tool while printing Check4 Do not print while IJ Network Tool is running Check5 Ma...

Страница 1008: ...een Cannot Be Seen At All If the POWER lamp is off The machine is not powered on Connect the power cord and press the ON button If the POWER lamp is lit The touch screen may be in the screen saver mod...

Страница 1009: ...nt to be displayed according to the following procedure 1 Press the HOME button and wait for about 5 seconds 2 Flick the HOME screen then tap Setup Using the Operation Panel 3 Tap Device settings 4 Ta...

Страница 1010: ...e machine is initializing Wait until the POWER lamp stops flashing and remains lit and then open the front cover again Check2 Is an error message displayed on the touch screen Close the front cover fo...

Страница 1011: ...t Enable Status Monitor is selected on the Option menu of the printer status monitor 1 Open the printer driver setup window How to Open the Printer Driver Setup Window 2 On the Maintenance sheet click...

Страница 1012: ...Installation Downloading Cannot Install the MP Drivers Easy WebPrint EX Does Not Start Up or Easy WebPrint EX Menu Does Not Appear How to Update MP Drivers in Network Environment Uninstalling IJ Netw...

Страница 1013: ...ick Start then Computer In Windows XP click Start then My Computer 2 Double click the CD ROM icon on the displayed window If the contents of the CD ROM are displayed double click MSETUP4 EXE If you ca...

Страница 1014: ...Turn the machine off 2 Unplug the USB cable from the machine and the computer then connect it again 3 Turn the machine on Check3 If you cannot resolve the problem follow the procedure below to reinst...

Страница 1015: ...rivers Deleting the Unnecessary MP Drivers If you reinstall the MP Drivers install the MP Drivers with the Setup CD ROM or install them from our website Note If the installer was forced to be terminat...

Страница 1016: ...EX onto your computer from our website Note If Easy WebPrint EX is not installed on your computer a message asking you to install it may be displayed on the notification area on the desktop Click the...

Страница 1017: ...s according to the regular procedure When the connection method selection screen is displayed select Use the printer with wireless LAN connection or Use the printer with wired LAN connection according...

Страница 1018: ...ms Programs and Features 2 Select Canon IJ Network Tool from the program list then click Uninstall If the User Account Control screen appears click Continue In Windows 7 or Windows Vista 1 Click Start...

Страница 1019: ...About Errors Messages Displayed If an Error Occurs A Message for Faxing Is Displayed on the Fax Standby Screen A Message Is Displayed 1019...

Страница 1020: ...reen or the touch screen When a Support Code and a message are displayed on the computer screen When a Support Code and a message are displayed on the touch screen For details on how to resolve errors...

Страница 1021: ...ct Send in black white for Color transmission in Advanced FAX settings under FAX settings The machine converts color documents into black white data if the recipient s fax machine does not support col...

Страница 1022: ...s If you did not print the fax stored in the machine s memory e g if you did not resolve the problem by pressing the Stop button you can delete or print the fax stored in the machine s memory later Do...

Страница 1023: ...n the computer or printing Deleting a Document in Machine s Memory FAX info does not match Transmission has been canceled because the machine could not detect the recipient s fax machine information o...

Страница 1024: ...is no image data or document saved on the USB flash drive that can be read by this machine The machine may not recognize the file if the file name or folder path contain certain characters Use only a...

Страница 1025: ...dismiss the error Note See Notice for Unplugging the Power Cord for unplugging the power cord The power cord has been unplugged and unsent received docs in memory have been lost A power failure has o...

Страница 1026: ...the printer port is configured appropriately in the printer driver In the following instructions XXX signifies your machine s name 1 Log on as a user account with administrator privilege 2 Select ite...

Страница 1027: ...start even though the port named CNBJNP_xxxxxxxxxx is selected when the machine is used over LAN Launch IJ Network Tool and select CNBJNP_xxxxxxxxxx as you confirmed in step 4 then associate the port...

Страница 1028: ...ssage is displayed outside the printer status monitor check the following Could not spool successfully due to insufficient disk space Delete any unnecessary files to increase the amount of free space...

Страница 1029: ...displayed at the time of the next survey To send the information automatically see Changing the confirmation screen setting If you do not agree to participate in the survey program Click Do not agree...

Страница 1030: ...nt follow the on screen instructions 2 Select Canon Inkjet Printer Scanner Fax Extended Survey Program 3 Select Change If you select Yes after you have followed the on screen instructions the confirma...

Страница 1031: ...ly Unplug the power cord from the outlet and contact the seller or the service center Never attempt to repair or disassemble the machine yourself Attempts by customers to repair or take apart the mach...

Страница 1032: ...e Touch Screen and the Computer Screen 1000 to 1ZZZ 1007 1008 1200 1300 1303 1310 1313 1314 1575 1600 1660 1688 1700 1701 1754 1755 1872 1873 1874 1890 2000 to 2ZZZ 2001 2002 2111 2112 2113 2121 2122...

Страница 1033: ...7100 7200 7201 7202 7203 7204 7205 7300 9000 to 2ZZZ 9000 9500 A000 to ZZZZ B202 B203 B204 B502 B503 B504 C000 About the support code for paper jam you can also refer to Support Code List When Paper I...

Страница 1034: ...med inside the front cover 1300 If the paper is jammed inside the rear cover 1303 If the paper is jammed inside the rear cover as the machine pulled in the printed paper 1313 If the paper is jammed in...

Страница 1035: ...off the machine to remove jammed paper during printing press the Stop button to cancel print jobs before turning off the machine 1 Open the front cover Important Do not touch the clear film A or the w...

Страница 1036: ...3 Hold the jammed paper with your hands If the paper is rolled up pull it out 4 Pull the paper slowly not to tear it then pull the paper out 5 Make sure that all the jammed paper is removed 1036...

Страница 1037: ...necessary When the paper is jammed while duplex printing or duplex copying is in progress it is possible that the printing or copying order is not as you expect if you resume printing after clearing t...

Страница 1038: ...int documents with photos or graphics otherwise the printout may curl and cause paper exit jams If you cannot remove the paper or the paper tears inside the machine or if the paper jam error continues...

Страница 1039: ...as completed sending or receiving all the faxes before unplugging the power cord If you unplug the power cord all the faxes stored in the machine s memory are deleted Note If you need to turn off the...

Страница 1040: ...r 5 Close the rear cover slowly Close the rear cover then slide it to the right Slide the rear cover so that the mark on the rear cover aligns with the mark on the machine 6 Reload the paper and tap O...

Страница 1041: ...4 on 1 copying is in progress it is possible that some pages are not printed if you resume printing after clearing the paper jam error In this case cancel printing and reprint from the beginning If yo...

Страница 1042: ...not be turned off while the machine is sending or receiving a fax or when the received fax or the unsent fax are stored in the machine s memory Make sure that the machine has completed sending or rece...

Страница 1043: ...aper may be ejected automatically Pull out the paper output tray It becomes easy to pull out the paper 5 Close the rear cover slowly Close the rear cover then slide it to the right Slide the rear cove...

Страница 1044: ...learing the paper jam error In this case cancel printing and reprint from the beginning When the paper is jammed while layout printing 2 on 1 copying or 4 on 1 copying is in progress it is possible th...

Страница 1045: ...hine s memory Make sure that the machine has completed sending or receiving all the faxes before unplugging the power cord If you unplug the power cord all the faxes stored in the machine s memory are...

Страница 1046: ...r 5 Close the rear cover slowly Close the rear cover then slide it to the right Slide the rear cover so that the mark on the rear cover aligns with the mark on the machine 6 Reload the paper and tap O...

Страница 1047: ...beginning When the paper is jammed while layout printing 2 on 1 copying or 4 on 1 copying is in progress it is possible that some pages are not printed if you resume printing after clearing the paper...

Страница 1048: ...the original remains in the ADF by pressing the Stop button while the machine is scanning the document If you press the Stop button during scanning then the document remained in the ADF the message a...

Страница 1049: ...ity are either too high or too low In this case reduce the number of document pages to approximately half of the loading capacity If the document still jams use the platen glass instead If the origina...

Страница 1050: ...es Make sure of the following Check1 Are there any foreign objects around the paper output slot Check2 Are the rear cover attached properly Check3 Is the paper curled Load the paper after correcting i...

Страница 1051: ...Align the paper guides with the both edges of the paper when you load paper in the cassette 1 After carrying out the above measures tap OK on the touch screen to dismiss the error Note The loadable p...

Страница 1052: ...e 2 Align the paper guides with the both edges of the paper when you load paper in the cassette 2 After carrying out the above measures tap OK on the touch screen to dismiss the error Important The lo...

Страница 1053: ...1200 Cause The front cover is open Action Close the front cover and wait for a while Do not close it while you are replacing an ink tank 1053...

Страница 1054: ...media suitable for auto duplex printing are A4 and Letter Make sure that the size of the paper loaded in the machine is correct Tapping OK on the touch screen will eject the paper and restart printing...

Страница 1055: ...tion If an ink tank becomes empty replace it An ink tank cannot be replaced until it becomes empty Please be advised that Canon shall not be liable for any malfunction or trouble caused by continuatio...

Страница 1056: ...eceived fax will not be printed and will be stored in the machine s memory until the ink is replaced You must manually print out faxes that were stored in the memory You can change the setting so that...

Страница 1057: ...1660 Cause The ink tank is not installed Action Install the ink tank 1057...

Страница 1058: ...e ink out condition Important Do not remove an ink tank until a new one is prepared to be installed Once you remove an ink tank the machine will not operate until a new one is installed Once you remov...

Страница 1059: ...1700 Cause The ink absorber is almost full Action Tap OK on the touch screen to continue printing Contact the service center 1059...

Страница 1060: ...1701 Cause The ink absorber is almost full Action Tap OK on the touch screen to continue printing Contact the service center 1060...

Страница 1061: ...Open the front cover Then push the ink tank After installing the ink tank properly close the front cover If the problem is not resolved contact the service center Important The ink tank that was once...

Страница 1062: ...be installed Once you remove an ink tank the machine will not operate until a new one is installed Once you remove an ink tank the machine will not operate even if the removed ink tank is just reinsta...

Страница 1063: ...tte 1 Note The cassette paper information registration screen is displayed after inserting the cassette 1 Register the cassette paper information according to the paper you loaded in the cassette 1 If...

Страница 1064: ...tte 2 Note The cassette paper information registration screen is displayed after inserting the cassette 2 Register the cassette paper information according to the paper you loaded in the cassette 2 If...

Страница 1065: ...assettes Note The cassette paper information registration screen is displayed after inserting the cassettes Register the cassette paper information according to the paper you loaded in the cassette 1...

Страница 1066: ...lder Action Open the front cover then confirm that the protective material or the tape does not remain attached to the print head holder If you find the protective material or the tape remains attache...

Страница 1067: ...2001 Cause The device incompatible with the machine is connected Action Check the device connected to the USB flash drive port Printing photos directly is possible with a USB flash drive 1067...

Страница 1068: ...use An unsupported USB hub is connected Action If a USB flash drive is connected to the machine through the USB hub disconnect the hub from the machine Connect a USB flash drive directly to the machin...

Страница 1069: ...settings for copying so that they match the cassette paper information For details on the cassette paper information registering to the machine Paper setting for Printing Windows Paper setting for Pri...

Страница 1070: ...stration screen is displayed after replacing the paper and inserting the cassette 1 Register the cassette paper information according to the paper you loaded in the cassette 1 Note If you do not know...

Страница 1071: ...rinting or copying and the cassette paper information registered to the machine are different To change the setting using the operation panel Cassette settings Windows Cassette settings Mac Cassette s...

Страница 1072: ...ttings for copying so that they match the cassette paper information For details on the cassette paper information registering to the machine Paper setting for Printing Windows Paper setting for Print...

Страница 1073: ...egistration screen is displayed after replacing the paper and inserting the cassette 2 Register the cassette paper information according to the paper you loaded in the cassette 2 Note If you do not kn...

Страница 1074: ...rinting or copying and the cassette paper information registered to the machine are different To change the setting using the operation panel Cassette settings Windows Cassette settings Mac Cassette s...

Страница 1075: ...ttings for copying so that they match the cassette paper information For details on the cassette paper information registering to the machine Paper setting for Printing Windows Paper setting for Print...

Страница 1076: ...cassette paper information registration screen is displayed after replacing the paper and inserting the cassettes Register the cassette paper information according to the paper you loaded in the cass...

Страница 1077: ...rinting or copying and the cassette paper information registered to the machine are different To change the setting using the operation panel Cassette settings Windows Cassette settings Mac Cassette s...

Страница 1078: ...the cassette 1 is not complete Action If the following screen is displayed the paper settings of the cassette 1 is not complete Tap Register on the touch screen of the machine to terminate the paper...

Страница 1079: ...the cassette 2 is not complete Action If the following screen is displayed the paper settings of the cassette 2 is not complete Tap Register on the touch screen of the machine to terminate the paper...

Страница 1080: ...attern to check the status of the print head Load one sheet of A4 Letter sized plain paper in the cassette 1 and perform Automatic Print Head Alignment again For Automatic Print Head Alignment always...

Страница 1081: ...while scanning and the document is remained in the ADF Action Take the corresponding actions below When you copy tap OK on the touch screen to dismiss the error and try to copy again When the documen...

Страница 1082: ...2802 Cause No document in the ADF Action Tap OK on the touch screen to resolve the error then operate again after loading documents 1082...

Страница 1083: ...cedure below If the original is jammed in the ADF Remove the document following the procedure below 1 If printing is in progress press the Stop button 2 Turn off the machine 3 If a multi page document...

Страница 1084: ...ument pages to approximately half of the loading capacity If the document still jams use the platen glass instead If the original is jammed in the ADF from the paper feed side If the document is jamme...

Страница 1085: ...cannot be printed Action When you print the contents on CREATIVE PARK PREMIUM confirm the message on the computer screen make sure that genuine Canon ink tanks are installed properly for all colors t...

Страница 1086: ...4103 Cause Cannot perform printing with the current print settings Action Press the machine s Stop button to cancel printing Then change the print settings and print again 1086...

Страница 1087: ...to cancel printing Specify the paper size setting to A4 Letter or Legal and specify the media type setting to Plain Paper Then print again Note If you will not change the paper size setting or the me...

Страница 1088: ...nplug the power cord of the machine from the power supply Plug the machine back in and turn the machine back on If the problem is not resolved contact the service center Important If you unplug the po...

Страница 1089: ...nplug the power cord of the machine from the power supply Plug the machine back in and turn the machine back on If the problem is not resolved contact the service center Important If you unplug the po...

Страница 1090: ...nplug the power cord of the machine from the power supply Plug the machine back in and turn the machine back on If the problem is not resolved contact the service center Important If you unplug the po...

Страница 1091: ...an ink tank until it clicks into place After confirming the conditions above turn on the machine again If the problem is not resolved contact the service center Important When you clear the jammed pa...

Страница 1092: ...an ink tank until it clicks into place After confirming the conditions above turn on the machine again If the problem is not resolved contact the service center Important When you clear the jammed pa...

Страница 1093: ...an ink tank until it clicks into place After confirming the conditions above turn on the machine again If the problem is not resolved contact the service center Important When you clear the jammed pa...

Страница 1094: ...an ink tank until it clicks into place After confirming the conditions above turn on the machine again If the problem is not resolved contact the service center Important When you clear the jammed pa...

Страница 1095: ...an ink tank until it clicks into place After confirming the conditions above turn on the machine again If the problem is not resolved contact the service center Important When you clear the jammed pa...

Страница 1096: ...nplug the power cord of the machine from the power supply Plug the machine back in and turn the machine back on If the problem is not resolved contact the service center Important If you unplug the po...

Страница 1097: ...nplug the power cord of the machine from the power supply Plug the machine back in and turn the machine back on If the problem is not resolved contact the service center Important If you unplug the po...

Страница 1098: ...nplug the power cord of the machine from the power supply Plug the machine back in and turn the machine back on If the problem is not resolved contact the service center Important If you unplug the po...

Страница 1099: ...nplug the power cord of the machine from the power supply Plug the machine back in and turn the machine back on If the problem is not resolved contact the service center Important If you unplug the po...

Страница 1100: ...nplug the power cord of the machine from the power supply Plug the machine back in and turn the machine back on If the problem is not resolved contact the service center Important If you unplug the po...

Страница 1101: ...nplug the power cord of the machine from the power supply Plug the machine back in and turn the machine back on If the problem is not resolved contact the service center Important If you unplug the po...

Страница 1102: ...nplug the power cord of the machine from the power supply Plug the machine back in and turn the machine back on If the problem is not resolved contact the service center Important If you unplug the po...

Страница 1103: ...nplug the power cord of the machine from the power supply Plug the machine back in and turn the machine back on If the problem is not resolved contact the service center Important If you unplug the po...

Страница 1104: ...nplug the power cord of the machine from the power supply Plug the machine back in and turn the machine back on If the problem is not resolved contact the service center Important If you unplug the po...

Страница 1105: ...5500 Cause Ink tank has not been properly recognized Action Contact the service center 1105...

Страница 1106: ...5501 Cause Ink tank has not been properly recognized Action Contact the service center 1106...

Страница 1107: ...5B00 Cause Printer error has occurred Action Contact the service center 1107...

Страница 1108: ...5B01 Cause Printer error has occurred Action Contact the service center 1108...

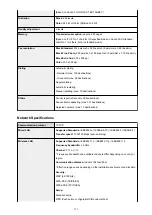
Страница 1109: ...nplug the power cord of the machine from the power supply Plug the machine back in and turn the machine back on If the problem is not resolved contact the service center Important If you unplug the po...

Страница 1110: ...nplug the power cord of the machine from the power supply Plug the machine back in and turn the machine back on If the problem is not resolved contact the service center Important If you unplug the po...

Страница 1111: ...nplug the power cord of the machine from the power supply Plug the machine back in and turn the machine back on If the problem is not resolved contact the service center Important If you unplug the po...

Страница 1112: ...nplug the power cord of the machine from the power supply Plug the machine back in and turn the machine back on If the problem is not resolved contact the service center Important If you unplug the po...

Страница 1113: ...nplug the power cord of the machine from the power supply Plug the machine back in and turn the machine back on If the problem is not resolved contact the service center Important If you unplug the po...

Страница 1114: ...nplug the power cord of the machine from the power supply Plug the machine back in and turn the machine back on If the problem is not resolved contact the service center Important If you unplug the po...

Страница 1115: ...nplug the power cord of the machine from the power supply Plug the machine back in and turn the machine back on If the problem is not resolved contact the service center Important If you unplug the po...

Страница 1116: ...nplug the power cord of the machine from the power supply Plug the machine back in and turn the machine back on If the problem is not resolved contact the service center Important If you unplug the po...

Страница 1117: ...nplug the power cord of the machine from the power supply Plug the machine back in and turn the machine back on If the problem is not resolved contact the service center Important If you unplug the po...

Страница 1118: ...nplug the power cord of the machine from the power supply Plug the machine back in and turn the machine back on If the problem is not resolved contact the service center Important If you unplug the po...

Страница 1119: ...nplug the power cord of the machine from the power supply Plug the machine back in and turn the machine back on If the problem is not resolved contact the service center Important If you unplug the po...

Страница 1120: ...nplug the power cord of the machine from the power supply Plug the machine back in and turn the machine back on If the problem is not resolved contact the service center Important If you unplug the po...

Страница 1121: ...nplug the power cord of the machine from the power supply Plug the machine back in and turn the machine back on If the problem is not resolved contact the service center Important If you unplug the po...

Страница 1122: ...nplug the power cord of the machine from the power supply Plug the machine back in and turn the machine back on If the problem is not resolved contact the service center Important If you unplug the po...

Страница 1123: ...nplug the power cord of the machine from the power supply Plug the machine back in and turn the machine back on If the problem is not resolved contact the service center Important If you unplug the po...

Страница 1124: ...nplug the power cord of the machine from the power supply Plug the machine back in and turn the machine back on If the problem is not resolved contact the service center Important If you unplug the po...

Страница 1125: ...nplug the power cord of the machine from the power supply Plug the machine back in and turn the machine back on If the problem is not resolved contact the service center Important If you unplug the po...

Страница 1126: ...nplug the power cord of the machine from the power supply Plug the machine back in and turn the machine back on If the problem is not resolved contact the service center Important If you unplug the po...

Страница 1127: ...nplug the power cord of the machine from the power supply Plug the machine back in and turn the machine back on If the problem is not resolved contact the service center Important If you unplug the po...

Страница 1128: ...nplug the power cord of the machine from the power supply Plug the machine back in and turn the machine back on If the problem is not resolved contact the service center Important If you unplug the po...

Страница 1129: ...nplug the power cord of the machine from the power supply Plug the machine back in and turn the machine back on If the problem is not resolved contact the service center Important If you unplug the po...

Страница 1130: ...nplug the power cord of the machine from the power supply Plug the machine back in and turn the machine back on If the problem is not resolved contact the service center Important If you unplug the po...

Страница 1131: ...nplug the power cord of the machine from the power supply Plug the machine back in and turn the machine back on If the problem is not resolved contact the service center Important If you unplug the po...

Страница 1132: ...nplug the power cord of the machine from the power supply Plug the machine back in and turn the machine back on If the problem is not resolved contact the service center Important If you unplug the po...

Страница 1133: ...nplug the power cord of the machine from the power supply Plug the machine back in and turn the machine back on If the problem is not resolved contact the service center Important If you unplug the po...

Страница 1134: ...nplug the power cord of the machine from the power supply Plug the machine back in and turn the machine back on If the problem is not resolved contact the service center Important If you unplug the po...

Страница 1135: ...nplug the power cord of the machine from the power supply Plug the machine back in and turn the machine back on If the problem is not resolved contact the service center Important If you unplug the po...

Страница 1136: ...nplug the power cord of the machine from the power supply Plug the machine back in and turn the machine back on If the problem is not resolved contact the service center Important If you unplug the po...

Страница 1137: ...nplug the power cord of the machine from the power supply Plug the machine back in and turn the machine back on If the problem is not resolved contact the service center Important If you unplug the po...

Страница 1138: ...nplug the power cord of the machine from the power supply Plug the machine back in and turn the machine back on If the problem is not resolved contact the service center Important If you unplug the po...

Страница 1139: ...nplug the power cord of the machine from the power supply Plug the machine back in and turn the machine back on If the problem is not resolved contact the service center Important If you unplug the po...

Страница 1140: ...nplug the power cord of the machine from the power supply Plug the machine back in and turn the machine back on If the problem is not resolved contact the service center Important If you unplug the po...

Страница 1141: ...nplug the power cord of the machine from the power supply Plug the machine back in and turn the machine back on If the problem is not resolved contact the service center Important If you unplug the po...

Страница 1142: ...nplug the power cord of the machine from the power supply Plug the machine back in and turn the machine back on If the problem is not resolved contact the service center Important If you unplug the po...

Страница 1143: ...nplug the power cord of the machine from the power supply Plug the machine back in and turn the machine back on If the problem is not resolved contact the service center Important If you unplug the po...

Страница 1144: ...nplug the power cord of the machine from the power supply Plug the machine back in and turn the machine back on If the problem is not resolved contact the service center Important If you unplug the po...

Страница 1145: ...nplug the power cord of the machine from the power supply Plug the machine back in and turn the machine back on If the problem is not resolved contact the service center Important If you unplug the po...

Страница 1146: ...nplug the power cord of the machine from the power supply Plug the machine back in and turn the machine back on If the problem is not resolved contact the service center Important If you unplug the po...

Страница 1147: ...nplug the power cord of the machine from the power supply Plug the machine back in and turn the machine back on If the problem is not resolved contact the service center Important If you unplug the po...

Страница 1148: ...service center has occurred Action Turn off the machine and unplug the power cord of the machine from the power supply Contact the service center Important If you unplug the power cord all the faxes...

Страница 1149: ...service center has occurred Action Turn off the machine and unplug the power cord of the machine from the power supply Contact the service center Important If you unplug the power cord all the faxes...

Страница 1150: ...service center has occurred Action Turn off the machine and unplug the power cord of the machine from the power supply Contact the service center Important If you unplug the power cord all the faxes...

Страница 1151: ...nplug the power cord of the machine from the power supply Plug the machine back in and turn the machine back on If the problem is not resolved contact the service center Important If you unplug the po...

Страница 1152: ...nplug the power cord of the machine from the power supply Plug the machine back in and turn the machine back on If the problem is not resolved contact the service center Important If you unplug the po...

Страница 1153: ...nplug the power cord of the machine from the power supply Plug the machine back in and turn the machine back on If the problem is not resolved contact the service center Important If you unplug the po...

Страница 1154: ...an ink tank until it clicks into place After confirming the conditions above turn on the machine again If the problem is not resolved contact the service center Important When you clear the jammed pa...

Отзывы: