201
Specifications
■
Printer
Product name
LX-P1300
LX-D1300
Printing method
Inkjet
Print colors
Full color
Output resolution
1200 dpi x 1200 dpi
Printing speed
Auto printing speed: 120, 80 mm/sec (4.7/3.1 in/sec)
Preset printing speed: 120, 80, 70, 60, 50 mm/sec
(4.7/3.1/2.7/2.3/1.9 in/sec)
Printable area (W x L)
56.0 mm x 397.0 mm (2.2 in x 15.6 in)
Print margin
(in relation to paper transport direction)
Top/Bottom: 1.5 mm (0.06 in)
Left/Right (Including Liner): 3.5 mm (0.14 in)
*1
Auto Cutter
Cut method: Sliding Cutter
Cut form: Full cut
Print head
2648
nozzles for each color (effective nozzles)
Ink used
Water based pigment ink
Yellow (Y), Magenta (M), Cyan (C),
and Black (Bk)
Water based dye ink
Yellow (Y), Magenta (M), Cyan (C),
and Black (Bk)
Interface
USB 2.0 (High Speed), 1000BASE-T/100BASE-TX/10BASE-T Ethernet
Operating noise
Approx. 50 dB (A) or less
Installation environment
Temperature: 15 to 30 degrees Celsius (59 to 86 degrees Fahrenheit)
Humidity: 10% to 80% (no condensation)
Power supply (AC adapter used)
AC100-240V, 50/60Hz
Power consumption
Maximum power consumption: Approx. 85 W
Sleep mode: Approx. 6.0 W or less
Dimensions (W x D x H)
134 mm x 250 mm x 250 mm (5.3 in x 9.8 in x 9.8 in)
Weight
Approx. 5 kg (Approx. 11.0 lbs) ( (without ink tank)
*1
When using label paper, it must have left and right margins, each of which is 1.5mm (0.06 in) or wider in relation
to the left and right paper edges respectively.
Содержание LX-P1300
Страница 1: ...User s Guide COLOR LABEL PRINTER LX P1300 LX D1300 CANON FINETECH NISCA INC 2018 4Y1 8615 030...
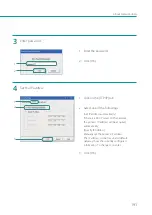
Страница 98: ...92 Chapter 2 Printing 4 Finish updating the special settings 1 1 Click Close...
Страница 138: ...132 Chapter 3 Maintenance...
Страница 155: ...Chapter 4 Troubleshooting For Troubleshooting Operations 150 List of Error Messages Warning Messages 164...
Страница 179: ...Chapter 5 Appendix Moving the Printer 174 Uninstall Printer Driver 184 About Network Utility 186...
Страница 189: ...183 Moving the Printer...
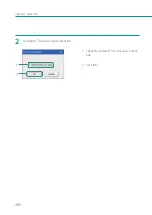
Страница 206: ...200 Chapter 5 Appendix 2 Configure Time Out Value Extension 1 2 1 Check the Extend Time Out value check box 2 Click OK...


