6
Chapter 1 Basic Operation
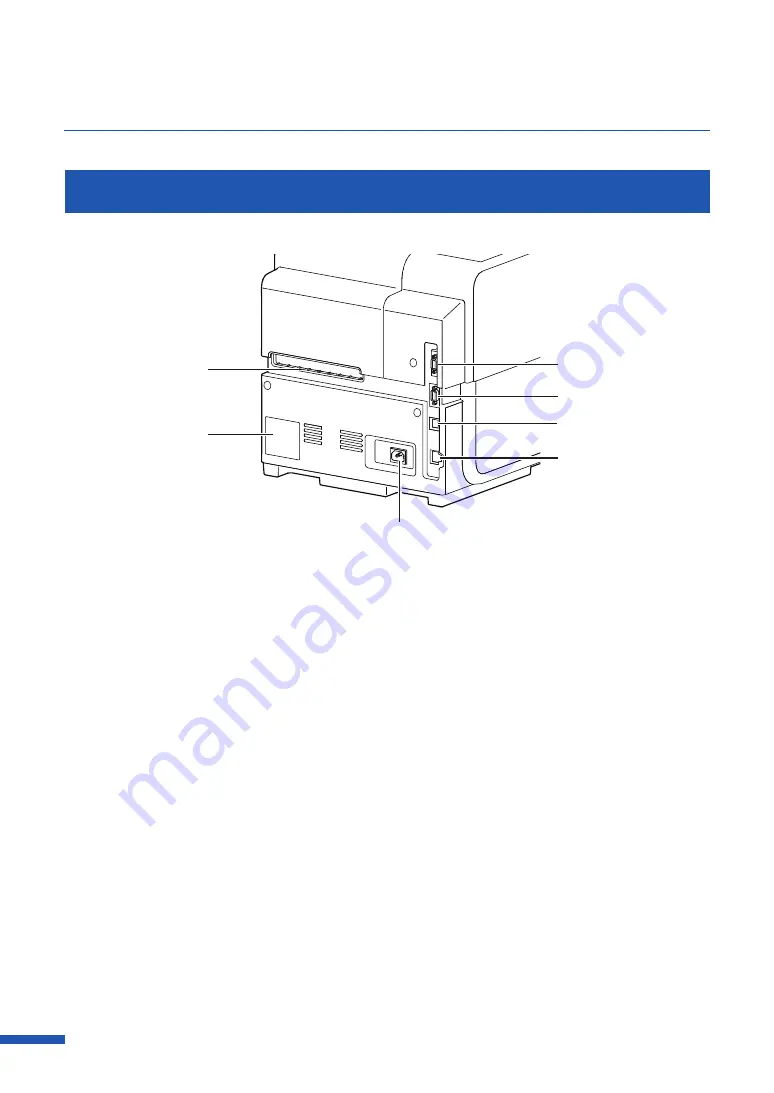
Left Side View
[1]
[7]
[3]
[4]
[5]
[6]
[2]
[
1
]
Rear feeder slot
[
4
]
RS232C port
This slot is used to feed fanfold paper.
This is an extended interface for
connecting an external unit.
[
2
]
Rating plate
[
5
]
USB port
A serial number for identifying the printer
is shown on this plate.
(The serial number is required when you
contact customer support or require any
sort of printer repairs.)
Connect a USB cable here to connect to
the computer.
[
6
]
LAN port
Connect a LAN cable here to connect to
the computer.
[
3
]
RS232C port
[
7
]
Power socket
Connect a barcode reader to this port.
Connect the power cord here.
Содержание LX-D5500
Страница 1: ...User s Guide CANON FINETECH NISCA INC 2018 4Y1 8614 020 LX D5500 COLOR LABEL PRINTER ...
Страница 59: ...55 Using Page Setup Features 6 Click Register A confirmation message appears 7 Click Yes 8 Click OK ...
Страница 113: ...109 Using Utility Features 5 Click Yes The changed special settings are sent to the printer 6 Click Close ...
Страница 151: ...147 Detailed Printhead Position Adjustment 12 Click Close A confirmation message appears 13 Click Yes ...
Страница 156: ...152 Chapter 5 Maintenance 1 Open the ink tank door 2 Open the ink tank cover 3 Slowly remove the ink tank ...
Страница 171: ...Chapter 6 Troubleshooting For Troubleshooting Operations 168 List of Error Messages Warning Messages 182 ...
Страница 206: ...202 Chapter 7 How to Use the Auto Cutter ...
Страница 217: ...213 Uninstall Printer Driver 3 Click Start Note A user account control dialog box may appear In this case click Yes ...
Страница 237: ...233 Index Utility tab 94 V Version Information 45 66 W Warning message 123 188 ...


