Canon LASER SHOT LBP-1210 Скачать руководство пользователя страница 18

Introduction

Chapter 1

Introduction

1

Chapter 1
Introduction

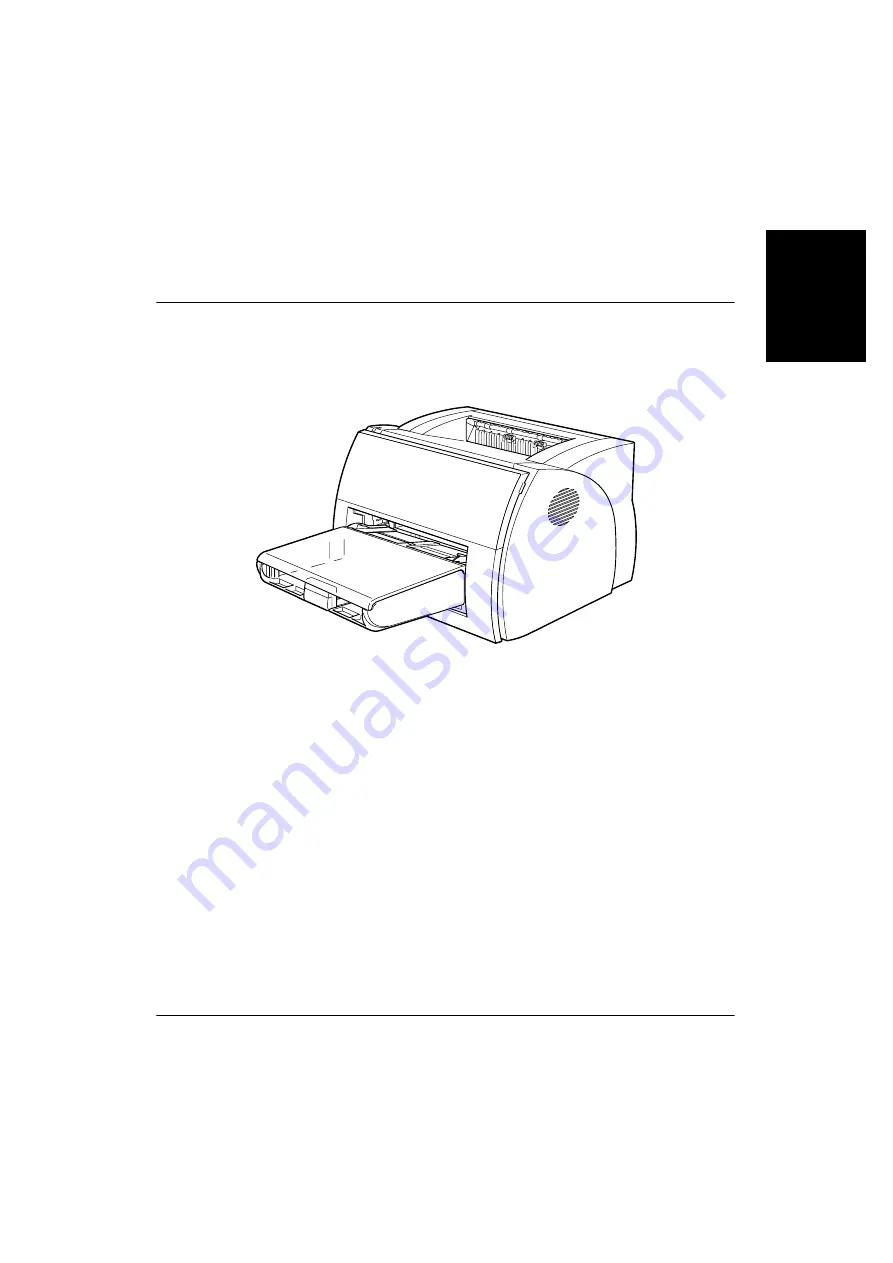
Congratulations on your purchase of the Canon LBP-1210 Laser Printer. 
This chapter introduces you to the printer and explains its features.

Your new laser printer has many advanced features, including the CAPT 
(Canon Advanced Printing Technology). The CAPT gives you instant 
access to printer information. 

The LBP-1210 offers outstanding print quality, flexible paper handling, 
energy-efficient printing, and trouble-free operation.

Содержание LASER SHOT LBP-1210

Страница 1: ...Laser Beam Printer User s Guide ...

Страница 2: ...LBP 1210 Laser Printer User s Guide IMPORTANT Read this manual carefully Use this manual when you need quick reference help ...

Страница 3: ...or for consequential or incidental damages incurred as a result of acting on information contained in the manual The information contained herein shall not be reproduced in whole or in part without prior written consent from Canon Trademarks LBP Canon LASER SHOT and the Canon Logo are trademarks of Canon Inc Microsoft Windows and Windows NT are either registered trademarks or trademarks of Microso...

Страница 4: ...ob Chapter 4 Troubleshooting Contains helpful information on how to solve printing problems Chapter 5 Maintenance Explains how to clean and handle the printer and how to replace the EP 25 cartridge Appendix A Lists the specifications for the printer Appendix B Describes how to connect the printer using the optional network adapter Glossary Includes definitions for terminology used in this guide Co...

Страница 5: ...armful interference to radio communications However there is no guarantee that interference will not occur in a particular installation If this equipment does cause harmful interference to radio or television reception which can be determined by turning the equipment off and on the user is encouraged to try to correct the interference by one or more of the following measures Reorient or relocate t...

Страница 6: ...is guide If such changes or modifications should be made you could be required to stop operation of the equipment Notice for EMC Directive 220 240 V model This equipment has been tested in a typical system to comply with the technical requirements of EMC Directive Use of shielded cable is necessary to comply with the technical requirements of EMC Directive International ENERGY STAR Office Equipmen...

Страница 7: ...assified as Class 1 under the code of Federal Regulations 1040 10 of Title 21 The label shown below is attached to this printer This label is attached to the laser scanner unit inside the printer 110 127 V 220 240 V models This printer has been classified under EN60825 1 1994 and conforms to the following classes CLASS 1 LASER PRODUCT LASER KLASSE 1 APPAREIL A RAYONNEMENT LASER DE CLASSE 1 APPAREC...

Страница 8: ...he printer carefully observe the location requirements described in this guide The shaded part of the face up delivery area may be hot Be careful not to touch it Do not expose the printer to a wet environment Do not expose the printer directly to a chemical environment experimental laboratories etc The exterior of the printer is made of plastic and the outside covering might fade become deformed o...

Страница 9: ...it in otherwise it may lead to damage overheating short circuit or result in fire Be sure to plug the power cord firmly into the power outlet as any flammable material caught between an opening might result in fire Avoid using an extension cord If you must use an extension cord be sure to take the following precautions Failure to do this might lead to overheating result in fire or cause flickering...

Страница 10: ... power cord and cables away from children Do not handle plugs with wet hands When the printer will not be used for a long period turn the power off and unplug the power cord for safety Unplug the printer from the wall outlet before cleaning Do not spray liquid cleaners or aerosol cleaners directly on the cabinet or the openings as the spray could penetrate inside the printer and contaminate intern...

Страница 11: ...excessive noise The outlet should always be free from any obstacles so as to allow easy access When unplugging the printer always disconnect the power cord by pulling on the plug not the cord itself Any misuse of electrical equipment is hazardous Do not allow children to handle power cords or cables Do not attempt to service this printer yourself except as instructed in this guide Opening or remov...

Страница 12: ...e drum surface to deteriorate and degrades the printing Near magnets or equipment that generates magnetic fields Near areas subject to vibration In dusty places or places where the air contains high concentrations of salt or corrosive gases Near water pipes and refrigerators If humidity is less than 30 use a humidifier or an anti static mat to prevent buildup of electrostatic charges If the room t...

Страница 13: ... Carrying the Printer CAUTION Do not carry the printer by holding the front panel or by holding it at the front and rear This could result in damage to the printer or personal injury if the printer is dropped Before transporting the printer always remove the EP 25 cartridge and store it in its original protective bag or wrap it in a thick cloth to protect it from strong light ...

Страница 14: ...o the Cassette 15 Loading Envelopes into the Cassette 18 Loading Paper Manually 23 Chapter 3 Using the Canon Advanced Printing Technology 25 Installing the CAPT 26 Windows 95 98 Me 26 Plug and Play 26 Add Printer Wizard 30 Windows NT 4 0 2000 XP 35 Windows 2000 Plug and Play 35 Windows XP Plug and Play 38 Windows NT 4 0 Add Printer Wizard 41 Windows 2000 Add Printer Wizard 45 Windows XP Add Printe...

Страница 15: ... 106 The Status Window Icon 107 Closing the Status Window 108 Messages 108 Chapter 4 Troubleshooting 111 Finding Information 111 Paper Jams 113 Locating Paper Jams 113 Removing Paper Jams 117 Print Quality Problems 124 Printout Has Vertical White Streaks 124 Printout Has Black Specks 125 Printout Too Light 125 Printout Too Dark 125 Printer Problems 126 CAPT Problems 129 CAPT Messages 132 Using the...

Страница 16: ...dix B Network Adapter AXIS 1610 147 Connecting Directly From Clients 148 Connecting Through A Print Server 149 Protocols 149 Using NetPilot To Configure Your Network Adapter 149 Installing the Network Print Monitor 149 Specifications 150 Glossary 151 Index 163 ...

Страница 17: ...xvi ...

Страница 18: ...er introduces you to the printer and explains its features Your new laser printer has many advanced features including the CAPT Canon Advanced Printing Technology The CAPT gives you instant access to printer information The LBP 1210 offers outstanding print quality flexible paper handling energy efficient printing and trouble free operation ...

Страница 19: ...ower consumption The printer comes with an efficient power management system Power consumption is very low particularly when idle Stylish compact design The printer provides compact lightweight easy to use functionality in a smooth stylish design The small footprint gives you more work space to help you meet your needs CAPT Printing Software The CAPT is easy to install and with it you can set cust...

Страница 20: ...ous sizes Letter A4 B5 or Executive as well as transparencies labels envelopes postcards and other special paper The cassette handles up to 250 sheets of 64 g m2 plain paper with a maximum stack height of 25 mm For manual feeding sheets are fed one at a time Delivery can be face down or face up Direct Network Connection With the optional network adapter you can connect directly to the LBP 1210 ove...

Страница 21: ...f the Printer Front View Rear View Paper guides Cassette Face down delivery slot Manual feed slot Delivery selection cover Front cover Power lamp USB port interface connector Power socket Parallel port interface connector Power switch ...

Страница 22: ...Introduction Chapter 1 Introduction 5 Inside the Printer For more information about setting up the printer see the Getting Started Guide Transfer roller Fixing assembly ...

Страница 23: ...6 Introduction Chapter 1 ...

Страница 24: ...chapter describes how to select the different types of paper you can use with your printer and how to load them It includes the following information Paper Requirements Storing Paper Paper Path Selecting Paper Delivery Loading Paper into the Cassette Loading Paper Manually ...

Страница 25: ...tte Plain paper Letter A4 Executive B5 64 163 Max height 25mm Approx 250 sheets of 64 g m2 paper Envelopes 98 x 162 mm to 176 x 250 mm COM 10 Monarch DL B5 C5 Max height 25 mm Postcards 100 x 148 mm Max height 25 mm Other Index card 3 x 5 Max height 25 mm Manual Plain paper 76 2 x 127 mm to 216 x 356 mm Including the following standard paper sizes Letter 8 1 2 x 11 A4 210 x 297 mm Executive 7 1 4 ...

Страница 26: ... or carbon paper or paper with glue staples clips or ribbons For colored paper use colors that are not damaged by the heat of the printer s fixing assembly about 190 C or 374 F Transparencies The acceptable size is A4 The transparencies must be able to withstand the heat generated by the fixing assembly about 190 C or 374 F without damage Labels Labels are paper with pressure sensitive adhesive Ac...

Страница 27: ...elopes must not have any fasteners snaps or windows or be made of artificial materials Do not use envelopes that discolor or melt at about 190 C 374 F envelopes which might emit dangerous fumes when heated or envelopes that seal with pressure sensitive adhesives Do not use envelopes which are damaged curled or wrinkled or that have an irregular shape Do not use oversized envelopes or envelopes wit...

Страница 28: ...herefore note the following when storing paper Store unused paper in its wrapping to protect against humidity Do not store paper directly on the floor as the floor is usually humid If you must store paper in a very humid place use a specially designed storage box Keep paper on a flat surface to prevent excessive in ream paper curl Do not stack paper too high to prevent excessive in ream paper curl...

Страница 29: ...ge transfer area where the printer drum has been statically charged A laser beam changes the static charge on the drum and toner clings to those parts of the drum As the paper rolls across the drum the toner transfers to the paper The toner is then fused to the paper by the fixing assembly The paper either comes out from the face up delivery slot or travels to the face down delivery slot depending...

Страница 30: ...y is selected Face down Delivery Printouts are stacked in order in the face down delivery slot which can hold up to 125 sheets of 64 g m2 paper To select face down delivery close the delivery selection cover Do not replace paper in the face down delivery slot once it is removed from the slot This could result in damage to the flaps inside the slot Never insert paper or other objects into the face ...

Страница 31: ...ill emerging from the face up delivery slot Do not open or close the delivery selection cover until the printout has completely come out of the delivery slot Opening closing the delivery selection cover while printing could cause a paper jam The printer is not equipped with a face up delivery tray The delivered paper must be removed manually Make sure there is enough room at the front of the face ...

Страница 32: ...ve and B5 It also accepts envelopes postcards or special paper with a maximum height of 25 mm Before loading paper on the cassette first select the paper delivery For more details see Selecting Paper Delivery on page 13 Follow the steps below to load a stack of paper 1 Prepare a stack of paper and tap it on a flat surface to properly align the edges Fan the stack of paper well If not printing prob...

Страница 33: ...3 Set the stack of paper with the printing side facing up The top edge of the paper should be inside the printer Slide the stack into the cassette until it stops Do not load more than 250 sheets of 64 g m2 plain paper or a stack of any paper higher than 25 mm ...

Страница 34: ...pace between the paper guide and the edge of the stack of paper 5 Set the manual feed slot on the cassette When reloading be sure to remove any paper remaining in the cassette Stack it together with the new sheets before loading The cassette is now ready to supply paper For information on paper delivery selection see Selecting Paper Delivery on page 13 LTR LGL B5 A4 ...

Страница 35: ...e to follow these steps before loading envelopes 1 Place the envelopes on a flat surface and press the corners down in the direction shown to flatten the envelopes 2 Flex the envelope stack including all four edges to remove any stiffness Correct any bent corners on the envelopes Check all four corners ...

Страница 36: ...tack of envelopes by tapping them on a flat surface Loading Envelopes 1 Set the paper with the printing side facing up so that the flap is on the left The top edge of the envelope should be inside the printer Slide the stack into the cassette until it stops ...

Страница 37: ... left and front to the size of the envelope Most applications allow you to choose which way envelopes feed into the printer Make sure your printer settings before you print When using C5 size envelopes remove any stiffness by lightly flexing both edges of the envelope ...

Страница 38: ... are facing upward with the flap on the left If the flap is along the short edge of the envelope insert envelopes so that print side are facing upward with the flap toward the printer The illustrations below show acceptable and unacceptable arrangements of the flaps of envelopes in a stack Acceptable The flap of each envelope should be separate not overlapping the edges of any of the other envelop...

Страница 39: ... flap of any of the envelopes overlaps the edges of other envelopes in the stack like those in the examples below paper jams or misfeeds will occur Flaps overlapping Top flap overlaps the envelopes underneath Flaps overlapping the envelopes underneath ...

Страница 40: ...and the top of the paper is inserted first Slide the sheet of paper into the manual feed slot until it stops see in the illustrations below Adjust the paper guides to the sheet of paper see in the illustrations below The manual feed has priority over the cassette Often applications will let you change the feeding direction of envelopes Confirm the feeding direction of envelopes before printing If ...

Страница 41: ...e printer or printing problems might result For continuous manual feed insert a new sheet only when the previous sheet has come out completely from the delivery slot If a new sheet is inserted before the previous sheet has been delivered a paper jam may occur ...

Страница 42: ...n Advanced Printing Technology 25 Chapter 3 Using the Canon Advanced Printing Technology This chapter describes the CAPT Canon Advanced Printing Technology It includes the following information Installing the CAPT Printing with the CAPT Checking the Status of a Print Job ...

Страница 43: ...e LBP 1210 as a network printer follow the steps in Connecting the LBP 1210 as a Network Printer on page 61 Windows 95 98 Me For installation instructions using the CD ROM menu please see the Getting Started Guide Plug and Play Following is the installation procedure of plug and play for Using USB and Parallel Port under Windows 95 98 Me Before you install the software make sure you do the followi...

Страница 44: ...are using OSR2 1 or later Using USB Port USB Cable In order to use the printer via USB the following requirements need to be satisfied Your computer must be equipped with a USB port and it is necessary that its operation is approved by the manufacturer Windows 95 is not available for USB The following procedure only applies to the installation under Windows 98 The first time you start Windows with...

Страница 45: ... and click OK Confirm that the folder to browse is selected under Specify a location then click Next For Windows Me select Specify the location of the driver Advanced and click Next in the Add New Hardware Wizard Click only Specify the location then click Browse to select the driver you want to install For example if your CD ROM drive is drive D browse to D English WinMe and click OK The installat...

Страница 46: ...ou device Recommended and click Next Click only Specify a location and Browse to select the driver in the language that you want to install For example if your CD ROM drive is drive D browse to D English Win9x and click OK Confirm that the folder to browse is selected under Specify a location then click Next For Windows Me select Specify the location of the driver Advanced and click Next in the Ad...

Страница 47: ...he installation is complete the following dialog box appears To close the dialog box click OK Click Finish on the Add New Hardware Wizard Add Printer Wizard To install the CAPT on a local computer using Windows 95 98 Me you can use the Windows 95 98 Me Add Printer Wizard Following is the installation procedures for Using Parallel Port under Windows 98 To install the LBP 1210 printer driver to USB ...

Страница 48: ...n Advanced Printing Technology Chapter 3 Using the Canon Advanced Printing Technology 31 2 Double click the Add Printer icon The Add Printer Wizard dialog box appears Click Next 3 Select Local printer and click Next ...

Страница 49: ...rinters Click Have Disk 5 The Install From Disk dialog box appears Use Browse to select the directory or enter the path name that contains the CAPT software then click OK For example if you are using the CD ROM to install the CAPT and your CD ROM drive is drive D the path name would be D English Win9x ...

Страница 50: ...Using the Canon Advanced Printing Technology Chapter 3 Using the Canon Advanced Printing Technology 33 6 Select the printer and click Next 7 Select the printer s port and then click Next ...

Страница 51: ...sing the Canon Advanced Printing Technology Chapter 3 8 Enter the name you wish to use then click Finish 9 When the installation is complete the following dialog box appears To close the dialog box click OK ...

Страница 52: ...r For details see the Getting Started Guide Start up Windows 2000 Using USB Port USB Cable In order to use the printer via USB the following requirements need to be satisfied Your computer must be equipped with a USB port and it is necessary that its operation is approved by the manufacturer Windows NT 4 0 is not available for USB When using parallel port go to Step 2 1 Plug and Play is being carr...

Страница 53: ...The New Hardware Wizard dialog box appears Click Next Select Search for a suitable driver for my device recommended in the Found New Hardware Wizard and click Next Unknown may be displayed as the name of the device 4 Select only Specify a location and click Next ...

Страница 54: ...iver in the language that you want to install For example if your CD ROM drive is drive D browse to D English Win2000 then click OK Click Next on Driver Files Search Results Click Yes if the Digital Signature Not Found dialog box appears 6 When the installation is complete the following dialog box appears Click OK to close the dialog box Click Finish on the Found New Hardware Wizard ...

Страница 55: ...ed Guide Start up Windows XP Using USB Port USB Cable In order to use the printer via USB the following requirements need to be satisfied Your computer must be equipped with a USB port and it is necessary that its operation is approved by the manufacturer Windows NT 4 0 is not available for USB When using parallel port go to Step 2 1 Plug and Play is being carried out and the USB class driver USB ...

Страница 56: ...on Advanced Printing Technology 39 3 The Found New Hardware Wizard dialog box appears Select Install from a list or specific location Advanced and click Next Unknown may be displayed as the name of the device 4 Uncheck the Search removable media floppy CD ROM check box ...

Страница 57: ...n the language that you want to install For example if your CD ROM drive is drive D browse to D English WinXP then click Next Click Continue Anyway if the Hardware Installation dialog box appears 6 When the installation is complete the following dialog box appears Click OK to close the dialog box Click Finish on the Found New Hardware Wizard ...

Страница 58: ...e Windows NT Add Printer Wizard 1 Log on as member of Administrators The full control access right for the printer is necessary for the installation of the CAPT 2 From the Start menu select Settings then Printers The Printers folder appears 3 Double click the Add Printer icon The Add Printer Wizard dialog box appears 4 Select My Computer then click Next 5 Select the printer port you want to use th...

Страница 59: ...ers Printers dialog box 7 The Install From Disk dialog box appears Use Browse to select the directory or enter the path name that contains the CAPT then click OK For example if you are using the CD ROM to install the CAPT and your CD ROM drive is drive D the path name would be D English WinNT40 ...

Страница 60: ...ology Chapter 3 Using the Canon Advanced Printing Technology 43 8 Select your printer model from the list of printers displayed then click Next 9 Click Next to accept the default printer name or enter the name you wish to use then click Next ...

Страница 61: ... If it is shared select all the operating systems that will use this printer Click Next 11 Click Yes if you want to print a test page or No if you do not want to print a test page then click Finish Windows creates the Canon LASER SHOT LBP 1210 icon on the Desktop and the Canon LASER SHOT LBP 1210 icon is added to the Printers folder ...

Страница 62: ...d correctly click Yes Windows 2000 Add Printer Wizard To install the CAPT on a local computer using Windows 2000 you can use the Add Printer Wizard Following is the installation procedure for Using Parallel Port under Windows 2000 To install the LBP 1210 printer driver to a USB port perform the same procedures as for Plug and Play 1 Log on as member of Administrators The full control access right ...

Страница 63: ... Technology Chapter 3 3 Double click the Add Printer icon The Add Printer Wizard dialog box appears Click Next 4 Select Local printer then click Next To check on Automatically detect and install my Plug and Play printer is not recommended ...

Страница 64: ... Canon Advanced Printing Technology Chapter 3 Using the Canon Advanced Printing Technology 47 5 Select the printer port you want to use then click Next 6 Click Have Disk in the Manufacturers Printers dialog box ...

Страница 65: ... Browse to select the directory or enter the path name that contains the CAPT then click OK For example if you are using the CD ROM to install the CAPT and your CD ROM drive is drive H the path name would be H English Win2000 8 Select your printer model from the list of printers displayed then click Next ...

Страница 66: ...y Chapter 3 Using the Canon Advanced Printing Technology 49 9 Click Next to accept the default printer name or enter the name you wish to use then click Next 10 Select whether this printer is shared or not shared with other computers Click Next ...

Страница 67: ...test page then click Next 12 Click Finish Click Yes if the Digital Signature Not Found dialog box appears 13 When the installation is complete the following dialog box appears Click OK to close the dialog Windows creates the Canon LASER SHOT LBP 1210 icon on the Desktop and the Canon LASER SHOT LBP 1210 icon is added to the Printers folder ...

Страница 68: ...ard To install the CAPT on a local computer using Windows XP you can use the Add Printer Wizard Following is the installation procedure for Using Parallel Port under Windows XP To install the LBP 1210 printer driver to USB port perform procedure as same as Plug and Play 1 Log on as member of Administrators The full control access right for the printer is necessary for the installation of the CAPT ...

Страница 69: ...hapter 3 3 Double click the Add Printer icon The Add Printer Wizard dialog box appears Click Next 4 Select Local printer attached to this computer then click Next To check on Automatically detect and install my Plug and Play printer is not recommended ...

Страница 70: ...Technology Chapter 3 Using the Canon Advanced Printing Technology 53 5 Confirm that Use the following port is selected and select the printer port you want to use then click Next 6 Click Have Disk in the Manufacturer Printers dialog box ...

Страница 71: ...e Browse to select the directory or enter the path name that contains the CAPT then click OK For example if you are using the CD ROM to install the CAPT and your CD ROM drive is drive H the path name would be H English WinXP 8 Select your printer model from the list of printers displayed then click Next ...

Страница 72: ...y Chapter 3 Using the Canon Advanced Printing Technology 55 9 Click Next to accept the default printer name or enter the name you wish to use then click Next 10 Select whether this printer is shared or not shared with other computers Click Next ...

Страница 73: ...e then click Next 12 Click Finish Click Continue Anyway if the Hardware Installation dialog box appears Windows creates the Canon LASER SHOT LBP 1210 icon on the Desktop and the Canon LASER SHOT LBP 1210 icon is added to the Printers and Faxes folder 13 When the installation is complete the following dialog box appears Click OK to close the dialog ...

Страница 74: ...ownload If network download is not available you can use the Add Printer Wizard Network Download Windows 95 98 Me and Windows NT 4 0 2000 XP clients can download the drivers for the LBP 1210 automatically 1 Open Explorer and browse the network until you can see the Canon LASER SHOT LBP 1210 printer icon 2 Double click the printer icon or drag the printer icon to your Printers folder 3 Follow the i...

Страница 75: ...alog box appears 3 Select Network printer then click Next 4 Enter the network path or print queue that you want to connect to or use Browse to open the Browse for Printer dialog to select the printer 5 The Wizard displays a list of available printers Click Have Disk 6 The Install From Disk dialog box appears Use Browse to select the directory or enter the path name that contains the CAPT then clic...

Страница 76: ...elect Network printer server then click Next The Connect to Printer dialog appears 5 Select the printer you want to connect to then click OK If the printer name is invalid it means the client could not connect to the network printer specified If a suitable driver is not found it probably means the server is a Windows 95 98 Me computer 6 Follow the instructions on screen to complete installation Wi...

Страница 77: ...cessary for the installation of the CAPT 2 From the Start menu select Printers and Faxes The Printers and Faxes folder appears 3 Click Add a printer The Add Printer Wizard dialog box appears Click Next 4 Select A Network printer or a printer attached to another computer then click Next The Specify a Printer dialog appears 5 Click Next or enter the network path or print queue that you want to conne...

Страница 78: ...ver Please note that there is no status display on the server when no one is logged in The status display is shown on the client Connecting the LBP 1210 as a Network Printer If you plan to share the LBP 1210 on a network install the print server locally then make the following settings See your print server system documentation for more information Windows 95 98 Me Server Settings Network Settings...

Страница 79: ...ss the printer 4 Click OK when you are done adding users 5 Click OK again Do not enter space or special character in the Share Name Windows NT 4 0 2000 XP Server Settings Add Server Service Windows NT 4 0 1 Double click the Network icon from the Control Panel 2 Select the Services tab and if the Server is not shown click Add 3 Select the Server and click OK 4 Restart Windows Add Server Service Win...

Страница 80: ...Install 5 Select Service then click Add 6 Select File and Printer Sharing for Microsoft Networks in the Network Services box then click OK 7 Click Close Printer Sharing Settings 1 Open the Canon LASER SHOT LBP 1210 Properties window then check Shared in the Sharing tab 2 Enter the Share Name as needed 3 Click OK The printer icon changes to indicate sharing Sharing settings may also be made during ...

Страница 81: ... Canon LASER SHOT LBP 1210 group Canon LASER SHOT LBP 1210 Help Selects the Canon LBP 1210 Help file for the CAPT Canon LASER SHOT LBP 1210 Status Window Displays the LBP 1210 Status Window Canon LASER SHOT LBP 1210 Trouble Shooter Starts the Trouble Shooter program for the CAPT It helps you solve printing problems in Windows 95 98 Me or NT 4 0 2000 XP For details see Chapter 4 Troubleshooting Can...

Страница 82: ...t the CAPT displays the Canon LASER SHOT LBP 1210 Status Window This window shows you the paper moving through the printer how long it will take to print the document and how much of the document has printed From the Status Window you can pause resume or delete the current print job If a printing problem occurs the Canon LASER SHOT LBP 1210 Status Window automatically opens and identifies the prob...

Страница 83: ...ialog box depends on how you have your system set up Screens examples use Windows 98 The way you get to the dialog boxes determines how long the printing options remain in effect If you start from an application s Print command your choices apply only to that print job They will not be stored when you close the application If you start from the Printers folder the settings apply to all Windows app...

Страница 84: ...Advanced Printing Technology Chapter 3 Using the Canon Advanced Printing Technology 67 General Tab Lets you print a test page or define separator pages Refer to your operating system documentation for more information ...

Страница 85: ...dvanced Printing Technology Chapter 3 Details Tab Specifies the printer port and time out settings Refer to your operating system documentation for more information Spool Settings The installer sets the following defaults ...

Страница 86: ... Chapter 3 Using the Canon Advanced Printing Technology 69 Sharing Tab Specifies the printer sharing settings This tab is available only when file and printer sharing is turned on Refer to your operating system documentation for more information ...

Страница 87: ...ustom paper sizes are set with the Custom Paper Size option Output Size lets you select the paper size to print on If your output size is set to anything other than Match Page Size the image will be automatically reduced or enlarged to fit on the page Copies lets you specify the number of copies to be printed 1 999 Orientation lets you select the direction of printing relative to the paper Portrai...

Страница 88: ... on the Page Setup Finishing and Quality tabs Click on the tabs in the View Settings dialog box to view the settings for each tab Paper Type displays the Paper Type pull down menu and lets you select the appropriate paper type to print on Paper Types that can be specified are as follows Plain Paper Paper of 64 90g m2 Transparencies Transparency Special Paper 1 Paper of 64g m2 or heavier with A4 le...

Страница 89: ...s or Inches 4 Define the Paper Size using the Width 7 62 21 59 cm and Height 12 70 35 56 cm settings 5 Click OK to accept your changes If you wish to restore the default settings to all of the custom forms then click Restore Defaults Overlay An overlay allows you to add data you use often such as a logo to the print data from an application For example when using an overlay you can automatically p...

Страница 90: ...n list and preview are updated The overlay file must be a Windows bitmap or a Windows metafile Overlay Placement lets you specify if you want the overlay to appear in back of the application data or in front of the application data Background Foreground Position lets you specify the position of the overlay based on its distance from the paper s left and top edges Size lets you set the size of the ...

Страница 91: ... desktop settings in the User s Profiles tab in the Passwords control panel up to 50 profiles can be stored for each user Profile lets you select profiles from a pull down menu Add opens the Add Profile dialog Edit opens the Edit Profile dialog Add Profiles After setting the desired options you can create a new profile by clicking Add on the Page Setup Finishing or Quality tab Name lets you specif...

Страница 92: ... that profiles appear in this list is the order they appear in the pull down menus Delete lets you delete the selected profile Import lets you import profile information from a file Export lets you export the selected profile information to a file If you change the name assigned to your printer you cannot retrieve any profiles saved for that printer To retrieve the profiles rename the printer to i...

Страница 93: ... For information on Profiles see page 74 Preferences Preferences on the Finishing tab window opens the Preferences dialog box The check box lets you force pages to print even when the paper size does not match If this is not checked you ll be asked to change paper when a paper size mismatch is detected By default the setting for this option is unchecked ...

Страница 94: ...dots that simulate the gray shades in the original image Different halftone patterns give different gray shade results Brightness is the relative proportion of light and dark areas Decreasing brightness darkens the overall image increasing brightness lightens it Brightness is expressed as a relative range from 80 to 80 Contrast is the degree of difference between the lightest and darkest areas of ...

Страница 95: ...ow light or dark your pages print Move the slider to the right to darken your printed output slide it to the left to lighten your printed output Toner Saver prints only alternate data bits so toner consumption is reduced Automatic Image Refinement is a printer technology from Canon with which the printer automatically senses and refines the jagged edges and ragged curves of characters and graphics...

Страница 96: ...hen you print on the LBP 1210 To view the default document properties select Document Defaults from the File menu in the Printers folder or click the right mouse button on the Canon LASER SHOT LBP 1210 icon in the Printers folder and select Document Defaults from the pop up menu You can also open an equivalent dialog box and specify the setting by selecting Print or Page Setup from the File menu o...

Страница 97: ...80 Using the Canon Advanced Printing Technology Chapter 3 General Tab Specifies to print a test page and separator pages Refer to your operating system documentation for more information ...

Страница 98: ...vanced Printing Technology Chapter 3 Using the Canon Advanced Printing Technology 81 Ports Tab Lets you specify the port to which the printer is attached Refer to your operating system documentation for more information ...

Страница 99: ...duling Tab Lets you define print spooling settings Refer to your operating system documentation for more information Spool print documents so program finishes printing faster and Start printing immediately are set automatically when you install the printer driver ...

Страница 100: ... Canon Advanced Printing Technology Chapter 3 Using the Canon Advanced Printing Technology 83 Sharing Tab Specifies the printer sharing settings Refer to your operating system documentation for more information ...

Страница 101: ...84 Using the Canon Advanced Printing Technology Chapter 3 Security Tab Lets you specify security settings Refer to your operating system documentation for more information ...

Страница 102: ...nter s specifications Selected Forms shows the three form names Change Forms opens the Change Forms dialog This dialog contains a listing of the available forms and their definitions Available Forms have Height 12 70 35 56 cm and Width 7 62 21 59 cm that were set in the Forms tab in the print server s Properties dialog box Only forms that conform to the printer s specifications are listed as avail...

Страница 103: ...lets you select the paper size to print on If your output size is set to anything other than Match Page Size the image will be automatically reduced or enlarged to fit on the page Copies lets you specify the number of copies to be printed 1 999 Orientation lets you select the direction of printing relative to the printer s paper Portrait Landscape Page Layout lets you select the number of pages pe...

Страница 104: ...g and Quality tabs Click on the tabs in the View Settings dialog box to view the settings for each tab Paper Type displays the Paper Type pull down menu and lets you select the appropriate paper type to print on Paper Types that can be specified are as follows Plain Paper Paper of 64 90g m2 Transparencies Transparency Special Paper 1 Paper of 64g m2 or heavier with A4 letter size or larger that is...

Страница 105: ...nder the application data Use Browse to select the file that contains the overlay data File Name displays the currently selected overlay file name Browse opens the Select File dialog box When you select a file and close the Select File dialog box the File Name drop down list and Preview are updated The overlay file must be a Windows bitmap or a Windows metafile Overlay Placement lets you specify i...

Страница 106: ...s You can save up to 50 profiles If you select Users can customize their own preferences and desktop settings in the User s Profiles tab in the Passwords control panel up to 50 profiles can be stored for each user Profile lets you select profiles from a pull down menu Add opens the Add Profile dialog Edit opens the Edit Profile dialog Add Profiles After setting the desired options you can create a...

Страница 107: ...in this list is the order they appear in the pull down menus Delete lets you delete the selected profile Import lets you import profile information from a file Export lets you export the selected profile information to a file If you change the name assigned to your printer you cannot retrieve any profiles saved for that printer To retrieve the profiles rename the printer to its original name Profi...

Страница 108: ...les see page 89 Preferences Preferences on the Finishing tab window opens the Preferences dialog box The first check box lets you force pages to print even when the paper size does not match If this is not checked you will be asked to change paper when a paper size mismatch is detected The second check box lets you turn EMF Spooling on If this is not checked EMF Spooling will be off These settings...

Страница 109: ... gray shades in the original image Different halftone patterns give different gray shade results Brightness is the relative proportion of light and dark areas Decreasing brightness darkens the overall image increasing brightness lightens it Brightness is expressed as a relative range from 80 to 80 Contrast is the degree of difference between the lightest and darkest areas of an image Decreasing co...

Страница 110: ...r Saver prints only alternate data bits so toner consumption is reduced Automatic Image Refinement is a printer technology from Canon with which the printer automatically senses and refines the jagged edges and ragged curves of characters and graphics Checking the Status of a Print Job You can track and control your print jobs using either of the following methods The Canon LASER SHOT LBP 1210 Sta...

Страница 111: ...s dialog box of the Status Window When an error occurs or user action is required When Windows starts if the Status Window was open the last time Windows was closed You can also open the Status Window by clicking on the Status Window icon in the Windows taskbar and selecting the Canon LASER SHOT LBP 1210 If multiple LBP 1210 printers are connected select a printer from the list The Status Window o...

Страница 112: ...Description Menu bar Contains menu options to control the Status Window and the printer Printer icon Displays the current printing status and error conditions Printer status message area Displays the current status of the printer Error message area Gives a description of situations requiring action Toolbar Menu bar Progress bar Job information area Error message area Printer status message area St...

Страница 113: ...n is required or to red when a warning is issued Progress bar Indicates the progress of the current job Tool bar Use to pause delete or resume printing Job information area Displays information related to print jobs The type of information displayed changes with the selected tab Status bar Displays the name of the printer port and describes menu options as you move your mouse over them Window area...

Страница 114: ...f the LBP 1210 Status Window The Job menu includes the following options Pause Job This temporarily halts printing of the current document After the current page completes printing the printer pauses until you select Resume Job Resume Job This resumes printing with the next page of the document you paused Delete Job This cancels printing of the document currently being printed ...

Страница 115: ...og box that lets you change the settings for the Status Window Port Setting This opens the Port Setting dialog box when the printer is connected to a local parallel port This setting is unavailable if the printer is not connected to a local parallel port or while printing is in progress Cleaning This setting allows you to print pages that clean the printer s rollers This setting is not available w...

Страница 116: ...lly each time you print Only display Printer Status Window for errors The Status Window opens only when an error occurs To manually open the Status Window click the Status Window icon in the Windows taskbar and then click the Canon LASER SHOT LBP 1210 You can change display options even as a document prints but the changed settings do not take effect until the next print job Sounds lets you select...

Страница 117: ... over the status only while printing Status Window is monitoring the printer only when printing a job Always On Top places the Status Window on top of all windows on the Desktop Port Setting This dialog box lets you define how your computer communicates with your printer using the parallel port The type of port you have depends on your computer Standard uses the parallel port as a standard paralle...

Страница 118: ...r 3 Using the Canon Advanced Printing Technology 101 Using the Help Menu You can select the Help menu from the menu bar of the LBP 1210 Status Window Help Topics displays the search window for help topics About displays Status Window version information ...

Страница 119: ...sume Job Continues printing after a pause Printing restarts with the next page of the document you paused Delete Job Cancels the current print job If you are printing several documents the CAPT continues to the next print job in the queue and displays the status of that print job To cancel all print jobs in the queue simultaneously choose Settings from the Start menu then select the Printers folde...

Страница 120: ...g the Tab Window Printing Job This tab shows information related to the job that is currently printing The following types of information are displayed Document name User name Computer name Estimated time left Estimated finish time Some of this information may not be displayed depending on the printer status ...

Страница 121: ...at are completed The following types of information are displayed Document name Status Owner Pages Printed At The job history displayed in the job information area can list a history of up to 100 jobs beginning from the time the Status Window was started The job history clears whenever you terminate the Status Window ...

Страница 122: ... Advanced Printing Technology Chapter 3 Using the Canon Advanced Printing Technology 105 Waiting Job This tab shows information related to the jobs that have not yet started Document name Status Owner Pages Started At ...

Страница 123: ... automatically when printing completes or the error is canceled unless the user interacted with the window or its menus Performing print job operations Print job operations pause resume delete may be performed from either the print server or the client for that job After a client performs a print operation no other operations are allowed until the server confirms that the operation has been accept...

Страница 124: ...eady Indicates that the printer is ready to print Printing Paused Indicates that printing has paused Attention Required When the Status Window displays an alert the window automatically opens to its full size You can minimize the window again but you will not be able to resume printing until you take the action specified in the full size window Warning An error has occurred and the printer may req...

Страница 125: ...ion about your print job and the printer itself When a paper size is listed in the message area such as Change paper to Letter use the following table to determine which size paper to use Message Use this Paper Size Letter Letter 8 1 2 x 11 in A4 A4 210 x 297 mm Executive Executive 7 1 4 x 10 1 2 in B5 B5 182 x 257 mm Env 10 10 Envelope 4 1 8 x 9 1 2 in Env Monarch Monarch Envelope 3 7 8 x 7 1 2 i...

Страница 126: ...s Use the Status Options dialog box in the Options menu to turn sounds on or off There are two types of audio messages alert messages and other messages Refer to the following tables which list the spoken messages the event that triggers each and the message s filename Information messages Spoken message Event Filename Printing complete Last page finished CAP2DONE WAV Printing paused Pause button ...

Страница 127: ...COME WAV Printer error Printer error CAP2ERR WAV Change paper Wrong sized paper is loaded CAP2CAGP WAV Check print server Print server down CAP2SERR WAV Insufficient memory Insufficient working memory CAP2MEM WAV Cleaning Cleaning in progress CAP2CLN WAV Check toner cartridge No cartridge CAP2CART WAV Printer busy Printer is processing another job CAP2PRTB WAV Port busy Selected printer port is be...

Страница 128: ... the printer does not print other jobs or your printed output is not what you expected the problem is with your computer software or cables If your printer is not operating properly try the suggestions in this chapter in the order listed Finding Information Problem See page Paper Jams 113 Locating Paper Jams 113 Removing Paper Jams 117 Print Quality Problems 124 Printout Has Vertical White Streaks...

Страница 129: ... in this chapter contact a Canon authorized service representative Before contacting Canon make sure you have the following information Product name LASER SHOT LBP 1210 Serial number located on the label on the bottom of the printer Place of purchase Nature of the problem Steps you took to resolve the problem and their results ...

Страница 130: ...along the print path Refer to the diagram below to help you locate paper jams Locate the area where the paper jam has occurred and follow the instructions for removing jams in that area Be sure to check all areas before resuming printing Paper feed area Imaging area Face down delivery area Face up delivery area 1 3 4 2 ...

Страница 131: ...affected area Remove watches and any bracelets or rings when touching the inside of the printer These items might be damaged if they come into contact with parts inside the printer 1 If there is the stack of paper left in the cassette or on the face down delivery tray remove it first then open the front cover with both hands until it stops 2 Remove the EP 25 cartridge ...

Страница 132: ... than 5 minutes If necessary put the cartridge in its original protective bag or wrap it with a thick cloth to prevent exposure to light CAUTION The face up delivery area shaded part becomes hot when the printer is in use Be careful not to touch this area because personal injury might result ...

Страница 133: ...and susceptible to finger oil and scratches which may lead to print deterioration Be careful when removing the paper toner on the paper might get onto your hands or clothing If this happens wash it off immediately with cold running water To avoid possible damage to the printer do not touch the pins near the left end of the transfer roller ...

Страница 134: ... the printer Paper Jam in the Paper Feed Area If only a small portion of the paper has moved into the printer Use both hands to pull the jammed paper straight up and out from the cassette slowly and carefully Be careful not to tear the paper when pulling If the paper is torn remove the paper scraps from the printer ...

Страница 135: ...dge then follow the procedure below 1 Use both hands to carefully move the paper inward then gently pull it out 2 Roll the leading edge of the paper outwards so that the printed surface is on the inside of the roll then gently pull the rolled up paper out of the printer 3 If the leading edge of the paper is visible but has not entered the imaging area pull the paper forwards and roll it inwards ...

Страница 136: ...orward from the paper cassette It may cause a printer malfunction Gently pull out the jammed paper Do not pull the jammed paper upward the toner on the paper will stain the printer and cause a permanent reduction in print quality Replace the cartridge and close the front cover ...

Страница 137: ...o that the printed surface is on the inside of the roll and the paper is pulled back out from the imaging area Then gently pull the rolled paper out of the printer Paper Jam in the Face down Delivery Area Please use both hands to remove jammed paper from the printer Follow the steps described in Before Removing Paper Jams Inside the Printer on page 114 to remove the toner cartridge then follow the...

Страница 138: ...rom the printer 3 Carefully pull the jammed paper through the rollers and out of the printer Be sure to place the paper release levers back to their original position If the levers are left pushed down the paper jam error will not be resolved Never push down the paper release levers while printing This could result in damage to the fixing assembly ...

Страница 139: ...ion cover and push down the green paper release levers on the right and left 2 While holding the printer steady carefully pull the jammed paper straight out If the jammed paper is badly folded similar to the folds of an accordion ease the jammed paper loose and then pull it out of the printer 3 Place the paper release levers back to their original position ...

Страница 140: ...printing troubleshooting has been successful If the printer does not return to the ready state for printing confirm that the paper release levers are placed back to their original position and check to see that paper is not left in the printer While removing the jammed paper some toner might stain the inside of the printer which will make the first few printouts dirty when printing resumes ...

Страница 141: ... printer 4 Close the front cover and try to print again If the problem persists the cartridge has probably expired Replace it with a new one using the steps described in Installing the EP 25 Cartridge in the Getting Started Guide When purchasing a replacement cartridge make sure you get the right one for this printer a Canon EP 25 cartridge The EP 25 cartridge typically lasts for about 2 500 print...

Страница 142: ... cleaning page repeat step 1 until there are no black specks on the cleaning page You may repeat this procedure several times with no adverse effect on the printer Printout Too Light This occurs with high volume printing in a hot environment Corrective action 1 Increase the printing density 2 If this has no effect replace the EP 25 cartridge Printout Too Dark If there is a strong light source near...

Страница 143: ...compatible Make sure you are using an 8 bit Centronics compatible parallel interface cable with bi directional capability Your computer might not be working properly Check your computer make sure it is turned on and working properly Your software might be sending the wrong codes Check the software you are using it might have sent a stop code or similar command to the printer Make sure the correct ...

Страница 144: ...tout is wrong There might be a communications problem between the printer and your computer Make sure your cable connections are secure Make sure your interface cable is less than 6 6 feet 2 0 m long Make sure you are not using a switch box Check that you have selected the correct printer driver in Windows The wrong printer is selected in the Printers folder Make sure the LBP 1210 is selected in t...

Страница 145: ...this line in your CONFIG SYS file c winutils mxtime exe to REM c winutils mxtime exe Computer indicates a device time out Your computer is sending data to the printer but the printer is not responding The printer might be off offline or not connected to the computer Make sure the printer is not paused Check that the printer s interface cable is securely connected to both the printer and the comput...

Страница 146: ...y try printing a page from an application If the print fails the CAPT is not installed correctly Remove the CAPT and install it again For more information see Uninstalling the CAPT on page 136 Cannot use Adobe Type Manager ATM fonts You might be using the wrong version of Adobe Type Manager You must be using Adobe Type Manager ATM version 2 51 or later Cannot print with a printer driver other than...

Страница 147: ...t notification checkbox is unchecked From the Device Manager make sure that the Auto insert notification checkbox is checked in the CD ROM drive Properties dialog box For more information see Windows Help File not found on CD ROM error when starting the CD ROM Menu The program is loaded from the hard disk drive Remove the CAP2MNU EXE file from your hard disk drive and restart the CD ROM Menu progr...

Страница 148: ...select Hardware tab and click Device Manager button 4 Delete ONLY the following USB class drivers under Universal Serial Bus controller For Windows 98 select Canon LASER SHOT LBP 1210 For Windows Me select Canon CAPT USB Printer and click Remove button For Windows 2000 XP select USB Printing Support or Canon CAPT USB Printer and uninstall from the Action menu In the case that the USB class driver ...

Страница 149: ...it matches the specified paper size Use the Resume Job menu option in the LBP 1210 Status Window to start printing on the paper in the printer Check Printer Cable Your computer and printer are not communicating This happens if the printer power shuts off the cable is disconnected or the cable is not bi directional Check Toner Cartridge There is no toner cartridge in the printer Install a toner car...

Страница 150: ...Busy The printer port is being used by other equipment Printing Failed The print job was too complex to be sent to the printer Try one or more of the following Try reprinting the job with a lower resolution such as 300 dpi Reform the most complicated pages in the print job to reduce graphics and other complex formatting Try reprinting only the page on which the error has occurred Service Error The...

Страница 151: ...R SHOT LBP 1210 group The Trouble Shooter checks the following and corrects any problems Free disk space in the drive containing the Windows directory and free memory Installed files Selected printer port the Trouble Shooter checks to see if usable Registries RapidPort communication device drivers Windows NT 4 0 2000 XP Language monitor Printer drivers Status Window Printer Properties settings Can...

Страница 152: ...alog box similar to the one below While the Trouble Shooter is running it saves a log file with the name tshooter tmp in your system temp directory such as windows temp or temp In the Exit dialog box the Trouble Shooter prompts if you want to save the results as a text file Check the Save Result check box and enter the desired filename The file saves with the extension of log When you click OK in ...

Страница 153: ...ou close all running applications To uninstall 1 Click the Start button then point to Programs 2 Point to Canon LASER SHOT LBP 1210 3 Click Canon LASER SHOT LBP 1210 Uninstallation 4 Follow the on screen instructions 5 Windows 95 98 Me Click OK and your system restarts Windows NT 4 0 2000 XP Click OK recommended to restart your system In Windows NT 4 0 2000 XP you cannot uninstall the Canon Advanc...

Страница 154: ...ter Do not place any heavy objects on the printer Do not insert paper or other objects into the face down delivery slot When the printer is printing do not rock or move the printer and do not open the front cover If you do the printer might be damaged Do not subject the manual feeding slot area to direct sunlight or other strong light After unplugging it from the AC outlet wait until the printer h...

Страница 155: ...t Do not spill water or detergent into the printer Otherwise the printer will be damaged and electric shock may even occur Do not lubricate the printer This printer does not require lubrication EP 25 Cartridge The EP 25 cartridge contains a photosensitive part called a drum which has characteristics similar to photo film It also contains black carbon powder called toner The drum is extremely sensi...

Страница 156: ...ible to free it even by shaking the cartridge and print quality can deteriorate Do not store the cartridge at a high temperature or in high humidity or in places where the temperature or humidity can change abruptly Store the cartridge at temperatures between 0 C and 35 C between 32 F and 95 F Do not store the cartridge in salty air or where there are corrosive gases such as those from aerosol spr...

Страница 157: ... might prove impossible to free it even by shaking the cartridge which results in print quality deterioration Keep the cartridge away from a monitor s cathode ray tube CRT disk drives and floppy disks The magnet in the cartridge can distort the image on the CRT or damage data on disks Do not touch the drum s protective shutter Avoid holding the cartridge in such a way that your hand is touching th...

Страница 158: ...d at 4 dot ratio equivalent to print coverage of approximately 5 The actual cartridge life depends on the average page coverage of your printed documents If your documents have on average less text with lots of white space the cartridge lasts longer However if you frequently print graphics and text the cartridge life is shorter When a print quality problem cannot be corrected following the steps i...

Страница 159: ... printer is in use Be careful not to touch this area because personal injury might result 2 Remove the EP 25 cartridge 3 Insert a new cartridge For details see Installing the EP 25 Cartridge in the Getting Started Guide CAUTION Do not dispose of toner cartridges in fire Toner powder is flammable ...

Страница 160: ... 1 Place letter or A4 size paper in the cassette 2 Click on the printer icon in the taskbar to open the Status Window 3 From the Options menu click Cleaning A cleaning sheet starts printing When printing starts the Status Window message area dis plays Cleaning and when printing completes it returns to normal While cleaning is in progress you cannot pause the printing or change paper settings ...

Страница 161: ...144 Maintenance Chapter 5 ...

Страница 162: ...pprox 250 sheets of 64 g m2 paper Special paper envelopes postcards index cards colored paper Maximum capacity 25 mm stack height except envelopes Envelope capacity 20 envelopes Plain paper special paper transparencies labels envelopes postcards index cards colored paper Maximum capacity 1 sheet 64 g m2 paper Paper delivery Face down Maximum capacity 125 sheets 64 g m2 paper Face up 1 sheet Remove...

Страница 163: ...ely 6 W Noise level Sound Power Level During printing Max 6 2 Bels During standby Background noise level Sound Pressure Level Bystander positions During printing Max 48 dB A During standby Background noise level Declared Noise Emissions in accordance with ISO 9296 Operating environment Printer plugged into an AC outlet Temperature 7 5 C to 35 C 45 5 F to 95 F Humidity 5 to 90 RH no condensation St...

Страница 164: ...ve a peer to peer connection The client can also be connected to the network adapter through a print server The network adapter for the LBP 1210 printer can also connect to other Canon Advanced Printing Technology printer models It cannot be connected to printers that do not have the Canon Advanced Printing Technology Secure the network adapter by snapping the two wire clips located on the printer...

Страница 165: ...not arrive in the order they were sent For example if client 1 enters jobs A and B and then client 2 enters job C the print order might be A C then B if job B did not arrive at the network adapter until job A was completed You must install the Print Monitor for the network adapter on each client When using the Add Printer Wizard you must connect directly to the network Since the printer port is tr...

Страница 166: ...EUI or TCP IP to communicate with the printer Windows XP supports only the TCP IP protocol Using NetPilot To Configure Your Network Adapter 1 Install NetPilot and the Print Monitor 2 Start NetPilot 3 Select the network adapter from the displayed list 4 Enter the network adapter settings NetPilot runs on Windows 95 98 Me and Windows NT 4 0 2000 Installing the Network Print Monitor 1 Connect the net...

Страница 167: ... Network interface Both 10Base T 100Base TX Protocols NetBIOS NetBEUI TCP IP Printer interface Bi directional parallel ECP Power supply External AC adapter RAM 2 MB ROM Flash EPROM 1 MB Flash method Safe flash Compatible MIB Some Canon MIBs some printer MIBs some TCP IP MIBs some host MIBs Compatible host utilities NetSpot NetPilot Compatible printers Canon Advanced Printing Technology printers on...

Страница 168: ...the on screen instructions before printing resumes Audio messages Audio messages notify the user of the printer operations shown in the Status Window Automatic Image Refinement A printer technology from Canon with which the printer automatically senses and refines the jagged edges and ragged curves of characters and graphics B Bi directional communications Allows information to pass back and forth...

Страница 169: ...Centronics type parallel interface with bi directional capability See also Interface port and Parallel interface Client A computer that is connected to the printer over a network A client does not control the printer directly It interacts with the printer through a server See also Server Collate To print multiple copies of a multi page document in sequential page order Command An instruction that ...

Страница 170: ...dpi Driver A program that controls how the computer and an external device interact The printer driver supplies Windows with information such as descriptions of the fonts and features of the installed printer When you print with the Canon Advanced Printing Technology you are using its printer driver E ECP Abbreviation for Extended Capabilities Port A bi directional communication mode that enables ...

Страница 171: ...cale image to black dots and white unprinted dots that simulate the gray shades in the original image I Interface The connection between two devices through which they communicate with each other The LBP 1210 printer features USB and parallel interface which makes it compatible with IBM and similar personal computers Interface cable The cable with bi directional capability used to create the inter...

Страница 172: ...er or computer memory size in thousand byte units L Landscape The printing of text and graphics along the length of the page Local printer A printer that is directly connected to your computer using a parallel cable M Megabyte MB A unit of measurement representing one million bytes used to describe printer or computer memory size My Computer The Windows program that you can use to browse through y...

Страница 173: ... connection O Orientation The printing of text either along the width portrait or length landscape of the page Overlay Refers to printing in which data that is common to all the pages such as a logo titles or table structure is overlaid with the print data from the application P Paper feed The act of guiding a sheet of paper into the printer s paper path Paper jam A situation created when paper be...

Страница 174: ...ers PDF documents can be read or printed out with Adobe s Acrobat Reader program Peer to peer connection A network connection between a computer and a printer or other device that does not go through a server See also Server Client Physical RAM Random access memory RAM that is physically present in the computer in the form of memory chips as opposed to virtual memory See also Virtual Memory Point ...

Страница 175: ...ofile A profile is a file that stores the printer s settings so those settings can be recreated simply by selecting the profile from a menu Progress bar In the Status Window or its icon a horizontal bar that graphically indicates the percentage of the print job that has actually printed Properties dialog box The dialog box that contains information about a particular device such as your printer Pr...

Страница 176: ...tional typeface designs but prints more slowly This printer can produce output with 300 or 600 dpi resolution Resolution values are represented by horizontal data and vertical data for example 600 x 600 dpi S Scalable fonts Scalable fonts allow characters to be printed in various sizes and rotation angles This is different from bitmap fonts which are printed in fixed sizes and angles Scaling Enlar...

Страница 177: ...g A process by which an application sends a document to the Spooler rather than directly to the printer thus freeing the computer and application for other tasks Spooled documents are printed in the order they are received Start menu The menu that presents commands that are a starting point for all work you do on your computer such as starting a program opening a document finding a file and gettin...

Страница 178: ...ts are printed toner consumption is reduced Toolbar In the Status Window the area in the tab window that includes buttons for pausing resuming and deleting the current print job Transfer roller Presses the paper against the drum to aid the transfer of toner to the paper Trouble Shooter A program that helps you solve printing problems The Trouble Shooter checks the Windows configuration settings an...

Страница 179: ...sed See also Physical RAM W WebNetSpot This utility is used to control network printers Weight Refers to the thickness of a font light medium or bold Also refers to the thickness of paper Windows Explorer The Windows program you can use to browse through open and manage the disk drives folders and files on your computer in a network system You can also use Windows Explorer to view and open shared ...

Страница 180: ...p 64 CAPT Problems 129 131 installing 26 63 messages 108 110 132 133 not working properly 129 printing with 65 93 uninstalling 136 using 25 110 Canon Advanced Printing Technology CAPT 152 Canon LASER SHOT LBP 1210 Help 64 Parts 4 5 Status Window 64 Trouble Shooter 64 Uninstallation 64 Canon LASER SHOT LBP 1210 group 64 using 64 Cassette 4 145 loading envelopes 18 22 loading paper 15 17 CD ROM Menu...

Страница 181: ...45 F Face down delivery 13 Face down delivery slot 4 Face up delivery 14 Features printer 2 File not found on CD ROM 130 Finishing tab preferences 76 Windows 95 98 Me 76 Windows NT 4 0 2000 XP 91 First print time 146 Fixing assembly 5 9 12 153 Font 154 Form 154 Front cover 4 G General tab Windows 95 98 Me 67 Windows NT 4 0 2000 XP 80 Glossary 151 162 Grayscale image 154 Guidelines printer 137 tone...

Страница 182: ...6 O Opening Status Window 94 Operating environment 146 Options menu using 98 100 Orientation 156 Overlay 72 88 156 P Page setup tab custom paper size 72 Windows 95 98 Me 70 Windows NT 4 0 2000 XP 86 Pages per minute 145 Paper 156 delivery 13 145 handling 7 24 loading 15 17 path 12 requirement 8 storing 11 Paper feed 156 Paper guides 4 Paper handling 7 24 Paper jams clearing 113 123 156 Paper path ...

Страница 183: ...inting 127 toner cartridge 138 weight 146 Printer animation status window 95 Printer driver 129 158 Printer icon 95 Printer properties Windows 95 98 Me dialog boxes 66 78 Windows NT 4 0 2000 XP dialog boxes 79 93 Printer ready icon 107 Printer sharing settings 63 Printing Canon Advanced Printing Technology 65 93 speed 145 Printing Failed 133 Printing job tab 103 Printing paused icon 107 Printing s...

Страница 184: ...tus Window 160 closing 108 icon 107 menu bar 95 opening 94 printer animation 95 printer icon 95 progress bar 95 status bar 95 tool bar 95 using 95 110 Storage environment 146 Storing paper 11 toner cartridge 139 Streaks vertical white 124 T Tab window printed job 104 printing job 103 using 103 waiting job 105 Temperature 146 Time out device 128 Toner 161 saver 161 Toner cartridge 138 146 cleaning ...

Страница 185: ...WebNetSpot 162 Weight paper 8 145 162 Weight printer 146 Windows 95 98 Me 26 details tab 68 finishing tab 76 general tab 67 page setup tab 70 printer properties 66 78 quality tab 77 sharing tab 69 Windows NT 4 0 2000 XP 35 default document properties 79 93 finishing tab 91 general tab 80 page setup tab 86 ports tab 81 printer properties 79 93 quality tab 92 scheduling tab 82 security tab 84 select...

Страница 186: ...s Cedex France CANON U K LTD Woodhatch Reigate Surrey RH2 8BF United Kingdom CANON DEUTSCHLAND GmbH Europark Fichtenhain A10 47807 Krefeld Germany CANON ITALIA S p A Palazzo L Strada 6 20089 Milanofiori Rozzano MI Italy CANON LATIN AMERICA INC 703 Waterford Way Suite 400 Miami Florida 33126 U S A CANON AUSTRALIA PTY LTD 1 Thomas Holt Drive North Ryde Sydney N S W 2113 Australia CANON SINGAPORE PTE...

Отзывы: