background image


11 

Quick User Guide 

 IRIScan

TM

 Express 4 


6. Troubleshooting 

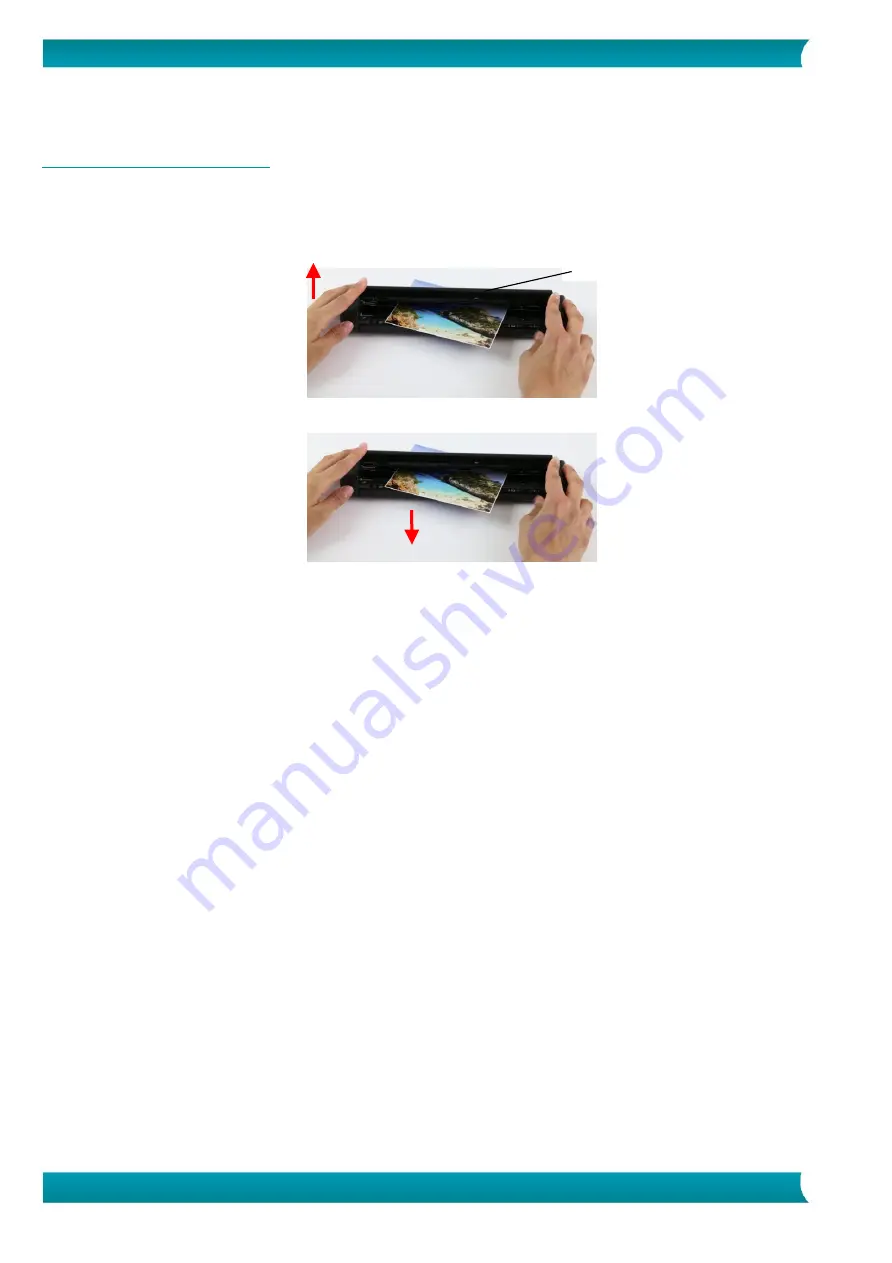
6.1 Clearing a Paper Jam 

 
1.


Open the cover by holding the scanner with one thumb on the feeder and another thumb on the cover. 
Carefully and firmly press your thumb into the feeder and then raise the cover. This will cause the top 
of the scanner to release from the bottom of the scanner. 


2.


Remove the item. 


Close the cover and reinsert the item to rescan.


Cover 

Содержание IRIScan Express 4

Страница 1: ...I R I S SA NV Rue du Bosquet 10 B 1348 Louvain la Neuve P 32 0 10 45 13 64 F 32 0 10 45 34 43 www irislink com Quick User Guide IRIScan Express 4 Quick User Guide ...

Страница 2: ... Documents 6 4 Using the Scanner 7 4 1 Top view 7 4 2 Rear view 7 4 3 Scanning with the IRIScan Express 4 8 5 Maintenance 9 5 1 Calibrate the scanner 9 5 2 Cleaning the scanner 10 6 Troubleshooting 11 6 1 Clearing a Paper Jam 11 6 2 Questions and Answers 12 6 3 Product Support 13 7 Specifications 14 7 1 Scanner Specifications 14 7 2 System Requirements 14 8 Legal Information 15 ...

Страница 3: ...on is subject to change without prior notice The software delivered with this scanner is The IRIScan Express 4 scanner is bundled with different software packages Windows Readiris Pro Cardiris Button Manager macOS Readiris Pro Capture Tool For detailed information about the full range of features of Readiris Cardiris and the Button Manager see their corresponding documentation on http www irislink...

Страница 4: ...ecurely on an even flat surface Tilted or uneven surfaces may cause mechanical or paper feeding problems Retain the scanner box and packing materials for shipping purposes 2 3 Installation 1 Go to www irislink com start 2 Scroll down to IRIScan Express 4 3 Select the version you acquired and click Getting Started 4 Then click Start now 5 Complete the form and click Register now Registering activat...

Страница 5: ...ppears This device is now ready to use 14 Click Finish and return to the setup screen 15 Click Button Manager to install the Button Manager A language selection window appears 16 Choose the language you wish to install The InstallShield wizard guides you through the rest of the installation 17 Click Finish to complete the installation 18 Click Cardiris Corporate to install Cardiris Follow the on s...

Страница 6: ...2 mm 127 x 177 mm 216 x 356 mm Business cards standard 3 5 x 2 88 x 50 mm or larger Long page 8 5 x36 216 x 914 mm for 300 dpi only Paper Weight 60 107 g m2 16 28 lb Unsuitable Documents Do not use the following types of originals for scanning or the scanner may malfunction or cause the original to jam in the slot Originals thicker than 0 8 mm Originals with either side shorter than 50 mm Original...

Страница 7: ...ert document into the feed slot printed side UP and aligned with the left edge to begin scanning 2 Paper guide Adjust to scan documents of different size 3 Scanner button Press to scan on Windows PC only 4 2 Rear view Item Name Description 1 Micro USB port Connect to a computer via the micro USB cable 2 3 1 1 ...

Страница 8: ...nsitive Please do not push your document into the feeding slot or the top of your image will be cut Simply let go the document when it begins to feed into the slot 1 Insert your document FACE UP into the feeder and align it to the left edge of the feeder Then adjust the paper guide to the right hand side of the document 2 Gently push the document into the feed slot 3 On Windows press the scanner b...

Страница 9: ... Finder Applications Capture Tool 3 The Capture Tool dialog box will be displayed 4 Click the Setup button to open the Scanner Properties dialog box 5 In Windows click the Settings tab and then click the Calibration button 6 On Mac OS click the Enhancement tab and then click the Calibration button 7 The Insert calibration sheet dialog box appears 8 Hold the edges of the calibration sheet included ...

Страница 10: ...canner Warning Do not use any solvents or corrosive liquid i e alcohol kerosene etc to clean any part of the scanner otherwise the plastic material may be permanently damaged 1 Open the cover by holding the scanner with one thumb on the feeder and another thumb on the cover Carefully and firmly press your thumb into the feeder and then raise the cover This will cause the top of the scanner to rele...

Страница 11: ...ding the scanner with one thumb on the feeder and another thumb on the cover Carefully and firmly press your thumb into the feeder and then raise the cover This will cause the top of the scanner to release from the bottom of the scanner 2 Remove the item Close the cover and reinsert the item to rescan Cover ...

Страница 12: ...fore scanning 3 Clean the rollers and glass with the included cleaning cloth Refer to the section Clean the scanner Question When I choose 600 dpi as optical resolution why are the auto crop and deskew functions disabled Answer Since performing auto crop and deskew consumes great deal of system memory it is recommended to select an optical resolution below 600 dpi to prevent errors Question Should...

Страница 13: ...aded from the I R I S website Open the Uninstall Scanner folder Double click Press Uninstall Enter your super user password The IRIScan driver and Capture Tool will be removed 6 3 Product Support Should you still experience issues using the IRIScan Express 4 consult the Technical Support section of http www irislink com ...

Страница 14: ...10ºC 35ºC 50ºF 95ºF Humidity 10 85 RH Dimensions HxWxD 11 4 x 2 x 1 4 290 x 52 x 35 mm Weight 0 88 lbs 400g 7 2 System Requirements For Windows Memory Minimum 1 GB RAM 2 GB is recommended Hard disk space 1 GB of available hard disk space Operating System Windows 7 Windows 8 Windows 10 For macOS Memory 1GB RAM 2 GB is recommended Hard disk space 1GB of available hard disk space Operating System Mac...

Страница 15: ...oned in this document may be trademarks or registered trademarks of their respective companies Warranty I R I S makes no warranty of any kind with regard to this material including but not limited to the implied warranties of fitness for a particular purpose I R I S shall not be liable for errors contained herein or for incidental or consequential damages in connection with the furnishing performa...

Страница 16: ...interference by one or more of the following measures Increase the separation between the equipment and receiver Connect the equipment into an outlet on a circuit different from that to which the receiver isconnected Consult the dealer or an experienced radio TV technician for help This device complies with Part 15 of the FCC Rules Operation is subject to the following two conditions 1 This device...

Страница 17: ...can not be disposed of with your other household waste Instead it should be sent to appropriate facilities for recovery and recycling in an effort to protect human health and the environment Fore more information about where you can drop off your waste equipment for recycling please contact your local city office your household waste disposal service or the shop where you purchased the product ...

Отзывы: