


Department ID Management
6-6
6
S
y
ste
m
M
anag
er
S
e
tti
ngs
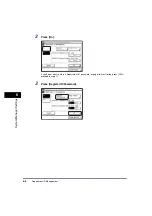
Department ID Management
You can register a Department ID and password for each department, and manage the machine
by limiting its use to only those who enter the correct Department ID and password. This is
called Department ID Management. Department IDs and passwords for up to 1000
departments can be registered. Use Department ID Management to keep track of the copy,
scan, and print totals for each department.
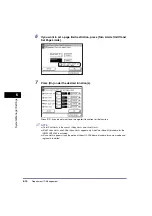
With Department ID Management, the following settings can be specified:
•
Turn Department ID Management ‘On’ or ‘Off’.
•
Register the Department ID and password.
•
Set page limits for scans, prints, and copies.
•
Accept or reject print and scan jobs from computers with unknown IDs.
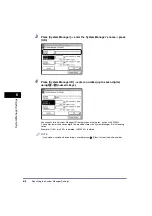
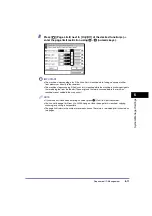
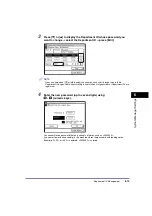
The Department ID Management Settings can be set in the Additional Functions screen. For
instructions, see “What Are Additional Functions?,” on p. 4-2.
After editing settings on Department ID Management, make sure to press
(Log In/Out) to
return to the screen for entering the Department ID and password.
IMPORTANT
•
If the optional Card Reader-E1 is attached, Department ID Management is automatically activated. (See
“Card Reader-E1,” on p. 3-19.)
•
Do not change the password when using a control card. The control card will become unusable if the
password for the Department ID is changed.
•
If User ID Management is set to ‘On’, Department ID Management is performed on the Department IDs
that correspond to registered users.
•
If User ID Management is set to ‘On’, the registered User ID and password in Department ID
Management of the machine must be matched. If the registered User ID and password in Department
ID are changed due to the changes made in “Device Information Settings,” on p. 6-32, make sure that
you change the user information accordingly. For instructions on how to set User ID and password, see
the Remote UI Guide.
Содержание iR2018i
Страница 2: ...iR2030 iR2025 iR2022i iR2018i Reference Guide 0 Ot ...
Страница 115: ...Available Paper Stock 2 58 2 Basic Operations ...
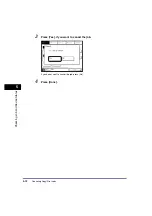
Страница 144: ...Card Reader E1 3 29 3 Optional Equipment 11 Press OK ...
Страница 151: ...Card Reader E1 3 36 3 Optional Equipment 4 Press Done 5 Press OK ...
Страница 154: ...Card Reader E1 3 39 3 Optional Equipment 5 Press Done 6 Press OK ...
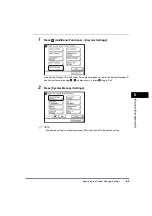
Страница 215: ...Timer Settings 4 60 4 Customizing Settings 1 Press Additional Functions Timer Settings 2 Press Date Time Settings ...
Страница 241: ...Cleaning and Adjusting the Machine 4 86 4 Customizing Settings ...
Страница 346: ...Drum Unit 7 29 7 Routine Maintenance 2 Open the front cover 3 Release the unlock lever to its horizontal position ...
Страница 443: ...Index 9 16 9 Appendix ...