


Specifying Common Settings
4-27
4
C
u
s
to
m
iz
in
g S
e
tt
ing
s
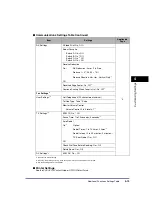
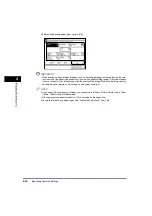
Auto Paper Selection/Auto Drawer Switching
You can set which paper sources can be used for Automatic Paper Selection and Auto Drawer
Switching. This setting can be made independently for all the different functions of the machine,
and is especially useful when you want to use different paper sources for different purposes.
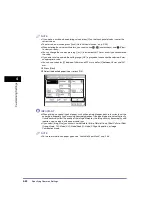
NOTE
•
Paper sources set to ‘On’ are used for the following functions:
- APS (Auto Paper Selection): The machine automatically selects the appropriate paper size (paper
source) based on the original’s size and copy ratio settings (when making a copy), or the set ratio of
the image (when receiving a fax).
- ADS (Auto Drawer Switching): If a paper source runs out of paper during a continuous print job, the
machine automatically selects another paper source with the same paper size, and begins feeding
paper from that paper source.
•
The default settings of Copy, Receive (Fax) and Other are ‘Off’ for the stack bypass, and ‘On’ for the
other paper sources.
•
The default settings of Printer are “On” for all paper sources except for the stack bypass. You cannot set
the stack bypass for Printer.
•
When you set ‘Off’ for the stack bypass and no optional cassette feeding module attached, Auto Drawer
Switching cannot be used for the iR2018i.
1
Press
(Additional Functions)
➞
[Common Settings].
If necessary, see the screen shot in step 1 of “Initial Function at Power ON,” on p. 4-15.
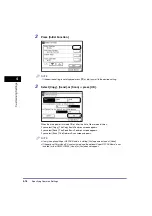
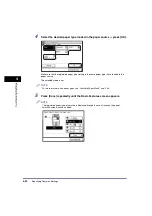
2
Press [
▼
] or [
▲
] until [Drawer Eligibility For APS/ADS] appears
➞
press [Drawer Eligibility For APS/ADS].
Содержание iR2018i
Страница 2: ...iR2030 iR2025 iR2022i iR2018i Reference Guide 0 Ot ...
Страница 115: ...Available Paper Stock 2 58 2 Basic Operations ...
Страница 144: ...Card Reader E1 3 29 3 Optional Equipment 11 Press OK ...
Страница 151: ...Card Reader E1 3 36 3 Optional Equipment 4 Press Done 5 Press OK ...
Страница 154: ...Card Reader E1 3 39 3 Optional Equipment 5 Press Done 6 Press OK ...
Страница 215: ...Timer Settings 4 60 4 Customizing Settings 1 Press Additional Functions Timer Settings 2 Press Date Time Settings ...
Страница 241: ...Cleaning and Adjusting the Machine 4 86 4 Customizing Settings ...
Страница 346: ...Drum Unit 7 29 7 Routine Maintenance 2 Open the front cover 3 Release the unlock lever to its horizontal position ...
Страница 443: ...Index 9 16 9 Appendix ...