


Finisher-U2
3-12
3
O
p
ti
ona
l E
q
u
ipm
ent
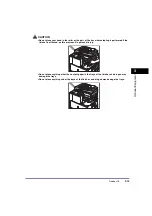
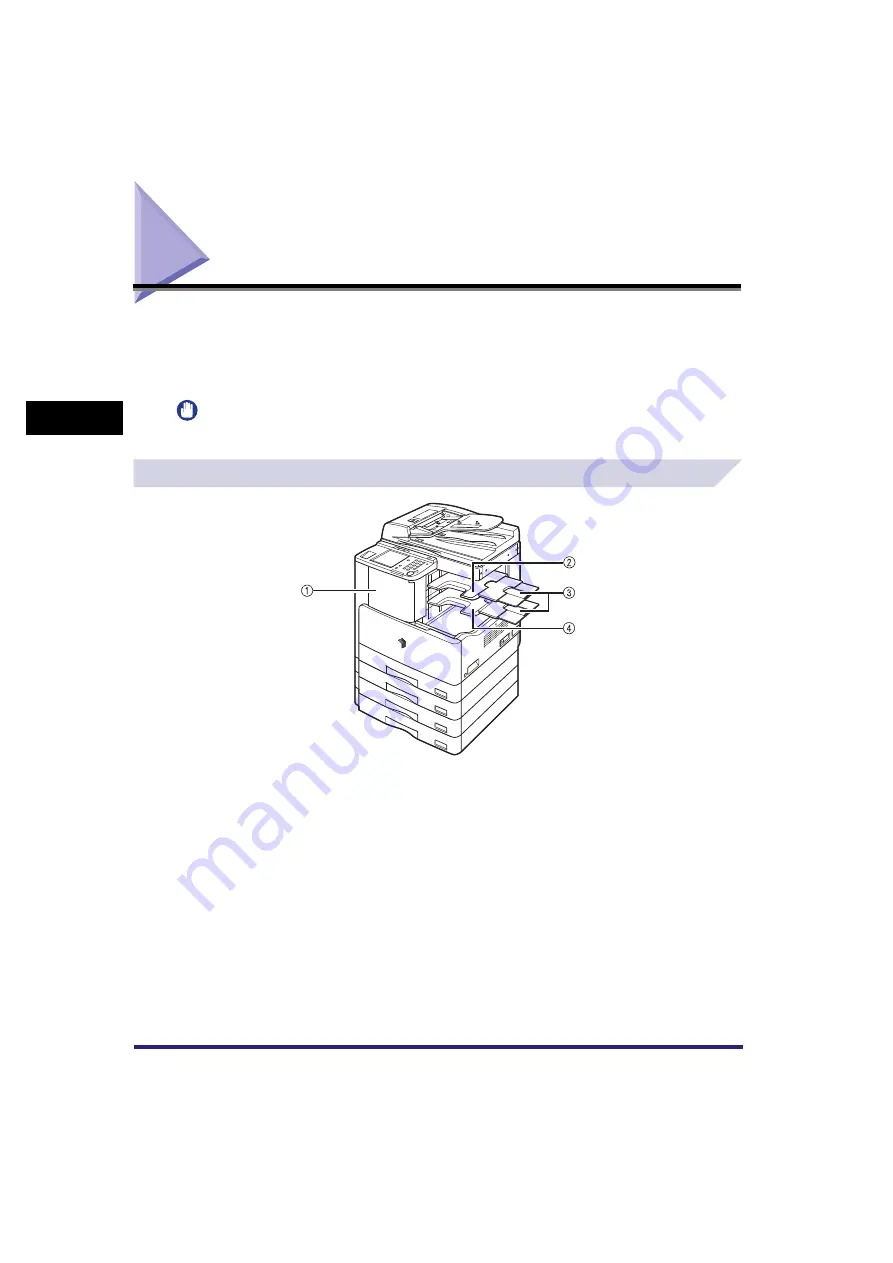
Finisher-U2
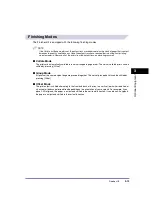
The Finisher-U2 is equipped with the following finishing modes: Collate, Group, Offset, and
Staple. (See “Finishing Modes,” on p. 3-13.)
If the optional Additional Finisher Tray-C1 is attached to the Finisher-U2, prints can be delivered
to two different locations.
IMPORTANT
The Finisher-U2 cannot be attached with the optional Inner 2 Way Tray-E2.
Parts and Their Functions
a
Front Cover of the Finisher
Open this cover to replace the staple cartridge in the
stapler unit, or to clear a staple jam. For instructions on
replacing the staple cartridge, see “Replacing the Staple
Cartridge,” on p. 7-17. For instructions on clearing a staple
jam, see “Clearing Staple Jams,” on p. 8-41.
b
Additional Finisher Tray-C1
The Additional Finisher Tray-C1 can be attached to the
optional Finisher-U2, and provides an additional paper
output tray.
c
Auxiliary Tray
If you are printing on large size paper, such as A3, pull out
the auxiliary tray.
d
Output Tray
Paper is output to this tray.
Содержание iR2018i
Страница 2: ...iR2030 iR2025 iR2022i iR2018i Reference Guide 0 Ot ...
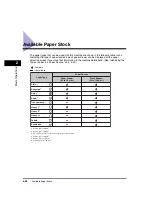
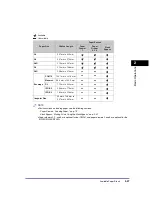
Страница 115: ...Available Paper Stock 2 58 2 Basic Operations ...
Страница 144: ...Card Reader E1 3 29 3 Optional Equipment 11 Press OK ...
Страница 151: ...Card Reader E1 3 36 3 Optional Equipment 4 Press Done 5 Press OK ...
Страница 154: ...Card Reader E1 3 39 3 Optional Equipment 5 Press Done 6 Press OK ...
Страница 215: ...Timer Settings 4 60 4 Customizing Settings 1 Press Additional Functions Timer Settings 2 Press Date Time Settings ...
Страница 241: ...Cleaning and Adjusting the Machine 4 86 4 Customizing Settings ...
Страница 346: ...Drum Unit 7 29 7 Routine Maintenance 2 Open the front cover 3 Release the unlock lever to its horizontal position ...
Страница 443: ...Index 9 16 9 Appendix ...