


9
9
9-162
9-162
Installation > TYPE6:2.5inch/80GB HDD-E1/Removable HDD Kit-AE1 Installation Procedure > Checking after Installation
Installation > TYPE6:2.5inch/80GB HDD-E1/Removable HDD Kit-AE1 Installation Procedure > Checking after Installation
4) Install the Rear Upper Cover (Rear Upper Cover 1 and HDD Cover).
5) Close the Waste Toner Cover.
6) Tighten the screws securing the Rear Upper Cover 1 and HDD Cover. (Use the screws
removed in “Removing the Covers” step 1.)
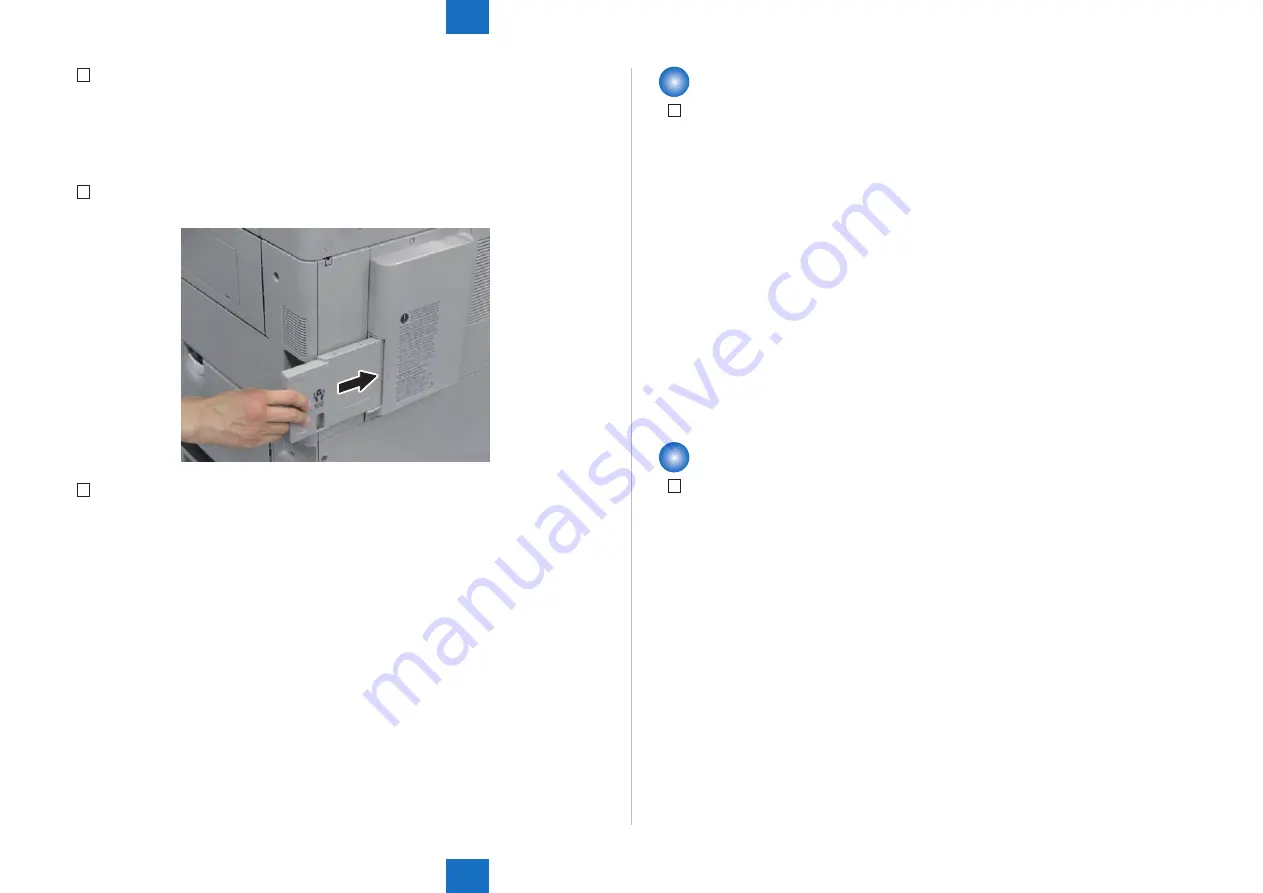
7) Install the HDD Case to the HDD Slot Unit.
8) Be sure to request the user to padlock the removable HDD to discourage theft.
F-9-353
Setting after Installation
1) Connect the power plug to the outlet.
2) Open the Switch Cover and turn ON the main power switch.
3) Perform license registration.
In the case of LMS (License Management System)
• Write down the serial number of the machine.
• Refer to the license access number certificate, and obtain a license key from LMS (License
Management System).
• Register the license key.
Settings/Registration > Management Setting > License/Other > Register License
In the case of CDS Contents Delivery System)
• Enter the license access number in Register/Update Software of Settings/Registration to
perform automatic registration.
4) Turn OFF and then ON the main power switch.
5) Delete the data on the flash memory.
• Settings/Registration > Management Settings > Data Management > Delete Old Data
Checking after Installation
1) Check that the HDD is recognized.
• Select [service mode > COPIER > Display > ACC_STS > HDD], and check that the
manufacturer’s name and the model number are displayed.
2) Check that the license is registered.
• Select Check Counter > Device Configuration Information, and check that “HDD” is
displayed


