Reinstalling the Printer
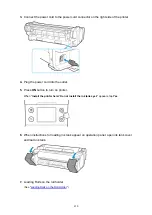
The basic workflow for reinstalling the printer is as follows.
For detailed instructions, see the Setup Guide.
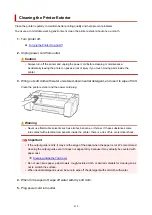
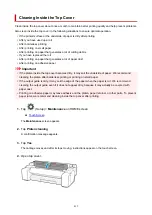
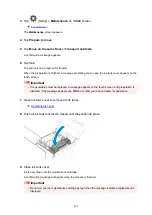
Assemble the stand (Option)
1.
To use the optional stand, assemble the stand by referring to the Printer Stand Setup
Guide that was provided with the stand.
Caution
• The stand must be assembled by at least two people on a flat surface. Attempting assembly by
yourself poses a risk of injury or bending the Stand.
• When assembling the stand, lock all four of the casters. Attempting to move the stand when the
casters are locked poses a risk of injury or damage to the location site.
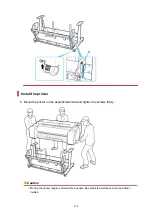
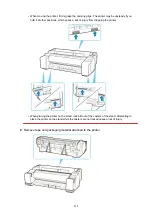
• Before moving the assembled stand, lift the support rod to the position shown (A) and unlock all
four casters. Moving the stand with the support rod lowered or the casters locked may cause
injury or damage the area of installation or basket cloth.
427
Содержание imagePROGRAF TM-200
Страница 1: ...TM 200 Online Manual English ...
Страница 54: ...54 ...
Страница 84: ...5 Tap ON 84 ...
Страница 94: ...94 ...
Страница 95: ...Basket Using the Basket 95 ...
Страница 104: ...4 Return to the regular position 104 ...
Страница 106: ...Operations and Touch Screen Operation Panel Touch Screen Checking Instructions During Printer Operations 106 ...
Страница 114: ...114 ...
Страница 119: ...3 Flick up and down and tap Other device settings 4 Tap Energy saving settings 5 Tap Auto power off 119 ...
Страница 141: ...For more on setting items on the operation panel Setting Items on Operation Panel 141 ...
Страница 146: ...HP GL 2 Settings Menus on HP GL 2 print settings Menu Setting Combinations Standard Size Table 146 ...
Страница 166: ...HP GL 2 Settings Menus on HP GL 2 print settings Menu Setting Combinations Standard Size Table 166 ...
Страница 177: ...F Range which cannot be printed G Paper for printing 177 ...
Страница 179: ...179 ...
Страница 182: ... Even if the image runs off the edge of the paper it is rotated to expand the print range 182 ...
Страница 185: ...A Output object area B Fit to long side post processing size 185 ...
Страница 187: ... ON is selected when printing on roll 187 ...
Страница 189: ...A Position of cut when OFF B Position of cut when ON 189 ...
Страница 197: ...197 ...
Страница 203: ...Printed without upper lower blank area 203 ...
Страница 209: ... Printed image after reduced A Position of cut for A3 size 209 ...
Страница 241: ...The resending setting is completed 241 ...
Страница 248: ... H Cutter Blade A round bladed cutter for automatic paper cutting 248 ...
Страница 254: ...Optional accessories Roll Holder Set Stand 254 ...
Страница 263: ...263 ...
Страница 265: ... 2 The password is specified automatically when the printer is turned on for the first time 265 ...
Страница 293: ...Performing Changing Network Settings Canon IJ Network Device Setup Utility Screen Performing Network Settings 293 ...
Страница 306: ...Note This setting item is not available depending on the printer you are using 8 Click Set 306 ...
Страница 316: ...7 Click OK to close screen 316 ...
Страница 322: ...IJ Network Device Setup Utility Menus Printer Settings Menu View Menu Option Menu Help Menu 322 ...
Страница 349: ...4 Enter wireless LAN router password Your device is connected to the printer 5 Start printing from application 349 ...
Страница 351: ...Adjusting the Print Head Adjusting the Print Head Troubleshooting Paper Abrasion and Blurry Images 351 ...
Страница 362: ...Adjusting Feed Amount Adjusting Feed Amount Adjusting Vacuum Strength 362 ...
Страница 366: ...7 Tap paper to adjust A test pattern is printed for adjustment and adjustment is finished 366 ...
Страница 375: ...Ink Tanks Ink Tanks Replacing Ink Tanks Checking Ink Tank Levels When to Replace Ink Tanks 375 ...
Страница 377: ...Note For instructions on replacing the ink tanks see Replacing Ink Tanks 377 ...
Страница 386: ...Print Head Print Head Checking for Nozzle Clogging Cleaning the Print Head Replacing the Print Head 386 ...
Страница 408: ...Cutter Blade Cutter Blade Replacing the Cutter Blade 408 ...
Страница 416: ...Related Topic Cleaning the Print Heads 416 ...
Страница 417: ...Cleaning the Printer Cleaning the Printer Exterior Cleaning Inside the Top Cover Cleaning the Print Head 417 ...
Страница 422: ...2 Close top cover 422 ...
Страница 423: ...Other Maintenance Preparing to Transfer the Printer Reinstalling the Printer Firmware update 423 ...
Страница 433: ...Specifications Specifications Print Area 433 ...
Страница 440: ...Safety Safety Precautions Regulatory Information WEEE EU EEA When Repairing Lending or Disposing of the Printer 440 ...
Страница 460: ...Basic Printing Workflow Printing procedure Canceling print jobs Pausing Printing 460 ...
Страница 478: ...Note The screen may differ slightly depending on the model you are using 478 ...
Страница 480: ...Pausing Printing Pausing Printing 480 ...
Страница 485: ...Printing from iOS Device AirPrint 485 ...
Страница 493: ...Printing Photos and Business Documents Printing By Setting Print Purpose Edit in PosterArtist and Print 493 ...
Страница 498: ...Note For instructions on how to edit and rearrange images refer to the PosterArtist manual 498 ...
Страница 499: ...Printing CAD Drawings Printing By Setting Print Purpose Printing from AutoCAD 499 ...
Страница 532: ...Note Selecting Enlarged Reduced Printing changes the printable area of the document 532 ...
Страница 571: ...7 Complete the setup Click OK When you print the upper and lower margins are reduced so that you can save paper 571 ...
Страница 592: ...Printer Driver Overview of the Printer Driver Printer Driver Description Updating the Printer Driver 592 ...
Страница 604: ...In such cases take the appropriate action as described 604 ...
Страница 648: ...Basic Print Job Operations Managing Job Queue Delete 648 ...
Страница 681: ...Check 8 Is the edge of the cutter blade blunt Replace the cutter blade Replacing the Cutter Blade 681 ...
Страница 774: ...Note To stop printing press the Stop button 774 ...
Страница 785: ...1201 Cause The ink tank cover is open What to Do Close the ink tank cover 785 ...
Страница 786: ...1210 Cause The ink tank cover is open What to Do Close the ink tank cover 786 ...
Страница 808: ...1485 Cause Cannot use attached print head What to Do Attach the correct print head Replacing the Print Head 808 ...
Страница 812: ...1500 Cause The ink in the ink tank is running low What to Do Prepare a new ink tank 812 ...
Страница 814: ...1552 Cause A genuine Canon ink tank has been inserted What to Do To dismiss the message tap OK on the touch screen 814 ...
Страница 817: ...1660 Cause Ink tank not inserted What to Do Insert the ink tank correctly Replacing Ink Tanks 817 ...
Страница 824: ...1752 Cause The ink has run out What to Do Open the ink tank cover and then replace the ink tank Replacing Ink Tanks 824 ...
Страница 849: ...3331 Cause Print results may be abnormal as there is a large volume of print data What to Do Check the print job 849 ...

