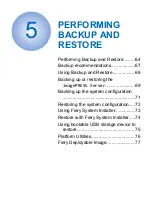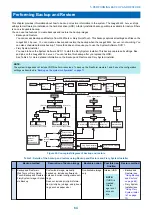
Using Backup and Restore
Backup and Restore allows you to create a backup of the
imagePRESS Server
for quick recovery later when any problem
happens. It also allows you to create a backup of the Fiery Resources and Settings. You can restore the
imagePRESS Server
either from images stored on the local hard disk, or from a bootable USB drive. Backup and Restore also provides the feature of
creating the scheduled backups.
You must log in to the
imagePRESS Server
as a system administrator to use the Backup and Restore features.
You can access Backup and Restore from the WebTools or Command WorkStation.
To access Backup and Restore from Command WorkStation
1. Launch Command WorkStation and login to the
imagePRESS Server
with Administrator privileges.
2. From the Server menu, select Device Center.
3. In Device Center, select Tools > Fiery Resources and Settings or Fiery System Image.
The Backup and Restore will display on the default web browser window.
To access Backup and Restore from WebTools
1. Open an Internet browser and type the IP address of the
imagePRESS Server
.
NOTE:
As a security measure, WebTools is designed to work only over Hyper Text Transfer Protocol Secure (HTTPS). By default,
WebTools uses a self-signed certificate created by the Fiery. This causes the web browser to display a untrusted certificate
message while accessing WebTools. It is safe to ignore this message and proceed to access WebTools.
2. In WebTools, click the Backup and Restore tab on the left side.
3. Log on with Administrator privileges and click OK.
NOTE:
The default password (Fiery.1) will be set after any of the following:
• You re-install the system software
• You restore the recovery partition (from Backup and Restore)
5. PERFORMING BACKUP AND RESTORE
68
Содержание ImagePRESS Server H350 V2
Страница 8: ...Introduction 1 Introduction 2 Specifications 7 ...
Страница 17: ...INSTALLING HARDWARE 2 Installing Hardware 11 ...
Страница 26: ...USING THE IMAGEPRESS SERVER 3 Using the imagePRESS Server 20 ...
Страница 35: ...REPLACING PARTS 4 Replacing parts 29 ...
Страница 38: ...1 2 Figure 19 Inside the front panel No Item 1 DVD drive 2 DVD eject button 4 REPLACING PARTS 31 ...
Страница 86: ...INSTALLING SYSTEM SOFTWARE 6 Installing System Software 80 ...
Страница 91: ...TROUBLESHOOTI NG 7 Troubleshooting 85 ...
Страница 104: ...INSTALLATION PROCEDURE 8 Installation 98 Removable HDD Kit B5 108 ...

