COPYRIGHT © CANON ELECTRONICS INC. 2012
CANON P-208 FIRST EDITION
3-11
CHAPTER 3 DISASSEMBLY & REASSEMBLY
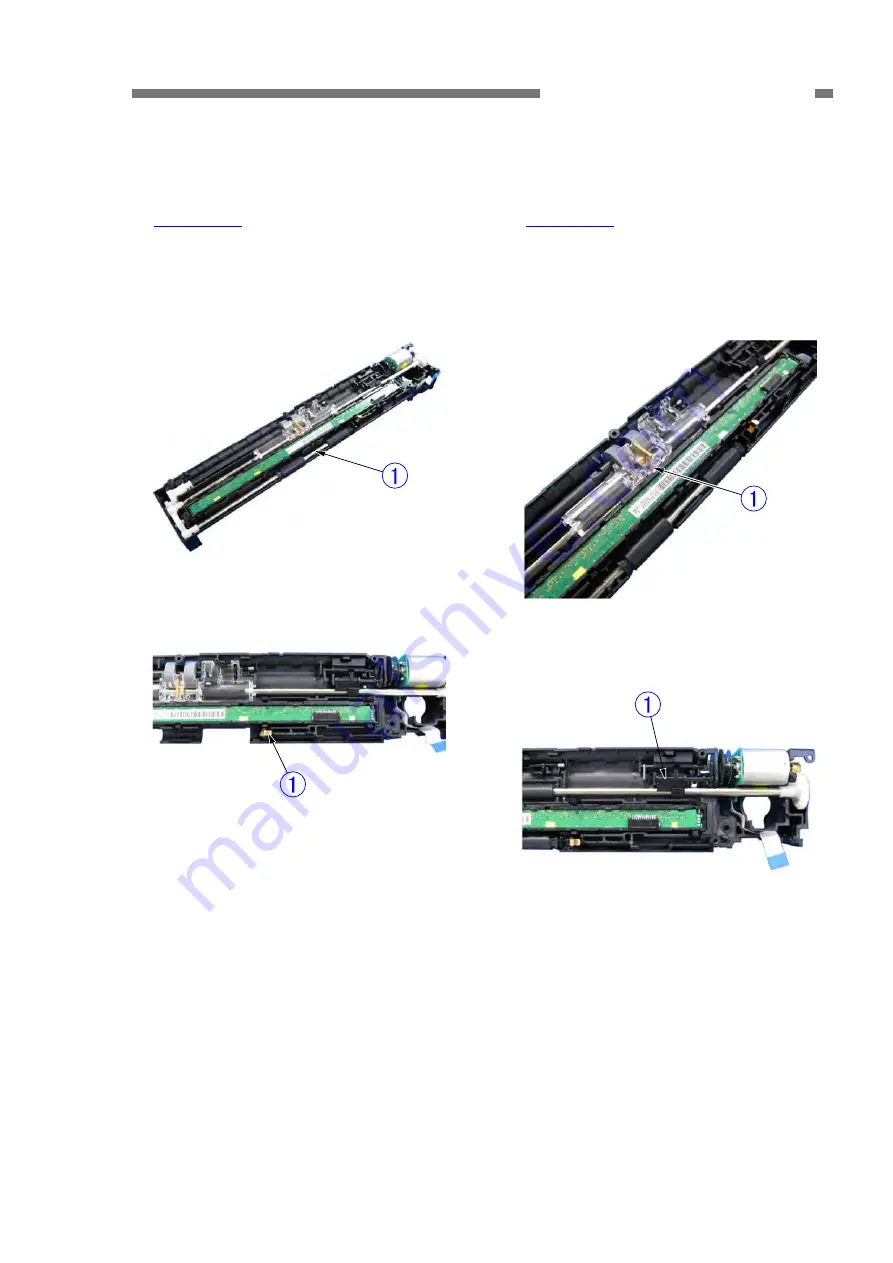
2. Eject Roller [Drive]
1) Remove the control PCB.
2) Remove the eject roller
{
1
together with
the bearing at the end.
Note:
The gear at the end may be detached
from the shaft.
Figure 3-303
3) Remove the plate spring
{
1
.
Figure 3-304
Notes on assembling
Push in the bearing until it is fully fitted.
3. Registration Roller [Drive]
1) Remove the control PCB.
2) Hold the projection
{
1
of the light guide
and remove the light guide.
Note:
The sintered bearing is detached to-
gether with the light guide.
Figure 3-305
3) Remove the power lever
{
1
.
Figure 3-306
Содержание imageFORMULA P-208II
Страница 6: ......
Страница 8: ......
Страница 18: ......
Страница 20: ......
Страница 40: ......
Страница 42: ......
Страница 58: ......
Страница 64: ......
Страница 66: ......
Страница 110: ......
Страница 112: ......
Страница 117: ...COPYRIGHT CANON ELECTRONICS INC 2012 CANON P 208 FIRST EDITION A 5 APPENDIX 2 Upper Unit Figure 200 ...
Страница 119: ...COPYRIGHT CANON ELECTRONICS INC 2012 CANON P 208 FIRST EDITION A 7 APPENDIX 3 Base Unit Figure 300 ...
Страница 122: ......
Страница 124: ...1212TG ...


