


0SCJ-061
Scanning Documents Directly to USB Memory
This section describes how to scan documents to save directly in a USB memory device connected to the machine. You can save scanned
documents as JPEG images, PDF files or in other digital file formats.
Available USB Memory Devices
You can use USB memory devices with the following format styles.
FAT16 (memory capacity: up to 2 GB)
FAT32 (memory capacity: up to 32 GB)
Do not use non-standard USB memory devices. You may not be able to save data properly in some USB memory devices.
Do not connect anything other than a USB memory device. USB memory devices cannot be connected via a USB hub or an
extension cable.
Do not use USB memory devices with special functions such as built-in security functions.
The USB port on the front of the machine supports USB 2.0.
If a folder in a USB memory device has many files, saving scanned data will take more time. Use your computer to delete
unnecessary files on your USB memory device or move them to a different folder.
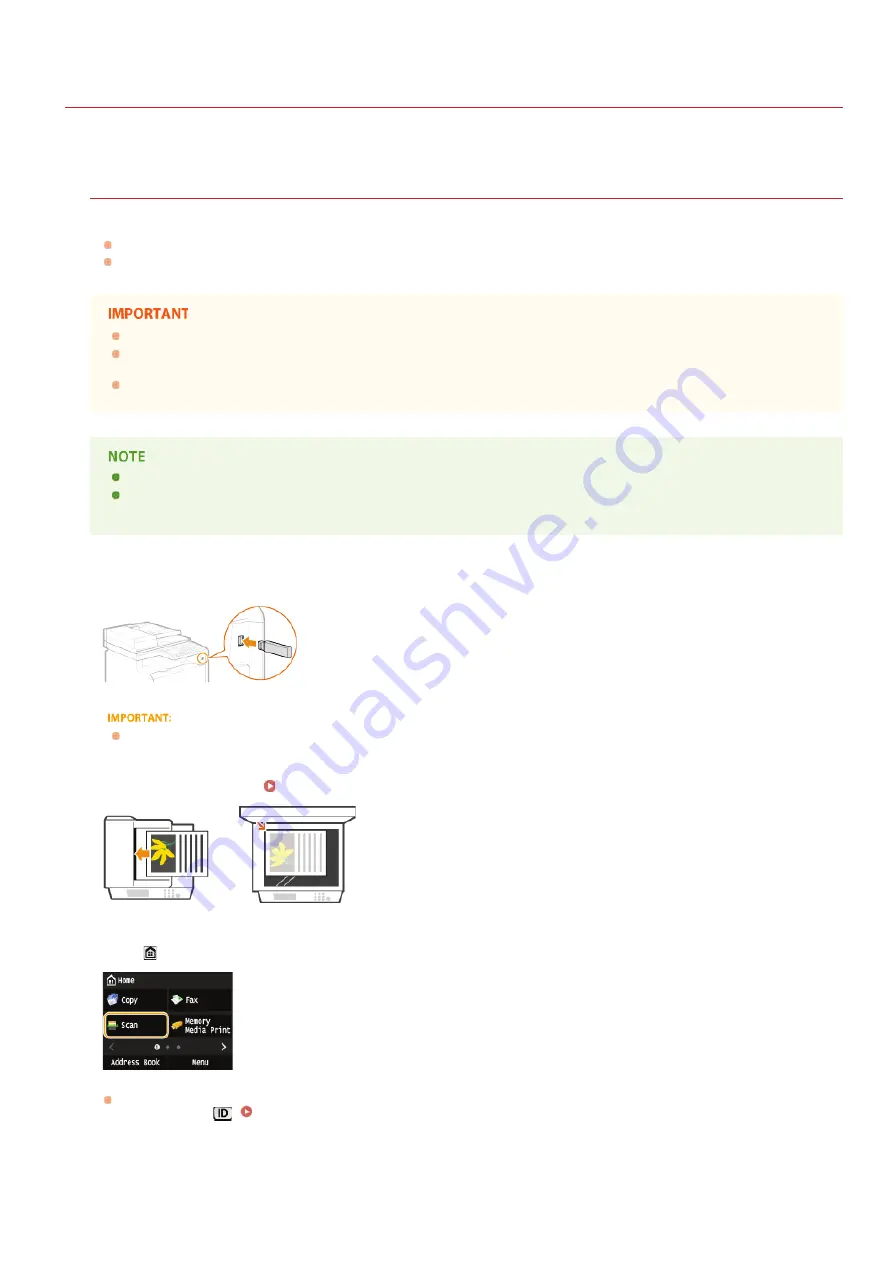
Connect a USB memory device to the USB port (USB2.0).
Do not remove the USB memory device or shock or shake the device or the machine when data is being read or written. Also,
do not turn OFF the machine while the processing is in progress.
Place the document(s).
Press
and tap <Scan>.
When the logon screen appears, use the numeric keys to enter the user name and password. Then select the authentication
server and press
.
.
Tap <USB Memory>.
1
2
3
4
㻞㻢㻡㻌㻛㻌㻣㻟㻡
Содержание i-SENSYS MF623Cn
Страница 35: ...Display 㻟㻡㻌㻛㻌㻣㻟㻡 ...
Страница 43: ...LINKS Setting the Department ID Management Setting the System Manager ID 㻠㻟㻌㻛㻌㻣㻟㻡 ...
Страница 52: ...LINKS Paper Notify to Check Paper Settings 㻡㻞㻌㻛㻌㻣㻟㻡 ...
Страница 89: ...LINKS Basic Copy Operations 㻤㻥㻌㻛㻌㻣㻟㻡 ...
Страница 94: ...LINKS Basic Copy Operations Adjusting Color Balance Adjusting Sharpness 㻥㻠㻌㻛㻌㻣㻟㻡 ...
Страница 96: ...LINKS Basic Copy Operations Adjusting Density Adjusting Sharpness 㻥㻢㻌㻛㻌㻣㻟㻡 ...
Страница 115: ...LINKS Receiving Faxes MF729Cx MF728Cdw MF628Cw 㻝㻝㻡㻌㻛㻌㻣㻟㻡 ...
Страница 152: ...LINKS Receiving Faxes MF729Cx MF728Cdw MF628Cw Checking Status and Log for Sent and Received Documents 㻝㻡㻞㻌㻛㻌㻣㻟㻡 ...
Страница 166: ...5 㻝㻢㻢㻌㻛㻌㻣㻟㻡 ...
Страница 191: ...㻝㻥㻝㻌㻛㻌㻣㻟㻡 ...
Страница 201: ...LINKS Printing a Document 㻞㻜㻝㻌㻛㻌㻣㻟㻡 ...
Страница 203: ...LINKS Printing a Document Printing Multiple Pages onto One Sheet Printing Booklet MF729Cx MF728Cdw MF724Cdw 㻞㻜㻟㻌㻛㻌㻣㻟㻡 ...
Страница 208: ...LINKS Printing a Document 㻞㻜㻤㻌㻛㻌㻣㻟㻡 ...
Страница 212: ...LINKS Printing a Document Printing Borders Printing Dates and Page Numbers 㻞㻝㻞㻌㻛㻌㻣㻟㻡 ...
Страница 214: ...LINKS Printing a Document For more information click Help on the printer driver screen 㻞㻝㻠㻌㻛㻌㻣㻟㻡 ...
Страница 263: ...LINKS Configuring Scan Settings in Simple Mode Scanning Using an Application 㻞㻢㻟㻌㻛㻌㻣㻟㻡 ...
Страница 308: ...㻟㻜㻤㻌㻛㻌㻣㻟㻡 ...
Страница 348: ...LINKS Setting IPv6 Addresses Viewing Network Settings Configuring WINS 㻟㻠㻤㻌㻛㻌㻣㻟㻡 ...
Страница 354: ...Configuring DNS 㻟㻡㻠㻌㻛㻌㻣㻟㻡 ...
Страница 362: ...LINKS Setting Up Print Server 㻟㻢㻞㻌㻛㻌㻣㻟㻡 ...
Страница 385: ...LINKS Changing the Maximum Transmission Unit Setting a Wait Time for Connecting to a Network 㻟㻤㻡㻌㻛㻌㻣㻟㻡 ...
Страница 483: ...Portal Page main page will be displayed Remote UI Screens 4 㻠㻤㻟㻌㻛㻌㻣㻟㻡 ...
Страница 490: ...LINKS Remote UI Screens 㻠㻥㻜㻌㻛㻌㻣㻟㻡 ...
Страница 514: ...USA Layout UK Layout Menu Preferences English Keyboard Layout Select USA Layout or UK Layout 㻡㻝㻠㻌㻛㻌㻣㻟㻡 ...
Страница 533: ...Initial Settings for Fax Functions MF729Cx MF728Cdw MF628Cw 㻡㻟㻟㻌㻛㻌㻣㻟㻡 ...
Страница 690: ...For more information about this function see Printing Booklet MF729Cx MF728Cdw MF724Cdw 㻢㻥㻜㻌㻛㻌㻣㻟㻡 ...
Страница 707: ...When replacing toner cartridges see How to Replace Toner Cartridges 㻣㻜㻣㻌㻛㻌㻣㻟㻡 ...
Страница 717: ...Click Back Exit 6 㻣㻝㻣㻌㻛㻌㻣㻟㻡 ...
Страница 729: ...Check the port settings Click the Ports tab Make sure that the correct port is selected for the printer 3 㻣㻞㻥㻌㻛㻌㻣㻟㻡 ...
Страница 736: ...㻝㻌㻛㻌㻠㻣 ...
Страница 768: ...㻟㻟㻌㻛㻌㻠㻣 ...


