background image

Содержание ELURA 2 MC

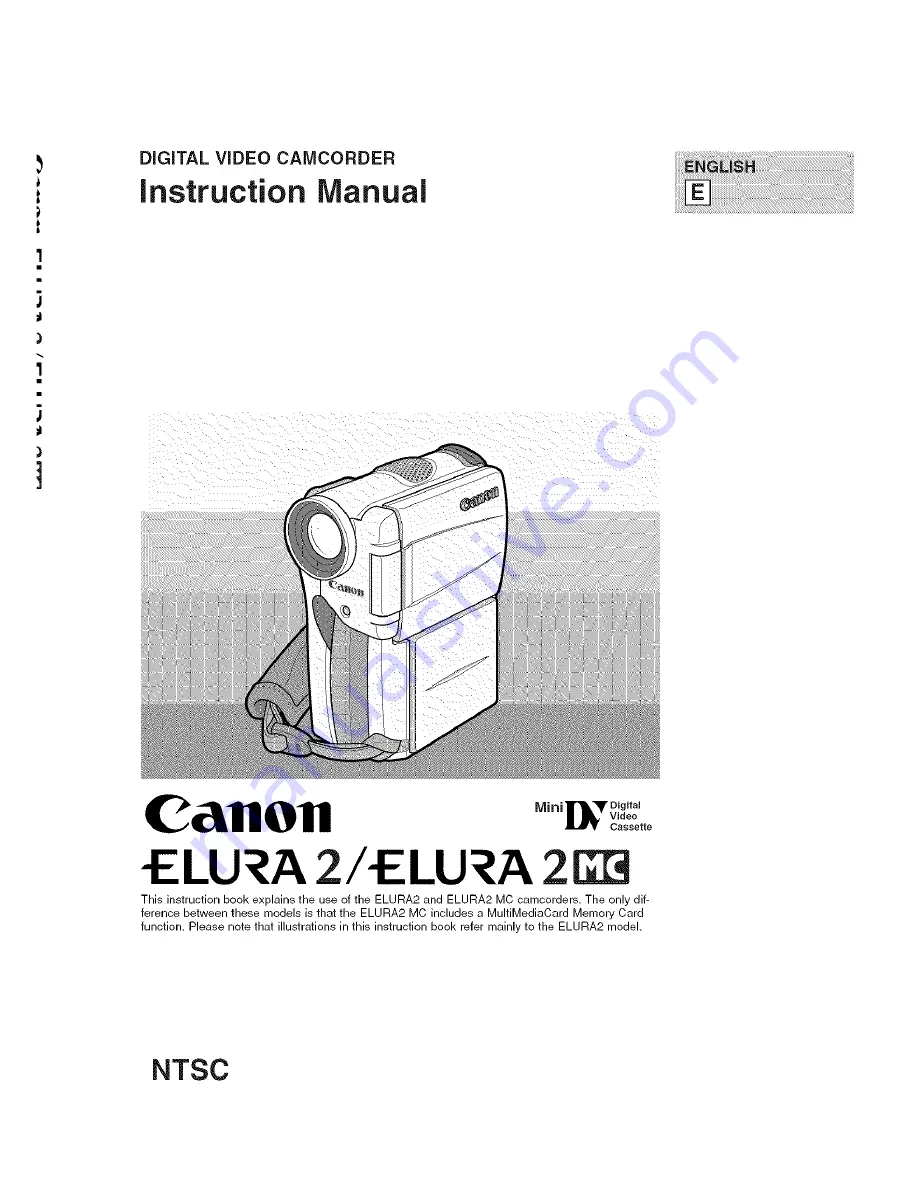
Страница 1: ... ELU _A 2G_ This instruction book explains the use of the ELURA2 and ELURA2 MC camcorders The only dif ference between these models is that the ELURA2 MC includes a MultiMediaCard Memory Card function Please note that illustrations in this instruction book refer mainly to the ELURA2 model NTSC ...

Страница 2: ...e determined by turning the equipment off and on the user is encouraged to try to correct the interference by one or more of the following measures Reorient or relocate the receiving antenna Increase the separation between the equipment and receiver Connect the equipment into an outlet on a circuit different from that to which the receiver is connected Consult the dealer or an experienced radio TV...

Страница 3: ...nd cart combination to overturn 10 11 12 13 Power Sources The CA 400 Compact Power Adapter should be operated only from the type of power source indicated on the marking label If you are not sure of the type of power supply to your home consult your product dealer or local power company Regarding other power sources such as battery power refer to instructions in this manual Polarization The CA 400...

Страница 4: ...ing covers may expose you to dangerous voltage or other hazards Refer all servicing to qualified service personnel 19 Damage Requiring Service Disconnect this product from the wall outlet and all power sources including battery and refer servicing to qualified service personnel under the following conditions a When the power supply cord or plug is damaged b If any liquid has been spilled onto or o...

Страница 5: ...Multi hnage Screen 63 Audio Recording 65 Setting the Self Timer 67 When Making Manual Adjustments Adjusting Exposure Manually 69 Adiusting Focus Manually 72 Setting the White Balance 73 Editing to a VCR 80 Dubbing to fl om a Cassette with Digital Video Equipment 81 Recording f rom a VCR TV or Analog Camcorder Analog Line in 83 Recordino Over Existing Scenes A V _sert Editing 85 Audio Dubbing 88 Se...

Страница 6: ...2 8 Screen displays _1132 Troubleshooting in case you run into any problems I_ 124 Menu at Glance 1223143 Symbols used in this instruction tnanual _21 Reference page nutnbers Functions that can be operated fiom the body of the catnera Functions that can be operated fiom the wireless controller Supplementary notes for camcorder operation _ Operation confirtnation beeps C2319 Capital letters are use...

Страница 7: ...r still pictures Digital Motor Drive Choose your favorite scenes from videos taken using progressive scan and display them as blur free still pictures too A 2 5 LCD screen makes it easy for you to shoot colorful well composed video It is also great for playback Stabilizes your recordings even in long telephoto shots The ELURA2 ELURA2 MC has the technology to capture crisp clear digital still pictu...

Страница 8: ...r _ _ iiiiiiiiiiiiiiiiiiiiiiiii _ _ iiiiiiiiiiiiiiiiiiiiiiiii _ m iiiiiiiiiiiiiiiiiiiiiiiii _ _ iiiiiiiiiiiiiiiiiiiiiiiii iiiiiiiiiiiiiiiiiiiiiiiii ...

Страница 9: ......

Страница 10: ...r 10 ...

Страница 11: ...e power adapter to provide your camera with instant power from an AC outlet Always turn the camera off before connecting removing the power source 1 Insert the DC coupler s terminals into the camera and press the other end until it clicks into place 2 Connect the power cable to the adapter 3 Plug the power cable into an AC outlet 4 Connect the DC coupler to the adapter 5 Remove the DC coupler from...

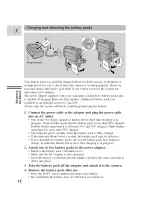
Страница 12: ...ashes mean that the battery pack is less than 50 charged Double flashes mean that it is between 50 and 75 charged Triple flashes mean that it is more than 75 charged The indicator glows steadily when the battery pack is fnlly charged If the indicator blinks twice a second the battery pack may be defective If you attached two battery packs the second battery pack now begins to charge its indicator ...

Страница 13: ...ging and recording times and how to install the backup battery Spedfications Power supply Power consumption Rated output Operating temperature range Dimensions Weight 100 240 V AC 50 60 Hz 40 W Adapter mode 7 2 V 2 0 ADC Charger mode 8 4 V 1 0 2 5 A DC 32 F 104 F 0 C 40 C 3 x 4 3 4 x 2 I 8 in 75 x 120 x 53 ram 8 7 s oz 250 g without power cable Weight and dnnensions are approximate Errors and omis...

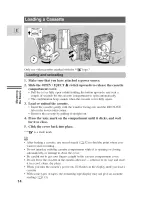
Страница 14: ...pulling it straight out 4 Press the _ mark on the compartment until it clicks and wait for it to close 5 Click the cover back into place M _v is a trade mark After loading a cassette use record search 1222152 to find the point where you want to start recording Do not interfere with the cassette compartment while it is opening or closing automatically or attempt to close the cover Be careful not to...

Страница 15: ...ect the tape heads transfer cassettes directly fiom the tape case to the camcorder do not open the tape protect cover or touch the tape itself Do not use cassettes where the tape has been damaged or spliced they may damage the camcorder Do not insert anything into the small holes on the cassette or cover them with cellophane tape Handle cassettes with care dropping them or exposing them to externa...

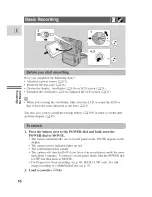
Страница 16: ...221 119 in order to set the date and time display _45 1 Press the button next to the POWER dial and hold turn the POWER dial to MOVIE The camera automatically sets to record pause mode PAUSE appears in the display The camera power indicator lights up red The confirmation beep sounds The camera will turn itself off if you leave it in record pause mode for more than about 5 minutes To return to reco...

Страница 17: ...ounter has stopped Replace the lens cap Return the viewfinder to its retracted position Return the LCD screen flush to the camera body Unload the cassette Turn the POWER dial to OFE Disconnect the power source To check that the camera is recording correctly make a test recording first Before making important recordings clean the video heads using a Canon DVM CL Digital Video Head Cleaning Cassette...

Страница 18: ...playback and the time code may not be written correctly A tape recorded in LP mode on other digital equipment may produce mosaic like noise and the sound may become distorted when played back on this camcorder and vice versa 18 Produces images in the 16 9 format for playback on widescreen TVs F MENU i_CAM SET UP _ _ 16 9 OFF 212t 341 L To switch 16 9 to ON open the menu and select CAM SET UP Then ...

Страница 19: ...m M NO 34 I s s EM BEEP ON To turn the beep off open tile menu and select SYSTEM Then select BEEP set it to OFF and close tile menu The POWER dial lock lever hits been preset to the position Switch it to the position when you want to use the P SCAN 22_1 48 and CARD REC ELURA2 MC only 222t97 modes t is recommended that you return the lock lever to the position when you finish recording ELURA2 O VCR...

Страница 20: ...o work its usual You can freely zoom in and out between lx and 40 magnification the ciunera automatically switches between optical zooming up to 10 and digital zooming 10 to 40 A zoom bar show s up in the display The digital zoom area is in blue 20 F MENU I CA SET UP O ZOOM O _ 341 L T_ turn the digital zoom off open the menu and select CAM SET UP Then select D ZOOM set R to OFF and clnse the menu...

Страница 21: ... the LCD screen automatically switches off and the view finder switches back on You can choose the angle of the screen that suits you best by opening and rotating the screen also you can rotate the LCD screen so that faces in the direction of the lens 2I_123 You can also push the panel flat against the camera until it is flush with the side with the screen fitcing outwards gl gg 21 ...

Страница 22: ...e Adjusting the LCD screen below 5 O You can adjust the brightness of the LCD screen MENU I l O ISP SET UP _ 34 _BRIGHTNESS _ Open the menu and select DISESET UP from the menu Then select BRIGHTNESS adjust the level with the SELECT dial and close the lnenu A bar showing the level appears in the display for 4 seconds Turn the SELECT dial up to make the display brighter Turn the SELECT dial down to ...

Страница 23: ... reversed mirror on or not mirror off The recording itself is unaffected regardless of which one you choose _i _ i i il M NO 0 sp E up M ROR ON _ 34 To turn tile mirror mode off open the menu and select DISESET UP Then select MIRROR set it to OFF and close the menu g_ _ 5 g_ Tile indicators that appear in tile LCD display when MIRROR is turned on ELURA2 MC only NO CARD _ CARD ACCESS _ REC REC PAUS...

Страница 24: ...al recording make sure that you slide the tab on the cassette so that it exposes the hole the switch position is usually labeled SAVE or ERASE OFF 1 Attach a power source and turn the POWER dial to VCR The power indicator lights up green_ 2 Load the cassette 3 Press the _ play button to start playback To end playback press the stop button To wind the tape forwards stop playback and press the I_ _ ...

Страница 25: ...rd playback To play back the recording at about 9 5 times normal speed press and hold the m_ D_ fast fOl w ard button during normal playback or press and hold the _ fast forward button during normal fast forward Rewind playback For reverse playback at about 9 5 times normal speed press and hold the 9 q rewind button during normal playback or press and hold the 9 q rewind button during normal rewin...

Страница 26: ...continuous frame reverse Slow Forward Playback To play back at about 1 5 normal speed press the SLOW button during normal playback Press the PLAY _ button to return to normal playback The camera automatically returns to playback after about 30 seconds of slow playback Slow Reverse Playback To play back in reverse a about 1 5 normal speed press the _ 1 button and then the SLOW _ button during norma...

Страница 27: ...ly by turning the SELECT dial down until OFF appears You can also adjust the headphone volume separately from the built in speaker Use the DU 300 Docking Unit to connect the headphones p 65 The levels you adjust for the built in speaker and headphones are memorized separately The camera remembers your levels even if you turn the camera off and back on again The speaker turns off when the camera is...

Страница 28: ...tted with microphone headphone S video and LANC t _ terminals Connect it to the base of the ELURA2 ELURA2 MC via the docking unit attachment terminal i r 5 1 Make sure that the ELURA2 ELURA2 MC is switched off 2 Align the terminals of the docking unit and the camera 3 Push the docking unR onto the camera and turn the locking screw clockwise to fix it securely onto the base To remove turn the locki...

Страница 29: ...t the camera to a TV with an SI terminal or the Video ID 1 system recordings made in the 16 9 mode for wide screen TVs will automatically play back in wide screen mode on the TV screen w _ Attach the DU 300 Docking Unit in order to use the S video terminal _2128 Use the S 150 S video Cable to connect the S video terminals Use the STV 250N Stereo Video Cable to connect the AUDIO terminals Connect t...

Страница 30: ... the camera to a TV set the TV VIDEO selector on the television to VIDEO If you are connecting the camera to a VCR set the input selector on the VCR to LINE If you are going to use the TV as a monitor while you are shooting remember to keep the TV volume turned down its long as the camera s audio terminals are connected If the sound from the TV speakers is picked up by the microphone an unpleasant...

Страница 31: ... you are using a tripod be careful not to leave the viewfinder exposed to bright sunlight or it may melt The light is concentrated by the viewfinder lens Make sure that the fastening screw of the tripod is no longer than J 4 inch 5 5 ram or it will damage the citmera w The most important element in the scene does not have to be in the center For a more interesting picture try to position your subj...

Страница 32: ...earted movements Long shot S Medium shot Close up O t_ _ o _m o iillN N iW iiii iiUiiiUii iii ii iiii iii iii ii iii Use pans to record it landscape or follow a moving subject Decide the area you want to cover and stand facing the end of your panning angle Without moving your feet turn your waist to the starting position Start recording and after a few seconds begin to turn slowly from the waist H...

Страница 33: ...f open the menu and select CAM SET UP Then select IMAGE S set it to OFF and close the menu The _ mark disappears from the display when the stabilizer is off The image stabilizer cannot be turned off when the program selector is set to the E Easy Recording position The hnage stabilizer is designed to deal with a normal degree of camera shake Keep the hnage stabilizer turned off when the camera is m...

Страница 34: ...MENU _ CA_ t i_tE NU _SEL _E_SE MEMU_LOSE CAM SET UP VCR SET UP DISP SET UP SYSTEM RETURN VCR MENU VCR MENU _I_E L _iE_ISET VCR SET UP CARD SET UP CARD OPER DISP SET UP SYSTEM RETURN C REC MENU ELURA2 MC only t REC MENU _SEL _E_GE M_Q_LOS CAM SET UP CARD SET UP DISP SET UP SYSTEM _RETURN C PLAYMENU ELURA2MC only C PLAY MENU _BEL _ EiTiSET VCR SET UP DISP SET UP N The following icons are used throu...

Страница 35: ... SELECT dial and move the arrow to _ RETURN 10 Press the SELECT dial in to select _ You return to the main menu ll Press the MENU button The main menu disappears Pressing the MENU button at any time closes the menu Selecting _ RETURN takes you back one menu or closes the main menu Available menu items appear in yellow terns that are unavailable due to the tape or card situation or the settings of ...

Страница 36: ...subinenu q Digital effects select 2221 61 Fader 2221 6 1 Effect _ 62 Multi image screen speed _ 63 Multi image screen split 212163 6 To card mix menu ELURA2 MC only _ 107 Return Card mix submenu _G ELURA2 MC only 8 Mix type _ 106 _ 9 Mix level 2221 107 d0_ Return yl D EFFECTS _ EL FADER 2 EFFECTM s sPEED I _ M S SPLIT cARD MIX l _ RETURN J CARD MIX 100 0001 MIX TYPE C 3 43 00 MIX LEVEL _RETURN 36 ...

Страница 37: ...ntroller 22143 Tally lamp _22144 Beep _ 19 Time zone Daylight saving time 22145 Date tflne set _47 Return VCR MENU Appears when the POWER dial is set to _ There are 6 submenus within the VCR MENU _c _ O To digital effects submenu To VCR set up submenu To card set up submenu ELURA2 MC only To card operations submenu ELURA2 MC only To display set up submenu To system submenu Close main menu O m 0 O ...

Страница 38: ..._j0 Wind screen 12221 66 _J Audio mode _ 65 _J Return D EFFECTS _SEL SE_SET M_UCt 0SE 2 FADER EFFECT _h _ M S SPEED ii _ I_ S SPL m 5 _ qETURN J 7 OUTPUT CH LiR AUDIO DUS AUDIO IN WIND SCREEN AUDIO MODE 12bit RETURN _o 0 _ U 5 e O Card set up submenu ELURA2 MC only 33 Image quality Z221 94 _ File numbers _ 96 3_ Return 1 FILE NOS CONTINUOUS _RETURN Card operations submenu ELURA2 MC only _6 Copy fr...

Страница 39: ...ppears when the POWER dial is set to _ There are 5 submenus within the C REC MENU To digital effects submenu To camera set up submenu To card set up submenu To display set up submenu To system submenu Close main menu O O O C REC MENU _iSEL _iE_I_ISET iM_R_ICLOSE CAM SET UP CARD SET UP DISP SET UF SYSTEM RETURN O Digital effects submenu 1 Digital effects select _2161 Effect _2162 Multi image screen...

Страница 40: ...aving _Z time 1212145 Date time set _2147 Return O IMAGE S _R_ ON WHITE BAL AUTO _ RETURN FILE NOS CONTINUOUS 32 SHTR SOUND ON RETURN 14 DISP SET UP _SEL_ _SET NNNDC LOS E M I RROR ON TV SCREEN ON 1_ D T DISPLAY OFF 1_ RETURN SYSTEM _SEL _SET ME_CLOS E BEEP ON T _ T ZONE DST N Y D TIME SET T _ RETURN J C PLAY MENU ELURA2 MC only Appears when the POWER dial is set to 1_ There are 4 submenus within ...

Страница 41: ...R _SEL _ _ SET _I_II M _iEIXii II I I I_I_ I_ _IIIIIIIIIIIIIIIIIIIIIIIIIIIIIIIIIIIIIIIIIIIIIIIIIIIIIIIIII_i g 6TgeT_ _PRI NT MAR K _ COPY C_ _ IMAGE ERASE I FORMAT RETURN RETURN 9 Display set up subinenu Brightness _2122 _ Displays 221 132 3 Dine time select E22t75 _ Return 0 System subinenu _ Wireless controller 2_143 Na _JS Seep 2221 19 d8_ Return 1_ 1 _ DISPLAYS ON t _ D TIME SEL DATE TIME RETU...

Страница 42: ...8 Zero set memo U i_ 79 Audio mix _191 A V insert _ 85 Audio dubbing _ 88 tl _ g_6 e Insert two AA batteries following the _ and markings Be careful not to reverse the polarity of the batteries When using the wireless controller in brightly lit places or outdoors the effective range will be less The camera may have difficulty picking up the remote control signals at extremely close range Do not le...

Страница 43: ... 2 OFF _ Sensor off To turn the remote sensor off Open the menu and select SYSTEM Then select WL REMOTE set it to OFF _ and close the menu _ appears in the display To change the mode _ on the camera Open the menu and select SYSTEM Then select WL REMOTE set it to _ 1 or _ 2 and close the menu The selected mode will appear on the display for 4 seconds on the wireless controller Press and hold the RE...

Страница 44: ...so appears for 4 seconds when you turn the power on The tally lamp lets you know that the camera is recording receiving signals from the wireless controller or counting down for the self timer However its flashing may be reflected into the lens during close up recording or when recording through glass _ You may therefore decide to turn it ofL tl _ t_ la _ 6 e MENU _ I TALLY LAMP ON _ YSTEM J _ 341...

Страница 45: ... T ZONE DST N Y 1 Open the menu and select SYSTEM 2 Select T ZONE I ST The time zone display appears on the scleen Your camcorder s time zone is factou pl eset to New York If you are at another time zone select your time zone first and daylight saving time DST setting if necessa U 3 Move up or down the list of time zones with the SELECT dial Select the option that represents your time zone If you ...

Страница 46: ...RACAS i1_ TOKYO _ RIO Rio de Janeiro ill SYDNEY _ FERNAN Fernando de Noronha if2 SOLOMON _ AZORES After you have selected your time zone and set the date and thne when you travel to another time zone there is no need to reset the date and time Just set the time zone to your destination and the camera s clock will automatically change to display the correct time for your destination The camera auto...

Страница 47: ...ged Turn the dial to make the change then 3at close the menu _ The date can be set to any year between 2000 and 2030 _ _ _ If you press the MENU button in the middle of setting the date and time you o _ D leave the menu and the clock starts If you press the SELECT dial in after setting the minutes you can set the date _ e and time again fiom the start You can choose to display or hide the date and...

Страница 48: ... postcards calendars etc ELURA2 MC only If you plan on copying still images to a MultiMediaCard later we recommend recording in Progressive Scan Mode _g _ t_ 48 1 Set the POWER dial lock lever to the OO position 2 Turn the POWER dial to P SCAN The power indicator lights up red PRO SCAN appears in the display 3 Press the start stop button to begin recording When you finish recording return the lock...

Страница 49: ...ure at any tflne during regular video recording or you can put the camcorder into record pause mode first then take a still picture During record mode Press the PHOTO button fully down and the still picture will be taken immediately The camera takes the image immediately and then records the photo to the tape for approxflnately 6 seconds During this time the camera also records the sound and the d...

Страница 50: ...how s the still picture A counter display appears and counts up to 6 seconds as the camcorder records the picture O disappears from the display The camera returns to record pause mode The camera automatically returns to record pause mode after recording a still image for approximately 6 seconds If a cassette is inserted and you turn the POWER dial to OFF during those approximately 6 seconds the ca...

Страница 51: ...100 with tile DV cable supplied with tile FR 100 3 Insert a floppy disk into tile FR 100 4 Play back your cassette in the camera and search for tile image you _ _c want to capture Find exactly tile frame you want by using frame _ _ advance reverse _ 26 o 5 Press the FR 100 s CAPTURE button to record the image onto the _ n floppy disk _ 6 After you have finished recording images remove the floppy d...

Страница 52: ...e button plays it backwards 2 Release the button when you find the point where you want to start recording The camera returns to record pause mode When the camera is in record pause mode you can use record review to play back the last few seconds of your recording and then return automatically to record pause mode You can quickly make sure that a scene has recorded properly and then go on to shoot...

Страница 53: ...onditions slide the program selector to program AE mode Open the program menu and select AUTO _2154 For various other recording conditions the camera has 5 more specialized AE auto exposure progran ls Availability of functions in each recording program Position of program selector Recording Program Shutter Speed Focus Exposure White balance Imagestabilizer ON OFF Digital effects 16 9 o o lYZ1 221 ...

Страница 54: ...play with the exception of Auto which is displayed and then disappears after 4 seconds Avoid changing programs during recording its the brightness of the image may change suddenly The specialized AE programs are not suitable for all kinds of lighting The flnage may flicker or a bright line may appear on the screen if you use them in the wrong lighting conditions f you switch the camera from the 1 ...

Страница 55: ...rts scenes in brightly lit conditions Normal playback will be slightly jerky but you will get clear images which can be analyzed frame by frame during slow or paused playback Use this program outdoors to make subjects stand out from a softened foreground and background It works well for still lifes and close ups The effect is most noticeable when the zoom position is between the middle range and t...

Страница 56: ...ki resort for example You may notice some shudder when recording moving subjects t L _ t_ t _ _ Z This program allows you to record in dimly lit places It is generally best used for close ups of slow or stationary subjects its moving subjects may leave a trailing after image However you can take advantage of this to create special effects by rapid zooming or by panning along with a moving subject ...

Страница 57: ...21 60 Art Black and White Sepia Mosaic Divides the display to show 4 9 or 16 still photos Has 4 transition speed options fast moderate slow and manual Z 63 Availability of digital effects by mode ELURA2 MC only CARD CARD MOVIE R SCAN PHOTO VCR REC PLAY Faders 0 X 0 X X Effects O O O O X Multi image 0 0 0 0 X Screen 0 Available X Not available The types of digital effects you are able to use depend...

Страница 58: ...e not recorded onto the original tape Digital effects can be added to another tape when dubbing using the A V out terminal VCR mode but not the DV out terminal You cannot operate digital effects while photo date searching If you slide the program selector to F Easy Recording while the digital effect display is flashing it will disappear fiom the display and reappear when you return to program AE m...

Страница 59: ..._ _ _ _ _ _ _ _ iliiiii i_iiiiii_iiiiiiiiiiiiiiiiiiiiiiii When you start recording the picture begins its a thin vertical line in the center of the screen which gradually expands sideways until it fills the whole of the screen When you end a scene the image is wiped fiom both sides of the screen Blurs the image by enlarging the size of some pixels The image appears as increasingly large squares of...

Страница 60: ...ecls Adds a paint like effect called solarization to the hnage Makes the hnage black and white Makes a monocl u ome image with a brownish tint tl _ gi Blurs the image by enlarging the size of some pixels 60 ...

Страница 61: ..._ I_FADER FADE T _ 341 L I Select fader I 1 Open the menu and select D EFFECTS 2 Select D E SELECT 3 Select FADER You return to the D EFFECTS submenu 4 Select FADER again the name of the previously selected fader also appears FADE T WIPE SCROLL M FADE settings appeal 5 Select the desired setting The menu returns to the submenu 6 Close the menu The name of your selected fader flashes in the display...

Страница 62: ...select D EFFECTS 2 Select D E SELECT 3 Select EFFECT You return to the D EFFECTS submenu 4 Select EFFECT again tile name of tile previously selected effect also appears ART BLK WHT SEPIA MOSAIC settings appear 5 Select tile desired setting The menu returns to the submenu 6 Close the menu The menu disappears and the name of your selected setting flashes in the display Effect on off 7 If you re in V...

Страница 63: ...ke sure the program selector is set to IN In VCR mode you can only operate the nmlti image screen in the following playback modes When M S SPEED is set to MANUAL Still picture playback slow forward reverse playback When M S SPEED is set to FAST MODERATE or SLOW Still picture playback MENU _ 341 D EFFECTS _ D E SELECT MULT1 8 _ M S SPEED MANUAL _ M S SPLIT 4 ISelect multi image screen I 1 Open the ...

Страница 64: ...h tile start stop button to begin recording The multi image screen is recorded to the tape ELURA2 MC only f you re in CARD RE mode push the PHOTO button to record the multi image screen to the MultiMediaCard You cannot use the multi image screen with digital zoom or the 16 9 mode You can operate the multi image screen from record or record pause mode After all the images have been captured push th...

Страница 65: ...wn in the display for approximately 4 seconds For details on adding new sound see p 88 For details of playing back a tape that has new sound on stereo 2 see p 91 When you record to the ELURA2 ELURA2 MC from a camcorder with DV terminal outputs the audio mode display becomes set to _C _ e if For greater creative control over audio recording you can connect an external microphone to the camera via t...

Страница 66: ... interfering with the sound track of a tape As a role use the wind screen when recording outdoors Make sure it s off when recording indoors where there is no wind to affect your recording 3 Ill Q _g 5 t_ F MENU vc SET uP k WINO SC EEN ON 212134 L To turn it off open the menu and select VCR SET UP Then select WIND SCREEN set it tn OFF and close the menu WS _ is shown in the display when you turn th...

Страница 67: ... use the wireless controller The time remaining counts down in the display e g 5 SEC SELF T disappears fiom the display when recording begins The tally lamp starts flashing 3 Press the start stop button to end recording For stills I 2 Press a PHOTO button on the camera body or the wireless controller The camera automatically adjusts the focus 2 seconds before the countdown is complete The O mark f...

Страница 68: ...es before recording To cancel the self timer before the countdown hits begun press the SELF TIMER button To cancel the self timer once the countdown has begun press the SELF TIMER button start stop if you re shooting movies or PHOTO if you re taking a still image _ tL t_ 68 ...

Страница 69: ...e pictme brighter or darker in order to deal with difficult lighting conditions The camera s iris can be manually set to any position fiom fully closed to fully open To make the recorded image brighter turn the SELECT dial upwards to a maximum of 11 This may be necessary if the background is very bright or if the subject is lit from behind D _ e 0_ To make the recorded image darker turn the SELECT...

Страница 70: ...ording position f you zoom while the exposure is locked the brightness of the scene may change Set the shutter speed manually to take stable shots of quickly moving subjects 3 _ 03 g MENU _CAM SET UP _ I_SHUTTER AUTO EZ3 341 L 1 Make sure the camera is set to the program AE mode 2 Open the menu and select CAM SET UP 3 Select SHUTTER 4 Press the SELECT dial in to select the desired shutter speed AU...

Страница 71: ...nes for shooting using high shutter speeds When shooting with a shutter speed of 1 1000 o1 higher do not shoot the sun directly Recommended shutter speeds when shooting People doing outdoor sports such as golf o1 tennis 1 2000 Moving cars o1 trains or other rapidly moving vehicles such as roller coasters People doing indoor sports such its basketball 1 1000 1 500 or 1 250 1 100 You are unable to s...

Страница 72: ...ant to return to autofocus If you zoom in on your subject after turning off autofocus it may not stay in focus It is generally best to adjust the zoom first and then the focus Use the SELECT dial to set the focus Turn the SELECT dial downward to move the focus farther away Turn the SELECT dial upwards to bring the focus nearer o o 72 You cannot adjust the focus without the _ mark before M FOCUS in...

Страница 73: ...ogram AE mode 2 Open the menu and select CAM SET UP 3 Select WHITE BAL 4 a For the indoor outdoor or auto settings press the SELECT dial in to choose the setting _ appears in the display when you set the white balance to indoor outdoor mode b To set the white balance yourself point the camera at a white object such as a sheet of paper and zoom in until it fills the display Then press the SELECT di...

Страница 74: ...ons change reset the white balance Try to record with light from a single source Correct white balance cannot be obtained for two types of lighting at once You cannot set the white balance or choose the indoor outdoor mode when the program selector is set to the K7 Easy Recording program The white balance returns to the AUTO setting when you slide the program selector to Z Easy Recording When you ...

Страница 75: ...g fast forward rewind reverse playback forward and reverse x2 playback Press the DATA CODE button while the camera is in play slow or still mode Press it once to display once more to hide it Select w llether you want the date the time or both to show up on your data code display _176 2 o_ D MENU D sp SETuP _ 341 _ _D TIME SEL DATE TIME To change the date and time combination open the menu and sele...

Страница 76: ...Camera data DiTlivlE SEE N Date Time Date Time The data code will read in the following situations During playback of a blank section of tape If the tape was recorded before entering the date and time in the camera s memory If the tape was recorded on a camera without a data code function If noise or tape damage prevents the data code from being read If a recording made on ELURA2 ELURA2 MC is play...

Страница 77: ... data code turned off The 6 second auto date will adjust for any time zone changes you have indicated MENU _ 341 DISP SET UP _ I 6SEC DATE OFF To turn tile 6 second auto date on open the menu and select DISP SET UP Then select 6SEC DATE set it to ON and close the menu When 6SEC DATE is turned on but DISPLAYS I_1132 is turned off the 6 second auto date will still appear for 6 seconds _ D e 77 ...

Страница 78: ...ty up to it maximum of 10 times e g press the _ button 5 times to move folwvard 5 still pictures or days PHOTO SEARCH DATE SEARCH appears in the middle of the display alongside the _ or _ _ t mark and number to search through The recording mode is also shown SP LP Press stop to stop n rid search ff you begin a search very close to the start of a recorded still picture during photo search the camer...

Страница 79: ...aches the zero set position _ _ RTN_ or qI4IRTN appears in the display o The tape counter with indication disappears from the display and the time _ _ code reappears _ _ m The zero set memo U may not function correctly where there is a break between recordings on the tape You can also use zero set memory to mark a position on a tape in camera mode When you then play back the tape pressing rewind w...

Страница 80: ... on your recorded cassette slightly before the section you want to copy 2 Start to play it back while you monitor the picture on the TV 3 Start recording on the VCR as soon as the section you want to copy appears on the screen Pause the VCR at the end of the section you want to copy then stop playback on the camera Repeat steps 1 to 4 until your edited recording is complete The quality of the edit...

Страница 81: ...n the tape may also be anomalous although it may not appear so on the TV image or not recorded at idl You are unable to dub tapes recorded with the copyright protective signal Example dubbing to the camera 1 Connect the camera and the other digital device Connect the Canon CV 150F DV cable optional with the sides of the plugs m marked with the arrows facing its shown above _ 2 _ 2 Prepare the othe...

Страница 82: ...cted when you press REC PAUSE the camera displays the caution CHECK THE DV INPUT An anomalous hnage may also flash onto the screen Blanks between recordings on the playback tape are recorded as anomalous images on the tape that is being recorded to During DV dubbing you cannot add digital effects Certain pre recorded software tapes are copyright protected If you tU to play back such a cassette COP...

Страница 83: ...d at all You are unable to dub tapes recorded with the copyright protective signal Attach the DU 300 Docking Unit in order to use the S video terminal 2_2128 1 Connect the camera to the VCR TV OF other camcorder 2 Prepare the device Set the TV Video selector on the television to Video For fnrther details see Connections for Playback on a TV Screen on p 28 Turn on the VCR Load your recorded cassett...

Страница 84: ...nals The camera enters record pause mode 3 Start playback on tile other device or turn on the TV to see tile desired program while you monitor the picture 4 Press the pause button Recording starts 5 When you get to the point where you want to stop recording press the stop button or the pause button Recording stops 6 Stop playback on tile other device You can monitor the picture in the view finder ...

Страница 85: ...audio will be replaced with the new video and audio Scene to be inserted It I Tile pl tyback tape I Before inserting I The tape it tile camera I Aller inserting I The tape 111 tile camera i i Insert start point Insert end point The video and audio of the new scene replace that of the old Attach the DU 300 Docking Unit in order to use the S video terminal 1_ 28 rn Q 85 ...

Страница 86: ...orly recorded During special playback fast forward playback rewind playback or slow playback etc analog only 2 tu TV You cannot insert A V flom a TV program with anomalous synchronized signals such as when the program itself received poor signals Example recording from a VCR 1 Connect the camera to the VCR 2 Prepare the VCR and TV Set the TV Video selector on the television to Video For fnrther de...

Страница 87: ...SERT and O appear in the display 4 Play back tile cassette in tile VCR 5 To start inserting press tile PAUSE button on tile camera changes to 6 To stop inserting press the STOP button on tile camera Inserting stops and A V INSERT disappears fiom the display The camera returns to stop mode If instead of pressing STOP you press PAUSE the camera returns to the A V insert pause mode If you set the zer...

Страница 88: ...we recommend dubbing your original tape onto a blank tape using the ELURA2 ELURA2 MC s analog line in function then dubbing audio onto the new tape Make absolutely sure to set the audio mode of the new tape to 12 bit and the recording mode to SP To connect other audio equipment 0 w Do not use the yellow video terminal The A V terminal doesn t put out any video so connect the S video terminals and ...

Страница 89: ... tab on the cassette has been slid to REC closed position Do not connect disconnect any cables to flom the camera when dubbing audio or preparing to dub audio rn F MENU vc SET uP L _ 381 _ _AUDIO DUB AUDIO IN 1 Open the menu select AUDIO DUB 2 Select AUDIO IN or MIC IN and close the menu 3 Locate the point where you want to start audio dubbing then press the PAUSE button You can use the playback b...

Страница 90: ...era returns to stop mode You can also set zero set memory 1_ 79 at the place you want to stop audio dubbing then eve W time you return to that position audio dubbing will cancel If instead of pressing STOP you press PAUSE the camera will return to the playback pause mode You can not use the DV terminal while adding sound You might want to adjust the audio mix _i91 when playing back a tape with add...

Страница 91: ...ing with the last selected setting 4 settings appear as you push the button STEREOI for just stereo I STEREO2 for just stereo 2 MIX FIXED for an equal mix of stereo 1 and 2 MIX VARL mix variable for when you want to mix the balance between stereo 1 and 2 To simply choose STEREO1 STEREO2 or MIX FIXED make sure your choice appears on the display If you choose MIX VARL you can go on to mix the balanc...

Страница 92: ...ad a tape recorded with multiple channel audio 2 Open the menu and select VCR SET UP Then select OUTPUT CH set it to the desired setting and close the menu Refer to the following list OUTPUT CH setting Played back sound Tape recorded with stereo sound Tape recorded on multiple channels L R L R channels main sub L L L channel only main only R R R channel only sub only 92 ...

Страница 93: ...d such as the various recording programs _ 53 self timer 1_ 67 shutter speed 222t70 white balance _173 and other manual adjustments Awfilable ffmctions are marked with a or _ icon While the camera is recording the still image appears red in the display It appears white when in mirror mode and on the screen of a connected TV While appears red in the display do not remove the MultiMediaCard or disco...

Страница 94: ... it in attempt pull pushing 4 Close tile cover When you set the POWER dial to CARD PLAY the last flnage recorded appears If there are no hnages recorded on the MultiMediaCard NO IMAGES appears in the display Do not touch the MnltiMediaCard terminals ii i ii ii ii iiiiiB Select the quality of a still flnage to be recorded F MENU cA DsE r up _0uA _rY F E L U2 341 Make sure the POWER dial lnck lever ...

Страница 95: ... high quality images FINE Approx 124 KB Approx 60 images print out etc attach images to Emails STANDARD Approx 70 KB Approx 105 images include them in your own home page etc These figures are approximate The actual number you will be able to record wtries depending on the images Remember that the sample images already recorded on the supplied MultiMediaCard are included in the total numbel The num...

Страница 96: ...voiding duplication of numbers This is convenient when you want to manage your images on a PC We recommend keeping the file numbers set to CONTINUOUS 0 RESET Three images are recorded on the card I lo ooll lll 101 101 02_llll OI W_en you Oh n 2_ e I _a_ _ card and take a picture _ _ i Each thne you insert a new MultiMediaCard the file number resets to its default value 101 0101 If the cltrd alread...

Страница 97: ...d appears in the display The camera will turn itself off if you are using a battery and do not operate the citmera for more than itbout 5 minutes Set the POWER dial to OFF imd then bitck to CARD RE rm 3 Press the PHOTO button halfway and hold it 0 Exposure is locked _ _ _ During autofocus O flashes white in the display as the camcorder adjust the _ focus and it is displayed continuously its it gre...

Страница 98: ... 3 and then press the PHOTO button fully down For full details of how to use the self timer refer to p 67 The wireless controller s PHOTO button has no half way setting Press the button fully and the camera immediately takes the hnage O o O 4 d e 3 2_ 98 ...

Страница 99: ... press the PHOTO button halfway down and hold it The tape is set to playback pause mode and the nutnber of itnages that can _ still be recorded on the MultiMedia Yard appears in the display r The display appears to close for an instant its if it were a shutter releasing a _a except when you are operating the multi image screen _ _ D 3 Press the PHOTO button fully down to record the image to the _ ...

Страница 100: ...ial and hold and turn tile POWER dial to VCR DV IN appears in the display If you have a cassette inserted make sure it is in stop mode 1 Start playback on the other device 2 When the image you want to record appears in the display press the PHOTO button halfway down and hold it The image appears its a still image in the display The number of flnages that can still be recorded on the MultiMediaCard...

Страница 101: ...utomatically in order of recording Index Six images at once Make sure a MultiMediaCard that has images recorded on it is inserted into the citme rit Single image 1 Push the button next to the POWER dial and hold turn the POWER dial to CARD PLAY The last image recorded appears in the display 2 Search lbr the desired still image by pressing the CARD l buttons Press to view the next image and to view...

Страница 102: ...age INDEX 101 0143 _43 50 o J F MENU CARD OPER _ MNDEX Z_34 L 1 Open the menu and select CARD OPER 2 Select INDEX Up to 6 images appear in the display 3 Move the C_ mark to the image you want to view Turn the SELECT dial downwards to go to the previous image and upwards to go to the next image Turning the dial upwards at the last image will take you to the next image Turning the dial downwards at ...

Страница 103: ... display 3 Move the C_ mark to the image you want to protect Turning the SELECT dia l downwards takes you to the previous image and upwards takes you to tile next image _ Turning tile dial upwards at tile last flnage will take you to the next flnage Turning tile dial downwards at the first image will take you to the previous _ _ image gg Jump to tile next previous index screen with the CARD button...

Страница 104: ...the cimlera_ 1 Move to tile image you want to erase with tile CARD 1 buttons 2 Open tile menu and select CARD OPER 3 Select IMAGE ERASE CANCEL SINGLE and ALL settings appeal To cancel erasing select CANCEL and close the menu To erase images one a j 3 at time 4 Select SINGLE ERASE THIS IMAGE NO YES appears in the display 5 Select YES The hnage erases and the previous image appears for erasing If th...

Страница 105: ...ltiMediaCard at once J 4 Select ALL ERASE ALL IMAGES EXCEPT FOR O_ IMAGES NO YES appears in the display 5 Select YES All images except the protected ones are erased If you select NO you return to step 3 6 Close the menu C2_ o o_ 105 ...

Страница 106: ...rding image appears in place of the blue area of a prerecorded still image such as a picture frame When recording your own still image for overlapping make sure to record the area in which you want the new image to appear blue with a blue curtain its a background for example Adjust the mix level in the blue area of the pre recorded image Image being recorded by the camera Still image i o _e4 Brr C...

Страница 107: ...the blue area Image being recorded by the camera Still image Mix level The mix level bar appears Adjust the mix level using the and at the ends of tile bar as guides _ _ MENU _ D EFFECTS _ D L SELECT CARD MIX k _ 341 _MIX TYPE C Make sure a MultiMediaCard that has images recorded on it and a cassette have _ _ been inserted into the camera Make sure the program selector is set to _ o Select _ _ E 1...

Страница 108: ...deactivated display flashes For a moving image 1 Press tile start stop button to start and stop recording The combined images are recorded onto the cassette For a still image 1 Press the PHOTO button halfway down and hold it O lashes white in the display as the camcorder adjusts the focus and it is displayed continuously its it green mark when the camera is ready to take the image 2 Press the PHOT...

Страница 109: ...onto the MultiMediaCard If you want to copy all the images on a cassette rewind the cassette to the beginning 2 Open the menu and select CARD OPER 3 Select COPY tm cia _ C2_ 4 Select EXECUTE _ _ Select CANCEL to stop copying _ _ _ Cassette and card information appear in the display and copying starts _ NOW COPYING _C2al appears in the display o The camera automatically perh rms the Photo Search fu...

Страница 110: ...the first image you want to copy by using the CARD buttons Still hnages on the MultiMediaCard including and after that hnage will be copied onto the cassette If you want to copy all the still images on the MultiMediaCard select the first image 3 Open the menu and select CARD OPER 4 Select COPY 1_ _1 5 Select EXECUTE Select CANCEL to stop copying Cassette and card information appear in the display ...

Страница 111: ...ove _ to the image you want to mark Turning the SELECT dial downwards takes you to the previous hnage and upwards takes you to the next image Turning the dial upwards at the last hnage will take you to the next image c Turning the dial downwards at the first hnage will take you to the previous gJ _ c2_ image 0 Jump to the next previous index screen with the CARD 1 buttons _ _ D 4 Press the SELECT ...

Страница 112: ...rmatted for you Be cautious when formatting recorded MultiMediaCards All images will be permanently erased F MENU CA DOPE _O AT L 2 34 L ca 2 to 0 ca 0 e 3 2_ Make sure a MultiMediaCard is inserted into the camera 1 Open the menu and select CARD OPER 2 Select FORMAT 3 Select EXECUTE Select CANCEL to cancel formatting FORMAT THIS CARD NO YES appears to confirm 4 Select YES Formatting starts and NOW...

Страница 113: ...amera not a PC or other device There have been cases where MultiMediaCards formatted with a PC or other device do not function properly We recommend saving backups of MultiMediaCard images on your PCs hard drive or other external memory device hnage dittit nlity be diunitged or lost due to a defect in a MultiMediaCard or if a MultiMediaCard is exposed to static electricity Contents of a MultiMedia...

Страница 114: ...rupside down This could damage theMultiMediaCard orthe camera The prerecorded sample hnages ontheMultiMediaCard included withthis camera areintended solely forthepersonal enjoyment gained fromcombining them withpersonal videos taken withthiscamerm Donotuse theprerecorded sample images foranyother purpose PhotoEssentials Royalty Free Stock Photography ThePhotoEssentials suite ofroyalty free images ...

Страница 115: ...ifications Capacity Interface Operating temperature range Dimensions Weight 8 MB MultiMediaCard standard 0 C 40 C 32 F 140 F 32 24 1 4 mm 1 5 g Weight and dimensions are approximate Errors and omissions excepte Subject to change without notice C2_ D gg o o_ K 115 ...

Страница 116: ...e grip belt through the loop on the cord Hook the lens cap on to the grip belt while you ale recmding and place it over the lens when you have finished oN _E 116 Release the Velcro fastening and hold the camera with your right hand while you adjust the belt with your left Your index finger should reach the zoom control and photo button and your thumb should reach the start stop button comfortably ...

Страница 117: ...battery pack starts to give you much less recording time than usual it hits reached the end of its life and must be replaced These figures show how long yon can view playback with the LCD after attaching a fully charged battery pack Playback time will be shortened at low temperatures Batlery pack Playback time using Ihe LCD screen BP 406 55 rain BP 422 3 hr 20 rain The indicator in the display sho...

Страница 118: ...tte W pack Attach the terminal cover whenever the battery pack is not being used Keep the terminals clean Make sure no foreign objects get between the terminals its this can cause a short circuit and damage the battery pack Attach the terminal cover whenever the battery pack is not being used Storing the battery pack f you do not use a batte U pack for a period of more than it few months any remai...

Страница 119: ... than 140 F 60 C Do not leave it near a heater or inside a car in hot weather for example Do not try to disassemble or modify it Do not drop or knock it Do not get it wet WARNING The batte U used in this device may present a fire or chemical burn hazard if mistreated Do not recharge disassemble heat above 212 F 100 C or incinerate Replace the batte W with a CR1616 made by one of the following comp...

Страница 120: ...Do not use the camera close to TV transmitters portable communication devices or other sources of electric or magnetic radiation They may cause picture interference or permanently damage the camera Do not expose the camera to water Cover the camera when you are recording in rain or mist There is a risk of electric shock if water gets inside the camera contact qualified service personnel its soon a...

Страница 121: ... cleaning LCD Clean the LCD screen using a commercially available cleaning cloth for glasses Where there is it big change in temperature moisture may form on the surface of the screen Wipe clean with a soft dry cloth At low temperatures the display may appear to be much darker than usual This is not a fault and its the screen warms up the display will return to normal Camera body and lens Use a so...

Страница 122: ...can always play back your recordings on the LCD screen your camera can only be connected to TVs which use its NTSC system This TV system is used in the following countries American S__tltlo__t Bahama Barbados Bermuda Bolivia Canada Chile Columbia Costa Rica Cuba Ecuador El Salwtdor Guam Guatemala Greenland Haiti Honduras Jamaica Japan Korea Mexico Micronesia Myanmar Nicaragua Panama Peru Philippin...

Страница 123: ...you take it out of the bag What happens when condensation is deteeted CONDENSATION HAS BEEN DETECTED is displayed for approximately four seconds Then the power indicator flashes and the mark flashes in the display If there is a cassette in the camera it stops automatically and REMOVE THE CASSETTE is displayed for approximately 4 seconds and then _w flashes in the display If you have the beep turne...

Страница 124: ...set to the appropriate mode _ 16 24 The cassette is not loaded or is set for erasure prevention _ 14 15 The cassette has reached the end The power source is not properly connected or the battery pack is exhausted or not properly attached 212 11 13 117 The function cannot be used in that recording program 222153 The camera was in record pause mode for more than about 5 minutes _ 16 97 The battery p...

Страница 125: ... surfaces Fast moving e g shiny car objects surfaces Slanted subjects Dark subjects Night scenes Problem Some all of the digital effects don t work The _ play button doesn t work There s a bright stripe on the screen Cause and or what to do about it There are a number of restrictions on using the digital effects _2157 64 The POWER dial is not set to VCR _ 24 The cassette is not loaded I_ 14 The ca...

Страница 126: ...the display even though a MultiMediaCard has been inserted Cause and or what to do about it It is not turned the right way _ 94 Turn it the right way and try inserting again Turn the camera s power off and back on again and remove and reinsert the card if necessary E _ Nothing happens when I press the buttons The POWER dial is not set to CARD REC or CARD PLAY _ 97 101 The MultiMediaCard is not ins...

Страница 127: ...ra malfunctions The DV cable is connected correctly but there s nothing in the display The camera becomes warm during use Cause and or what to do about it The remote sensor mode is set to OFF _ in the menu 212143 The remote sensor modes of the wireless controller and the camera itself are different _ 43 The batteries are dead or not inserted o Check the screen displays _ 132 External interference ...

Страница 128: ... E _ 0 128 ...

Страница 129: ...battery pack BP 945 to give up to 11 hours 40 rain recording thne The lithium ion battery packs used with the CH 910 BP 900 series Batte U Pack differ from the battery pack used with the ELURA2 ELURA2 MC and can be purchased as optional accessories Note The DC 400 DC Coupler supplied with the camera connects directly to the CH 910 Use it in place of the DC Coupler that is supplied with the CH 910 ...

Страница 130: ...ws BP 915 60 min BP 930 120 rain BP 945 170 rain Charge the BP 900 Series batte W packs with the CA 910 Compact Power Adapter or CH 910 Dual BatteW Charger Holder optional Zoom Remote Controller ZR 1000 When this product is plugged into the LANC _ terminal of a Canon camcorder it is possible to control functions such as the start and stop of recording and the zoom and focusing functions while the ...

Страница 131: ... video equipment we recommend Canon brand accessories or products bem ing the same mark Provided accessories WL D76 Wireless Controller D834 572 000 WL D75 Wireless Controller D834 562 000 CA 400 Compact Power Adapter 85 1250 201 BP 406 Battery Pack D85 1280 000 S 150 S video Cable D824 330 000 STV 250N Stereo Vide Cable D824 590 0 Lens cap D524 130 000 Optional accessories CB 400 Car Battery Adap...

Страница 132: ... menu For instructions on how to hook the camera up to your TV see p 28 You can turn off the displays to give you a clear screen for playback m MENU I D sp SETUP D SP A S 0 Z_ 34 L To turn the displays off open the menu and select DISP SET UP Then select DISPLAYS set it to OFF and close the menu If you turn the displays off the LCD screen will be completely blank but the camera will continue to sh...

Страница 133: ...rding mode Playback is stopped 2 24 Normal playback _2I 24 Fast l wward _2 24 Rewind 12271 24 Fast forward playback _ 25 i_i i i i ii_ _ _ _ _J_ _ _ _ _ _ _ iiiiiiiiiiiiiiiiiiiiiiiiiiiiiiiiiiiiiiiiiiiiiiiiiiiiiiiiiiiiiii_ _ 1 ii i i i i i i i i i i i i i i Rewind playback ZI 25 Frame advance playback _ 26 FraiT_e reverse p_ayback_2_ iiiiiiiiiiiiiiiiiiiiiiiiiiiiiiiii Playback pause forward andrever...

Страница 134: ...Timer E _ O _ VCR MENU _ 37 C REC MENU _ 39 ELURA2 MC only C PLAY MENU _ 40 ELURA2 MC only The remote sensoF is turned off 2121 43 Self timer countdown C221 67 Zero set memory c2279 VDR MENU _SEL g VCR SET UP CARD SET UP CARD OPER DISP SET UP SYSTEM _RETURN D REC MENU _SEL _ RIER O _ E _ _ E_ CARD SET UP DISP SET UP SYSTEM RETURN D ELAY MENU _SEL _I VCR SET U DISP SET UP SYSTEM RETURN Recording pr...

Страница 135: ..._i _ _ i ii i iii _ i ii Audio visual insert C221 85 Audio dubbing _ 88 Audio input _ 88 Microphone input C2 88 DV input _ 1 81 100 Condensation warning _21123 j iiiiiiiiiiiiiiiiiiiiiiiiiiiiiiiiiiiiiiiiiiiiiiiiiiii i __ _ _ ili iiiiiiiiiiiiiiiiiiiiiiiiiiiiiiiiiiii The wind screen is turned off 221 66 Vohnne level _ 27 MultiMediaCard Displays ELURA2 IVlConly No MultiMediaCard is inserted _l 94 hnag...

Страница 136: ...nd and frame number on a special data code area on the tape itself It is reset automatically when a new tape is loaded In camera mode the frame number doesn t appear in the display Recording reminder Card mix _21 106 Print mark 2221 111 Data code _ 75 When you start recording the camera counts from 0SEC to 10SEC Shots which are shorter than ten seconds may be difficult to edit later On the other h...

Страница 137: ...pears when the battery pack is exhansted _2112 117 Refer to p 82 Appears when the tape has reached the end Refer to p 15 Appears if yon press the REC PAUSE button when the DV cable is not connected properly _l 81 Refer to p 123 Appears when yon try to do audio dubbing or A V insert on a tape recorded in LP mode _ 85 88 Appears when yon try to do audio dubbing on a tape recorded in 16 bit audio or ...

Страница 138: ...There is no more remaining memory on the MultiMediaCard Change the card or erase images You have reached tile maximum file or folder number _ 96 The image has been recorded in an incompatible JPEG _ _ t_rmat or other t _rmat E _ that tile camera can _ _ not play back or the image data has been damaged 138 Appears if yon have tried to mark 51 or more images t _r printing or if a mark file cannot be...

Страница 139: ...e Low light program Recommended illumination More than 100 lx Filter diameter 27 mm Viewfinder 0 44 in TFT color LCD approx 113 000 pixels LCD screen 2 5 in measured diagonally TFT color approx 200 000 pixels Microphone Stereo electret condenser microphone DV terminal input output Special 4 pin connector conforms to IEEE1394 A V terminal input output o 3 5 mm Audio input 10dBV at least 47 kohms L ...

Страница 140: ...densation 123 Connection to TV or VCR 28 Copying from Cassette to MultiMediaCard 109 Copying from MultiMediaCard to Cassette 110 Data Code 75 Date and Time 45 Date Search 78 Digital Effects 57 Digital Motor Drive 48 Digital Video 7 Digital Zoom 20 Docking Unit 28 DV Dubbing 81 100 Easy Recording 55 Editing to a VCR 80 Effects 60 Erasing Still hnages fiom a MultiMediaCard 104 Exposure 69 External M...

Страница 141: ...cidental Erasure 103 Print Mark l I 1 Problems 124 Progressive Scan 48 Protect 103 B Recharging the Batte U Pack 118 Recording 16 97 Recording from Cassette to MultiMediaCard 99 Recording from DV Device to MultiMediaCard 100 Recording Programs 53 Record Pause Mode 16 Record Review 52 Record Search 52 Remote Control 42 Remote Sensor 43 Rewind 24 SI video input terminal 29 Sample images 114 Sand Sno...

Страница 142: ...era Abroad 122 Using the Menus 34 VCR 28 Videocassettes 14 Video Heads 121 Video D 1 system 29 Viewfinder 116 121 Viewing Still hnages 101 White Balance 73 Wide angle 20 Widescreen TV 18 Wind Screen 66 Wipe 59 Wireless Controller 42 Zero Set Memory 79 Zooming 20 m _o _ E 142 ELURA2 MC only ...

Страница 143: ...select Date time set Digital effect select Displays Effect First make sure the POWER dial is set to Erase Fader File numbers Format Then select it from this submenu and set CAM SET UP DISRSET UP VCR SET UP VCR SET UP SYSTEM DISRSET UP D EFFECTS D E SELECT CARD MIX _ CARD OPER CARD OPER DISRSET UP DISRSET UP DISRSET UP SYSTEM D EFFECTS DISRSET UP D EFFECTS D E SELECT EFFECT CARD OPER D EFFECTS D E ...

Страница 144: ...V screen White balance Wind screen Zoom First make sure the POWER dial is set to Then select it from this subinenu and set CAM SET UP CARD OPER D EFFECTS D E SELECT MULTI S D EFFECTS D E SELECT MULTI S D1SRSET UP D EFFECTS _ D E SELECT _ CARD MIX _ CARD MIX EFFECTS _ D E SELECT _ CARD MIX _ CARD MIX VCR SET UP CARD OPER CARD OPER CARD SET UP VCR SET UP SYSTEM CAM SET UP CARD SET UP SYSTEM SYSTEM D...

Страница 145: ...l_lll_y covers all de_ct_ encountel_d in normal use of die DV Camcor len and does not apply in die I_llo_ving a Loss of or cl_llll_ge to die DV Camcol_ler due to abuse mishandling iml rol er packaging by you alteration _cci_lent leaking batteries exterior nick_ scratches or clent_ electrical cun ent fluctu_fii_ns_ I_lilure to I_llow Ol el_fing in_truction_ m_lintenance and envil_nmental instructio...

Страница 146: ...equipment is used for commercial professional or industrial purposes This limited warranty does not cover the cabinet exterior finish of the digital video equipment video cQssette tapes head cleanings nor does it apply to digital video equipment purchased outside Canada TO OBTAIN WARRANTY SERVICE Ship your Canon digital video equipment in its original carton box or equivalent properly packed fully...

Страница 147: ...ary Alberta T2E 7K7 CANON CANADA INC MONTREAL 5990 Cdte de Liesse Quebec H4T lV7 if you have any questions call the Canon Canada information Center toll free at 1 800 828 4040 Canada only Si vous avez des questions veuillez t_l_phoner sans frais au Canada 1 800 828 4040 Canada seulement CANON MEXICANA S DE R L DE C V Periferico Sur No 4124 Col Ex Rancho de Anzaldo C P 01900 M6xico D R Mexico CANON...

Отзывы: