background image

60

Documents Do Not Feed Properly

If a document does not feed properly, first confirm the 
following:

Are pages sticking together because of static electricity 
or another cause?

Are you attempting to scan a document with size, paper 
thickness or quality that is not supported by the 
scanner? (See “Documents” on p. 17.)

Are the rollers dirty?

Are the rollers worn out?

IMPORTANT

• Double feeding occurs when document pages stick together, 

and incompatible paper thickness or quality can cause paper 
jams. Check your documents carefully before loading.

• Replacement rollers can be purchased as consumables. If 

performance is not improved after cleaning the rollers, contact 
your local Canon dealer or service representative.

If this does not solve the problem, consider the following 
possible problems and causes:

Problem

Cannot scan from the feeder.

Cause

The scanning side setting for the ISIS/
TWAIN driver is set to [Flatbed].

Solution

Set the scanning side to a setting other than 
[Flatbed].

Saved Image Files Do Not Open

If image files saved by CapturePerfect 3.0 cannot be 
opened by another application, first confirm the following:

Does the application you are using support 
CapturePerfect 3.0 image file types (*.bmp, *.tif, *.jpg 
and *.pdf)?

If this does not solve the problem, consider the following 
possible causes:

Cause

The application does not support multi-
page TIFF files.

Solution

Open the files using an application that 
supports multi-page TIFF files, or save the 
images as single-page TIFF files using 
CapturePerfect 3.0.

Cause

The compression format used by 
CapturePerfect 3.0 is not supported.

Solution

Open the image file with CapturePerfect 3.0, 
set the compression format to [None], and save 
it again.

Scanning Results Are Not as Expected

If the scanned images do not appear as expected, one or 
more ISIS/TWAIN driver settings may be incorrect, or 
your application may not support certain scanner 
functions.

Problem

The scanned image is too dark (or faint).

Cause

The [Brightness] setting is not set to an 
appropriate value.

Solution

If the image is too dark, set a higher brightness 
setting, or if the image is too faint, set a lower 
brightness setting.

Содержание DR 7090C - imageFORMULA - Document Scanner

Страница 1: ...Please read this manual before using the scanner After you finish reading this manual keep it in a safe place for future reference Reference Guide...

Страница 2: ...pressly provided herein Except as expressly permitted under the applicable law you shall not alter modify disassemble decompile or otherwise reverse engineer the SOFTWARE or accompanying documentation...

Страница 3: ...ith RESTRICTED RIGHTS Use duplication or disclosure is subject to restrictions as set forth in either subparagraph c 1 ii of the Rights in Technical Data and Computer Software clause at DFARs 252 227...

Страница 4: ...ass B limits in Subpart B of Part 15 of FCC Rules Do not make any changes or modifications to the equipment unless otherwise specified in the manual If such changes or modifications should be made you...

Страница 5: ...gulations in each sales region of the Document Scanner DR 7090C Model M11067 Trademarks Canon and the Canon logo are registered trademarks of Canon Inc in the United States and may also be trademarks...

Страница 6: ...ease follow the procedures in the Easy Start Guide to set up the scanner Reference Guide This Manual This manual consists of the basic scanner operating instructions extracted from the User Manual Use...

Страница 7: ...IMPORTANT Indicates operational requirements and restrictions Be sure to read these items carefully to operate the scanner correctly and avoid damage to the scanner Hint Indicates a clarification of...

Страница 8: ...g a Document into the Feeder 19 Positioning a Document on the Flatbed Platen Glass 20 4 Document Feeding 22 Scan Procedure 22 5 Scanning 25 About the Job Function 25 CapturePerfect 3 0 28 Scanner Sett...

Страница 9: ...ving the Transportation Screw 2 Installing the Securing Braces 3 Power 3 Checking the Rear Cables 4 Opening and Closing the Feeder 4 Moving the Scanner 4 Handling 5 Disposal 7 2 Features 8 3 Names and...

Страница 10: ...ations where the fumes from ammonia paint thinner or other volatile chemicals may be present Avoid locations that are subject to vibration Avoid exposing the scanner to rapid changes in temperature If...

Страница 11: ...ied voltage Doing so might cause fire or electric shock Do not connect other electrical equipment to the same power outlet to which the scanner is connected Also when using an extension cord make sure...

Страница 12: ...r carefully and slowly taking care to avoid pinching your fingers To prevent the scanner from tipping backward when the feeder is open install the securing braces See p 3 Moving the Scanner The scanne...

Страница 13: ...e to do so may result in a fire or electric shock Never place alcohol benzene paint thinners or other flammable substances near the scanner Do not cut damage or modify the power cord Do not place heav...

Страница 14: ...CAUTION Do not install the scanner on a surface that is unstable or tilted or in an area subject to excessive vibrations as this may cause the scanner to fall resulting in personal injury or damage to...

Страница 15: ...scanner is operating Doing so might result in a malfunction or injury Do not directly touch the pins and contacts on the scanner s connector with your hands Doing so might result in a malfunction Open...

Страница 16: ...ad up to 100 sheets of standard copy paper at one time Variety of Scanning Modes The scanner is equipped with six scanning modes Black and White Error Diffusion Advanced Text Enhancement Advanced Text...

Страница 17: ...cument page Dropout and Color Enhancement Functions The scanner is equipped with drop out and enhancement functions that enable you to specify one color red blue or green to be omitted dropped out or...

Страница 18: ...lied with the scanner or another application program that supports the Multi Stream function Patchcode Support Patch code sheets inserted between document pages can be detected for batch separation Op...

Страница 19: ...nt size e Document Feeder Tray Load documents to be scanned here f Document Eject Tray Scanned documents are ejected here Open the document feeder tray to remove ejected documents g Eject Tray Extensi...

Страница 20: ...g the SCSI ID and terminator Set the SCSI ID and terminator using the DIP switches located between the SCSI connectors and power cord connector For details on the settings refer to the User Manual Ref...

Страница 21: ...batch separation This key lights when pressed or in accordance with the application s batch separation settings Scanning the next document while this key is lit causes the scanned image to be stored...

Страница 22: ...mped on the scanned side of the document page approximately 0 4 10 mm from the trailing edge of the document page Hint The stamp pattern is fixed and cannot be changed When scanning both sides of a do...

Страница 23: ...Document into the Feeder 19 Positioning a Document on the Flatbed Platen Glass 20 4 Document Feeding 22 Scan Procedure 22 5 Scanning 25 About the Job Function 25 CapturePerfect 3 0 28 Scanner Setting...

Страница 24: ...anner to the computer using a SCSI cable be sure to turn ON the scanner first and then turn ON the computer If you turn ON the computer first the scanner may not be properly recognized by the computer...

Страница 25: ...to 90 g m2 Follow these guidelines when you prepare a document for scanning When scanning long documents set Long Document mode to ON in the user mode settings and then scan the documents one by one B...

Страница 26: ...hat mixing documents of different thicknesses and sizes may cause a malfunction during feeding Documents containing text or pictures within 0 2 5 mm of its edges or documents with a color background m...

Страница 27: ...ponding paper size on the document size label IMPORTANT Use both hands to adjust both the left and right slide guides Adjusting only one slide guide can lead to a malfunction 2 Align the edges of the...

Страница 28: ...er tray only as much as you need to remove the ejected document pages Trying to forcibly raise the document feeder tray can cause a malfunction Positioning a Document on the Flatbed Platen Glass Use t...

Страница 29: ...down CAUTION Lower the feeder slowly taking care to avoid pinching your fingers Failure to do so might result in personal injury When scanning a thick book or similar item on the flatbed platen glass...

Страница 30: ...your computer After placing the document onto the scanner instruct the scanner from your computer to start scanning Panel Feeding See p 23 Panel feeding comes in handy when using the feeder for contin...

Страница 31: ...el Feeding With panel feeding you execute the scan command from your application and then use the scanner s Start and Stop keys to control the scanning operation 1 Select Panel Feeding in Feeding Opti...

Страница 32: ...of the document is complete the scanner goes into the Ready Mode 5 Raise the document feeder tray to remove the ejected document pages IMPORTANT Make sure to remove ejected document pages from the doc...

Страница 33: ...bs which can then be selected for scanning by pressing the Job key on the control panel Job registration stores scanning condition settings image file format selection save destination and image data...

Страница 34: ...reen appears on the display panel 5 Press the Job and keys to select a job number 01 to 99 6 Place the document onto the scanner IMPORTANT For details on how to place documents see Placing Documents o...

Страница 35: ...Job function perform the following procedure to configure the scanner s event settings 1 Click the Start button then select Settings Control Panel 2 Double click Scanners and Cameras The Scanners and...

Страница 36: ...t scanners CapturePerfect 3 0 includes the following modes Select the desired scan mode from the Scan menu to perform scanning For more information on CapturePerfect 3 0 refer to the CapturePerfect 3...

Страница 37: ...99 additional jobs can be registered Color Document Scan the document using 24 bit color simplex at 300 dpi resolution and save the file in the folder My Pictures under the folder My Documents Binary...

Страница 38: ...nual as needed to select the scanner 3 Select Canon DR 7090C and click Settings The Configure Device Settings dialog box opens IMPORTANT If Canon DR 7090C is not displayed in Scanner Name you must re...

Страница 39: ...ected once you have started scanning each document placed in the Document Feed Tray is scanned and when no document is loaded the scanner enters the standby state If the Automatic Feeding Feed Option...

Страница 40: ...ded and click either Continue Scanning or Stop Scanning Hint If Use Continue Scanning dialog in the Scan menu is not checked scanning finishes without displaying the Continue Scanning dialog box 12 Wh...

Страница 41: ...gure basic scan settings Orientation Settings Dialog Box Allows you to configure scan settings based on document orientation Scan Area Dialog Box Allows you to define specific areas for scanning Other...

Страница 42: ...t the paper size in accordance with the document to be scanned Hint If Auto detection is selected the edges of the document are detected and images that match the size of the document are saved Dots p...

Страница 43: ...pectedly For example the paper edges may cut your fingers or the document may be damaged Remove all jammed sheets of paper Paper scraps left inside the scanner may be drawn into the scanner again caus...

Страница 44: ...eft b forward feeds jammed paper into the document eject tray After feeding the paper raise the document feeder tray and remove the paper 6 Close the feeder guide CAUTION Take care to avoid pinching y...

Страница 45: ...t to check Is the document size or thickness outside the range supported by the feeder or is the document paper of substandard quality What to do See Documents on p 17 for information about required d...

Страница 46: ...he feeding path and may damage the document Make sure to align the document straight when placing it in the document tray When using the Long Document mode jam detection may not work propery and docum...

Страница 47: ...ner scans the front side of the document page and then automatically flips the page to scan the reverse side Total Counter Displays the cumulative total number of document pages fed by the scanner How...

Страница 48: ......

Страница 49: ...nging the Stamp Cartridge 42 2 Daily Cleaning 44 About the Cleaning Cloth and Cleaning Paper 44 Cleaning the Main Unit 44 Cleaning the Flatbed Platen Glass and Pressure Board 45 Cleaning the Feeder 46...

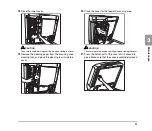
Страница 50: ...the opening lever and then slowly raise the cover until it stops 2 Open the feeder guide and then open the inner cover The feeder guide has a green tab while the inner cover located under the feeder...

Страница 51: ...feeder guide and inner cover CAUTION Take care to avoid pinching your fingers when closing the feeder guide and inner cover 6 Close the feeder cover CAUTION Take care to avoid pinching your fingers w...

Страница 52: ...r water directly onto the flatbed platen glass Sprayed liquid can get inside the scanner and soil the light source and lens Overuse of water and allowing the scanner to become too wet during cleaning...

Страница 53: ...ten glass and pressure board periodically 1 Open the feeder CAUTION Open the feeder carefully and slowly taking care to avoid letting the feeder fall over backwards 2 Wipe the flatbed platen glass sca...

Страница 54: ...thout periodic cleaning a problem may be caused on the scanned image or the document may become soiled Clean the feeder periodically 1 Open the feeder cover Operate the opening lever and then slowly r...

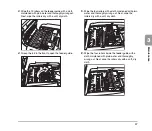
Страница 55: ...dry cloth 4 Grasp the tab in the front to open the feeder guide 5 Wipe the four rollers with a cloth moistened with plain water and thoroughly wrung out Next wipe the rollers dry with a soft dry cloth...

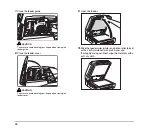
Страница 56: ...er guide 8 Close the feeder cover CAUTION Take care to avoid pinching your fingers when closing the feeder cover 9 Open the feeder 10 Wipe the feeder roller white and platen roller black with a cloth...

Страница 57: ...s When cleaning the platen roller rotate the roller slowly while wiping it 11 Pull the lever on the upper part of the feeder to open the scanning area on the feeder 12 Remove the scanning area cleanin...

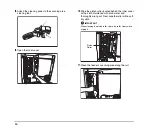
Страница 58: ...platen roller located behind the inner cover with a cloth moistened with plain water and thoroughly wrung out Next wipe the roller with a soft dry cloth IMPORTANT When cleaning the platen roller rota...

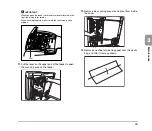
Страница 59: ...leaning paper from the scanning area cleaning tool and place the cleaning tool inside the cover 20 Close the cover for the feeder s scanning area CAUTION Take care to avoid pinching your fingers when...

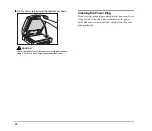
Страница 60: ...to avoid pinching your fingers Failure to do so might result in personal injury Cleaning the Power Plug If you leave the power plug connected to the power outlet for a long period of time dust may acc...

Страница 61: ...Chapter 4 Practical Examples 1 Messages 54 Status Display 54 Error Messages 55 2 Troubleshooting 57 Trouble Categories 57 Problem and Solution 57...

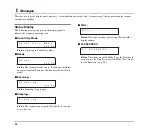
Страница 62: ...If you do not perform any operations for 10 minutes the scanner will enter Sleep mode Scanning Status Scanning is in progress Sleeping Status The scanner is entering the Sleep mode Press any key to r...

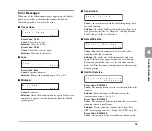
Страница 63: ...n Tool Settings in the User Manual Detect Mix Doc Cause Mixed size documents were detected while scanning at 600 dpi resolution Solution Check the size of the documents and scan again If this message...

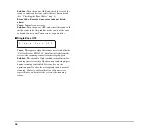
Страница 64: ...anon service representative Single Pass OFF Cause This appears when the scanner is restarted after the Call for Service E2250101 insufficient light from the reverse side scanning sensor error message...

Страница 65: ...t Open See p 60 Scanning Results Are Not as Expected See p 60 The Display Panel Does Not Display Properly See p 62 Job Functions Do Not Operate Properly See p 62 It you cannot resolve a problem contac...

Страница 66: ...The Scanner Is Not Recognized Connecting via SCSI If the scanner s SCSI connection is not recognized first confirm the following Are the scanner and PC connected correctly using the proper cable Is th...

Страница 67: ...first confirm the following Scanning may be slow if the USB interface does not support Hi Speed USB 2 0 Does the PC s USB interface support only Full Speed USB 1 1 Is the USB cable you are using the o...

Страница 68: ...Flatbed Saved Image Files Do Not Open If image files saved by CapturePerfect 3 0 cannot be opened by another application first confirm the following Does the application you are using support Capture...

Страница 69: ...ing glass or rollers inside the scanner are dirty Solution Clean the scanning glass and roller inside the feeder See Daily Cleaning on p 44 If lines still appear on the image even after you clean the...

Страница 70: ...ems and causes Problem The job title does not appear after pressing the Job keys Cause The job was not registered using Job Registration Tool Solution Register the job using Job Registration Tool For...

Страница 71: ...Chapter 5 Appendix 1 Specifications 64 Specifications for the Scanner 64 Options 65 Consumables 65 External Dimensions 66 2 Index 67...

Страница 72: ...d 60 to 90 g m2 Document Feeding Feeder Flatbed Scanning Method 3 line CCD CIS Light Source Xenon lamp Scanning Sides Simplex Duplex Scanning Modes Black and White Error Diffusion Advanced Text Enhanc...

Страница 73: ...ted above if the software supports them They may not work depending on your computer s capabilities and the software you are using Specifications are subject to change without notice Options Stamp Uni...

Страница 74: ...66 External Dimensions 23 7 602 mm 12 4 314 mm 5 9 150 mm 12 5 317 mm 16 4 714 mm 14 8 377 mm 23 1 586 mm 24 3 618 mm 1 3 32 mm...

Страница 75: ...Cover 11 Feeding 22 Automatic Feeding 24 Panel Feeding 23 Standard Feeding 22 Flatbed 20 Flatbed Platen Glass 11 H Handling 5 I Installation Location 2 J Job Function 25 Job Keys 13 Job Mode 26 Job Re...

Страница 76: ...ass Duplex 39 Slide Guide 11 Specifications 64 Stamp Cartridge 42 Stamp Unit 14 Standard Feeding 22 Stand by Mode 38 Start Key 13 Stop Key 13 T Transportation Screw 2 U USB Connector 12 User Mode Func...

Страница 77: ...P O BOX 2262 1180 EG AMSTELVEEN THE NETHERLANDS CANON LATIN AMERICA INC 703 WATERFORD WAY SUITE 400 MIAMI FLORIDA 33126 U S A CANON AUSTRALIA PTY LTD 1 THOMAS HOLT DRIVE NORTH RYDE SYDNEY N S W 2113 A...

Отзывы: