Calibrate the printhead
Introduction
When you are unsure about the density of colors on your printed output, you can optimize the
printhead performance. Perform a printhead calibration when you want to optimize colors.
When you enable [Automatic nozzle optimization] the printer will create a test print on which
each individual nozzle will print a pattern. Failing nozzles are compensated by other nozzles for all
print jobs, which results in an optimum print quality.
NOTE
• You can only perform printhead calibration when you print without winding. For more
Print without winding on page 139
.
• You have to use a media width that is larger than 1270 mm (50 inch).
• You have to use a media type that can be used for printing without winding.
• You have to use a smooth, white, opaque, non-reflective media for the printhead calibration of
one of the following categories:
• Heavy paper > 200 gsm (54 lb bond)
• Paper 120-200 gsm (32-54 lb bond)
• Film
• Polymeric & cast self-adhesive vinyl
• Thick film > 200 um (0.0079 inch)
Procedure
1.
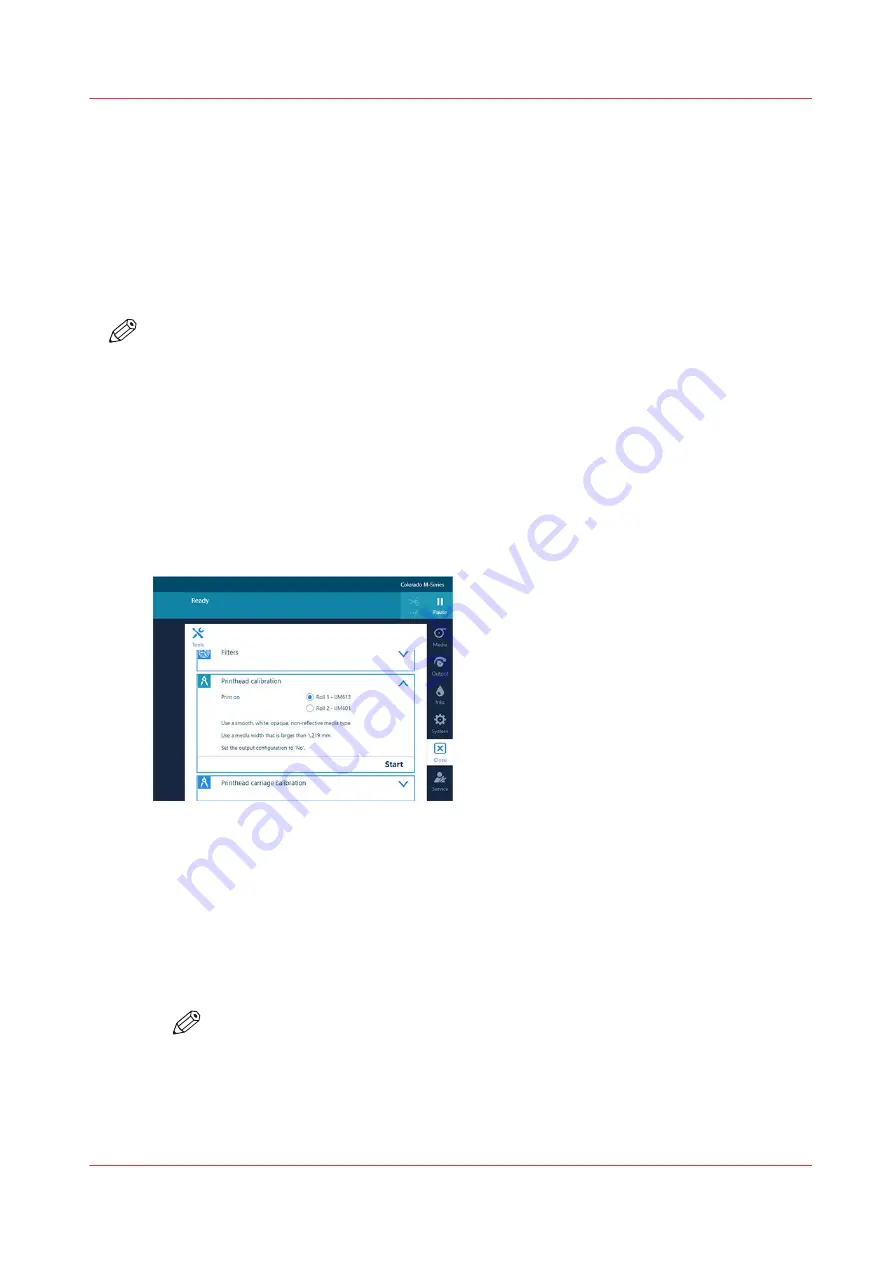
On the operator panel tap on the [Tools] icon on the right.
2.
Tap on [Printhead calibration].
3.
Select the roll you want to use for calibration.
4.
Tap on [Start].
The printer performs the calibration.
NOTE
The calibration can take quite some time, around 30 minutes. Wait until the printer is
finished with the calibration. When the active job disappears and [Start] is no longer
greyed out, the calibration is finished.
Calibrate the printhead
Chapter 7 - Improve quality
255
Содержание Colorado M Series
Страница 1: ...Colorado M series Extended operation guide 2023 Canon Production Printing ...
Страница 9: ...Chapter 1 Introduction ...
Страница 17: ...Instruction videos Available documentation Chapter 1 Introduction 17 ...
Страница 20: ...Optional features 20 Chapter 1 Introduction ...
Страница 21: ...Chapter 2 Safety information ...
Страница 32: ...Safety System 32 Chapter 2 Safety information ...
Страница 33: ...Chapter 3 Explore the system ...
Страница 40: ...The components of the printer top cover open 40 Chapter 3 Explore the system ...
Страница 41: ...Chapter 4 Handle the media ...
Страница 70: ...FLXfinish in the RIP 70 Chapter 4 Handle the media ...
Страница 165: ...Chapter 5 Print a job ...
Страница 174: ...Use the PRISMAsync Remote Control app 174 Chapter 5 Print a job ...
Страница 175: ...Chapter 6 Maintain the system ...
Страница 206: ...6 Unscrew the six green screws of the mirror boxes manually Clean the mirrors 206 Chapter 6 Maintain the system ...
Страница 249: ...Chapter 7 Improve quality ...
Страница 259: ...Chapter 8 Configure the network and security settings ...
Страница 290: ...Enable system installation from USB 290 Chapter 8 Configure the network and security settings ...
Страница 291: ...Chapter 9 Troubleshooting and support ...
Страница 309: ...Install a license via ORS Chapter 9 Troubleshooting and support 309 ...
Страница 313: ...Install a license received via e mail Chapter 9 Troubleshooting and support 313 ...
Страница 342: ...No gradual variation vertical banding Vertical banding 342 Chapter 9 Troubleshooting and support ...
Страница 363: ...Chapter 10 Regulation Notices ...
Страница 377: ......


