


Status on the operator panel
Introduction
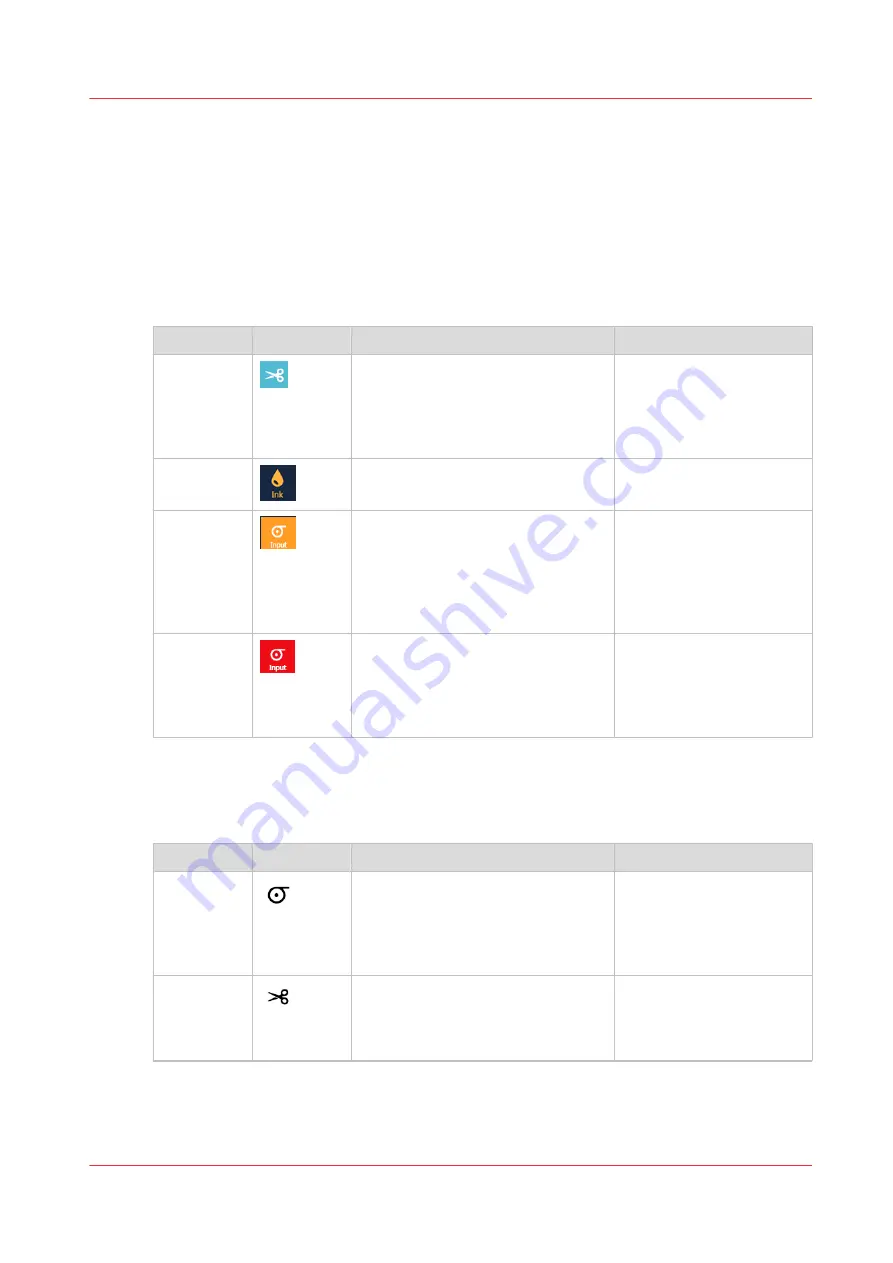
The operator panel indicates when an operator attention is required via colors and symbols.
Colors on the operator panel
When you see an orange or red color indication on the operator panel, tap the tile with the color
to see what action is required. You can take action if necessary.
Color
Example
Description
Status
Light-blue
Operator action is coming up in the
future, for some actions you can al-
ready prepare, e.g.:
'You can refill ink', 'A cut is planned',
'Not calibrated media'.
The system is operational.
Orange icon
In the near future an orange warning
will appear, unless action is taken.
The system is operational.
Orange
Operator action is possible or re-
quired to keep the system running,
e.g.:
'You should refill ink', 'You should
perform maintenance', 'You should
load the correct media type'.
The system stays opera-
tional and most of the time
can continue its action for
now.
Red
Operator action is required now, e.g.:
'You must refill ink to continue print-
ing', 'You must remove media from
the paper path to continue printing'.
The system is blocked and
will only continue when
the indicated action has
been performed by the op-
erator.
Indicators on the operator panel
Indicators on the operator panel want to get your attention to make you aware of an operator
action that is coming up (typically used in the queue).
Color
Example
Description
Status
Media (re-
quest)
Load required media for this job.
Load a roll with the requested media
type and width. The roll width can al-
so be bigger than the size that is re-
quested.
When the indicator is or-
ange and this job becomes
the active job, the system
is paused until you solve
the issue.
Cut (re-
quest)
Cut the media after this job.
When the indicator is or-
ange and this job is finish-
ed, the system is paused
until you solve the issue.
4
Status on the operator panel
Chapter 5 - Print a job
163
Содержание Colorado 1630
Страница 1: ...Colorado 1630 Extended operation guide 2021 2022 Canon Production Printing ...
Страница 9: ...Chapter 1 Introduction ...
Страница 18: ...Optional features 18 Chapter 1 Introduction ...
Страница 19: ...Chapter 2 Safety information ...
Страница 30: ...Safety System 30 Chapter 2 Safety information ...
Страница 31: ...Chapter 3 Explore the system ...
Страница 38: ...The components of the printer top cover open 38 Chapter 3 Explore the system ...
Страница 39: ...Chapter 4 Handle the media ...
Страница 81: ...FLXfinish in the RIP Chapter 4 Handle the media 81 ...
Страница 157: ...Chapter 5 Print a job ...
Страница 166: ...Use the PRISMAsync Remote Control app 166 Chapter 5 Print a job ...
Страница 167: ...Chapter 6 Maintain the system ...
Страница 248: ...6 Unscrew the six green screws of the mirror boxes manually Clean the mirrors 248 Chapter 6 Maintain the system ...
Страница 257: ...Chapter 7 Improve quality ...
Страница 267: ...Chapter 8 Configure the network and security settings ...
Страница 298: ...Enable system installation from USB 298 Chapter 8 Configure the network and security settings ...
Страница 299: ...Chapter 9 Troubleshooting and support ...
Страница 318: ...Install a license via ORS 318 Chapter 9 Troubleshooting and support ...
Страница 351: ...No gradual variation vertical banding Vertical banding Chapter 9 Troubleshooting and support 351 ...
Страница 372: ...Error codes overview 372 Chapter 9 Troubleshooting and support ...
Страница 373: ...Appendix A Regulation Notices ...
Страница 387: ......


