


33
Co
py
4
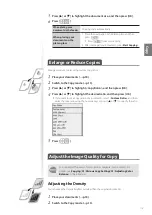
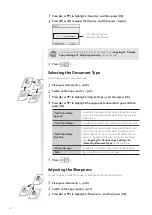
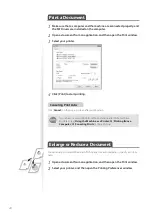
Press [
◄
] or [
►
] to adjust the sharpness, and then press <Apply>.
– : Less sharpness
(Suitable for photos)
+ : More sharpness
(Suitable for documents written in pen or
pencil)
5
Press [
].
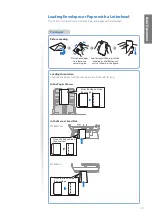
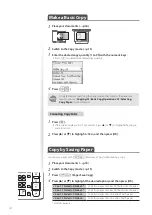
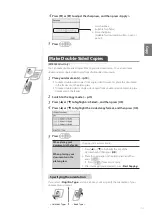
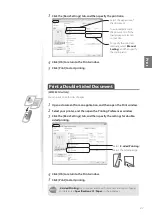
Make Double-Sided Copies
(MF8580Cdw Only)
You can make double-sided copies from single-sided documents. You can also make
double-sided or single-sided copies from double-sided documents.
1
Place your documents (
→
p.18).
•
To make double-sided copies from single-sided documents, place the documents
in the feeder or on the platen glass.
•
To make double-sided or single-sided copies from double-sided documents, place
documents in the feeder.
2
Switch to the Copy mode (
→
p.15).
3
Press [
▲
] or [
▼
] to highlight <2-Sided>, and then press [OK].
4
Press [
▲
] or [
▼
] to highlight the 2-sided copy format, and then press [OK].
5
Press [
].
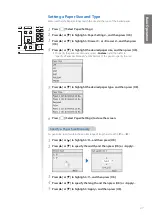
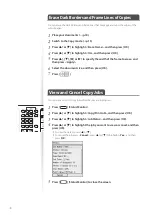
When placing your
documents in the feeder
Copying starts automatically.
When placing your
documents on the
platen glass
1. Press [
▲
] or [
▼
] to highlight the size of the
document, and then press [
OK
].
2. Place the next page on the platen glass, and then
press [
].
•
Press [
] for every scanning.
3. After scanning all your documents, press <
Start Copying
>.
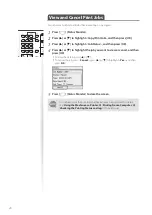
Specifying the orientation
If you select <
Orig/Fin. Type
> at step 4 above, you may specify the orientation of your
documents and output.
<Calendar Type>
<Book Type>
Содержание Color imageCLASS MF8580Cdw
Страница 38: ...38 38 Memo...
Страница 72: ...72 72 Memo...
Страница 92: ...92 92 Memo...
Страница 119: ...119 119 Memo...