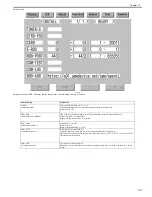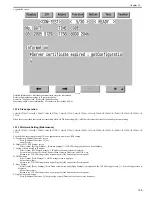
Chapter 11
11-40
In the support departments of regional headquarters of Canon, all license files of the applications that have been issued are filed according to device serial numbers,
enabling you to obtain a series of license files through a single screen as long as you can identify the serial number of the device in question.
The following shows the steps to follow after you have obtained a special license from the support staff of the regional headquarters of Canon.
1) Copy the set of special license files on the PC you are using for service work.
Register the following with the Service Support Tool (SST): system file, language file, remote UI file, hard disk drive format file, MEAP contents file. (Be sure
to pay attention to the version compatibility of individual files.)
2) Have the new hard disk drive at hand and replace it on site.
While holding down the 2 and 8 keys at the same time, turn on the main power so that the machine will start up in download mode. The IP address 172.16.1.100
will automatically be used, which enables you to download files in high speed through a network.)
3) Using the SST, format the new HDD, and install the System, MEAP Contents, Language, and Remote UI files.
4) When the device has started normally, obtain the jar files of the MEAP applications from the user, and install them using the license files of the applications in
the same way as you would when installing them for the first time.
5) As necessary, make login service selections and import user information.
Memo:
If you format the hard disk without uninstalling MEAP applications, always reinstall the applications previously installed. Unless reinstalling them, lots for the
MEAP counters the applications use will not be released. The message "The number of applications that can be installed has exceeded the limit. Try to install
this application after uninstalling other applications." may appear and the device does not accept to install new application. To install new applications, once
reinstall the applications installed before formatting and uninstall unnecessary applications.
11.1.24 MEAP Safe Mode
0018-8624
Color iR C3380G / Color iR C2880G / Color iR C3380i / Color iR C3380 / Color iR C2880i / Color iR C2880 / iR C3480 / iR C3480i / iR C3080 / iR C3080i / iR
C2550
Use safe mode if you need to start up the system without worrying about extra applications. It will start up only those system software files (including SMS) that
normally start up as default files while preventing MEAP applications and the like from starting up.
When you have made changes and turned off and then on the device, the control panel will indicate 'MPSF' in its lower right corner. The MEAP applications that
may have been active before you shut down the equipment will not start up on their own. Make use of safe mode when restoring the system software as when MEAP
applications or services cause a fault as the result of a conflict or wrong sequence of registration/use. You can access to SMS in this condition so that you can take
necessary measures, for example, you can stop application that may cause the trouble.
If default authentication has been selected, the mode of authentication remains valid; otherwise, the message "The login service must be set again with SMS" ap-
pears. Change the login service as necessary.
Starting in Safe Mode
1) Start the device in service mode: click
Ad Func
key, press 2 and 8 buttons at the same time, and then click
Ad Func
key once again so that the service mode
screen appears.
2) Press
COPIER
button.
3) Press
OPTION
button.
4) Press
USER.
5) Press the right-arrow button.
6) Press
MEAPSAF
E.
F-11-59
7) Press the 1 key on the control panel keypad to change the setting to '1'; then, click
OK
button.
Содержание CiRC2550
Страница 2: ......
Страница 27: ...Chapter 1 Introduction ...
Страница 28: ......
Страница 47: ...Chapter 1 1 18 F 1 14 ON OFF ON OFF ...
Страница 70: ...Chapter 1 1 41 5 Turn on the main power switch ...
Страница 79: ...Chapter 2 Installation ...
Страница 80: ......
Страница 85: ...Chapter 2 2 3 Not available in some regions ...
Страница 134: ...Chapter 3 Basic Operation ...
Страница 135: ......
Страница 137: ......
Страница 143: ...Chapter 4 Main Controller ...
Страница 144: ......
Страница 152: ...Chapter 4 4 6 F 4 6 CPU HDD ROM access to the program at time of execution ...
Страница 171: ...Chapter 5 Original Exposure System ...
Страница 172: ......
Страница 203: ...Chapter 6 Laser Exposure ...
Страница 204: ......
Страница 206: ......
Страница 220: ...Chapter 7 Image Formation ...
Страница 221: ......
Страница 277: ...Chapter 8 Pickup Feeding System ...
Страница 278: ......
Страница 282: ......
Страница 336: ...Chapter 9 Fixing System ...
Страница 337: ......
Страница 339: ......
Страница 357: ...Chapter 10 Externals and Controls ...
Страница 358: ......
Страница 362: ......
Страница 366: ...Chapter 10 10 4 F 10 2 F 10 3 FM1 FM2 FM5 FM8 FM11 FM4 FM3 FM6 FM7 FM9 FM10 ...
Страница 375: ...Chapter 10 10 13 F 10 10 2 Remove the check mark from SNMP Status Enabled ...
Страница 376: ...Chapter 10 10 14 F 10 11 ...
Страница 402: ...Chapter 11 MEAP ...
Страница 403: ......
Страница 405: ......
Страница 452: ...Chapter 12 RDS ...
Страница 453: ......
Страница 455: ......
Страница 464: ...Chapter 13 Maintenance and Inspection ...
Страница 465: ......
Страница 467: ......
Страница 469: ...Chapter 13 13 2 F 13 1 8 9 1 2 3 3 5 6 7 10 11 12 13 14 4 ...
Страница 474: ...Chapter 14 Standards and Adjustments ...
Страница 475: ......
Страница 477: ......
Страница 485: ......
Страница 486: ...Chapter 15 Correcting Faulty Images ...
Страница 487: ......
Страница 495: ...Chapter 15 15 4 F 15 2 COLOR M 1 COLOR Y C K 0 ...
Страница 569: ...Chapter 15 15 78 F 15 82 J102 J107 J103 J108 J101 J109 J106 J112 J115 J113 J114 J104 J105 ...
Страница 570: ...Chapter 16 Self Diagnosis ...
Страница 571: ......
Страница 573: ......
Страница 600: ...Chapter 17 Service Mode ...
Страница 601: ......
Страница 603: ......
Страница 712: ...Chapter 18 Upgrading ...
Страница 713: ......
Страница 715: ......
Страница 746: ...Chapter 19 Service Tools ...
Страница 747: ......
Страница 748: ...Contents Contents 19 1 Service Tools 19 1 19 1 1 Special Tools 19 1 19 1 2 Solvents and Oils 19 2 ...
Страница 749: ......
Страница 752: ...APPENDIX ...
Страница 774: ......

