Adjusting Cropping Frames (ScanGear)
"Cropping" is the act of selecting the area you want to keep in an image and discarding the rest when
scanning it.
On the
Basic Mode
tab and
Advanced Mode
tab, you can specify cropping frames (scan areas) on the
image(s) displayed in the Preview area of the screen.
When you perform a scan, each area specified with a cropping frame will be scanned as a separate image.
Note
• In whole image view, you can specify multiple cropping frames on the preview image.
• Refer to "Adjusting Cropping Frames in the Image Stitch Window" for your model from Home of the
Online Manual
for how to adjust cropping frames with IJ Scan Utility.
Initial Cropping Frame
In thumbnail view:
No cropping frame is specified. You can drag the mouse over a thumbnail to specify a cropping frame.
In whole image view:
An active cropping frame is automatically specified around the preview image. You can drag the cropping
frame in the Preview area to specify the area.
Note
• You can change the auto crop setting in the
Preferences
dialog box. Refer to
Cropping Frame on
Previewed Images
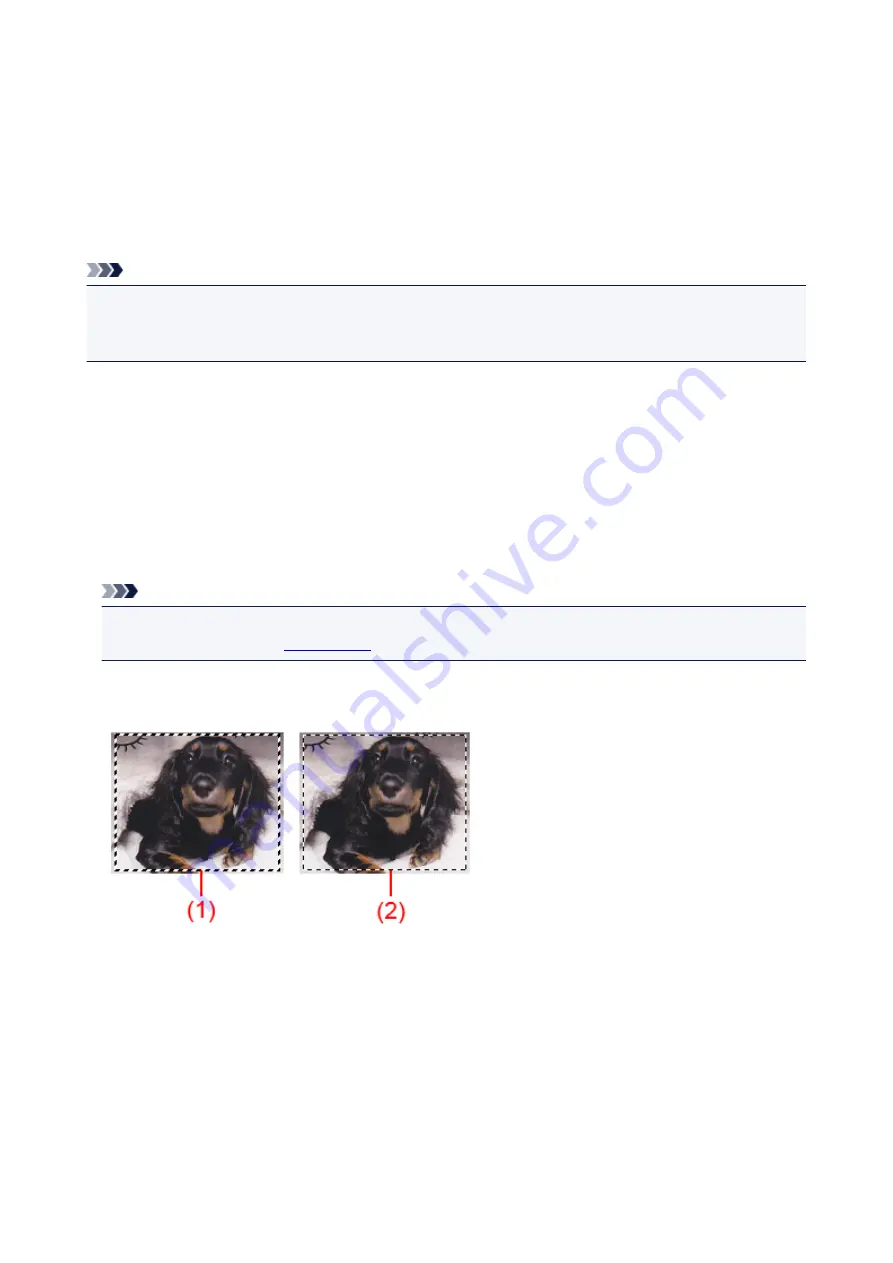
Cropping Frame Types
(1) Thick cropping frame (rotating or stationary)
Represents a selected cropping frame. Appears only in whole image view. You can select multiple
cropping frames by clicking them while pressing the Ctrl key. Output size, image corrections, and
other settings on the
Basic Mode
tab or
Advanced Mode
tab will be applied to all the selected
cropping frames.
(2) Thin cropping frame
In thumbnail view:
Output size, image corrections, and other settings on the
Basic Mode
tab or
Advanced Mode
tab
will be applied.
194
Содержание CanoScan LiDE 220
Страница 20: ...Safety Guide Safety Precautions Regulatory and Safety Information 20 ...
Страница 27: ...Placing Items Place the Item on the Platen Items You Can Place How to Place Items 27 ...
Страница 38: ...Scanning Scanning from a Computer Scanning Using the Scanner Buttons 38 ...
Страница 53: ...5 Select Select Source according to the items to be scanned 6 Select Auto scan for Paper Size then click OK 53 ...
Страница 97: ...Defaults You can restore the settings in the displayed screen to the default settings 97 ...
Страница 106: ...Defaults You can restore the settings in the displayed screen to the default settings 106 ...
Страница 141: ...141 ...
Страница 202: ...4 When a confirmation appears click Yes 5 When uninstallation is complete click Complete ScanGear is deleted 202 ...
Страница 211: ...Other Scanning Methods Scanning with WIA Driver Scanning Using the Control Panel Windows XP Only 211 ...
Страница 214: ...6 Click Scan When scanning is completed the scanned image appears in the application 214 ...
Страница 230: ...Troubleshooting Search Each Function Problems with Scanning Problems with Installation Downloading 230 ...
Страница 231: ...Problems with Scanning Problems with Scanning Scan Results Not Satisfactory Software Problems 231 ...
Страница 255: ...Software Problems The E mail Client You Want to Use Does Not Appear in the Screen for Selecting an E mail Client 255 ...


