quickstart guide
CAM-IPTZ-101
www.crestron.com
888.273.7876
201.767.3400
Specifications subject to
change without notice.
CAM-IPTZ-101
For details, refer to the latest version of the
CAPTURE-HD
& CAPTURE-HD-PRO
Operations Guide, Doc. 7233.
QUICKSTART DOC. 7388A (2033585) 09.12
PTZ Camera for CAPTURE-HD & CAPTURE-HD-PRO
The CAM-IPTZ-101 is a Canon
®
PTZ camera capable of capturing high-quality video
from a wide range of angles. The CAM-IPTZ-101 captures crystal clear, high-contrast
images even in low light and is capable of dual streaming in both MJPEG and
MPEG4 formats. When connected to Crestron's state of the art Capture HD
®
High-Definition Capture Recorder, the CAM-IPTZ-101 is the perfect camera for
capturing various angles and views of a presentation.
A. Accessories
•
Video adapter cable, BNC jack to 3.5 mm plug, 8” (203 mm) long, supplied
• Ethernet
cables, available separately
• BNC
video
interface cable, available separately
B. Camera Configuration Settings
The CAM-IPTZ-101 comes from the factory with the following settings:
•
IP Address: 192:168.100.1 (static)
•
User name: root
•
Password: VB-C300
To configure the camera, do the following:
NOTE:
For additional information and specifications for the CAM-IPTZ-101,
refer to the Crestron
®
Web site (www.crestron.com). Refer also to the
information and materials from the manufacturer included with the camera.
1
LAN
Cable
PC
100-240 VAC
PoE
Hub
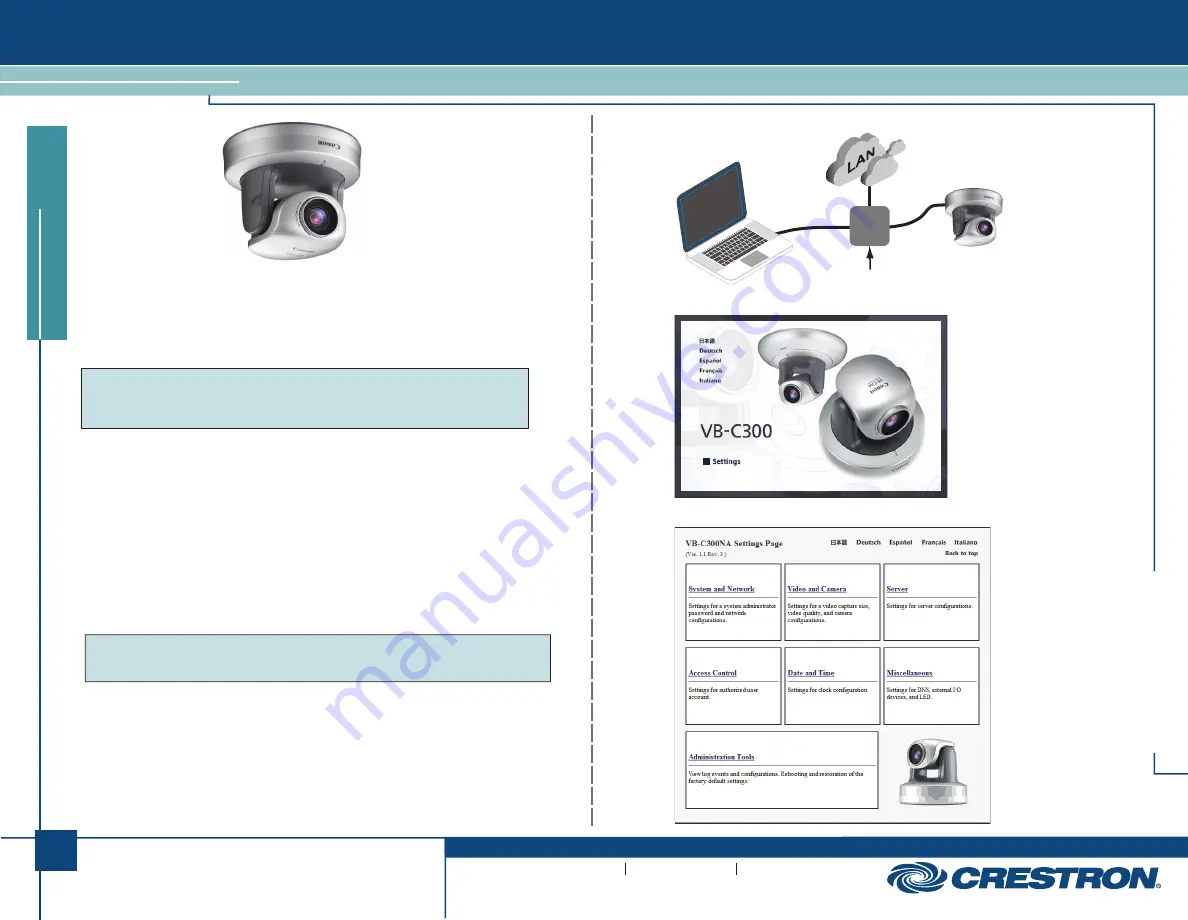
Configuration Connections
Initial Screen
“VB-C300NA Settings Page”
CAUTION: Never touch the camera head while its position is being initialized.
NOTE:
The camera head position is automatically initialized when power is applied.
1.
Connect the camera to a PC and LAN via a PoE hub as shown in the
diagram to the right.
2.
Set the PC’s IP address to 192.168.100.10
3.
Use the PC’s Web browser to connect to http://192.168.100.1. When the
initial screen appears, click on
Settings
.
4.
When prompted, enter the user name and password given above.
5.
When the “VBC300NA Settings Page” appears, click on the various
setting topics and enter any necessary information.


