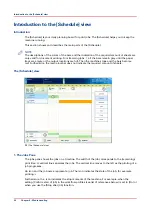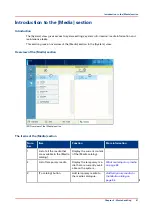
Item
Function
[Assign] button
Assign media from the media catalog (
).
[Unassign]
Unassign media from the selected paper tray.
[Open] button
Open the selected paper tray to load the media (
).
[Registration]
Perform a media registration for the selected media (
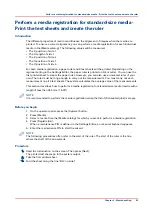
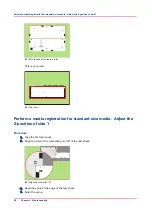
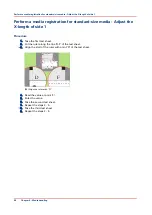
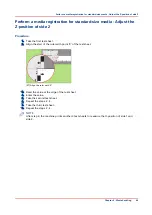
media registration for standard-size media - Print the test
sheets and create the ruler on page 65
istration for large media - Print the test sheets and create the
ruler on page 72
Arrow buttons
When your configuration contains more paper modules than
the [Trays] view can display in 1 screen, you can touch the ar-
row buttons to change part of machine displayed.
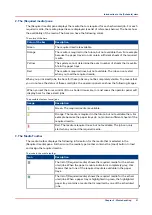
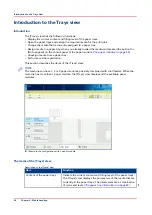
The paper tray information
The [Trays] view displays the following textual information for each paper tray.
• The media name, for example 'Normal paper'
• The media size, for example A3 or A4
• The media weight, for example 80 g
• The media color
• The special characteristics of the media, for example [cyclic] or [punched]. In brackets,
additional information is given about these media, for example the cycle count or the number
of holes for punched media.
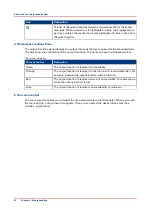
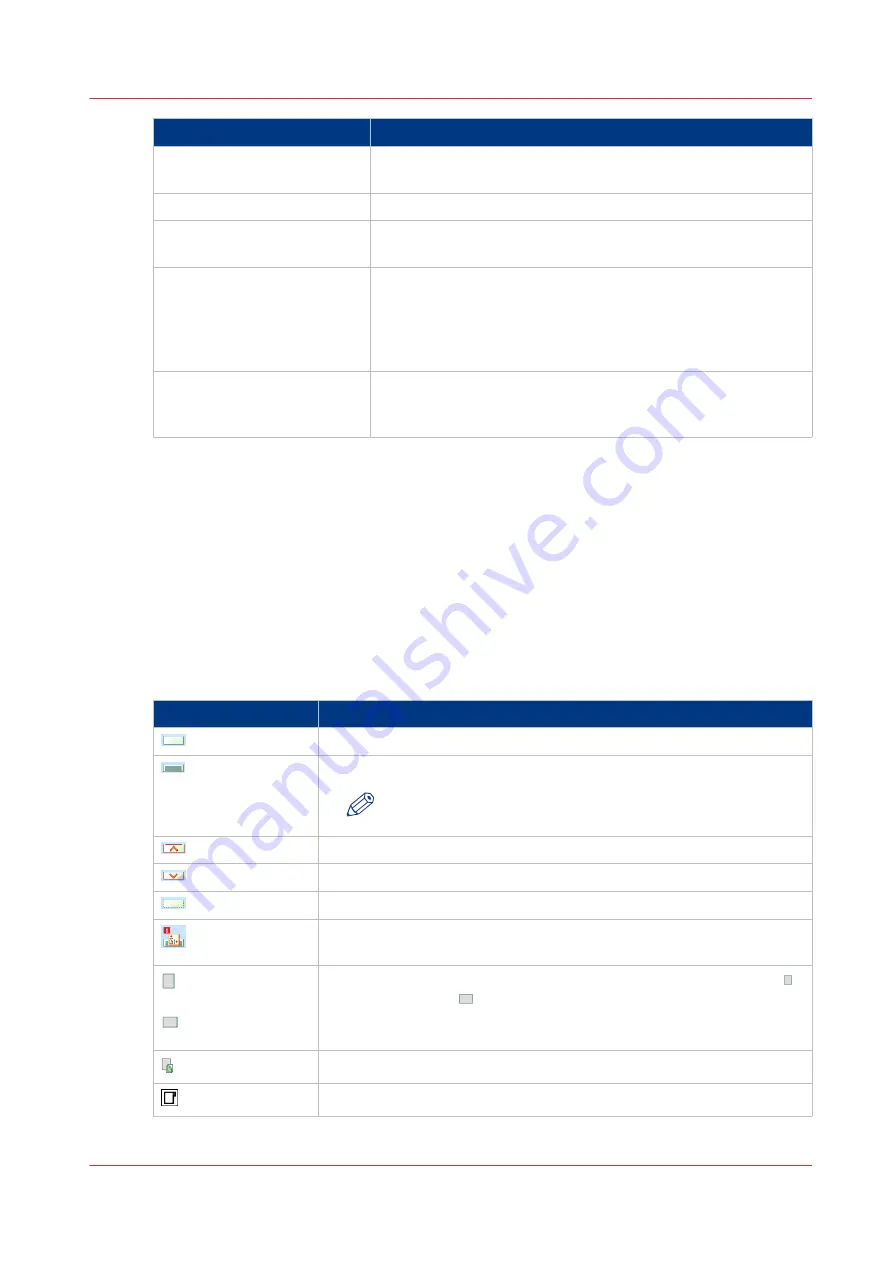
The [Trays] view displays the following icons for each paper tray.
The meaning of the icons
Icon
Description
The paper tray is empty
The paper tray is full
NOTE
Each line indicates the presence of about 100 sheets
The paper tray is too full. Please remove sheets from the stack
The plate inside the paper tray is down
The paper tray is open
The paper guides inside the paper tray do not match the selected me-
dia size. You must correct the paper guides or the selected media
or
The paper tray contains media that are fed over the long edge (LEF)
or short edge (SEF) . The small icons indicate A4 or A4-like media.
The large icons indicate A3 or A3-like media. When you defined a color
for a media, the icon can have that color
The paper tray is in use for one or more scheduled jobs
The paper tray contains tab sheets
4
Introduction to the Trays view
Chapter 6 - Media handling
57
Содержание 6160
Страница 1: ...Operation guide Océ VarioPrint 6000 Line ...
Страница 7: ...Chapter 1 Preface ...
Страница 11: ...Chapter 2 Introduction ...
Страница 13: ...Chapter 3 Power information ...
Страница 19: ...Chapter 4 Main parts ...
Страница 31: ...Chapter 5 Adapt printer settings to your needs ...
Страница 49: ...Chapter 6 Media handling ...
Страница 85: ...Chapter 7 Carry out print jobs ...
Страница 162: ...Exchange all setups between printers 162 Chapter 7 Carry out print jobs ...
Страница 163: ...Chapter 8 Remote Service ORS optional ...
Страница 166: ...Remote Service 166 Chapter 8 Remote Service ORS optional ...
Страница 167: ...Chapter 9 Remote Monitor optional ...
Страница 169: ...Chapter 10 Optional finishers and other devices ...
Страница 189: ...Chapter 11 Counters ...
Страница 194: ...Find the meter readings 194 Chapter 11 Counters ...
Страница 195: ...Chapter 12 Keeping the printer running ...
Страница 209: ...Appendix A Miscellaneous ...
Страница 212: ...Product specifications 212 Appendix A Miscellaneous ...
Страница 220: ...Index 220 ...
Страница 221: ......


