manualshive.com logo in svg
background image

Introduction

2

E

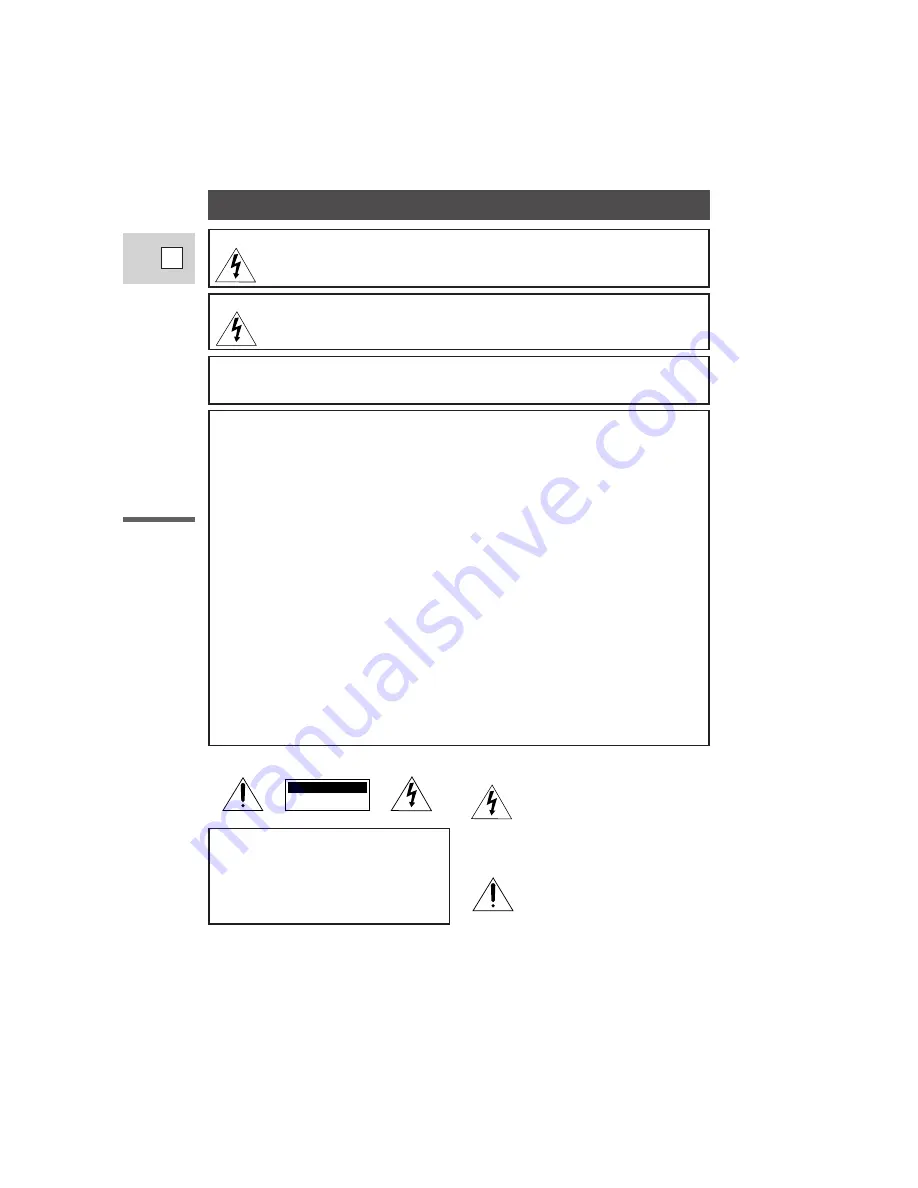
WARNING: TO REDUCE THE RISK OF FIRE OR ELECTRIC SHOCK, DO NOT

EXPOSE THIS PRODUCT TO RAIN OR MOISTURE.

Important Usage Instructions

WARNING: TO REDUCE THE RISK OF ELECTRIC SHOCK AND TO REDUCE

ANNOYING INTERFERENCE, USE THE RECOMMENDED
ACCESSORIES ONLY.

COPYRIGHT WARNING:

Unauthorized recording of copyrighted materials may infringe on the
rights of copyright owners and be contrary to copyright laws.

Important Warning

CAUTION:
TO REDUCE THE RISK OF ELECTRIC
SHOCK, DO NOT REMOVE COVER (OR
BACK). NO USER SERVICEABLE PARTS
INSIDE. REFER SERVICING TO QUALI-
FIED SERVICE PERSONNEL.

The lightning flash with arrowhead
symbol, within an equilateral triangle,
is intended to alert the user to the
presence of uninsulated “dangerous
voltage” within the product’s
enclosure, that may be of sufficient
magnitude to constitute a risk of
electric shock to persons.

The exclamation point, within an
equilateral triangle, is intended to
alert the user to the presence of
important operating and maintenance
(servicing) instructions in the literature
accompanying the product.

CAUTION

RISK OF ELECTRIC SHOCK

DO NOT OPEN

Digital Video Camcorder, ZR

This device complies with Part 15 of the FCC Rules. Operation is subject to the following two
conditions: (1) This device may not cause harmful interference, and (2) this device must accept any
interference received, including interference that may cause undesired operation.

Note: This equipment has been tested and found to comply with the limits for class B digital device,
pursuant to Part 15 of the FCC Rules. These limits are designed to provide reasonable protection
against harmful interference in a residential installation. This equipment generates, uses and can
radiate radio frequency energy and, if not installed and use in accordance with the instructions, may
cause harmful interference to radio communications. However, there is no guarantee that interference
will not occur in a particular installation. If this equipment does cause harmful interference to radio or
television reception, which can be determined by turning the equipment off and on, the user is
encouraged to try to correct the interference by one or more of the following measures:
• Reorient or relocate the receiving antenna.
• Increase the separation between the equipment and receiver.
• Connect the equipment into an outlet on a circuit different from that to which the receiver is

connected.

• Consult the dealer or an experienced radio/TV technician for help.

Use of shielded cable is required to comply with class B limits in Subpart B of Part 15 of FCC Rules.
Do not make any changes or modifications to the equipment unless otherwise specified in the manual.
If such changes or modifications should be made, you could be required to stop operation of the
equipment.

Canon U.S.A. Inc.
One Canon Plaza, Lake Success, NY 11042, U.S.A.
Tel No. (516)328-5600

Содержание 0057B001 - ZR 300 Camcorder

Страница 1: ...interference received including interference that may cause undesired operation Note This equipment has been tested and found to comply with the limits for class B digital device pursuant to Part 15 of the FCC Rules These limits are designed to provide reasonable protection against harmful interference in a residential installation This equipment generates uses and can radiate radio frequency ener...

Страница 2: ... may cause the product and cart combination to overturn 10 Power Sources The CA 600A Compact Power Adapter should be operated only from the type of power source indicated on the marking label If you are not sure of the type of power supply to your home consult your product dealer or local power company Regarding other power sources such as battery power refer to instructions in this manual 11 Pola...

Страница 3: ...g battery and refer servicing to qualified service personnel under the following conditions a When the power supply cord or plug is damaged b If any liquid has been spilled onto or objects have fallen into the product c If the product has been exposed to rain or water d If the product does not operate normally even if you follow the operating instructions Adjust only those controls that are covere...

Страница 4: ...ly 47 Adjusting Focus Manually 49 Setting the White Balance 50 For Playback Displaying Data Code 52 Setting the World Clock 53 Returning to a Pre Marked Position 55 Searching the Tape Photo Search Date Search 56 Editing to a VCR 57 Preparing the Camera 60 Notes on Using the Batteries 61 Setting the Audio Mix 63 Maintenance 64 Troubleshooting 68 The ZR System Diagram 72 Optional Accessories 73 Find...

Страница 5: ...r years to come To get the most out of your new camcorder We recommend that you read this manual thoroughly there are many sophisticated features which will add to your recording enjoyment Getting started To get started we suggest that you master the basic operations of the camcorder first before moving on to use its full range of features For quick reference in addition to the contents and index ...

Страница 6: ...give you outstanding picture quality Advanced digital technology allows you to add special effects and scene transitions to your recordings Digital Video Digital Effects Image Stabilizer PCM Digital Sound Lithium ion power supply 2 5 LCD Screen 180 000 Pixels The high resolution LCD screen makes it easy for you to shoot colorful well composed video It is also great for playback 11 lens and 44 digi...

Страница 7: ...le into an AC outlet 6 Remove the DC coupler after use Place the camera on its side before removing the coupler since the coupler may drop out when you press the battery release knob Slide across the battery cover release switch and replace the small rubber stopper Press the battery release knob orange upwards Always turn the camera off before removing the power source Before operating your camera...

Страница 8: ...power cable into an AC outlet One of the two charge indicators flashes red to show that charging is in progress Single flashes mean that the battery pack is less than 50 charged Double flashes mean that it is between 50 and 75 charged Triple flashes mean that it is more than 75 charged The indicator glows steadily when the battery pack is fully charged If you attached two battery packs the second ...

Страница 9: ... AC outlet you do not need to remove attached battery packs but charging will not take place until you remove the DC coupler from the adapter You can find detailed notes for using the batteries in the Notes on Using the Batteries on p 61 These notes include charging and recording times and how to charge the back up battery Do not tug at the DC Coupler cable or bend it backwards and forwards while ...

Страница 10: ...Remove the cassette by pulling it straight out 4 Press the PUSH mark on the compartment until it clicks and wait for it to close 5 Click the cover back into place OPEN EJECT 2 3 4 5 Loading and unloading Use videocassettes marked with the Mini logo only Notes After loading a cassette use record search p 34 to find the point where you want to start recording Do not interfere with the cassette compa...

Страница 11: ...cassettes directly from the tape case to the camcorder do not open the tape protect cover or touch the tape itself Do not use cassettes where the tape has been damaged or rejoined they may damage the camcorder Do not insert anything into the small holes on the cassette or cover them with cellophane tape Handle cassettes with care dropping them or exposing them to external shocks may cause internal...

Страница 12: ...ts the camera s Easy Recording program It allows you to simply point and shoot without making any manual adjustments see p 37 2 Slide the MOVIE PHOTO switch to MOVIE 3 Slide the LENS COVER switch to OPEN The lens cover opens and PAUSE appears in the display the camera is now in record pause mode The camera will turn itself off if you leave it in record pause mode for more than about five minutes T...

Страница 13: ...itch to CLOSE Return the LCD screen flush to the camera body and replace the LCD cover Unload the cassette Set the POWER switch to OFF Disconnect the power source Notes Make sure that your fingers do not obstruct the microphone or lens during recording In addition to Easy Recording the camera has six other recording programs Turn the POWER switch to the P position to give you access to these recor...

Страница 14: ... the tape and usage conditions may affect recording mosaic like noise may appear in the image and the sound may be distorted during playback For important recordings therefore set the camera to SP mode If you record in both modes on the same tape the picture may become distorted during playback and the time code may not be written correctly A tape recorded in LP mode on other digital equipment may...

Страница 15: ... zoom control the faster the zoom speed The T and W buttons on the wireless controller adjust the picture angle but not the zoom speed 11 optical zoom D ZOOM ON The zoom control continues to work as usual You can freely zoom in and out between 1 and 44 magnification the camera automatically switches between optical zooming up to 11 and digital zooming 11 to 44 Notes When you want to get as close a...

Страница 16: ...t be careful not to leave it exposed to bright sunlight or it may damage the unit or the LCD screen when attached to the camera You may be able to move the Finder Unit out of direct sunlight by changing the angle of the LCD screen When not attached to the camera always replace its protective cap and never look through the Finder Unit directly at the sun or other bright light sources The Finder Uni...

Страница 17: ...ess controller When you lift the LCD panel up vertically so that it faces the opposite direction see diagram opposite you can watch yourself during recording or let your subject monitor recording REC REC PAUSE EJECT STOP AF OFF Self Timer countdown Exposure Adjustment Manual focus Exposure Adjustment No Cassette is loaded The tape has reached the end Condensation warning Photo mode AF AE mark The ...

Страница 18: ... position is usually labelled SAVE or ERASE OFF 1 Attach a power source press down and slide the POWER switch to VCR 2 Load the cassette 3 Press down the e play side of the multi switch to start playback To end playback press down the 3 stop side of the multi switch To wind the tape forwards stop playback and turn the multi switch lever away from the lens To wind the tape backwards stop playback a...

Страница 19: ... hold the multi switch lever away from the lens during normal fast forward Rewind playback For reverse playback at about 9 5 times normal speed turn and hold the multi switch lever towards the lens during normal playback or turn and hold the multi switch lever towards the lens during normal rewind Other playback modes The camcorder has a built in speaker so you can review the sound track alongside...

Страница 20: ...ton to return to normal playback The camera automatically returns to playback after about 30 seconds of slow playback Slow Reverse Playback To play back in reverse at about 1 5 normal speed press the 4a button and then the SLOW button during normal playback Press PLAY e to return to normal playback The camera automatically returns to 1 reverse playback after about 30 seconds of slow playback Rever...

Страница 21: ...et the TV VIDEO selector on the television to VIDEO If you are connecting the camera to a VCR set the input selector on the VCR to LINE VIDEO S VIDEO INPUT AUDIO L R S 150 S video Cable STV 150 Stereo Video Cable V R L S If your TV or VCR has an S video input terminal Attaching the DU 100 Docking Unit 1 Make sure that the ZR is switched off 2 Lift the MULTI CONNECTOR cover and align the multi conn...

Страница 22: ...of an attached Docking Unit there will be no output from the AUDIO VIDEO OUT terminal of the camera itself If you are going to use the TV as a monitor while you are shooting remember to keep the TV volume turned down as long as the camera s audio terminals are connected If the sound from the TV speakers is picked up by the microphone an unpleasant high pitched squeal called feedback may be produce...

Страница 23: ...terminal on the RF unit to the antenna input on the TV Use the coaxial cable with F connectors If your TV has flat twin lead cable use the 75 300 ohm adapter Connecting the RF unit TV with coaxial antenna cable VHF 2 3 RU 100 RF Unit 1 V R L If your TV does not have audio video terminals TV with flat twin lead antenna cable RU 100 RF Unit 300 75 ohm adapter 75 300 ohm adapter VHF 2 3 V R L To conn...

Страница 24: ... wind the wires around the screws Turn the TV on start playback on the camera see p 19 and set the TV and the RF unit to the video channel The video channel is the channel which is not used by a broadcasting station in your area and can be used for cassette playback channel 3 or 4 4CH 3CH FROM ANT TO TV 4CH 3CH Selecting the video channel Note Turn the camera off or disconnect it from the RF unit ...

Страница 25: ...d movement you can mount the camera on a tripod or any flat surface at a suitable height and operate it with the wireless controller When you are using a tripod be careful not to leave an attached Finder Unit exposed to bright sunlight or it may damage the unit or the LCD screen since the Finder Unit magnifies light You may be able to move the Finder Unit out of direct sunlight by changing the ang...

Страница 26: ...ment or change in picture angle should have a definite purpose Avoid unnecessary or half hearted movements Pan Use pans to record a landscape or follow a moving subject Decide the area you want to cover and stand facing the end of your panning angle Without moving your feet turn your waist to the starting position Start recording and after a few seconds begin to turn slowly from the waist Hold the...

Страница 27: ... Backlight p 65 3 Brightness p 65 4 Date and time set p 52 VCR menu q Remote sensor p 31 w Recording mode p 15 e Audio monitor p 63 r Mix balance p 63 t Stereo mono p 23 y Data code p 52 u Date and time select p 32 i Liquid crystal displays p 78 o Backlight p 65 0 Brightness p 65 1 Base zone p 54 2 Recording zone p 54 w q e r t y u i VCR MENU SELECT SET MENU CLOSE SENSOR ON REC MODE SP A MONITOR M...

Страница 28: ... select dial 5 Press the MENU button to close the menu Notes You can only see eight options on the screen at the same time Pointers at the top bottom of the screen indicate that there are more options that you can scroll through You may often find it convenient to use the wireless controller to move around the menus Press its MENU button to enter leave the menu and use the cursor keys in place of ...

Страница 29: ...ilizer on or off from the IMAGE S option at the camera menu The i mark appears in the display when the stabilizer is on The image stabilizer cannot be turned off when the POWER switch is set to the Easy Recording position Notes The image stabilizer is designed to deal with a normal degree of camera shake Keep the image stabilizer turned off when the camera is mounted on a tripod If you turn off th...

Страница 30: ...teries Remote sensor Inserting batteries Notes When using the wireless controller in brightly lit places or outdoors the effective range will be less The camera may have difficulty picking up the remote control signals at extremely close range or certain angles Extend the range or change the angle Do not leave the controller exposed to direct sunlight or in hot or humid places When the batteries r...

Страница 31: ... year the next part of the display starts flashing 4 Set the months days hours and minutes in the same way Return to the full menu by pressing in the select dial 5 Press the MENU button when finished and to start the clock The date can be set to any year between 1998 and 2020 If you press the MENU button in the middle of setting the date and time the seconds are set to zero you leave the menu and ...

Страница 32: ... recording release the button select a new picture and then press down the start stop button lightly once more If the subject is unsuitable for autofocus p 69 the camera may not be in focus despite displaying the green mark In this case release the start stop button adjust the focus manually p 49 and retry 3 Press the start stop button fully down to take the still picture The camera takes the imag...

Страница 33: ...ding you will enter record search mode directly 3 Turn the select dial to select REC SEARCH 4 Press in the select dial to enter record search mode The record search options appear on the screen Turn the select dial upwards to search forwards line up the arrow with the mark Turn the dial downwards to search backwards line up the arrow with the mark When the arrow is at the center the tape is stoppe...

Страница 34: ... a scene has recorded properly and then go on to shoot the next scene without producing any noise in the picture 1 Make sure the camera is in record pause mode 2 Press and release the c record review button while you check the picture in the display The camera rewinds the tape plays back the last few seconds and returns to record pause mode Note Noise may appear on the screen during record search ...

Страница 35: ...n disappears after 4 seconds MENU Selecting from the program menu In addition to setting the recording programs you can turn the digital effects on off and select record search 1 Set the camera to record pause mode with the POWER switch set to the P position 2 Press in the select dial to open the program menu 3 Turn the select dial up or down to move the arrow up or down the display 4 Press in the...

Страница 36: ... indoor outdoor modes 16 9 effect Digital Effects Also autofocus and image stabilization cannot be turned off Notes To leave the menu without making any changes select the RETURN option The program menu Recording Program is reset to AUTO when you turn the camera off using the POWER switch Avoid changing programs during recording as the brightness of the image may change suddenly The specialized AE...

Страница 37: ...ul for recording high speed sports scenes in brightly lit conditions Normal playback will be slightly jerky but you will get clear images which can be analyzed frame by frame during slow or paused playback on a VCR Sports Use this program outdoors to make subjects stand out from a softened foreground and background It works well for still lifes and close ups The effect is most noticeable when the ...

Страница 38: ...or glare free recordings of subjects lit by a concentrated light source SPOTLIGHT This program allows you to record in dimly lit places It is generally best used for close ups of slow or stationary subjects as moving subjects may leave a trailing after image However you can take advantage of this to create special effects by rapid zooming or by panning along with a moving subject Picture quality w...

Страница 39: ...ecording the scene gradually fades in from a black screen When you stop recording it gradually fades out Fade Trigger When you start recording the picture begins as a thin vertical line in the center of the screen which gradually expands sideways until it fills the whole of the screen When you end a scene the image is wiped from both sides of the screen Wipe Adds a paint like effect called solariz...

Страница 40: ...41 E Using the Full Range of Features Records a monochrome image with a sepia tint Sepia This effect converts on screen action to a series of still images giving an effect similar to slow motion Strobe ...

Страница 41: ...hes when turned off To turn digital effects of completely choose EFFECT OFF ON for the D EFFECT option at the camera menu Turning your chosen effect on off 1 Put the camera in record pause mode with the POWER switch set to the P position 2 Select the D EFFECT option from the camera menu and choose one of the digital effects from list When you close the menu the name of the digital effect that you ...

Страница 42: ... to Easy Recording the digital effect is deactivated and its name flashes purple in the display for a few seconds and then disappears When you switch the POWER switch back to P the name of your chosen digital effects flashes once more in the display If the digital effects are turned off completely at the camera menu D EFFECT OFF flashes purple in the display for a few seconds each time you close t...

Страница 43: ...r details of playing back a tape that has new sound on stereo 2 see page 63 For greater creative control over audio recording you can connect an external microphone to the camera via the DU 100 Docking Unit s MIC terminal You can monitor the sound while recording by attaching stereo headphones to the camera s terminal this terminal also doubles as the Audio Video Out socket You can adjust the volu...

Страница 44: ...ind noise from interfering with the sound track It does not operate with an external microphone WS is displayed Turn it off when you want the microphone to be as sensitive as possible 1 Open the camera menu and point the arrow at WIND SCREEN 2 Select the OFF setting and close the menu WS is shown in the display see p 28 ...

Страница 45: ...rt stop button to end recording Notes Once the countdown has begun press the start stop button to turn it off Cancel the self timer at any stage by switching the power off or sliding the LENS COVER switch to CLOSE In photo mode slide the MOVIE PHOTO switch to PHOTO and then set the self timer in exactly the same way The camera automatically adjusts the focus and exposure 2 seconds before the count...

Страница 46: ...lock or exposure shutter speed adjustment when the program selector is set to the Easy Recording position The number flashes in the display when you select the highest possible value in the current shooting conditions E LOCK 11 E LOCK 0 E LOCK 0 E LOCK 1 1 FOCUS EXP When you are recording in situations where the lighting may change suddenly you can lock the exposure at the current level in order t...

Страница 47: ...cord pause mode in the Auto recording program 2 Select the SHUTTER option at the camera menu 3 Turn the select dial up or down to select the shutter speed The camera shows the current shutter speed in the display 4 Close the menu Note The camera returns to the AUTO shutter setting when you slide the POWER switch away from the P setting or change the recording program SHUTTER 1 100 see p 28 ...

Страница 48: ...d at the point set by autofocus AF appears in the display You can now adjust the focus manually Press the FOCUS side of the multi switch again when you want to return to autofocus Focus lock FOCUS EXP FOCUS EXP Notes In the Easy Recording program you can adjust the focus temporarily but you cannot turn off autofocus The manual focus setting is canceled if you change the position of the POWER switc...

Страница 49: ... mode In daylight especially for close ups and where the subject is of one dominant color WHITE BAL SET 1 Open the camera menu and point the arrow at WHITE BAL 2 a For the Indoor Outdoor or Auto settings simply choose the setting appears in the display when you set the white balance to indoor outdoor mode b To set the white balance yourself point the camera at a white object such as a sheet of pap...

Страница 50: ...balance by first returning to the AUTO setting and then reselecting SET Try to record with light from a single source Correct white balance cannot be obtained for two types of lighting at once You cannot set the white balance or choose the indoor outdoor mode when the program selector is set to the Easy Recording program The camera returns to the AUTO setting when you slide the POWER switch away f...

Страница 51: ...RA DATA and CAM D T 3 Press the MENU button once more to close the menu Displaying Data Code Notes To avoid accidental recording make sure that you slide the tab on the cassette so that it exposes the hole the switch position is usually labelled SAVE or ERASE OFF The data code will read in the following situations When playback is stopped During playback of a blank section of tape If the tape was ...

Страница 52: ...a recording simply set the time zone the recording was taken in and the camera adjusts the time for you MENU 1 24 1 2 3 4 5 6 7 8 9 10 11 12 13 14 15 16 17 18 19 20 21 22 23 2 3 5 6 7 9 8 10 4 12 11 13 24 19 20 18 17 21 23 22 15 14 16 1 London 2 Paris 3 Cairo 4 Moscow 5 Dubai 6 Karachi 7 Dacca 8 Bangkok 9 Hong Kong 10 Tokyo 11 Sydney 12 Solomon Time zone 13 Wellington 14 Samoa 15 Honolulu 16 Ancho...

Страница 53: ...e recording can be edited to a VCR showing the local time but when editing via the digital terminal only the original date and time can be recorded In this case you need to reset the date and time before you make a recording The World Clock displays will only appear when the data code is shown p 52 If you make a change to the base zone setting the recording zone setting is reset automatically When...

Страница 54: ... from the display and the time code reappears Notes Press the ZERO SET MEMORY button once more to cancel the zero set memory before you forward rewind the tape The zero set memory may not function correctly where there is a break between recordings on the tape You can also use zero set memory to mark a position on a tape in record pause mode When you then play back the tape pressing rewind will ta...

Страница 55: ...cture up to a maximum of 10 times e g press the button 5 times to move forward 5 still pictures PHOTO SEARCH DATE SEARCH appears in the middle of the display alongside the or or mark and for photo search the number of photos to search through The recording mode is also shown SP LP Notes Press the 3 stop side of the multi switch to end your search If you begin a search very close to the start of a ...

Страница 56: ...e edited tape will be slightly lower than that of the original By connecting the camera to another VCR you can edit your recordings in order to remove unwanted scenes or combine different shots to create your own video productions 1 Connect the camera to the VCR See Connections for Playback on a TV screen on p 22 2 Prepare the TV and VCR Turn on the TV and set it to the video channel or set the TV...

Страница 57: ... IN appears in the display when you press play on the playback device Then press the a pause button to start pause recording If the cables are not connected properly the camera displays the caution CHECK THE DV INPUT The image displayed by the camcorder that is being recorded to for example on its LCD screen an attached TV or in its viewfinder may become distorted during digital dubbing The actual...

Страница 58: ...s when connecting to equipment not bearing the LANC m symbol m REMOTE terminal Copyright signal Certain pre recorded software tapes are copyright protected If you try to play back such a cassette COPYRIGHT PROTECTED PLAYBACK IS RESTRICTED appears in the display for a few seconds and then the camera displays a blank blue screen you cannot view the contents of the cassette If you try to record from ...

Страница 59: ...efore using it to carry the camera Attach the shoulder strap Remove the LCD cover Remove the cover by pushing it in at the center and pulling it off from the top first If you plan to use the Finder Unit case make sure that you attach it to the strap before attaching the strap to the camera Place the Finder Unit in the case when not in use Attaching the FU 100 Finder Unit case Replace the cover whe...

Страница 60: ... light also flashes The indicator is not constant different levels will be shown when you subject the battery pack and camcorder to different conditions When using the camcorder in cold areas such as ski slopes the k symbol starts blinking sooner than in warm temperatures How much power is left When to recharge You can recharge a lithium ion battery pack whenever it is convenient Unlike a conventi...

Страница 61: ...ll charge by connecting a power source to the camera overnight You do not need to turn the camera on for charging to take place If you use the camcorder regularly the back up battery will remain charged If it is stored however it slowly discharges and eventually in excess of 6 months from being fully charged there will be insufficient power to maintain the date and time In this case connect a powe...

Страница 62: ...ER see p 28 2 Choose the output Open the VCR menu and point the arrow at A MONITOR Select the output and return to the main menu STEREO1 for just stereo 1 STEREO2 for just stereo 2 MIX FIXED when you want an equal mix of stereo 1 and 2 MIX VARI when you wish to mix the balance between stereo 1 and 2 3 Mix the balance If you chose MIX VARI above you can now select the MIX BALANCE option from the me...

Страница 63: ...r sources of electric or magnetic radiation They may cause picture interference or permanently damage the camera Do not expose the camera to water Cover the camera when you are recording in rain or mist There is a risk of electric shock if water gets inside the camera contact qualified service personnel as soon as possible Protect the lens Sand and dust can damage the lens be especially careful on...

Страница 64: ...n you turn the camera off using the POWER switch LCD Clean the LCD screen using a commercially available glass cleaner Where there is a big change in temperature moisture may form on the surface of the screen Wipe clean with a soft dry cloth At low temperatures the display may appear to be much darker than usual This is not a fault and as the screen warms up the display will return to normal Camer...

Страница 65: ...though you can always play back your recordings on the LCD screen your camera can only be connected to TVs which use its NTSC system This TV system is used in the following countries American Samoa Bahama Barbados Bermuda Bolivia Canada Chile Columbia Costa Rica Cuba Ecuador El Salvador Guam Guatemala Greenland Haiti Honduras Jamaica Japan Korea Mexico Micronesia Myanmar Nicaragua Panama Peru Phil...

Страница 66: ...EN DETECTED is displayed for approximately 4 seconds Then the power indicator flashes and the h mark flashes in the display If there is a cassette in the camera it stops automatically and REMOVE THE CASSETTE is displayed for approximately 4 seconds and then EJECT is shown in the display The camera may not detect the condensation immediately the condensation warning may not start flashing for 10 to...

Страница 67: ... The LENS COVER switch is set to CLOSE p 13 You are attempting to play back or record from a copyright protected cassette p 59 The tape heads are badly contaminated p 65 Refer to this checklist first if you have any problems with your camcorder Possible explanations are given for each problem on the list turn to the page numbers in brackets for more information Make sure that the camera is properl...

Страница 68: ...s e g shiny car surfaces Fast moving objects Slanted subjects Dark subjects Night scenes Without much contrast e g a white wall Behind glass Many subjects at different distances Horizontal stripes Note Contents of data code display may change according to D TIME SEL or DATA CODE settings made on the menu Check settings made for date time Contents of data code display may vary Setting the Data Code...

Страница 69: ...ning p 65 The video heads need cleaning p 65 The TV VIDEO selector on the TV isn t set to VIDEO p 22 If connected using the optional RF unit the video channel has not been selected The screen displays are set to OFF at the DISPLAYS option of the VCR menu p 28 The speaker volume is set to the minimum level p 20 Headphones are being used Problem The e play button doesn t work There s a bright stripe...

Страница 70: ...e RESET button on the camera body behind the LCD panel using the tip of a ball point pen or similar camera functions return to their default setting Remove the cable and then reconnect it or turn the power off and back on again This is not a malfunction The back up battery needs recharging p 62 During playback the recording zone has been set to a different location to the base zone Problem The wir...

Страница 71: ...r Holder TV Antenna SC 1000 Soft Carrying Case DC 600 DC Coupler VL 10Li Battery Video Light FU 100 Finder Unit and Case RU 100 RF Unit S 150 S video Cable STV 250 Stereo Video Cable DU 100 Docking Unit SA 1 Adapter Bracket BP 608 Battery Pack BP 914 BP 927 and BP 941 Battery Pack STV 150 Stereo Video Cable BP 914 BP 927 and BP 941 Battery Pack VCR Digital device CV 150F DV Cable SS 200 Shoulder S...

Страница 72: ...U 100 RF Unit This optional converter allows the camera to be connected to the antenna terminal of any TV It can be a useful accessory while traveling as you may need it if you want to connect the camera to a TV in your hotel room SC 1000 Soft Carrying Case This lightweight bag keeps the camera within easy reach without weighing you down or getting in the way SA 1 Adapter Bracket Attaches a video ...

Страница 73: ... 900 Use it in place of the DC Coupler that is supplied with the CH 900 This mark identifies genuine Canon video accessories When you use Canon video equipment we recommend Canon brand accessories or products bearing the same mark Provided accessories WL D67 Wireless Controller D83 0462 000 CA 600 Compact Power Adapter D85 0812 201 DC 600 DC Coupler D85 0800 201 BP 608 Battery Pack D85 0822 201 SS...

Страница 74: ...nal DC terminal S video terminal MIC terminal LANC terminal DV IN OUT terminal P 58 Strap attachment bar P 60 phones terminal P 44 AUDIO VIDEO OUT terminal P 23 Stereo microphone START STOP button P 13 MOVIE PHOTO switch P 13 POWER switch P 13 Cassette cover P 11 Cassette compartment P 11 AUDIO terminal Camera mode Auto Program menu VCR mode DU 100 Docking Unit R L ...

Страница 75: ...ease switch P 8 MULTI CONNECTOR cover P 22 c record review button P 35 Multi switch lever P 19 51 53 Multi switch P 19 51 53 Select dial P 29 RESET button P 71 MULTI CONNECTOR P 22 MENU button P 29 RESET Remote sensor P 31 Camera mode Manual exposure adjustment Manual focus VCR mode Fast forward playback Rewind playback Camera mode VCR mode Mating hole of Docking unit P 22 Tripod socket P 26 Rubbe...

Страница 76: ...n P 19 SLOW button P 21 START STOP button P 13 MENU button P 29 TV SCREEN button P 78 DATA CODE button P 52 REW button P 20 button P 21 PAUSE button P 20 START STOP ZOOM W T ZERO SET MEMORY SEARCH SELECT DATA CODE TV SCREEN MENU PAUSEa REW PLAYe FF STOP3 REC PAUSE SLOW 2 SEARCH SELECT button P 56 REC PAUSE button P 58 ZERO SET MEMORY button P 55 Transmitter ...

Страница 77: ... 5 mins Yellow less than 5 mins Red final few secs finally it tells you when you have completely run out of tape The camera is ejecting the tape p 11 The safety mechanism is activated Unload the cassette and turn the camera off Turn it on again and reload the cassette Recording mode p 15 Playback is stopped p 19 Normal playback p 19 Fast forward p 20 TV SCREEN DATA CODE PAUSE REC 5m i n EJECT EJEC...

Страница 78: ...izer is turned on p 30 Camera menu p 28 VCR menu p 28 Program menu p 36 The remote sensor is turned off p 31 Self timer countdown p 46 Audio mode p 44 Data code p 52 5 5 2 2 1 1 PHOTO SEARCH DATE SEARCH 5 0 0 T W T W REW CAM MENU SELECT SE MENU CLOS SHUTTER AUTO D EFFECT EFFECT IMAGE S ON D ZOOM ON 16 9 OFF WHITE BAL AUTO SELF TIMER OFF SENSOR ON VCR MENU SELECT SE MENU CLOS SENSOR ON REC MODE SP ...

Страница 79: ... mode p 33 Setting the AF AE mark flashes white AF AE locked mark lights up green Record search p 34 Recording programs p 36 Manual exposure display p 47 Exposure locked Brighter than standard exposure level Darker than standard exposure level Shutter speed p 48 Manual focus is selected p 49 White balance is SET INDOOR OUTDOOR p 50 SPORTS PORTRAIT SPOTLIGHT SAND SNOW LOW LIGHT AF OFF AUTO 1 100 RE...

Страница 80: ... automatically when a new tape is loaded Appears each time you turn the power on until you set the date and time p 32 Appears when the battery pack is exhausted p 9 61 Appears when the tape has reached the end Refer to page 12 Appears when you press the 2 record button if the DV cable is not connected properly p 58 Refer to page 67 Appears as a warning to protect the tape and also when condensatio...

Страница 81: ...f Canon Inc Using the DU 100 Docking Unit supplied Specifications ZR BP 608 Battery Pack Power Supply rated 7 2 V DC Power Consumption while recording with the AF turned on 5 9 W Television system EIS standard 525 lines 60 fields NTSC color signal Video recording system 2 rotary heads helical scanning DV system Consumer digital VCR SD system Digital component recording Audio recording system PCM d...

Страница 82: ... to TV or VCR 22 D Date and Time 32 Date Search 56 Docking Unit 22 Displaying Data Code 52 DC Coupler 8 Digital Effects 40 Digital Video 7 Digital Zoom 16 DV terminal 58 E Easy Recording 37 Editing 57 Exposure 47 External Microphone 44 F Fade Trigger 17 Fast Forward 20 Feedback 20 Finder Unit 17 Finding Your Way Around the ZR 75 Focusing 49 H Head Cleaning 65 Headphones 44 I Image Stabilizer 30 In...

Страница 83: ...31 Remote Sensor 31 Rewind 20 S Sand Snow 39 Screen Displays 78 Scroll 40 Self Timer 46 Sepia 41 Shoulder Strap 60 16 9 43 Specifications 82 Sports 38 Spotlight 39 SP Modes 15 Storage 64 Strobe 41 S video 22 System Diagram 72 T Tape Protection 12 Telephoto 16 Temperature 62 64 Time Code 81 Tripod 26 Troubleshooting 68 TV 22 78 U Using the Camera Abroad 66 Using the Menus 28 V VCR 22 57 Videocasset...

Страница 84: ... all defects encountered in normal use of the DV Camcorder and does not apply in the following cases a Loss of or damage to the DV Camcorder due to abuse mishandling improper packaging by you alteration accident leaking batteries exterior nicks scratches or dents electrical current fluctuations failure to follow operating instructions maintenance and environmental instructions prescribed in CUSA s...

Страница 85: ...igital video equipment is used for commercial professional or industrial purposes This limited warranty does not cover the cabinet exterior finish of the digital video equipment video cassette tapes head cleanings nor does it apply to digital video equipment purchased outside Canada TO OBTAIN WARRANTY SERVICE Ship your Canon digital video equipment in its original carton box or equivalent properly...

Отзывы: