CRVW3 3-Channel Vibrating-Wire Datalogger
39
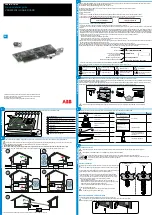
FIGURE 8-10. Power Source Connection to the CRVW3 Charge
Terminals
Connect the 7 Ah rechargeable battery into the power/charge circuit by
plugging the provided connector into the “Battery” connector on the panel.
FIGURE 8-11. –RC Battery Connector Cable and CRVW3 Battery
Connection
When either a charged battery is connected to the CRVW3 or sufficient voltage
is applied to the charge terminals of the CRVW3, LED activity should be
observed on the device to indicate startup and operation.
It is possible to convert a CRVW3 device from the –RC option to
the –ALK option and vice versa. This involves obtaining the
desired battery or battery pack from Campbell Scientific, and
reversing the latch that secures the battery within the enclosure.
This is done by removing the battery hinge pin, rotating the hinge
bracket to accommodate the desired battery option, and re-
inserting the hinge pin. Contact your local support representative
if further details about this process are required.
8.2.2.3 Grid Power
If grid power is available at the CRVW3 site, that can be used as the main
power source. Although the CRVW3 can operate exclusively from a proper
voltage applied to its charge terminals, a battery option is still recommended
for backup purposes and measurement continuity in case of power outages. Use
pn 29796 as the main power source and connect it through the appropriate
gland to the charge terminals. Any charge source with a level of 16 V to 28 V
may be used. A rechargeable battery is recommended (–RC option) as a
backup source in this scenario. When the device is powered by applying
voltage to the charge terminals, the battery will be charged (or kept fully
NOTE
Содержание CRVW3
Страница 2: ......
Страница 3: ......
Страница 7: ......
Страница 13: ...Table of Contents vi ...
Страница 121: ...Appendix A Updating CRVW3 Firmware A 4 ...
Страница 131: ...Appendix E Engineering Output and Calibration E 4 ...
Страница 133: ......
Страница 134: ......