


Section 4. External Storage Peripherals
4-7
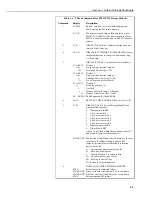
Table 4-3 *9 Mode Commands for SM192/716 Storage Module
Command
Display
Description
1
01: 0000
RESET: enter 248 to erase all data and programs.
While erasing, the SM checks memory.
01: XX
The number of good chips is then displayed (six for
SM192, 22 for SM716). The time required to reset an
SM192 is about 60 seconds, and for an SM716 about 4
minutes.
3
03: 01
INSERT FILE MARK: 1 indicates that the mark was
inserted, 0 that it was not.
4
04: XX
DISPLAY/SET MEMORY CONFIGURATION: enter
the appropriate code to change configuration 0=ring,
1=fill and stop
5
DISPLAY STATUS (A to advance to each window):
01: AB C D
Window 1:
AB
Storage pointer location (chip no.)
C D
Total good RAM chips (1-22)
02: AB C D
Window 2:
AB
Display pointer location (chip no.)
C
Unloaded Batt. Chk. 0=low, 1=OK
D
No. of Programs stored (Max=8)
03: A0 C D
Window 3:
A
Errors logged (up to 9)
0
Not Used
C
Memory Config. (0=ring, 1=fill&stop)
D
Memory Status (0=not full, 1=full)
04:
XXXXX PROM signature (0 if bad PROM)
6
06: 0X
BATTERY CHECK UNDER LOAD (0=low, 1=OK)
7
07: 00
DISPLAY DATA: Select the Storage Module Area
with the following codes:
0
Dump pointer to SRP
1
File 1, current file
2
File 2, previous to file 1
3
File 3, previous to file 2
4
File 4, previous to file 3
5
File 5, previous to file 4
7
Display pointer to SRP
9
Oldest data to SRP
(Codes 1-5 will loop within file boundaries, codes 0, 7
and 9 allow display to cross boundaries.)
07:XXXXXX SM location at end of area selected. Press
A
to advance
to first data. If another location is entered, SM
jumps to first start of array following that location.
Review data with:
A
Advance and display next data point
B
Back up one data point
#
Display location, C to return to data
#A
Advance to next start of Array
#B
Back-up to start of Array
#D Return to *9 command mode
8
DUMP TO ANOTHER STORAGE MODULE:
08:00
Select Area as in command 7 above
01:XXXXXX First Loc. in area selected/Enter Loc. to start dump
02:XXXXXX Final Loc. in area selected/Enter Loc. to end dump
03:XX
Enter destination SM address