12
Operating instructions
Getting started
To activate the CXU, press the Standby/On button on the front panel.
1. Press the Open/Close button to open the disc tray.
2. Place the disc on the tray, label side facing up.
3. The player will read the disc information and start playback.
4. Use the Navigation
buttons to navigate around the menu.
5. To stop playback, press the
button.
6. To turn off the player, press the Standby/On button.
Options menu
Pressing the Options button on the remote during playback opens up a menu
bar at the bottom of the screen for various settings and playback features.
The Options menu selections differ depending on content type.
For more detailed information, please visit our website www.
cambridgeaudio.com for the product reference manual and FAQ.
Fast forward/rewind search
Press to toggle between 1X, 2X, 3X, 4X and 5X playback speed. Press the
button for backward or the
button for forward playback.
Skip playback
Press the Skip
or
button once to skip by one track/chapter on the disc.
Repeat
DVD
and
DVD-Audio
– Repeat Chapter, Repeat Title, Repeat All, Repeat Off.
Blu-ray Disc
– Repeat Chapter, Repeat Title, Repeat Off.
CD
and
SACD
– Repeat One, Repeat All, Repeat Off.
Audio language (soundtrack) selection
Press the Soundtrack button on the remote control during playback.
Subtitle selection
When playing a DVD, Blu-ray disc or other video programs recorded with
subtitles, press the Subtitle button on the remote control to select the desired
subtitle.
Zoom
Repeatedly pressing the Zoom button will switch the zoom level in the
following sequence: 1:1 (No zoom), Stretch/Compress, Full Screen, Under
Scan, 1.2X, 1.3X, 1.5X, 2X, 1/2X.
7.1 Channel Audio Out
Stereo Audio Out
FL
SL
C
SBL
Right
Left
FR
SR
SW
SBR
Digital Outputs
Diagnostic Video
Digital Inputs
HDMI Input
HDMI Out 2
HDMI Out 1
Ethernet
USB
Coax
RS-232C
Optical
Coax
Composite
Optical
In
2
1
IR Emitter
Power AC
Diagnostic Video
Composite
In
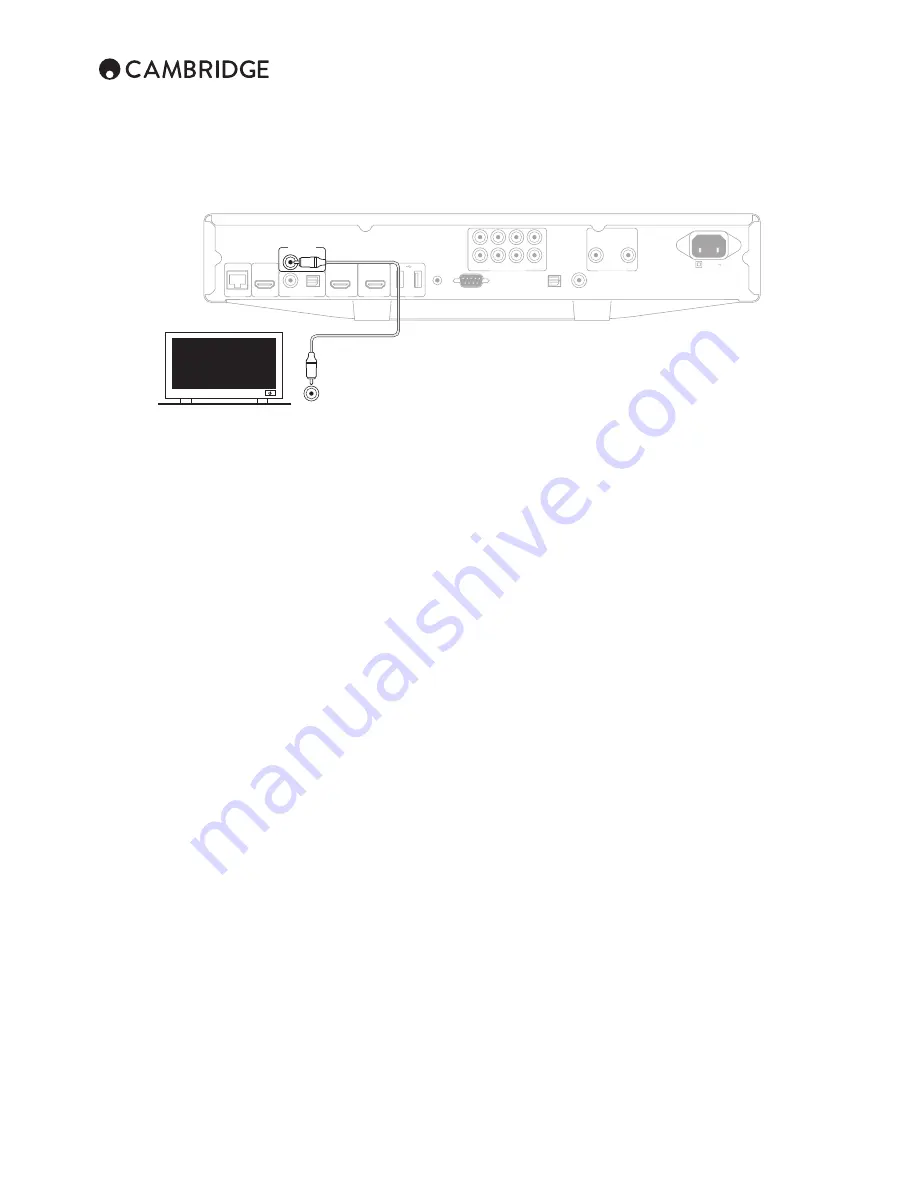
Diagnostic video output.
This output can be useful if you lose the HDMI output (perhaps by selecting
an output type your TV cannot display).
Top/Pop up menu
During playback, press the Pop-up menu button to access the pop-up menu.
Press the Top menu button to access the top menu.
HDMI / MHL input selection
Press the Inputs button on the remote to bring up the "Input" source menu.
Note:
The front HDMI In port is MHL (Mobile High-definition Link) compatible.
A dedicated MHL cable or adapter is required (not included) and some
configuration may be required on the mobile device.
Audio Return Channel (ARC) selection
The ARC sources are available in the Inputs menu. Press the Inputs button on
the remote to bring up the Input source menu.
Playback by chapter or track number
• To select the seventh track, press the [7] button.
• To select the 16th track, press [1] followed by [6] in quick succession.
Note:
Certain DVD-Audio and Blu-ray Discs may not allow for direct chapter
selection.
Go to
Press the Go To button on the remote once to access Time Search and enter
the required time from the start of the disc as H:MM:SS (Hours, Minutes,
Seconds) using the numerical keys or the (
) navigational buttons.
Press twice to access Chapter Time Selection and enter the required time
from the start of the chapter. Press three times to access the Display
information.
Output resolution
If you would like to change the output resolution, you may do so by pressing
the Res button on the remote control. The following output resolutions are
available:
PAL output via HDMI 1 or 2 – 4kx2k, Auto, 1080p, 1080i, 720p, 576p, 576i,
Source Direct.
NTSC output via HDMI 1 or 2 – 4kx2k, Auto, 1080p, 1080i, 720p, 480p, 480i,
Source Direct.
Note:
In case you are not able to get a picture, please connect the player to
the TV using the composite video output, then use the Setup menu to adjust
the player settings.
Содержание CXU
Страница 1: ...CXU UNIVERSAL DISC PLAYER...


