38
Initial Settings
fig.VS-700-rec02-digi-e.eps
Start up SONAR, and from the
“File”
menu choose
“New”
to access the
“New Project File”
dialog box. In the
“Name”
field, enter the desired name for the song you’ll be creating. Then, in the
“Template”
field, choose
“Normal”
and press the
[OK]
button to open SONAR’s initial screen.
By default, two audio tracks and two MIDI tracks will be created.
In this example, we’ll start by recording an audio track (track 1).
2. Create a New File
VS-700R Rear Panel
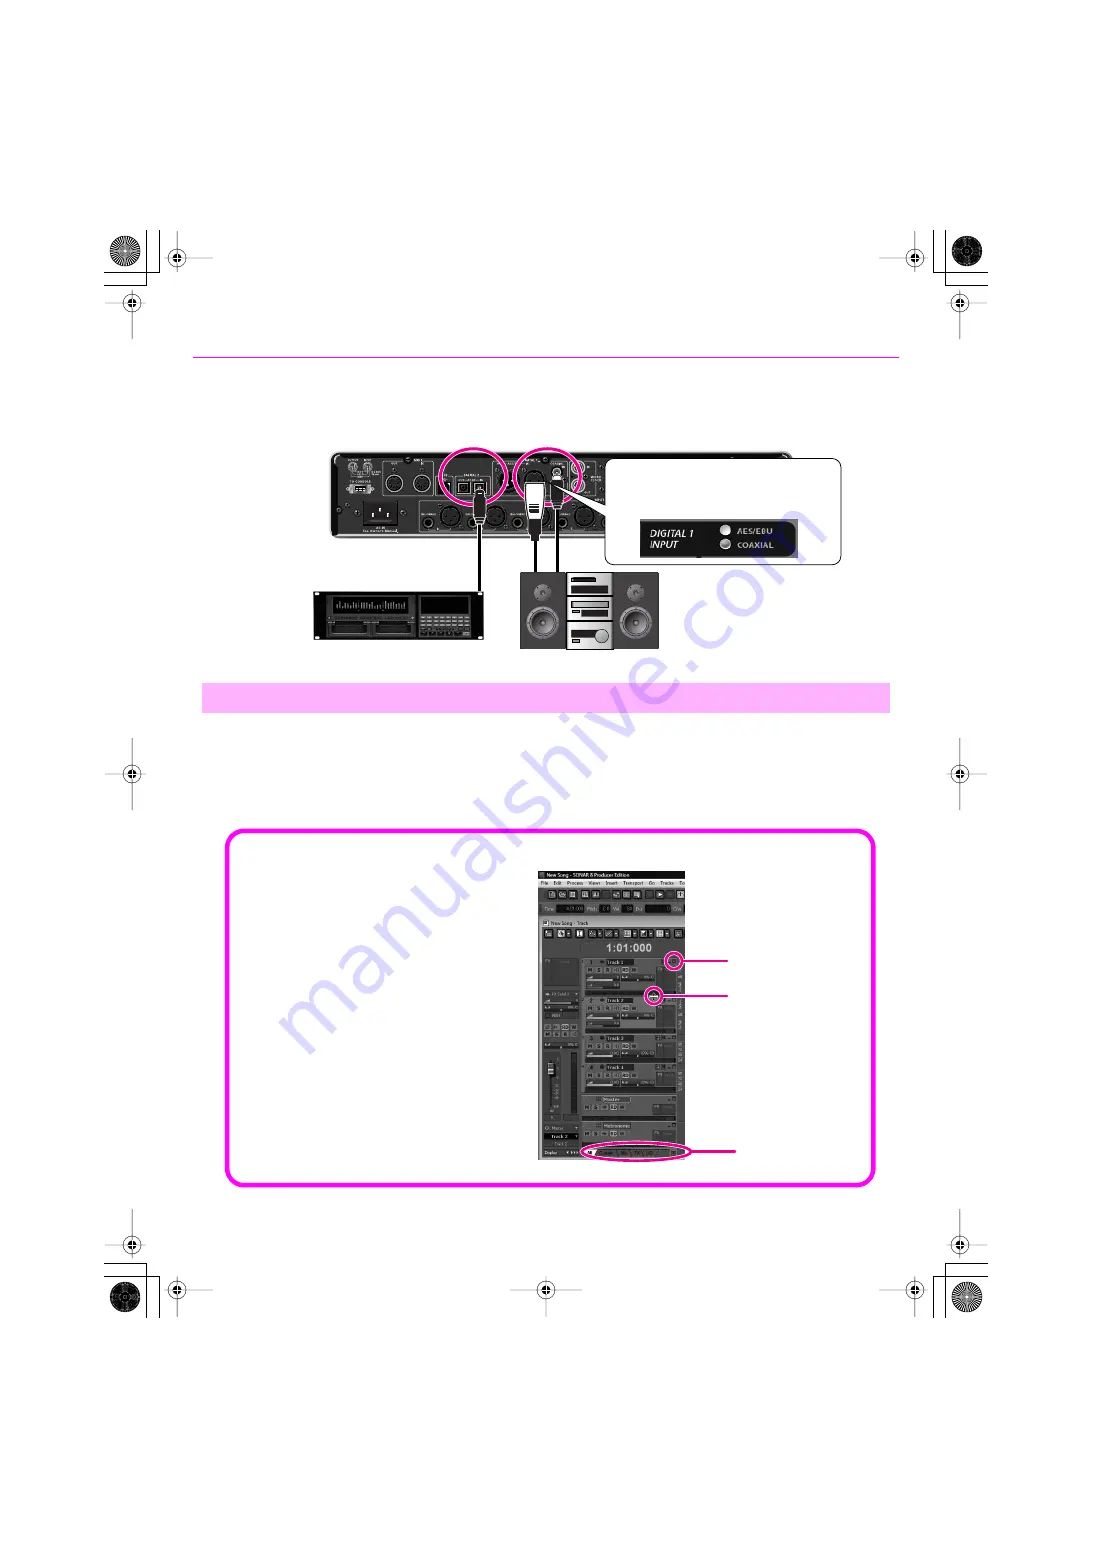
Connecting a Digital Audio Source
If you want to digitally connect a DAT or similar device, connect its output connector (e.g., DIGITAL OUT connector) to the VS-700R's DIGITAL IN
connector.
If you're connecting an ADAT device,
connect it to the ADAT connector.
A maximum of eight channels can be input
Using an
AES/EBU
connector
Using
a coaxial
connector
The DIGITAL 1 coaxial connector and AES/EBU connector
are a mutually exclusive selection. To make your choice, go
to SONAR’s “Tools” menu, open “VS-700,” select the “MIC
PRE” tab, and make the desired setting in the “DIGITAL 1
INPUT” field.
About the track display
A track in SONAR has numerous
parameters. Depending on the display
settings, some parameters might not
be shown, or might be shown in
different locations.
To change the track display, you can
press the
[maximize]
button,
“drag
the display region”
, or use the
“track
parameter display switching tabs.”
If you select
“ALL”
from the
“track
parameter display switching tabs”
,
all parameters will be shown.
fig.63-1e.eps
drag the display region
track parameter display
switching tabs
maximize
VS-700_Install_e.book 38 ページ 2008年11月20日 木曜日 午後5時6分
Содержание Sonar V-STUDIO VS-700
Страница 1: ...4 5 0 1 VS 700_Install_e book 1...
Страница 63: ...VS 700_Install_e book 63...
Страница 64: ...5 1 0 0 0 0 2 2 4 5 0 1 VS 700_Install_e book 64...


