


- skID Technical Information Manual
40
Inter Char Delay (ms):
The
Inter Char Delay
is the delay between printing one character and the
next. It is expressed in ms. The default value is 5. If set to 0, the reader does not introduce delay:
the only delay is that of the BT of the device in use. The use of the
Inter Char Delay
is
recommended to slow down the sending of characters from the reader to mobile devices, as
these are not performing enough to keep up with the Bluetooth transmission, with the risk of
losing characters.
Inter Line Delay (ms):
The
Inter Line Delay
is the delay between printing one last character of a
line and the first character of the next line. It is expressed in ms. The default value is 60. If set to
0, the reader does not introduce delay: the only delay is that of the BT of the device in use. The
use of the
Inter Line Delay
is recommended to slow down the sending of characters from the
reader to mobile devices, as these are not performing enough to keep up with the Bluetooth
transmission, with the risk of losing characters.
HW Trigger Mode:
this option selects the type of trigger button event which triggers the
inventory. The
HW Trigger Mode
options are the following:
o
ONE-SHOT: inventory cycles will be performed as long as the trigger button is kept
pressed.
o
START/STOP: to start the inventory cycles press once the trigger button. Press the
button again when you want to stop the inventory cycles.
By default the
HW Trigger Mode
is set to “ONE SHOT”.
You can change the default value using the drop-down menu.
Warning:
To save the changes click on the
SAVE
button (check the green dot on the bottom
right side of the sidebar). On the main application window click on
File
Disconnect
. Power off
the reader, disconnect the USB cable and then power on the reader, the new settings are
active.
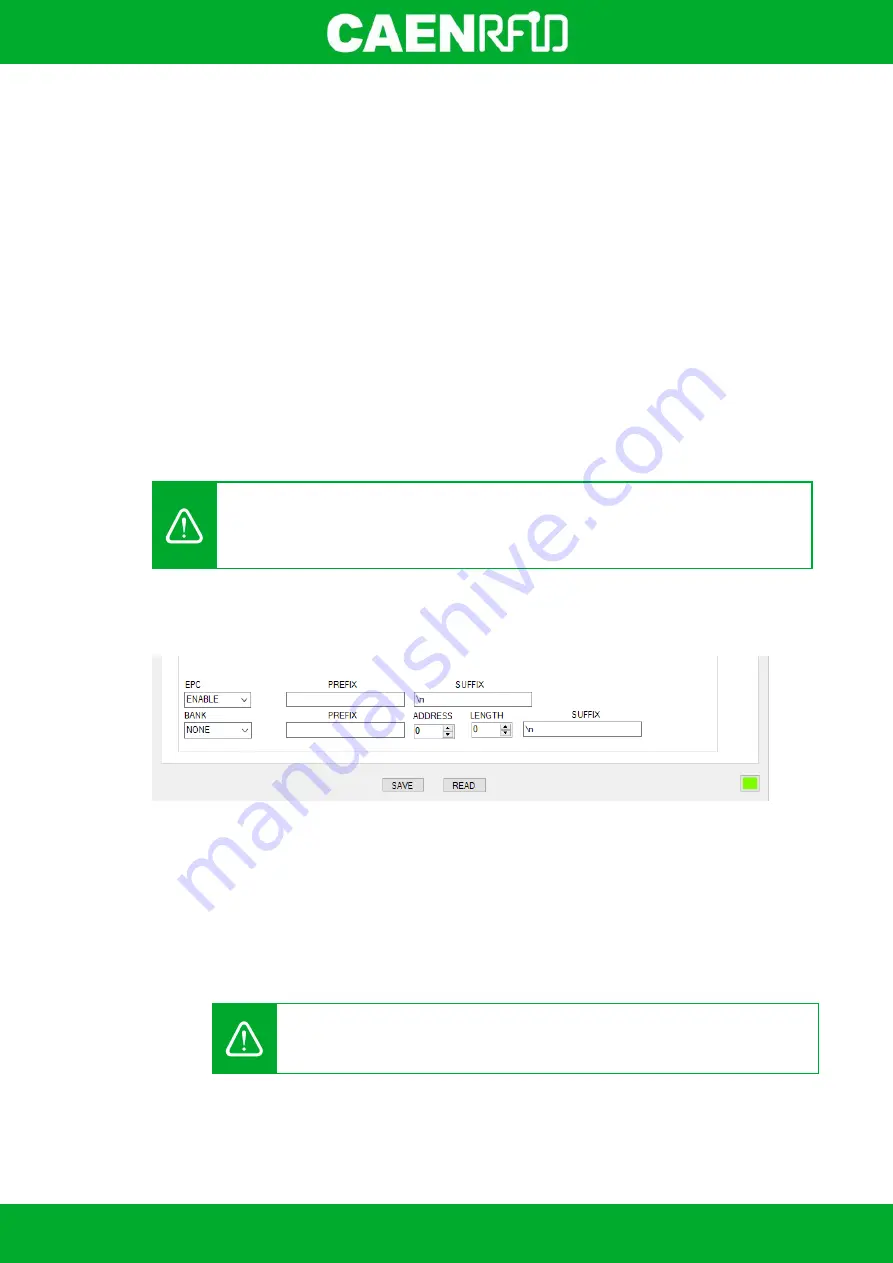
EPC code parameters
Using the table below you can customize the text of the code displayed on the screen:
Tab. 3.1: EPC Code parameters
EPC Code:
enable or disable. By default, the
EPC Code
is enabled and the EPC code is displayed
on the screen. You can change the default value using the drop-down menu.
PREFIX:
The
PREFIX
option permits to specify a string to add before the EPC when a tag is read.
The following list shows the accepted characters for the prefix:
'a', 'b', 'c', 'd', 'e', 'f', 'g', 'h', 'i', 'j', 'k', 'l', 'm', 'n', 'o', 'p', 'q', 'r', 's', 't', 'u', 'v', 'w', 'x', 'y', 'z', 'A', 'B', 'C',
'D', 'E', 'F', 'G', 'H', 'I', 'J', 'K', 'L', 'M', 'N', 'O', 'P', 'Q', 'R', 'S', 'T', 'U', 'V', 'W', 'X', 'Y', 'Z', '0', '1', '2', '3',
'4', '5', '6', '7', '8', '9', '{', '|', '}', '!', '"', '#', '$', '(', ')', '*', '+', ',', '.', '/', ':', ';', '=', '?', '@', '[', ']', '^', '_', '-'
By default the
prefix
string is empty. The maximum allowed length of the string is 7 characters.
Warning:
if you are using a qwerty keyboard, pay attention that it is a
standard
qwerty keyboard because if not the conversion of symbols could create display
problems.
SUFFIX:
The
SUFFIX
option permits to specify a string to add after the EPC when a tag is read.
The following list shows the accepted characters for the postfix:
Содержание skID
Страница 1: ...1 TECHNICAL INFORMATION MANUAL Revision 1 1 February 2021 skID R1280I Mini Sled RAIN RFID Reader...
Страница 9: ...INTRODUCTION skID Technical Information Manual 9 Fig 1 4 skID R1280I Reader Grip...
Страница 18: ...INTRODUCTION skID Technical Information Manual 18 2 3 4 5 Fig 1 14 Installation Notice SP Connect TM...
Страница 21: ...GETTING STARTED skID Technical Information Manual 21 3 Click on Add reader...
Страница 22: ...GETTING STARTED skID Technical Information Manual 22 4 Click on BLE in the Connection Type window...
Страница 24: ...GETTING STARTED skID Technical Information Manual 24 7 To start using your skID R1280I click on the reader line...
Страница 25: ...GETTING STARTED skID Technical Information Manual 25 8 Click on Start Inventory...
Страница 26: ...GETTING STARTED skID Technical Information Manual 26 9 A list of the read tags is shown...
Страница 28: ...GETTING STARTED skID Technical Information Manual 28 3 Click on Menu Connect...
Страница 29: ...GETTING STARTED skID Technical Information Manual 29 4 Click on icon...
Страница 46: ...EASY2READ PROFILE skID Technical Information Manual 46 3 Click on Add reader...
Страница 47: ...EASY2READ PROFILE skID Technical Information Manual 47 4 Click on BLE in the Connection Type window...
Страница 50: ...EASY2READ PROFILE skID Technical Information Manual 50 8 Click on Start Inventory...
Страница 51: ...EASY2READ PROFILE skID Technical Information Manual 51 9 A list of the read tags is shown...
Страница 53: ...EASY2READ PROFILE skID Technical Information Manual 53 3 Click on Add reader...
Страница 54: ...EASY2READ PROFILE skID Technical Information Manual 54 4 Click on Bluetooth in the Connection Type window...
Страница 57: ...EASY2READ PROFILE skID Technical Information Manual 57 8 Click on Start Inventory...
Страница 58: ...EASY2READ PROFILE skID Technical Information Manual 58 9 A list of the read tags is shown...
Страница 69: ...EASY2READ PROFILE skID Technical Information Manual 69 2 Launch the CAEN RFID Easy Controller for iOS App...
Страница 70: ...EASY2READ PROFILE skID Technical Information Manual 70 3 Click on Menu Connect...
Страница 71: ...EASY2READ PROFILE skID Technical Information Manual 71 4 Click on icon...
Страница 77: ...HID PROFILE skID Technical Information Manual 77...
Страница 85: ...HID PROFILE skID Technical Information Manual 85...


