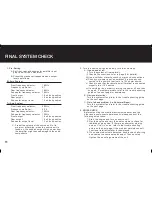
FINAL SYSTEM CHECK
11
1. Pre-Setting
A. Set front, rear and subwoofer amplifier input
gain to half of their maximum.
B. Preset the crossover frequencies and output
levels as follows.
2. Turn the source unit on and slowly turn the volume up:
A.
If no sound at all:
i) Turn the system off immediately.
ii) Check all connections (refer to page 9 for details).
iii) Use a volt/ohm meter to check your ground connections.
iv) Check your power input, ensure that it is properly con-
nected to the positive terminal of a 12V power source.
v) Check to see that the remote on/off terminal is connected
properly to a +12V source.
vi) If everything is on order try turning the power off and then
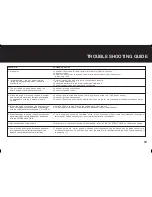
on again. If problem persists, refer to the trouble shooting
guide on the next page for assistance.
B.
Obvious distortion:
Turn the system off and refer to the trouble shooting guide
on the next page.
C.
Out of phase problem (i.e. Abnormal Bass):
Turn the system off and refer to the trouble shooting guide
on the next page.
3. NOISE CHECK
Before mounting the mobile electronic crossover and the
other audio components permanently, please conduct the
following noise check:
1. Start the engine and turn on source unit.
2. Rev the engine and vary the audio volume to check for
radiated engine noise. If there is an alternator whining
noise or “tic-tic” noise, refer to the trouble shooting
guide on the next page. If the problem persists consult
your local retailer/installer for assistance.
3. If no unwanted noise is detected, double check all wiring
and cables to ensure safe placement. Then securely
tighten the mounting screws of the unit.
Bi-Amp System
Front frequency selector:
160Hz
Frequency multiplier:
X 1
Rear frequency selector:
160Hz
Subwoofer frequency selector 160Hz
Front output
10 o’clock position
Rear output
10 o’clock position
Subwoofer output level
12 o’clock position
Tri-Amp System
Front frequency selector:
200Hz
Frequency multiplier:
X 20
Rear frequency selector:
120Hz
Subwoofer frequency selector 120Hz
Front output
10 o’clock position
Rear output
10 o’clock position
Subwoofer output level
12 o’clock position
C. Preset the volume of the source unit to its
minimum (otherwise, when the source unit is
tuned on, the sudden surge of high power from
the amplifier might cause damage to the audio
components.
Содержание CXR-7
Страница 1: ...3 WAY ELECTRONIC CROSSOVER OWNERS MANUAL CXR 7 ...
Страница 2: ......
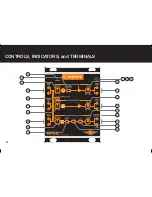
Страница 6: ...CONTROLS INDICATORS and TERMINALS 5 CXR 7 ...
Страница 11: ...ELECTRICAL WIRING DIAGRAM 10 Electrical wiring diagram CXR 7 ...


