25
4.6
Set up Automatic Connection of the XENO 4 with cabLase Editor 5
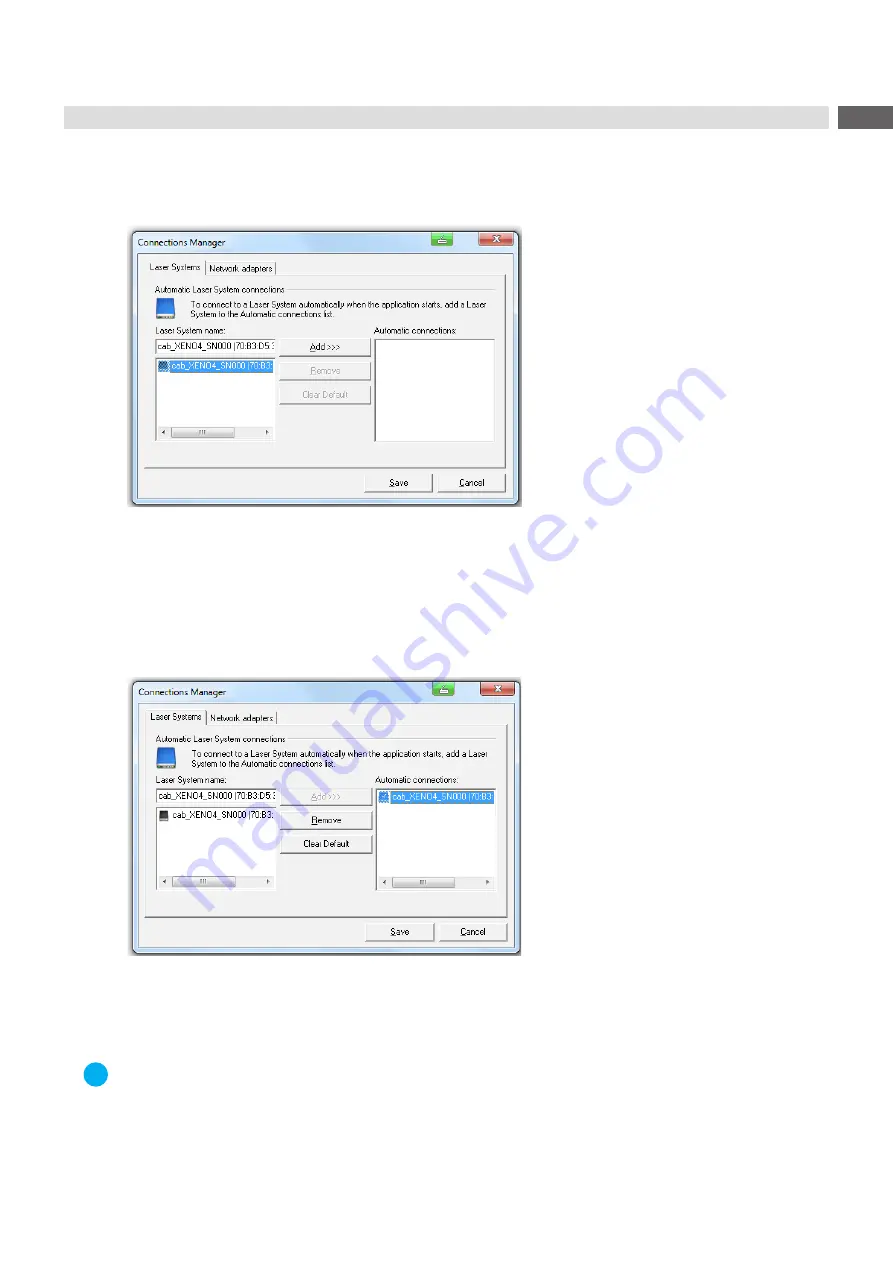
Select menu "Connections" > Manage". This is followed by the input/output window:
Figure 17
Set up automatic connection
The left windows shows all marking lasers XENO 4 available in the network, each with their respective MAC
addresses.
Click on the marking laser XENO 4 to be connected:
The marking laser selected is highlighted in blue.
Click on "Add".
The marking laser is added to the list "Automatic connections".
Figure 18
Set marking laser as default
Select the marking laser required in the list "Automatic connections" and confirm by clicking on "Set as default".
Selection is confirmed by a check mark in the PC icon.
Click on "Save" to confirm the settings selected.
i
Note!
When starting the software, cabLase Editor 5 now always set up automatically connection with the marking
laser XENO 4 selected.


