background image

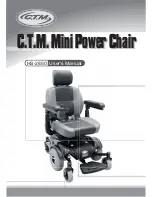
C.T.M. Mini Power Chair

C.T.M. Mini Power Chair

C.T.M. Mini Power Chair

HS-2850

User's Manual

Содержание HS-2850

Страница 1: ...C T M MiniPowerChair C T M MiniPowerChair C T M MiniPowerChair HS 2850 User s Manual...

Страница 2: ...T PRECAUTIONS ELECTROMAGNETIC INTERFERENCE AND WARNINGS IDENTIFICATION OF PARTS OPERATING YOUR POWER CHAIR DISASSEMBLING RE ASSEMBLING YOUR POWER CHAIR CHARGING THE BATTERIES CARE AND MAINTENANCE TROU...

Страница 3: ...congratulation on purchasing your new C T M Power Chair It is designed to provide you with transportation ability indoors and outdoors We pride ourselves on providing safe and comfortable products Ou...

Страница 4: ...n care crossing roads Do not drive on slopes exceeding 6 degrees and take extreme care when turning on slopes Do not use full power when turning to sharp corners Take great care and drive in low speed...

Страница 5: ...current technology is capable of achieving at least a 20 V m immunity level which would provide useful protection from the more common sources of radiated EMI The immunity level of this motorized sco...

Страница 6: ...e EMI from sources such as radio and TV stations amateur radio HAM transmitters two way radios and cellular phones can affect the power chair Following the warnings listed below should reduce the chan...

Страница 7: ...tors Figure 1 HS 2850 Power Chair Front View Figure 2 HS 2850 Joystick Figure 3 HS 2850 Power Chair Rear View IDENTIFICATION OF PARTS 5 Before attempting to drive this power chair on your own it is im...

Страница 8: ...If only amber and red LEDs are lit the batteries are moderately charged Recharge before undertaking a long trip If only red LEDs are lit the batteries are running out of charge Recharge as soon as pos...

Страница 9: ...ontally To adjust footplate loosen screw and arrange height to desired position then tightened screw to secure plate in place D E Figure 7 Figure 7 POWER BASE Free Wheeling Lever When lever is in N Ne...

Страница 10: ...n all battery gauge LED lights should be lit lighting The self diagnostic warning lights should not be blinking 4 While resting your arm on armrests joystick should be within reach By pushing joystick...

Страница 11: ...s twist While standing up avoid stepping on footplate as it may cause injury The batteries should be charged as soon as possible after each ride See CHARGING THE BATTERIES on page 14 J L Figure 13 Fig...

Страница 12: ...st Angle Adjustment By pulling the fixation vel cro backwards to disengage the pins from the holes and adjust angle to a comfortable position then release fixation vel cro to engage to it s position F...

Страница 13: ...f Self Diagnostic Warning Lights start to flash identify problem from chart on page 18 and take action If power chair breaks down and must be moved please follow below directions 1 Get off power chair...

Страница 14: ...t back 2 Pull up the seat lock lever N 3 Lift up on seat assembly O to ensure the seat is secure See Fig 14 Body Shroud Removal By using a screw driver to pressing down at the center of the push rivet...

Страница 15: ...y conductive metals Battery Removal 1 Disconnect two battery plugs Q See Fig 23 2 Unfasten velcro strap that hold batteries in place See Fig 24 3 Remove two batteries S See Fig 25 13 Figure 23 Figure...

Страница 16: ...nd of power cord into a standard electrical wall outlet 4 Switch the charger power On If charging your power chair for over 8 14 hours and it does not function please check fuse is not burned out powe...

Страница 17: ...s If storing your power chair for some time one month or more make sure batteries are fully charged and on returning charge them again before using power chair Batteries will only give maximum perform...

Страница 18: ...to wash or rinse power chair in order to protect electrical parts Polish with an automotive liquid polish SEAT AND ARMRESTS The seat material used by C T M is of high quality and will remain in good c...

Страница 19: ...Inspect the tires frequently for any signs of damage such as unusual wearing or insufficient tread depth Tread depth should not be allowed to drop below 1 mm ELECTRICAL CONNECTIONS Make sure battery...

Страница 20: ...ctions and cabling Check the left park brake connections and cabling Check the right park brake connections and cabling Check the SHARK Communications Bus connections and wiring Replace the Remote Che...

Страница 21: ...It should be steady if it is flashing see the chart on page 17 for problem identification 3 Check all electrical connections to be sure they are tight 4 Make sure batteries are connected correctly 5...

Страница 22: ...Speed Weight Capacity Ground Clearance Grade Climbable Curb Climbing Turning Radius Brake Seat Width Drive Train Battery Weight Motor Size Travel Range Battery Charger Seat Type 39 24 42 5 6 10 6 180...

Отзывы: