L0217
NOT
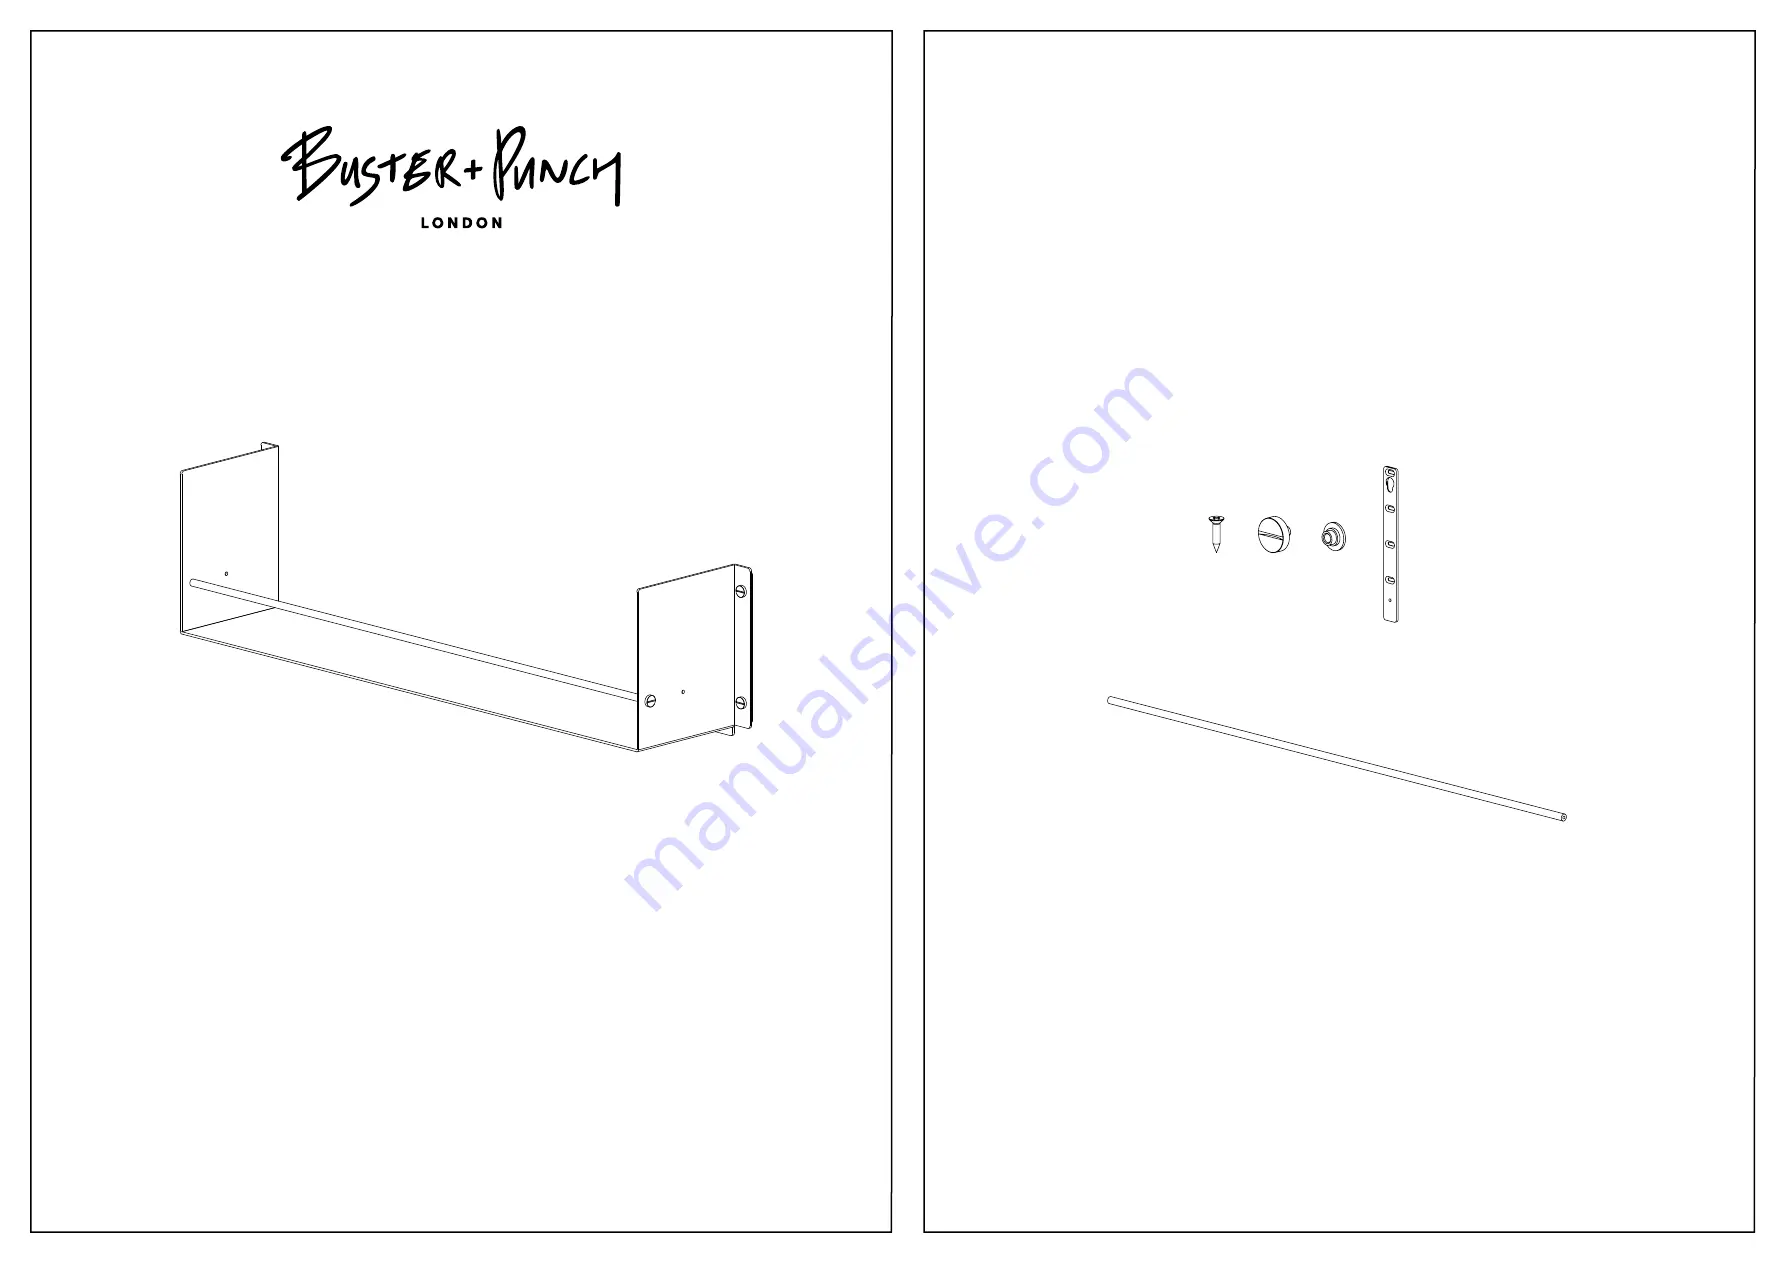
INCLUDED
x6
x8
x2
x1
B U S T E R A N D P U N C H . C O M
G I R D E R S H E L F
PREPARATION AND INSTALLATION
INSTRUCTION MANUAL
D E T A I L S K I T
C O N T E N T S
Страница 1: ...L0217 NOT INCLUDED x6 x8 x2 x2 x1 B U S T E R A N D P U N C H C O M G I R D E R S H E L F PREPARATION AND INSTALLATION INSTRUCTION MANUAL D E T A I L S K I T C O N T E N T S ...
Страница 2: ...x 2 x 1 1 Locate the glass rail in the position that is desired and use two coin screws to fix it in place Ensure the screws are not cross threaded Use fingers only no screw drivers or ...
Страница 3: ...the top holes centre distance 1094mm Ensure that the shelf is level before marking b drill two 2mm pilot holes where the marks are Consult this diagram to determine the height your shelf will sit on the wall Bracket mounting screw position 276mm 260mm 280mm 17mm ...
Страница 4: ...g holes on both brackets Do not fully tighten down Make sure the brackets are vertical b Secure brackets by adding the remaining six screws Ensure the brackets are hanging vertically before tightening screws countersunk screw not supplied 8x 2x ...
Страница 5: ...2x 2x Screw together a coin cap and a coin cap mounting component together through the top holes one each side in the hanger shelf body Make sure the mounting component is the correct orientation 4 ...
Страница 6: ...Hang the shelf on the brackets Use the coin screw connector and slot the shelf into the brackets Once the connector is in the hole the shelf should drop down into the slot on the bracket 5 ...
Страница 7: ...Hang the shelf on the brackets Use the coin screw connector and slot the shelf into the brackets Once the connector is in the hole the shelf should drop down into the slot on the bracket 6 2x ...
Страница 8: ...7 end ORDINARY ...