User Guide
86
www.bull.com
11.
Repeat steps 5 through 10 for the right slide rail, ensuring that it is parallel and
level with the left slide rail.
12.
If you wish to install a cable arm, follow the instructions in
“Installing a Cable
Arm (with Sliding Rails Only)” on page 87
before going to step 13
13.
Extend both slide rails into the fully extended (locked) position.
14.
Align the mounting studs with the component mounting channels on the slide
rails.
15.
Carefully place the component mounting studs in the component mounting
channels on the slide rails.
Allow the component mounting studs to fully seat in the component mounting
channels (letter “D” on Figure 44). The component release levers (one on each
slide rails) pivot out of the way and then back in place whent the studs are fully
engaged in the mounting channels.
Ensure that the component release levers are in locked position.
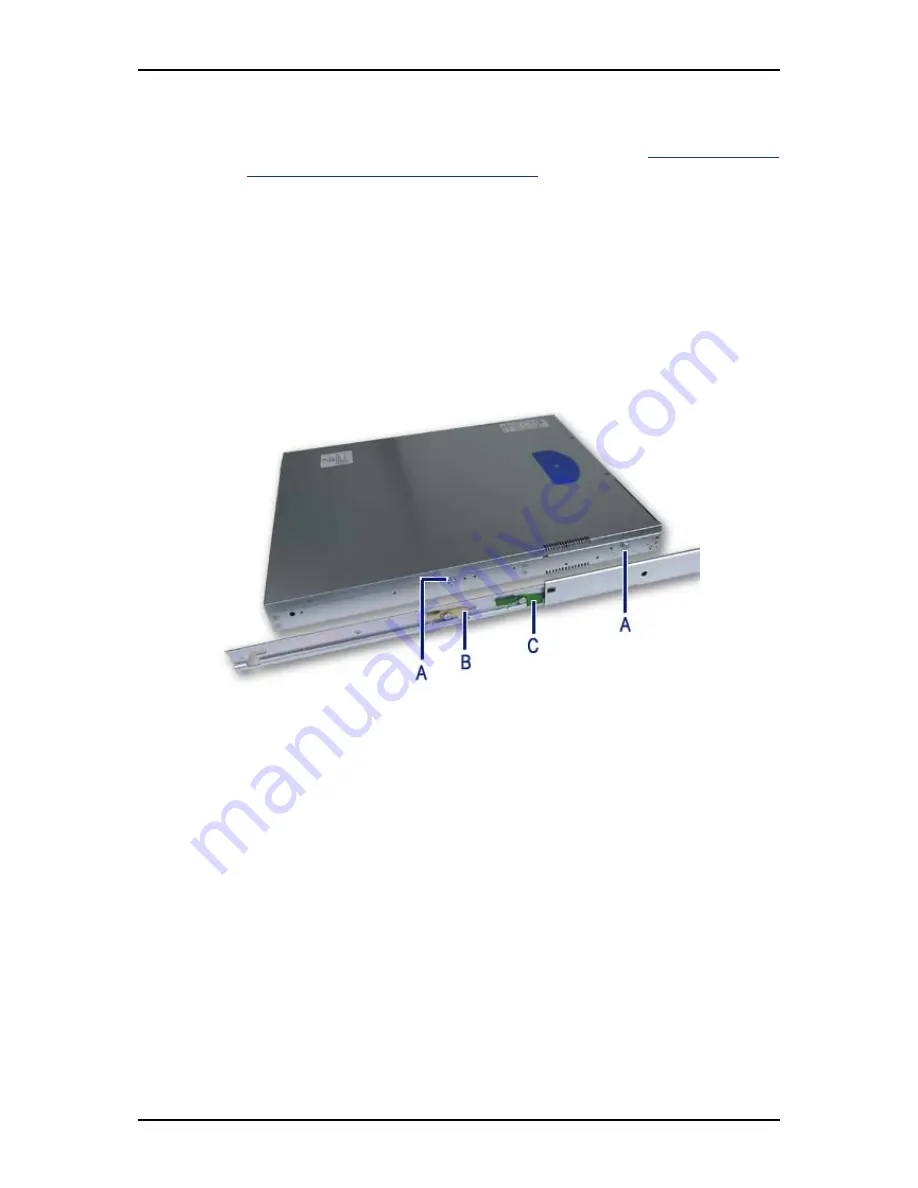
Figure 52: Placing the System on the Rails
A: Mounting studs
B: Slide extension release lever
C: Component release lever
16.
Use two rack screws (#10-32 x 3/4) to secure the chassis and rack handles into
the rack.
17.
Press and hold the left and right slide extension release levers and slowly slide
the component and side rails into the fully retracted position.
Содержание NovaScale R410 E1
Страница 1: ...NovaScale T810 E1 T830 E1 R410 E1 User s Guide NOVASCALE REFERENCE 86 A1 15FA 00 ...
Страница 2: ......
Страница 34: ...User Guide 34 www bull com Motherboard Motherboard Layout Figure 14 Motherboard Layout ...
Страница 53: ...User Guide 53 www bull com SAS Hard Disk Drive Capacity 73GB minimum 15000 RPM RAID support ...
Страница 294: ...User Guide 294 www bull com Boot Manager Menu Allows you to boot the system using one of the items listed in the menu ...
Страница 295: ...User Guide 295 www bull com Error Manager Menu The Error Manager Menu displays any errors encountered during POST ...
Страница 318: ......
Страница 319: ...BULL CEDOC 357 AVENUE PATTON B P 20845 49008 ANGERS CEDEX 01 FRANCE REFERENCE 86 A1 15FA 00 ...


