


Notes:
• Up to eight backup jobs can be configured at a time, and 25 backup source and destination folder pairs can be
used in one backup job.
• During setup, you may choose to encrypt and/or compress backup data. Encrypted data will be transferred
securely on the network. Compressed data will ease network loading and is recommended for slow or heavily-
loaded network connections. Enabling either will increase the CPU load on the source TeraStation so that
the transfer speed will become slower, and backup time will be slower than if they are disabled. Encrypted or
compressed data will be decrypted or decompressed on the destination TeraStation.
• To inherit the subfolders’ access restriction settings to the backup destination, the backup destination should also
support the subfolders’ access restrictions. Check it before creating a backup job.
• To back up data between Buffalo NAS devices on a network using jumbo frames, make sure that both devices are
configured to use identical (or similar) MTU sizes. If MTU sizes are significantly different, the backup job may not
be properly performed. In such a case, select the default MTU size (1500 bytes) for both devices.
• You can also specify a hostname by a fully qualified domain name (FQDN).
• Windows-based TeraStations with multibyte characters in the hostname may not be detected as a backup
destination, and folders in these devices cannot be used as backup destination folders.
• Backup data, such as “.DS_Store” files, from macOS may include characters that cannot be read on FAT32-
formatted drives in its filename. For best results, reformat the drive before using it as a backup destination.
If Backing Up from rsync-Compatible Devices to the TeraStation
If you want to set an rsync-compatible device as the backup source and back up data on the rsync-compatible
device to the TeraStation, you will need to enable rsync access on the TeraStation.
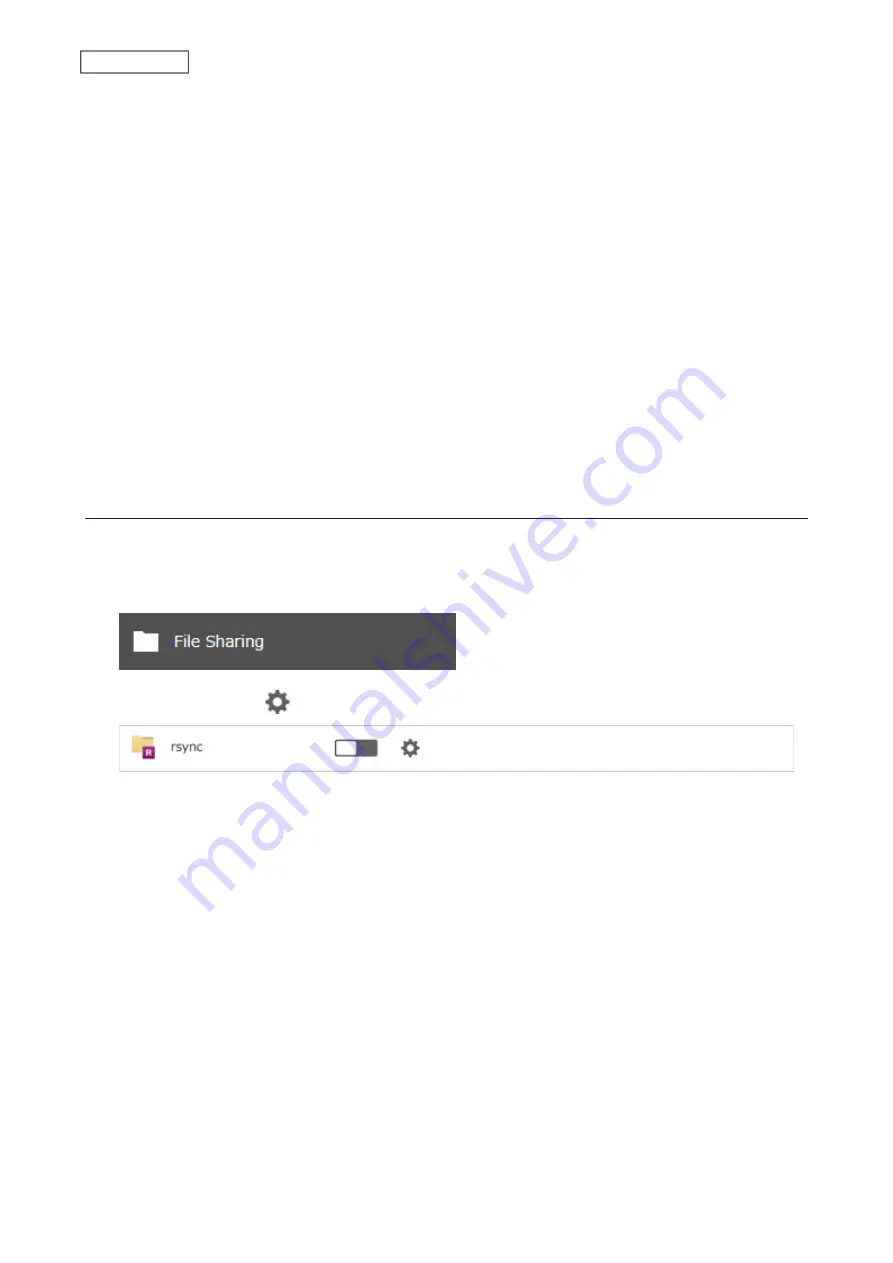
1
From Settings, click
File Sharing
.
2
Click the settings icon (
) to the right of “rsync”.
98
Chapter 5 Backup
Содержание TeraStation 6000 Series
Страница 32: ...3 Click Add Group 31 Chapter 3 File Sharing...
Страница 120: ...2 Click Time Machine 119 Chapter 5 Backup...
Страница 121: ...3 Click Select Backup Disk 4 Select the TeraStation then click Use Disk 120 Chapter 5 Backup...
Страница 123: ...7 Time Machine will count down from 120 seconds then backup will begin 122 Chapter 5 Backup...
Страница 131: ...3 From the job list click the job whose settings you want to change 4 Click the Options tab 130 Chapter 6 Remote Access...
Страница 132: ...5 Click Edit 131 Chapter 6 Remote Access...
Страница 136: ...7 Enter the desired job name and click Next 8 Select Backup and click Next 135 Chapter 6 Remote Access...
Страница 144: ...4 Click the Options tab 5 Click Edit 143 Chapter 6 Remote Access...
Страница 153: ...4 Click the Options tab 152 Chapter 6 Remote Access...
Страница 154: ...5 Click Edit 153 Chapter 6 Remote Access...
Страница 169: ...11Click the NFS Rules tab 12Click Add 168 Chapter 7 Advanced Features...
Страница 193: ...3 Click Edit 4 Select or enter the desired MTU size and click OK 192 Chapter 7 Advanced Features...