


56
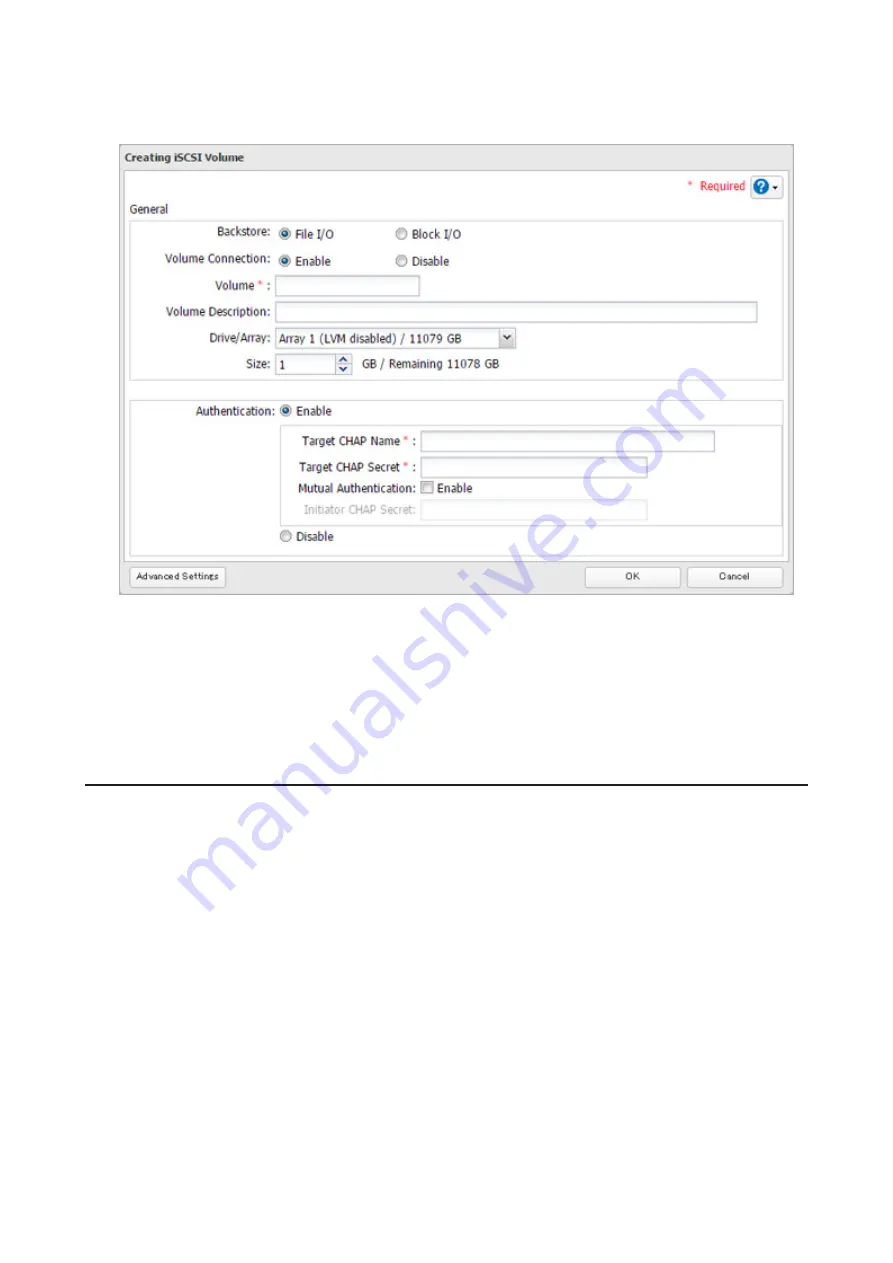
If you enabled LVM for the target drive or array, or selected "File I/O" for the "Backstore" option, the volume size
that you specify here can be changed later. To change the volume size, refer to the "Expanding Volume Sizes"
section below.
6
The "Confirm Operation" screen will open. Enter the confirmation number, then click
OK
.
7
Click
OK
, then
Close
.
Note:
If you click
Disable Connection
for the selected volume in
Storage
-
iSCSI
in Settings, the selected iSCSI
volume can no longer be accessed. If you click
Enable Connection
, the volume will become accessible from the
iSCSI initiator software.
Connecting or Disconnecting Volumes
Note:
By default, the IP address of the TeraStation is automatically assigned from a DHCP server. However, in
this case, if you turn off and restart the TeraStation, the IP address may be changed and the volumes on the
TeraStation may not be accessible. To avoid changing the IP address unexpectedly, using a fixed IP address for
the TeraStation is recommended.
Connecting Volumes
To connect a volume, follow the procedure below.
Note:
Do not shut down the TeraStation while connecting to an iSCSI volume. It may cause unexpected data
erasure. Make sure all connections are disconnected before shutdown.
1
In Windows, navigate to
Control Panel
-
Administrative Tools
-
iSCSI Initiator
.
Содержание TeraStation 5010
Страница 8: ...7 For Customers in Taiwan 175 ...
Страница 67: ...66 1 In Settings click Backup 2 Click to the right of Backup 3 Click List of LinkStations and TeraStations ...
Страница 75: ...74 3 Click Edit 4 Click Add 5 Click Browse under Replication Source ...
Страница 87: ...86 18Click Time Machine ...
Страница 88: ...87 19Click Select Backup Disk 20Select the TeraStation then click Use Disk ...
Страница 97: ...96 3 Click Create New Job 4 Select backup settings such as date and time to run 5 Click Add ...
Страница 103: ...102 4 Click the Options tab 5 Click Edit ...
Страница 114: ...113 7 Move the NFS switch to the position to enable NFS 8 Click to the right of NFS 9 Click the Client Settings tab ...
Страница 128: ...127 Updating Automatically 1 In Settings click Management 2 Click to the right of Update 3 Click Edit ...
Страница 137: ...136 3 Click Edit ...
Страница 138: ...137 4 Select or enter the desired MTU size and click OK ...
Страница 140: ...139 3 Click Edit 4 Clear the DHCP checkbox and enter the desired IP address and its subnet mask ...