Notes:
• If the migration target TeraStation contains shared folders, users, and groups that share the same name as the
transferred settings, the existing settings will be overwritten.
• If the migration target TeraStations have already added some shared folders, users, and groups, the transferred
settings may exceed the maximum number of allowed shared folders, users, or groups. After migration finishes,
open Settings and verify that all settings were properly transferred.
Restoring Factory Defaults
Initializing from Settings
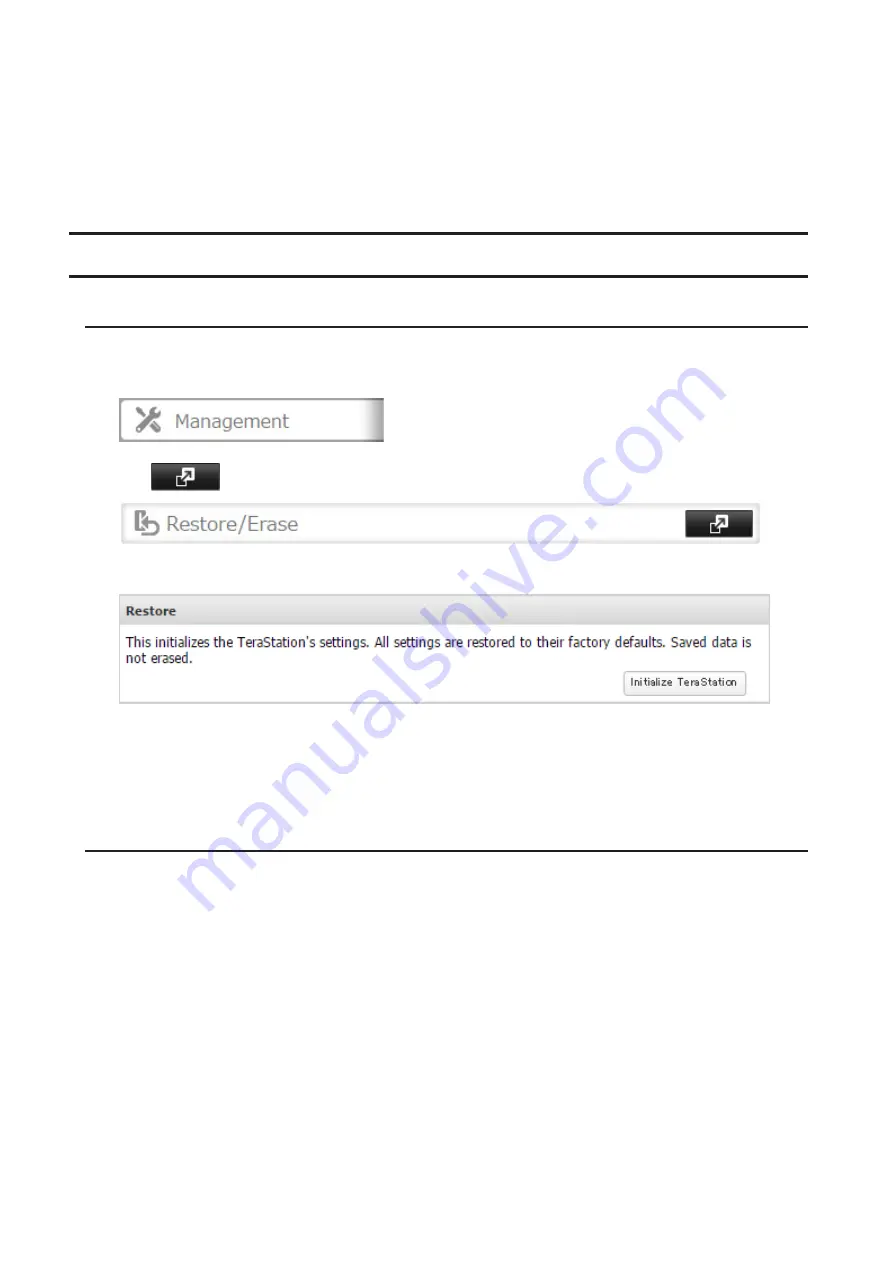
To initialize the TeraStation to its factory defaults from Settings, follow this procedure.
1
In Settings, click
Management
.
2
Click
to the right of "Restore/Erase".
3
Click
Initialize TeraStation
.
4
The "Confirm Operation" screen will open. Enter the confirmation number, then click
OK
. The TeraStation will
be restored to its factory default settings.
5
When the "finished" message is displayed, restoring settings is finished. Click
OK
.
Initializing with the USB Initialization Drive
An initialization drive will restore the settings on your TeraStation to their factory defaults. You can initialize them
without logging in to Settings. Follow the procedure below to create an initialization drive.
Notes:
• Initializing settings with the USB drive is available for the same TeraStation unit that created the initialization
drive.
• Normally, making and using an initialization drive will not affect data on the TeraStation. However, always back up
your data regularly!
• This USB drive can be used to recover the system if your TeraStation doesn't boot at all. In this case, if the data
partition is damaged, then all your data will be deleted by the recovery process.
Creating an Initialization Drive
1
Insert a 1 GB or larger USB drive (not included) into a USB port on the TeraStation.
Note:
All data on the USB drive will be erased!
153
Содержание TeraStation 5010 TS51210RH
Страница 32: ...3 Click Create User 31...
Страница 35: ...3 Click Add Group 34...
Страница 103: ...2 Click to the right of Failover 3 Click the Periodic Sync tab 4 Click Edit 102...
Страница 106: ...15Click Time Machine 105...
Страница 107: ...16Click Select Backup Disk 17Select the TeraStation then click Use Disk 106...
Страница 121: ...3 From the task list click the task whose settings you want to change 4 Click the Options tab 120...
Страница 122: ...5 Click Edit 121...
Страница 145: ...7 Click to the right of NFS 8 Click the Client Settings tab 144...
Страница 159: ...Updating Automatically 1 In Settings click Management 2 Click to the right of Update 3 Click Edit 158...
Страница 168: ...3 Click Edit 167...
Страница 169: ...4 Select or enter the desired MTU size and click OK 168...
Страница 171: ...3 Click Edit 170...
Страница 198: ...1 Open the front cover with the included key 2 Remove the front cover while holding the hook downward 197...
Страница 211: ...IEC60950 1 WARNING Hazardous moving parts Keep away from moving fan blades 210...


