


Procedure for TeraStations Other Than TS-X Series
Follow the procedure below to create a config file on a TeraStation that is not a TS-X series.
1
Refer to the user manual of the TeraStation that you want to transfer settings for saving settings to a USB drive.
2
Access the "usbdisk x" shared folder while connecting the USB drive to the TeraStation whose settings were
saved in the previous step. The "x" in the folder name represents the USB port number you connected the drive
to.
3
Copy and paste the .nas_config file to the desired location on your computer.
Transferring Settings
Follow the procedure below to transfer settings from another series TeraStation.
1
Before transferring access restrictions with Active Directory domain users, make sure the migration target
TeraStations are joined to the same domain controller. To have the unit join the domain network, refer to the
procedure on the "Active Directory" section in chapter 3.
If you didn't configure access restrictions with Active Directory domain users, skip to the next step.
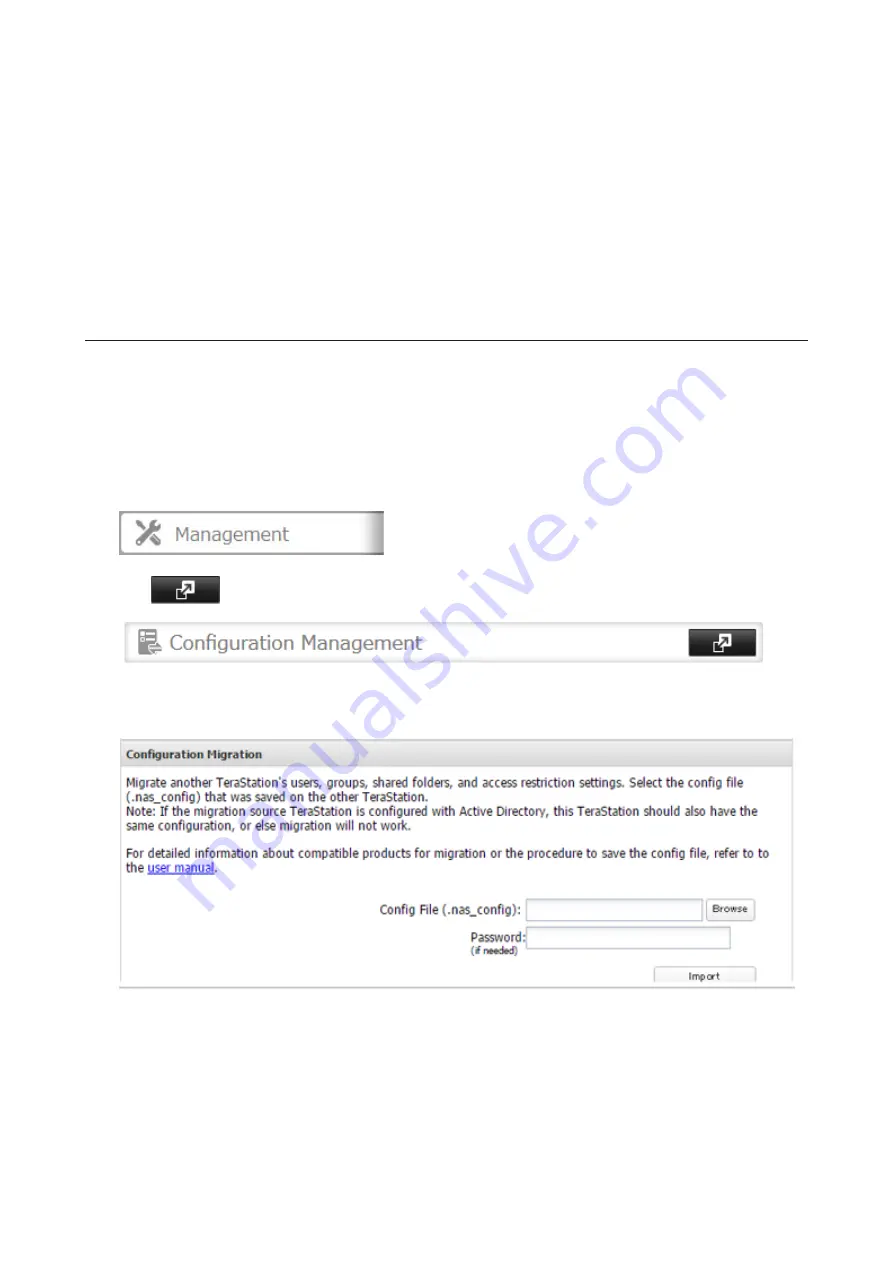
2
In Settings, click
Management
.
3
Click
to the right of "Configuration Management".
4
Click
Browse
and select the config file (.nas_config) that was created with another TeraStation.
If the config file was created with a password, enter it into the "Password" box.
5
Click
Import
.
6
The "Confirm Operation" screen will open. Enter the confirmation number, then click
OK
.
7
When the "finished" message is displayed, transferring settings is finished. Click
OK
.
152
Содержание TeraStation 5010 TS51210RH
Страница 32: ...3 Click Create User 31...
Страница 35: ...3 Click Add Group 34...
Страница 103: ...2 Click to the right of Failover 3 Click the Periodic Sync tab 4 Click Edit 102...
Страница 106: ...15Click Time Machine 105...
Страница 107: ...16Click Select Backup Disk 17Select the TeraStation then click Use Disk 106...
Страница 121: ...3 From the task list click the task whose settings you want to change 4 Click the Options tab 120...
Страница 122: ...5 Click Edit 121...
Страница 145: ...7 Click to the right of NFS 8 Click the Client Settings tab 144...
Страница 159: ...Updating Automatically 1 In Settings click Management 2 Click to the right of Update 3 Click Edit 158...
Страница 168: ...3 Click Edit 167...
Страница 169: ...4 Select or enter the desired MTU size and click OK 168...
Страница 171: ...3 Click Edit 170...
Страница 198: ...1 Open the front cover with the included key 2 Remove the front cover while holding the hook downward 197...
Страница 211: ...IEC60950 1 WARNING Hazardous moving parts Keep away from moving fan blades 210...