183
Chapter 7 Advanced Features
3
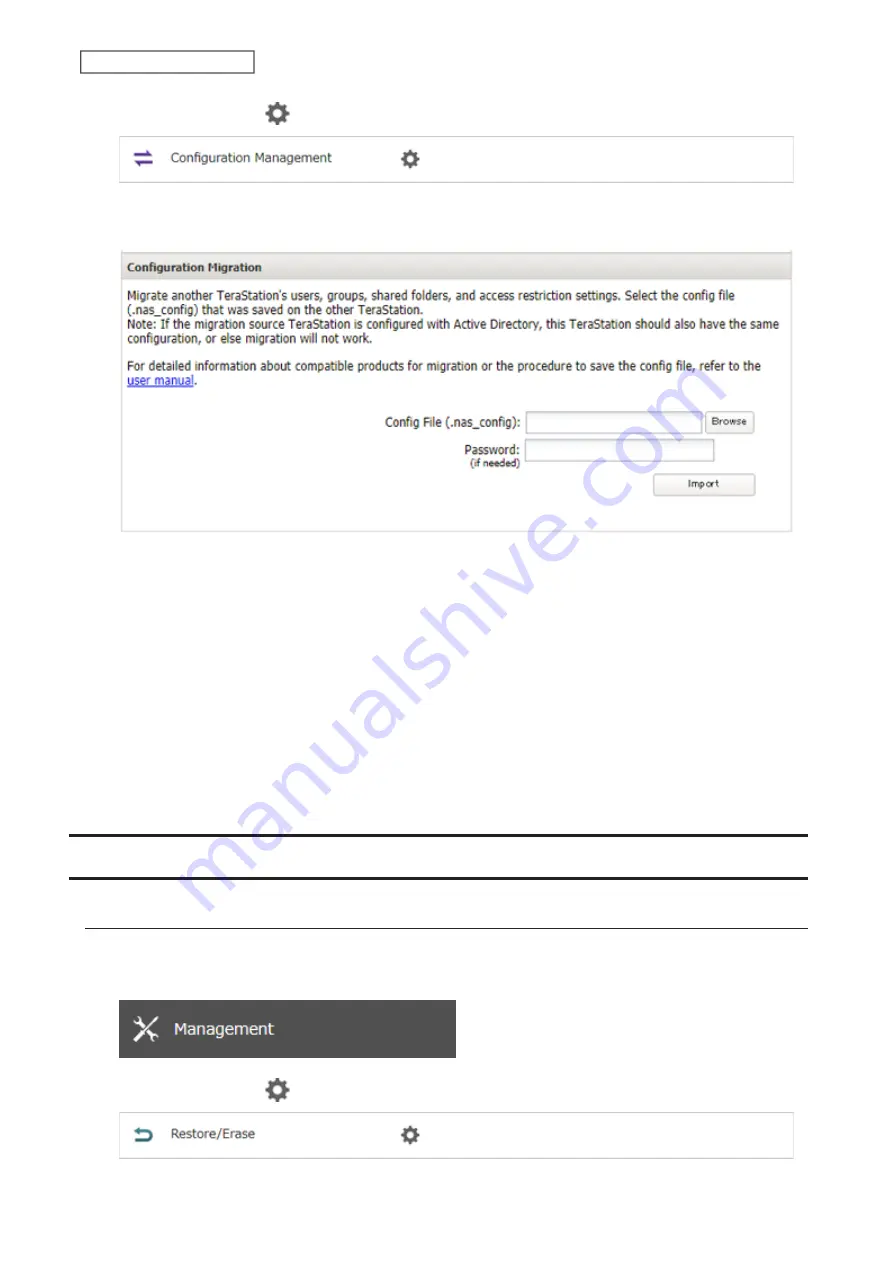
Click the settings icon (
) to the right of “Configuration Management”.
4
Click
Browse
and choose the config file (.nas_config) that was created with the migration source TeraStation. If
the config file was created with a password, enter it into the “Password” field.
5
Click
Import
.
6
The “Confirm Operation” screen will open. Enter the confirmation number, then click
OK
.
7
The TeraStation will transfer the settings. When transferring settings is completed, click
OK
.
Notes:
• If the migration target TeraStation contains shared folders, users, and groups that share the same name as the
transferred settings, the existing settings will be overwritten.
• If the migration target TeraStations have already added some shared folders, users, and groups, the transferred
settings may exceed the maximum number of allowed shared folders, users, or groups. After migration finishes,
open Settings and verify that all settings were properly transferred.
Restoring Factory Defaults
Initializing from Settings
To initialize the TeraStation to its factory defaults from Settings, follow the procedure below.
1
From Settings, click
Management
.
2
Click the settings icon (
) to the right of “Restore/Erase”.
Содержание TeraStation 3010
Страница 29: ...28 Chapter 3 File Sharing 3 Click Create User...
Страница 32: ...31 Chapter 3 File Sharing 3 Click Add Group...
Страница 71: ...70 Chapter 4 Storage Management 6 Click Edit under NAS Volume 7 Click Create Volume...
Страница 88: ...87 Chapter 5 Backup 4 Enter the backup device access key and click OK 5 Click Add...
Страница 107: ...106 Chapter 5 Backup 2 Click the settings icon to the right of Failover 3 Click the Periodic Sync tab 4 Click Edit...
Страница 111: ...110 Chapter 5 Backup 3 Click Select Backup Disk 4 Select the shared folder then click Use Disk...
Страница 113: ...112 Chapter 5 Backup 7 Time Machine will count down from 120 seconds then backup will begin...
Страница 125: ...124 Chapter 6 Cloud Services and Remote Access 5 Click Edit...
Страница 137: ...136 Chapter 6 Cloud Services and Remote Access 4 Click the Options tab 5 Click Edit...
Страница 146: ...145 Chapter 6 Cloud Services and Remote Access 3 From the job list click the job whose settings you want to change...
Страница 147: ...146 Chapter 6 Cloud Services and Remote Access 4 Click the Options tab...
Страница 148: ...147 Chapter 6 Cloud Services and Remote Access 5 Click Edit...
Страница 176: ...175 Chapter 7 Advanced Features 11Click the NFS Rules tab 12Click Add...
Страница 201: ...200 Chapter 7 Advanced Features 3 Click Edit 4 Select or enter the desired MTU size and click OK...
Страница 205: ...204 Chapter 7 Advanced Features 3 Click FQDN Mapping 4 Click Add...


