


4
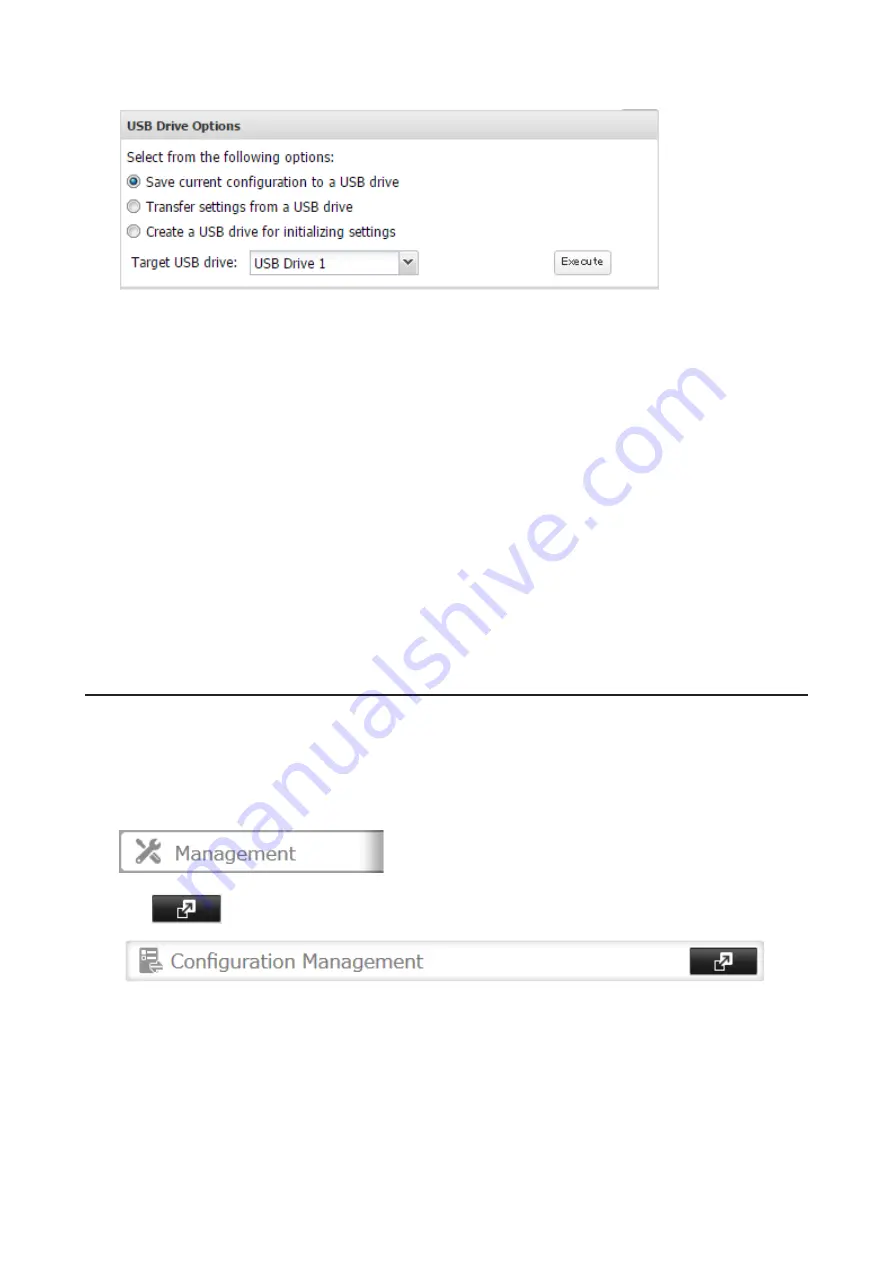
Select “Save current configuration to a USB drive”.
5
From “Target USB drive”, select the USB drive that is connected to the USB 2.0 port on the TeraStation, then
click
Execute
.
6
The “Confirm Operation” screen will open. Enter the confirmation number, then click
OK
.
7
The TeraStation will save the settings. When saving settings is completed, click
OK
.
Dismount the USB drive before unplugging it. See the “Dismounting Drives” section in chapter 4 for the procedure
on dismounting drives.
Troubleshooting:
If the settings are not saved to the USB drive successfully, you may receive an error message such as “The specified
operation cannot be executed.”. Verify:
• The USB drive is connected to a USB 2.0 port, not a USB 3.0 port.
• The USB drive has a capacity of 1 GB or larger.
• The USB drive is not write-protected.
Applying Settings
The saved settings can be applied to a different TeraStation of the same series. If applying settings to another
TeraStation, the unit’s current firmware version will be changed to the version used to save the settings.
1
Insert the USB drive with the saved settings to a USB 2.0 port on the TeraStation.
2
From Settings, click
Management
.
3
Click
to the right of “Configuration Management”.
195
Содержание terastation 3000
Страница 23: ...4 Configure the desired settings then click OK 22...
Страница 26: ...3 Click Create User 25...
Страница 29: ...3 Click Add Group 28...
Страница 109: ...6 Click Time Machine 108...
Страница 110: ...7 Click Select Backup Disk 8 Select the shared folder and click Use Disk 109...
Страница 128: ...3 Click Edit 4 Click Browse 5 Select the shared folder that you want to make available to iTunes then click OK 127...
Страница 129: ...6 Click OK then OK again 7 Move the iTunes server switch to the position to enable the iTunes server 128...
Страница 134: ...4 Open the License tab then click Activate Free License To deactivate the license click 133...
Страница 136: ...3 Click Next 4 Click Find Cameras 135...
Страница 142: ...2 Select the search criteria on the left side of the search screen then click Search 141...
Страница 143: ...3 The search results are displayed Click a thumbnail to start the media viewer 142...
Страница 161: ...14Check that the license pack was added to Installed Licenses This completes authentication of an additional license 160...
Страница 187: ...9 Click the Client Settings tab 186...
Страница 191: ...4 Click Edit Note The settings of the PHP language interpreter can be changed from Edit php ini 5 Click Browse 190...
Страница 209: ...3 Click the LAN port where the jumbo frames will be used 4 Select the desired Ethernet frame size and click OK 208...


