background image

Converting Local Users into External Users

If using an external SMB server for authentication, you may convert any local users into external users. This way, the 
LinkStation will have a user list that matches the users in the external SMB server, and access restrictions for this 
LinkStation’s shared folders may be assigned to the converted “external” users.
Follow the procedure below to convert a local user into an external user. If a local user is converted, their user 
information (including passwords) will be removed from the LinkStation. External users cannot be reverted to local 
users.

Note: 

External authentication should be enabled before local users can be converted. For more information on 

external authentication, refer to the 

“User Authentication with an External SMB Server”

 section.

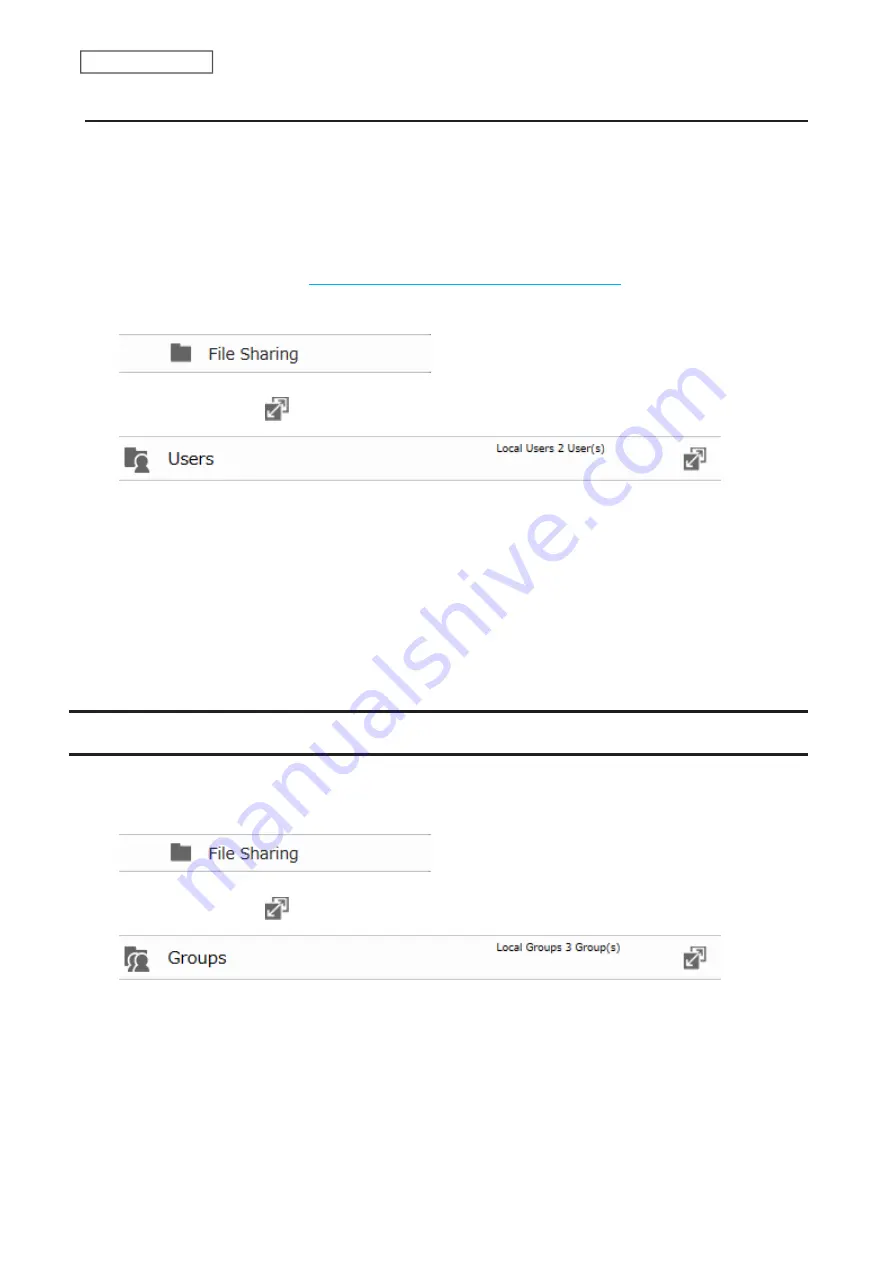
From Advanced Settings, click 

File Sharing

.

Click the settings icon ( 

 ) to the right of “Users”.

From the user list screen, select the checkboxes of any users to be converted to an external user, then click 

Convert to External User

.

Click 

OK

.

The “Confirm Operation” screen will open. Enter the confirmation number, then click 

OK

.

Converted users are displayed under the “External Users” tab. You can then configure access restrictions for external 
users.

Adding a Group

Note: 

You may add up to 300 groups.

From Advanced Settings, click 

File Sharing

.

Click the settings icon ( 

 ) to the right of “Groups”.

36

Chapter 2 File Sharing

Содержание LinkStation 200 Series

Страница 1: ...cedures If you have any inquiries about the product contact the number on the warranty statement or the packing box Do not discard the included documents the warranty statement or the packing box Amer...

Страница 2: ...hat to which the receiver is connected Consult the dealer or an experienced radio TV technician for help This device complies with Part 15 of the FCC Rules Operation is subject to the following two co...

Страница 3: ...r of langer zijn om USB apparaten met deze LinkStation series te verbinden Gebruik alleen de kabels en toebehoren die zich in de verpakking bevinden Gebruik geen ander toebehoren of kabels tenzij dit...

Страница 4: ...uant to Directive 2009 125 EC of the European Parliament and of the Council The x at the end of the AC adapter s model name represents a variable alphabetic character between D and Z WB 18L12R Z080x P...

Страница 5: ...KAMONDORI Bldg 30 20 Ohsu 3 chome Naka ku Nagoya 460 8315 Japan Input voltage 100 240 V Input AC frequency 50 60 Hz Output voltage 12 0 V Output current 4 0 A Output power 48 0 W Average active effici...

Страница 6: ...AS Navigator2 12 SmartPhone Navigator 12 WebAccess 12 NovaBACKUP 13 Turning the LinkStation On and Off 13 Accessing Settings 13 Opening Settings 14 Settings Up Through Setup Wizard 21 Accessing Shared...

Страница 7: ...anagement 52 Available RAID Modes 52 Working with RAID Arrays 52 Using JBOD 52 Creating a RAID Array 53 Changing the RAID Mode using RMM 55 RAID Scanning 56 Adding an External Drive 57 Connecting an E...

Страница 8: ...a Backup Destination 80 Configuring a Backup Job 81 Backing Up Your Mac with Time Machine 85 Copying from a USB Device 91 Configuring Direct Copy 92 Starting Direct Copy 94 Chapter 6 Multimedia 97 DLN...

Страница 9: ...TP Transfer Data 114 SSL 114 Restoring Factory Defaults 115 Resetting the Administrator Password 116 Updating the Firmware 116 Name Date Time and Language 117 Jumbo Frames 120 Changing the IP Address...

Страница 10: ...Blinking Amber Notices 138 Blinking Amber Information Events 138 Glowing Amber 139 Default Settings 139 Specifications 140 9...

Страница 11: ...the number or type of drives in the unit the model name will be different Check the sticker on the packing box for your unit s model name LS210D 1 2 3 4 5 6 8 11 7 9 LS220D LS220DE LS220DR 1 2 10 3 4...

Страница 12: ...s 4 Power Switch Move the switch up and down to power the device on and off 5 USB Port Compatible USB drives USB memory devices digital cameras and USB printers can be connected USB hubs are not suppo...

Страница 13: ...software help for more detailed information on operating the software To open the help launch NAS Navigator2 and navigate to Help NAS Navigator2 Help from the menu bar SmartPhone Navigator SmartPhone...

Страница 14: ...to the On position to turn the device on To turn off the LinkStation move the switch to the Off position and wait for the unit to fully shut down before unplugging it Don t unplug the AC adapter with...

Страница 15: ...ht click your LinkStation s icon and select Open Settings For macOS select the LinkStation s icon while holding down the control key then select Open Settings 3 Enter the username and password then cl...

Страница 16: ...wizard lets you configure the following settings Changing the administrator password Creating shared folders Configuring access restrictions WebAccess Configure WebAccess to access your LinkStation r...

Страница 17: ...in chapter 6 for more information DLNA Configure DLNA to stream media files to DLNA compatible devices on the LAN Refer to the DLNA section in chapter 6 for more information Using a Computer Advanced...

Страница 18: ...ter the username and password then click OK Notes If the time out period is set to 10 minutes you will be logged out of Settings after 10 minutes of inactivity Click Secure Connection to log in using...

Страница 19: ...vice Notes If you have an older version of SmartPhone Navigator installed on your device update it to the latest version Your icons and software may be slightly different from the examples in this man...

Страница 20: ...ptimized Settings display are described in the Specifications section in chapter 9 1 Tap the SmartPhone Navigator icon on your mobile device 2 Tap your LinkStation from the list of devices 3 Tap Open...

Страница 21: ...4 Enter the username and password then tap Log In Note The default username and password are admin and password 20 Chapter 1 Getting Started...

Страница 22: ...al users group only changing the password of logged in users is available To go back to Easy Admin click the home icon Tap Desktop on Settings optimized for mobile devices to show Advanced Settings Th...

Страница 23: ...kStation s icon and select Open Settings For macOS select the LinkStation s icon while holding down the control key then select Open Settings 3 Changing the password from the default is recommended No...

Страница 24: ...n s icon 3 File Explorer will open with shared folders lists For macOS the LinkStation is mounted as a drive icon on the desktop or it is displayed in the sidebar of the Finder Note When you access a...

Страница 25: ...3 Tap Browse Note Alternatively you can access shared folders from the WebAccess app Open the application and tap your LinkStation s hostname in the NAS list 24 Chapter 1 Getting Started...

Страница 26: ...key data Configuring Shared Folders Adding a Shared Folder You can create a shared folder from a computer or a mobile device Follow the appropriate procedure below to create a shared folder Using a C...

Страница 27: ...4 Configure the desired settings then click OK 26 Chapter 2 File Sharing...

Страница 28: ...Using a Mobile Device 1 From Settings tap Folder Setup 27 Chapter 2 File Sharing...

Страница 29: ...2 Tap Create Folder 28 Chapter 2 File Sharing...

Страница 30: ...e setting and display language do not match the shared folder name will not be displayed correctly The following characters are handled differently by macOS and Windows devices Avoid using these chara...

Страница 31: ...art the LinkStation delete the file and perform the copy operation again Recycle Bin To protect your data from accidental deletion you may configure your LinkStation to use a recycle bin instead of de...

Страница 32: ...computer and enter LinkStation name shared folder name into the address bar For example if the LinkStation name is LSXXX001 and the shared folder name is share enter LSXXX001 share to open it Configu...

Страница 33: ...4 Enter the desired settings then click OK 32 Chapter 2 File Sharing...

Страница 34: ...Using a Mobile Device 1 From Settings tap Users 33 Chapter 2 File Sharing...

Страница 35: ...2 Tap Create User 34 Chapter 2 File Sharing...

Страница 36: ...contain up to 20 alphanumeric characters hyphens underscores _ commas periods semicolons tildes and the symbols The first character should not be a symbol unless it is an underscore Use the same user...

Страница 37: ...authentication should be enabled before local users can be converted For more information on external authentication refer to the User Authentication with an External SMB Server section 1 From Advance...

Страница 38: ...3 Click Add Group 37 Chapter 2 File Sharing...

Страница 39: ...u are logged in as an administrator you can change any setting including other users passwords If you are logged in as a member of the power users group you can create and edit shared folders users an...

Страница 40: ...behavior Local Users and Groups You can configure access restrictions using local users and groups from a computer or a mobile device Follow the appropriate procedure below to configure access restri...

Страница 41: ...the user or group Read and write Read only No access Note The example above shows access restrictions by users To restrict access by group click the Local Groups tab and select group permissions 7 Cl...

Страница 42: ...Using a Mobile Device 1 From Settings tap Folder Setup 41 Chapter 2 File Sharing...

Страница 43: ...2 Tap the shared folder that you want to set access restrictions for 42 Chapter 2 File Sharing...

Страница 44: ...ion will use account information from the Active Directory domain controller to set access restrictions for LinkStation s shared folders There is no need to perform individual account management for t...

Страница 45: ...to the right of Workgroup Domain 3 Click Edit 4 Select Active Directory then click Next 5 Click Yes 6 Enter the desired settings then click OK 7 Click the settings icon to the right of Folder Setup 4...

Страница 46: ...restrictive access settings will always apply For example if both read only and read and write permissions are given to a user the user will have read only access If there is a difference of more than...

Страница 47: ...set access restrictions for LinkStation s shared folders There is no need to perform individual account management for the LinkStation If multiple LinkStations are installed on the network the accoun...

Страница 48: ...d settings then click OK 7 Click the settings icon to the right of Folder Setup 8 Click the shared folder that you want to set access restrictions for 9 Click Edit 10Enable Access Restrictions 47 Chap...

Страница 49: ...hod to Workgroup the account on the domain controller will not be deleted automatically If the LinkStation has joined a domain network you cannot connect to it via FTP Don t disable the SMB protocol w...

Страница 50: ...re added disable this option to limit the number of authenticated user accounts 8 If Restrict user registration to a single folder is checked the LinkStation will automatically create a read only shar...

Страница 51: ...he level of access for each external user Read and write Read only No access 15Click OK Notes Users that are automatically registered belong to the hdusers group They can be added to other groups from...

Страница 52: ...rnal SMB server If using a Windows PC for external authentication the default Windows SMB security settings may need to be changed An easy way to do this is to run File Sharing Security Level Change T...

Страница 53: ...displayed in NAS Navigator2 do not turn off the LinkStation If you do the RAID scan will start over JBOD This mode uses the drives inside the LinkStation as individual drives The usable space is equal...

Страница 54: ...6 Click OK when finished Next create a shared folder by referring to the Adding a Shared Folder section in chapter 2 Creating a RAID Array Before creating a new RAID array first put the drives into J...

Страница 55: ...ransfers will be slower during this period but the array will remain fully usable The I17 message will also be displayed in NAS Navigator2 during the resync If you clear the Resync after creating the...

Страница 56: ...er 2 Changing the RAID Mode using RMM If the drives are currently in JBOD you can use RMM RAID Mode Manager to create a RAID 1 array without erasing data on the drives 1 From Advanced Settings click D...

Страница 57: ...nfirm Operation screen will open Enter the confirmation number then click OK 10Click OK when finished RAID Scanning A RAID scan checks your RAID array for bad sectors and if it finds any it automatica...

Страница 58: ...nized the LinkStation adds usbdisk x to the shared folder list where x is the USB port to which the drive is connected Compatibility The following devices are supported by the LinkStation Buffalo exte...

Страница 59: ...ettings If the LinkStation is off then all drives are already dismounted and may be unplugged safely Note If you unplug your external drives without dismounting them Settings may still show usbdisk in...

Страница 60: ...n screen will open Enter the confirmation number then click OK 5 When the dismounting process is finished it is safe to unplug the drive Disconnect the drive from the LinkStation Using a Mobile Device...

Страница 61: ...the LinkStation or one that is connected via USB for integrity Detected errors are fixed automatically With large drives a drive check may run for many hours Shared folders cannot be accessed during...

Страница 62: ...click Check Disk 4 Click Check You have the option of deleting information files from macOS during the check if desired 5 Either the I14 message for RAID arrays the I21 message for drives or the I27 m...

Страница 63: ...is is because some drive space is used for the system area 1 From Advanced Settings click Drives 2 Click the settings icon to the right of Drives to format an internal drive or USB Drives to format an...

Страница 64: ...arger drive without GPT disconnect and then reconnect it before reformatting with GPT Erasing Data on the LinkStation Completely Under some circumstances data from formatted drives can be recovered Th...

Страница 65: ...be set for external drives connected to the LinkStation If both user and group quotas are configured for a user the most restrictive quota will always apply Quotas for Users Follow this procedure to...

Страница 66: ...o set a quota for a new group create a group by referring to the Adding a Group section in chapter 2 4 Enable quotas choose the maximum amount of space the group will be allowed to use and click OK 5...

Страница 67: ...10Click at the top right of Settings and choose Restart 66 Chapter 3 RAID Modes and Drive Management...

Страница 68: ...estrictions Note WebAccess supports downloading up to 60 000 files at a time Attempting to download 60 000 or more files at a time may result in unexpected behavior Configuring WebAccess You can confi...

Страница 69: ...aracters underscores _ and hyphens The BuffaloNAS com name is case sensitive 5 Click Apply 6 Continue with the procedure at http buffalonas com manual setup en Using a Computer Advanced Settings 1 Fro...

Страница 70: ...scores _ and hyphens If Exclusive Session is enabled multiple users cannot be logged in to WebAccess at the same time Only the last login will be active Enter a time in minutes 1 to 120 or Unlimited b...

Страница 71: ...shared folders will not work Use Inherited Folder Permissions Users and groups have the same access permissions with WebAccess that they do locally If access restrictions are not set for the shared f...

Страница 72: ...username and password twice then tap Next If the user with the entered username doesn t already exist a new user and a shared folder with the same name as the username will be created 71 Chapter 4 Rem...

Страница 73: ...network setup will finish at the screen below and you will only be able to access your NAS device from the local network To use WebAccess from outside your home reconfigure WebAccess by referring to t...

Страница 74: ...73 Chapter 4 Remote Access...

Страница 75: ...No access Read only Read and write WebAccess Public Mode Allow Anonymous R R W R W R W Allow All Groups and Users R W R W R W Use Inherited Folder Permissions R R W R W Read and write R Read only No...

Страница 76: ...e to Create a BuffaloNAS com Name If UPnP is disabled on your router creating the BuffaloNAS com name may fail If this occurs try the following procedure Using a Computer 1 From Settings click File Sh...

Страница 77: ...uring the required settings on the Buffalo NAS device is finished next configure the router using the port number set at step 5 above Using a Mobile Device 1 From Settings tap WebAccess 76 Chapter 4 R...

Страница 78: ...ber set at step 3 above FTP By default the LinkStation s shares are only accessible by users connected to the same network or router as the LinkStation The optional FTP server allows users outside the...

Страница 79: ...nt software with the following settings for anonymous FTP access Hostname IP address of the LinkStation Username Anonymous Password any character string Port 21 Notes If the LinkStation joins a domain...

Страница 80: ...device Folders available as backup destinations Shared folder on the backup source LinkStation excluding the info folder USB drive connected to the backup source LinkStation Shared folder on another B...

Страница 81: ...ckup source LinkStation excluding the info folder USB drive connected to the backup source LinkStation Shared folder on another Buffalo NAS device Folders available as backup destinations Shared folde...

Страница 82: ...ack up to a Buffalo NAS device on another network follow the procedure below to add the Buffalo NAS device so it can be used as a backup destination 1 From the Backup Job Settings screen click LinkSta...

Страница 83: ...igured a backup password for the backup source folder on another Buffalo NAS device or the backup destination folder click Set If you hadn t skip to step 5 4 Enter the backup password and click OK 82...

Страница 84: ...6 Select backup settings such as date and time to run then select a backup mode for the Operation Mode drop down list Refer to the differences between the backup modes in the Backup Modes section abo...

Страница 85: ...he shared folder that will be the backup source then click OK 10Click Browse under Backup Target Folder Name 11Select the shared folder that will be the backup destination then click OK 12Click OK The...

Страница 86: ...he drive before using it as a backup destination Backing Up Your Mac with Time Machine Time Machine is a backup program included with macOS Configure your LinkStation as shown below to use Time Machin...

Страница 87: ...ck Browse 5 Select the shared folder that you enabled AFP for in the previous steps then click OK 6 Click OK then click OK again 7 Move the Time Machine switch to the position to enable Time Machine 8...

Страница 88: ...inder menu bar navigate to Go Connect to Server 2 Enter afp and then the IP address or hostname of your LinkStation then click Connect 3 Enter a username and password to be used for accessing the shar...

Страница 89: ...ult username and password for the administrator account are admin and password If access restrictions are configured log in with an account with write privileges 4 Select the shared folder that has be...

Страница 90: ...6 Click Time Machine 89 Chapter 5 Backup...

Страница 91: ...7 Click Select Backup Disk 8 Select the shared folder then click Use Disk 90 Chapter 5 Backup...

Страница 92: ...ect Copy to copy data from a USB device directly to the LinkStation You can configure or start Direct Copy from a computer or a mobile device Follow the appropriate procedure below to configure or sta...

Страница 93: ...itch to the position to enable Direct Copy By default the Direct Copy target folder will be set to the share folder To change the folder follow the procedure below 1 From Advanced Settings click Backu...

Страница 94: ...5 Select the Direct Copy target folder and click OK 6 Click OK Using a Mobile Device 1 From Settings tap USB Device 93 Chapter 5 Backup...

Страница 95: ...use the function LED to light up are not supported When you connect PTP devices the function LED may not light up In such a case disconnect the PTP device from the LinkStation then reconnect it 2 You...

Страница 96: ...ct the USB device to any USB port on the LinkStation After it mounts about 10 seconds the function LED will light up Unsupported devices will not cause the function LED to light 2 From Settings tap US...

Страница 97: ...the access LED of the USB device will stop blinking Notes While the function LED is blinking press the function button once to cancel Direct Copy You can also cancel the copy operation from a mobile d...

Страница 98: ...tion can be played back on DLNA compatible TVs stereo equipment game consoles and other devices on the local network LinkStation TeraStation Enabling DLNA You can enable DLNA from a computer or a mobi...

Страница 99: ...tings icon to the right of Folder Setup 3 Select the folder that you want to share with media players and other DLNA compatible devices 4 Click Edit 5 Under LAN Protocol Support select the DLNA checkb...

Страница 100: ...11Select an interval for DLNA server database updates and click OK Using a Mobile Device 1 From Settings tap DLNA Server 99 Chapter 6 Multimedia...

Страница 101: ...the software of the DLNA compatible device 3 Select the file to be played back Note For more information on playing files refer to the DLNA compatible devices manuals Connected DLNA Compatible Device...

Страница 102: ...le Devices When new movies photos and music files are added to the LinkStation s DLNA folder the database must be updated before the new files can be streamed By default the database is updated when t...

Страница 103: ...ase immediately Disabling Playback from Specific Devices You may block specific DLNA devices from playing back media content 1 From Advanced Settings click Services 2 Click the settings icon to the ri...

Страница 104: ...s vdr vob wmv xvid Picture files bmp gif jpeg jpg png tif tiff yuv Music files 3gp aac ac3 aif aiff apl dff dsf flac lpcm m3u m4a mp1 mp2 mp3 mp4 mpa ogg pcm wav wma iTunes Server If iTunes server is...

Страница 105: ...click OK 6 Click OK 7 Move the iTunes server switch to the position to enable iTunes server BitTorrent BitTorrent is a protocol for distributing large amounts of data efficiently The information in t...

Страница 106: ...to the position to enable BitTorrent 3 Select the shared folder to save files downloaded via BitTorrent from the drop down list then click Apply Using Advanced Settings 1 From Advanced Settings click...

Страница 107: ...will be saved then click OK 6 Enter the port number then click OK 7 Move the BitTorrent switch to the position to enable BitTorrent Opening the Download Manager Note The default username is admin and...

Страница 108: ...Using Easy Admin 1 From Easy Admin click BitTorrent 2 The download manager will open Using Advanced Settings 1 From Advanced Settings click Applications 107 Chapter 6 Multimedia...

Страница 109: ...Click the settings icon to the right of BitTorrent 3 Click Open Download Manager 4 The download manager will open Downloading Files 1 Open the download manager 2 Click the icon 108 Chapter 6 Multimedi...

Страница 110: ...procedure below to configure the print server Notes Only one USB printer can be connected to the LinkStation Bidirectional communication is not supported i e remaining ink quantities and other printe...

Страница 111: ...the connected printer the shared name is displayed 7 Click OK 8 Select your printer then click OK 9 Register the printer Using a Mobile Device 1 From Settings tap USB Device 2 Move the print server s...

Страница 112: ...trigger notifications from any of the following functions drive internal external or RAID array fan models with 2 drives only backup scheduled status report 1 From Advanced Settings click Management...

Страница 113: ...Click OK to save the configured settings and have a test email sent Sleep Mode To save energy you can specify times to put the LinkStation into sleep standby mode during which the drives and LEDs are...

Страница 114: ...backup job within five minutes of the current time the LinkStation will not enter sleep mode when the configured time is reached If scheduled times in the timer overlap the operation is performed usi...

Страница 115: ...TLS for secure FTP communication First open a shared folder s settings and click Edit under LAN Protocol Support select the FTP checkbox and click OK Afterwords enable SSL security in the setup scree...

Страница 116: ...iles To update a server certificate and a private key for SSL follow this procedure 1 From Advanced Settings click Management 2 Click the settings icon to the right of SSL 3 Register server key for Se...

Страница 117: ...tialized When initialization is finished the LinkStation will automatically reboot This will typically reset the admin username and password IP address settings and Ethernet frame size The function bu...

Страница 118: ...e Date Time and Language Configure the LinkStation s hostname date time and language as shown below 1 From Advanced Settings click Management 2 Click the settings icon to the right of Name Time Langua...

Страница 119: ...new NTP IP address or its hostname then click OK If an NTP server is specified by name instead of IP address make sure that a DNS server is configured for the LinkStation Note The internal clocks of t...

Страница 120: ...email notifications DLNA and other functions To change the language displayed in Settings go to Settings and click Language from the menu bar Choose your desired language from the drop down list 7 Cli...

Страница 121: ...umbo frames you may be able to improve network performance 1 From Advanced Settings click Network 2 Click the settings icon to the right of IP Address 3 Click the LAN port where the jumbo frames will...

Страница 122: ...Ethernet frame size is smaller than the hub or router s Larger frame sizes may not transfer the data to the LinkStation correctly Changing the IP Address Normally the LinkStation s IP address is set a...

Страница 123: ...llowing IP addresses are reserved and should not be used If you configure one of them by accident initialize settings by referring to the Resetting the Administrator Password section above Local loopb...

Страница 124: ...ridge as Buffalo will only replace the drive and not the cartridge To avoid damaging the LinkStation with static electricity ground yourself by touching something made of metal before handling any sen...

Страница 125: ...panel and swing it open 3 Push the failed drive s cartridge up and remove it from the LinkStation Notes Do not press hard on the top of the LinkStation Pull the drive straight out the front of the cha...

Страница 126: ...4 Unscrew the four screws and remove the drive from the cartridge 5 Install a new drive sold separately into the cartridge 6 Replace the four screws 125 Chapter 8 Drive Replacement...

Страница 127: ...o the empty slot 8 Close the front panel 1 2 9 Connect all cables then turn on the LinkStation When the replaced drive is detected the power LED will blink amber 10From Advanced Settings click Drives...

Страница 128: ...ll open Enter the confirmation number then click OK The LinkStation will start recovering the RAID array After a few minutes the I18 message will be displayed until the array is recovered Using a Mobi...

Страница 129: ...ation Notes Do not press hard on the top of the LinkStation Pull the drive straight out the front of the chassis 4 Unscrew the four screws and remove the drive from the cartridge 5 Install a new drive...

Страница 130: ...6 Replace the four screws 7 Insert the new drive back into the empty slot 129 Chapter 8 Drive Replacement...

Страница 131: ...tation will start recovering the RAID array Drive Replacement for a RAID 0 Array If a drive used in a RAID 0 array fails you will need to delete the RAID array format the replaced drive then create a...

Страница 132: ...panel and swing it open 3 Push the failed drive s cartridge up and remove it from the LinkStation Notes Do not press hard on the top of the LinkStation Pull the drive straight out the front of the cha...

Страница 133: ...4 Unscrew the four screws and remove the drive from the cartridge 5 Install a new drive sold separately into the cartridge 6 Replace the four screws 132 Chapter 8 Drive Replacement...

Страница 134: ...that held the failed drive by referring to the Using JBOD section in chapter 3 11Format the replaced drive by referring to the Formatting Drives section in chapter 3 12Create a new RAID 0 array by ref...

Страница 135: ...functions in JBOD all data on the drive will be lost 1 Turn the LinkStation off and remove all cables 2 Squeeze the left side of the front panel and swing it open 3 Push the failed drive s cartridge u...

Страница 136: ...4 Unscrew the four screws and remove the drive from the cartridge 5 Install a new drive sold separately into the cartridge 6 Replace the four screws 135 Chapter 8 Drive Replacement...

Страница 137: ...nkStation When the replaced drive is detected the power LED will blink amber 10Format the replaced drive by referring to the Formatting Drives section in chapter 3 The drive will be formatted Next cre...

Страница 138: ...clogging the fan If any foreign objects or dust are found use a pair of tweezers an air duster or other tools to remove them E12 A rise in the system temperature may have exceeded the allowable safety...

Страница 139: ...hat the backup job is configured correctly Make sure that the backup target NAS device is on and not in standby mode If the backup job still fails check the status of the network as well as the backup...

Страница 140: ...ettings are being initialized Do not turn off the LinkStation s power I27 Checking the USB drive I28 Formatting the USB drive Do not turn off the LinkStation s power I32 A new drive has been detected...

Страница 141: ...rint Server Disabled BitTorrent Disabled Time Machine Disabled Direct Copy Disabled Name Time Language Date Time Source NTP Enabled Email Notification Disabled Restore Erase Administrator Username and...

Страница 142: ...0 8 1 in Weight LS210D approx 1 1 kg 2 4 lbs LS220D LS220DR approx 2 5 kg 5 5 lbs LS220DE approx 0 9 kg 1 9 lbs Power Consumption LS210D max 18 W 1 2 TB models max 24 W 3 TB models LS220D LS220DE LS2...

Отзывы: