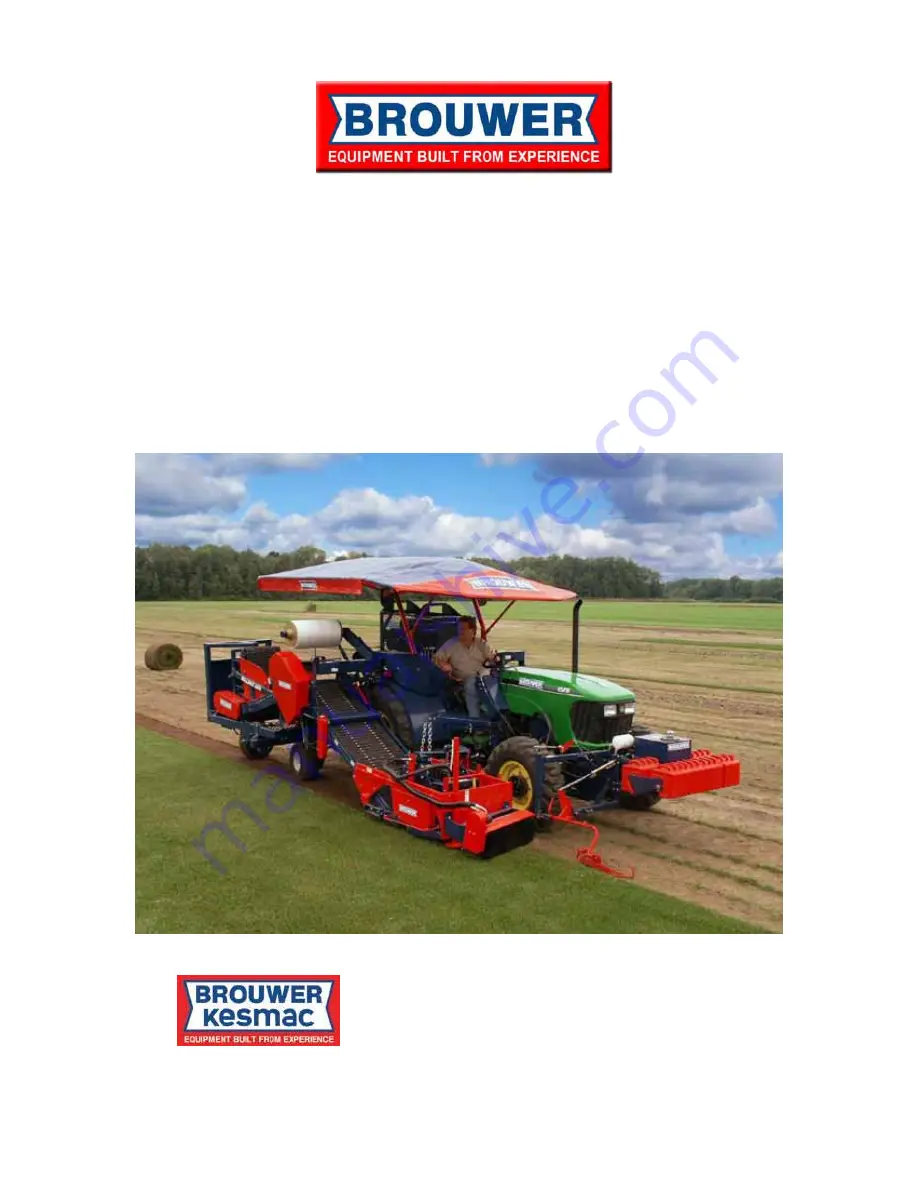
background image

BROUWER SOD HARVESTER 

ROLLMAX 2400 

Model 5990280/1 

OPERATOR’S MANUAL 

KM99174 

August 2008 

                  Kesmac Inc. 


23324 Woodbine Avenue, Keswick Ontario Canada L4P 3E9                    

                                   Tel (905) 476-6222 Fax (905) 476-6744  

                                    Web Site www.brouwerturf.com  Email [email protected]


Содержание 5990280/1

Страница 1: ...TER ROLLMAX 2400 Model 5990280 1 OPERATOR S MANUAL KM99174 August 2008 Kesmac Inc 23324 Woodbine Avenue Keswick Ontario Canada L4P 3E9 Tel 905 476 6222 Fax 905 476 6744 Web Site www brouwerturf com Email info kesmac com ...

Страница 2: ......

Страница 3: ...3 07 Tube Rack and Dispenser 3 08 Netting Selection 3 09 Cut Off Blades and Springs 3 10 Pitch Angle Adjustment 3 11 Ground Roller Roller Scraper Sod Guide Combination Blade 3 12 Cutter Drive Belt Conveyor Mats Drive Sprockets 3 13 Crown Roller Idler Shafts Mat Tension Idler 3 14 Rubber Conveyor Mat 3 15 Mintex Metal Mat 3 16 Mat Sliders 3 17 Control lever Adjustments 3 18 Cut Off clutch and Solen...

Страница 4: ......

Страница 5: ...er operators who cannot read or understand them WARNING The Brouwer Rollmax Turf Harvesters are designed for safe efficient operation and must not be used for any purpose other than that for which they are designed Prior to being shipped from the manufacturer the machines are inspected to insure that all safety guards shields and warning safety operating decals are correctly positioned and secure ...

Страница 6: ......

Страница 7: ...peration 1 02 General Operating Safety 1 03 1 04 Maintenance Safety 1 04 1 06 Transport and Storage 1 07 Safe Service Procedure 1 07 Tire Service 1 07 Handling Chemicals 1 07 Safe Welding 1 08 Safety Warning Decals 1 09 1 11 Specifications 1 12 ...

Страница 8: ......

Страница 9: ...ould personal injury and or property damage result from any of the above DANGER TO PREVENT POSSIBLE SERIOUS INJURY OR DEATH Under no circumstances is any service or maint enance work to be performed on the machine until THE ENGINE IS SWITCHED OFF THE IGNITION KEY IS REMOVED SAFETY This Symbol means ATTENTION BECOME ALERT Your safety and that of others is involved Signal word definitions The signal...

Страница 10: ...llow children or untrained persons to operate this equipment Local regulations may restrict the age of the operator Only the operator must be on the machine never allow riders on the machine Riders can be injured by foreign objects or can be thrown off the machine Also they may obstruct the ability of the operator or the operators view resulting in unsafe operation of the machine 1 02 SAFETY The w...

Страница 11: ...ever start the engine from the ground Start only from the operator s seat with the transmission in NEUTRAL and park brake ON SAFETY Transporting Exercise caution when loading or unloading the machine on or off a truck or trailer Ensure that the machine is properly blocked and secured during transport Operating Do not change the engine governor setting or over speed the engine WARNING Work in a ven...

Страница 12: ...e of a cable is not recommended Tow bar failing The harvester becoming unstable and tipping 1 04 The following procedures are recommended If possible reverse the machine out if it is mired in mud Dig mud out from behind the wheels Place boards behind under the wheels and reverse out slowly Keep bystanders clear of the rear of the machine Dig mud out from in front of the wheels and drive ahead slow...

Страница 13: ...Y Hydraulic System WARNING The RollMax Hydraulic System operates under high pressure To prevent serious injury from hot high pressure oil Never check for leaks with bare hands Use cardboard paper or wood High pressure oil can penetrate the skin If it is injected into the skin it must be surgically removed within a few hours by a doctor familiar with this type of injury Failure to do so may result ...

Страница 14: ...5 to 30 minutes Get medical help immediately 1 06 If acid is swallowed Do not induce vomiting Drink large quantities of water or milk but do not exceed 2 liters 2 Quarts Get medical help immediately Battery Charging Charge batteries in an open well ventilated area away from sparks or open flame Unplug the charger before connecting or disconnecting the battery Jump Starting Check that the Jumper ca...

Страница 15: ...erienced and qualified personnel dismantle wheel assemblies SAFETY CAUTION Operating the machine with loose wheel lug nuts will result in damage to and require the replace ment of wheel assembly components Always maintain the correct tire pressures Do not inflate tires above the recommended oper ating pressure shown on the side wall WARNING Never weld or heat a wheel tire assembly The heat can cau...

Страница 16: ...100mm from around the area to be affected by heating If solvent or stripper is used wash them off with soapy water before doing any welding Remove any stripper or solvent containers and other flammable material from the area Allow a minimum of 15 minutes for fumes to disperse before welding Do not use chlorinated solvent in areas where welding will be done Do all work in an area that is well venti...

Страница 17: ...or more of the following patents THIS MACHINE CANNOT BE COPIED IN WHOLE OR IN PART FOR OWN USE OR RESALE U S Patents 3 590 927 3 790 096 4 015 566 4 018 287 4 029 152 4 345 659 4 621 696 4 832 130 4 944 352 4 903 778 5 775 436 6 056 064 Other patents pending Also patented in other countries 015899 EQUIPMENT BUILT FROM EXPERIENCE 006214 Running cutter conveyor or roll up when tractor is shifted int...

Страница 18: ...s clear of machine before starting engine or operation 5 Keep all riders off harvester and equipment 6 Keep hands feet and clothing away from power driven parts 7 Couple brake pedals together for road travel 8 Reduce speed when turning or applying individual brakes or operating around hazards on rough ground or steep slopes 9 Use slashing warning lights on highway unless prohibited by law 10 Stop ...

Страница 19: ...SAFETY 1 11 Warning Decals This page intentionally left blank ...

Страница 20: ...90kg Approximately Options Accessories Auto Steer Transport Canister Auto Slab Kit Sod Wrap Netting Canopy and Operating Lights Poly Tubes Rotary Brush Attachment Net Wrap Outer Net Wrap Tractor Specifications Model John Deere 5225 Engine Turbo Diesel 53 hp 45 PTO Transmission 9 x 3 SyncShuttle Steering Hydrostatic Power Rear Axle Heavy Duty Tires 2WD Rear 19 5 24 Front 11L 15 4WD Rear 19 5 24 Fro...

Страница 21: ...t to F Frame 2 03 Adjust Dump Conveyor Stop Bolt 2 03 Connect RollMax Unit Hydraulic Hoses 2 04 Install Unload Ramp 2 04 Attach Ramp Spring and Transport Chain 2 04 Canopy Installation Canopy Installation Contents 2 05 Fitting Canopy to Installed Canopy Frame 2 06 Canopy Assembly Parts List 2 07 Assembling Perimeter Frame 2 08 Assembling Cross Brace Tubes 2 08 Fitting Front Support Tubes 2 08 Fitt...

Страница 22: ......

Страница 23: ...m Ext ension A and the Depth Control Bracket Remove the fasteners securing the Conveyor to the shipping brackets on the tractor and carefully lift the Conveyor clear and position it alongside the tractor To attach the conveyor to the tractor Raise the Conveyor Assembly until the Conveyor Beam Extension A is aligned with the Tractor Main Beam B and bolt them together Attach the Lift Arm Chains C Se...

Страница 24: ...mp B Attach the Wiring Harness from the tractor to the mounting clips on the Main Beam C Use Nylon Ties to attach the harness Connect the Proximity Sensor Cable D at the Cut Off Sensor Wheel Fit the harness Connectors to the Top Netting Solenoid Terminal Block E If installed Check that the Lower Net Drum BRAKE F is ON when transporting and OFF when dispensing netting Connect the Wiring Harness Plu...

Страница 25: ...ntact Fit the F Frame to the Main Frame Locate the F Frame in the Main Frame Mount Brackets D Insert the Pins E fit Shim Washers to take up excess side play Fit the Retainer Bolts Installing the RollMax Unit Use a Crane or Forklift to lift the RollMax Unit off the Shipping Supports F WARNING Exercise care when lifting the RollMax Unit Attach the lift straps as shown to prevent the unit from tippin...

Страница 26: ...penser Brake Solenoid Module C Attach the Unload Ramp D to the RollMax Frame with the Pivot Tube E and Hitch Clips Attach the Ramp Spring F inside rubber sleeve to the Ramp with the Spring Snap Hook When in transport attach the Transport Chain G to the Ramp with the Spring Snap Hook Adjust the Stop Bolt H to ensure that the Dump Conveyor is parallel to the Main Conveyor NOTE The initial Dump Conve...

Страница 27: ...container off shore the Canopy Fame is broken down and has to be assembled by the customer installed onto the tractor and then the Canopy fitted Fitting Canopy to Installed Canopy Frame 2 6 Canopy Assembly Parts List 2 7 Assembling Perimeter Frame 2 8 Assembling Cross Brace Tubes 2 8 Fitting Front Support Tubes 2 8 Fitting Rear Support Tubes 2 9 Installing Canopy Frame Assembly onto the tractor 2 ...

Страница 28: ...hipped with the Canopy Canopy Installation Remove the Canopy from the shipping container Identify the FRONT of the Canopy Start with the Canopy positioned at the front of the Frame and unfold it completely over the frame Fold the front edge of the Canopy over the front Tube A and secure in place with the Zip B Pull the Canopy to the rear fold it over the rear tube and secure it with Zip ties C Fol...

Страница 29: ...NC X 2 GR 8 8 70 19 70 20 F040714 BOLT 7 16 UNC X 1 5 GR 8 9 70 21 F220700 JAM NUT 7 16 UNC 9 70 22 F320700 USS WASHER 7 16 18 70 23 H310162 CROSS BRACE 1 70 24 H110761 CROSS BRACE FRT REAR 2 70 25 H110762 CROSS BRACE 4 70 26 H110219 FRAME REAR STRAIGHT 1 70 27 H110220 FRAME FRONT CORNER LH 1 70 28 H110221 FRAME FRONT CORNER RH 1 70 29 H110723 FRAME REAR CORNER LH 1 70 30 H110724 FRAME REAR CORNER...

Страница 30: ...en the remaining four Cross Braces 25 to the Perimeter Frame they must be spaced as illustrated Lift the assembled Canopy Frame onto the Canopy Support 1 with the Perimeter Frame placed in the halves of the Brace Clamps that are welded to the Canopy Frame secure in place with half Brace Clamps IMPORTANT Before tightening the Clamps position the Canopy Frame Assembly so that the measurement from th...

Страница 31: ... 1 for the recommended procedure when fitting the Canopy onto the Frame Installing the assembled Frame and Canopy onto the tractor CAUTION Two persons must install the Canopy Assembly One to person to operate the Forklift the other to guide the assembly into position and bolt the Canopy Support to the frame Insert the Forklift Forks with extended forks under the cross tube of the Canopy Support A ...

Страница 32: ...d Lock washers D Connecting Wiring Harness Feed the left hand side Canopy Harness E down between the frame and fuel tank and make the connections to the corresponding Tractor Harness On the right hand side make the connections with the gray cable F and its corresponding plugs Feed the Canopy Harness G down to make connections to the corresponding Tractor Harness NOTE When the electrical connection...

Страница 33: ...Warm Up 3 01 Travel Speeds 3 02 Hydraulic System 3 02 3 03 Controls 3 03 3 06 Automatic Cut Off 3 07 Manual Cut Off 3 07 Tube Lift Rack and Dispenser 3 08 Netting Selection 3 09 Cut Off Blade and Springs 3 10 Pitch Angle Adjustment 3 11 ...

Страница 34: ......

Страница 35: ...icated on the Oil Level Temperature Gauge located on the oil tank Operate the following Main and Dump Conveyors Operate for several minutes Cutting Head Raise and lower Depth of Cut Cylinder Extend and Retract RollMax Unit Operate though several cycles Auto Steer Switch ON and OFF to operate the Shoe Lift Cylinder IMPORTANT To prevent damage to the Cut Off mechanism the Cut Off must only be operat...

Страница 36: ...ndard ISO 344 HV Grade MUST be used These oils have improved viscosity and temperature characteristics It is imperative that the oil used meets these specifications It is recommended that the Hydraulic Oil is changed every 750 hours of operation or annually Always drain the oil into an approved container Clean the Magnetic Drain Plug before refitting Fill to the correct level as indicated in the o...

Страница 37: ...when traveling at over 2 mph Damage to the Shear Pin on the Metering Valve Input Shaft will occur This will result in loss of oil flow indicating excessive ground speed or malfunction of the front Flow Control Valve When the Cutter is engaged the ground speed control of the conveyor also engages The Conveyors will start automatically when the machine moves forward and will adjust speed to match th...

Страница 38: ...g The scale marks on the Depth Indicator C show the change in depth MANUAL CONVEYOR OVERRIDE The Manual Conveyor Override Lever D PUSH to manually advance the Roll up Conveyor only PULL to advance the Main Conveyor and the Roll up Conveyor simultaneously When a roll of sod is complete the Roll Up Conveyor Override can be used to Rotate the Roll several times to apply several wraps of netting to th...

Страница 39: ...e Switch Button C With the Netting Selector Switch B on LOWER Hold the Switch Button down while the Conveyor swings and the netting is cut off Swing the Roll Up Conveyor to the DUMP position The Roll is automatically dumped and the Dump Conveyor Return Spring re sets the dump latches Return the Roll Up Conveyor toward the roll up position A stop latch will stop the Roll Up cavity in position to re...

Страница 40: ...round speed Before cutting for the first time run the conveyors empty in ground speed mode to approximately match the ground speed and conveyor speed When cutting if the turf stretches and tears as it travels up the conveyor it indicates that the conveyor speed is too fast If the turf bunches or folds the conveyor speed is too slow ROLL UP CONVEYOR SPEED The Roll Up Conveyor Speed Control C Rotate...

Страница 41: ...n the Counter CUT OFF LENGTH SENSOR The Cut Off length Sensor B The Counter Sensor targets two bolts in the Sensor Wheel C as it rotates with the conveyor each revolution equals one foot The Sensor signals the Counter until the pre selected length is reached starting the Cut Off sequence CUT OFF SOLENOID The Cut Off Solenoid D The Counter signal activates the Cut Off Solenoid when the selected len...

Страница 42: ...witch the tractor engine OFF Failure to observe this precaution could result in serious injury TUBE LIFT RACK Loading the Tube Lift Rack Open the Access Door B to Load the Tubes IMPORTANT Do not overload and jam the tubes against the Lift Rack top lifting brackets TUBE DISPENSER The Tube Dispenser Lever To dispense a Tube into the Roll Up Conveyor pull the Dispenser Lever C FORWARD only when Roll ...

Страница 43: ...trol lever to clamp the netting during cut off When netting is applied only to the outer layers of the roll leave the switch in the ON position while rolling and toggle the switch to OFF for the last ten feet of the roll and for the over wrap Toggle the switch to ON to cut the netting when the roll is dumped When there is no netting being used and there is none threaded through the rollers leave t...

Страница 44: ...to swing with the forward travel as it cuts When stationary the Blade should hang vertically Any change in the position or shape of the attachment hooks E will change the angle of the blade CUT OFF SPRINGS The Cut Off Springs tension is set at the factory with the Shaft F in the center cut out in the frame This gives the correct tension for most conditions Moving the shaft up to the upper cut out ...

Страница 45: ...he Ground Roller adjustment instructions for correct Roller to Blade set up NOTE The factory setting for the pitch angle locates the Adj uster Bracket A in the second hole from the rear in the Cutter Head Frame B To adjust the Pitch Angle Loosen the Nuts C sufficient to allow the Adjuster Bracket to slide in the Cutter Head Frame Remove Locator Bolts D See Note below For soft soil or peat pull the...

Страница 46: ...on resulting in longer pieces of sod In soft soil or excessive thatch rolling the turf before harvesting will help in easier cutting and better quality tighter rolls In stoney ground it may be advisable to move the Roller forward to provide more clearance between the Roller and the Blade to allow small stones to pass through Clearance may be increased up to 2 to 2 inches ROLLER SCRAPER The Roller ...

Страница 47: ...ame sufficient to allow the belt to be removed Re assemble in the reverse order Check that the Crankshaft is square to the frame when tightening the bearing bolts IMPORTANT If there are Shims between the Crankshaft Bearing and the Frame ensure that they are in place when re assembling CONVEYOR MATS Rubber Mats are suitable for most conditions and are the preferred type The Mintex Metal Mat is used...

Страница 48: ...ring Bolts and the Adjustment Wedges Lock Bolts NOTE If the Mat persists in tracking to one side check the Sprocket Drive Shaft alignment See page 3 13 FRONT IDLERS Rubber Mat shown Additional Idlers Sprockets D at the front prevent the Mat from running against the Cutter Head Frame IMPORTANT When replacing worn Sprockets the new Sprockets must be positioned on the Shafts so that the sprocket teet...

Страница 49: ...ype A is for use with Air Power Part No KD89999 Type B is for use with a hand tool Part No KD90000 These special tools speed up the removal and replace ment of the Mat Splices The Sprocket Slots in the mat have Metal Inserts in them If they need to be removed use a chisel or similar tool to open them up for removal For a fast safe method of installing Metal Mat Clips the Track Clip Installer Tool ...

Страница 50: ...shed by the Cross Rods When installing new Drive Sprockets Slide the Sprockets onto the Shafts and Keys with the Set Screws loose Fit the Mat with the Sprockets spaced evenly and positioned so that the teeth are centered in the mat mesh then tighten the Set Screws If installing new Mat Tension Idler Sprockets Bolt the Idler Shaft and new Sprockets into place with the Sprocket Lock Collars D Loose ...

Страница 51: ...Tension Idler A Raise and support the Mat as high as possible clear of the Sliders B Remove the Locknuts from the T Bolts C and Socket Cap Screws D that fasten the Sliders to the Conveyor Frame and lift the Sliders out of the Frame Fit three T Bolts into each new Slider and install them onto the Conveyor Frame Fit the Socket Cap Screws Fit the Locknuts Tighten them until they are just snug This wi...

Страница 52: ... valve To increase the Roller lift speed Less control when setting thicker sod Turn the Adjusting Nut D away from the Spool Valve 1 Conveyor Lift 2 Depth Control 3 Conveyor Manual Over Ride 4 Roll Up Conveyor 3 18 Manual Conveyor Over ride Lever To run all Conveyors faster during over ride Turn Adjusting Nut E toward the Spool Valve o run all Conveyors slower during over ride Turn Adjusting Nut E ...

Страница 53: ... or it engages and disengages while cutting the next roll the Adjusting Screw D must be lengthened When correctly adjusted the Cam Ring E should be able to be rotated 1 16 to 1 8 in away from the head of the Stop Lever Screw D Cut Off Solenoid 0 When the Solenoid is activated the Large Washer F pulls down the Stop Lever G this engages the Clutch rotating the Cut Off Camshaft There should be in cle...

Страница 54: ...ater or solvents Inspect the inside of the Drum for scoring and the Clutch Rollers D for wear or damage NOTE If a new Clutch Assembly is fitted remove the Sprocket and Taper Lock from the worn Clutch for re use Lubricate the assembly liberally with penetrating oil Do not use heavy oil or grease these will cause the clutch to slip Re assemble in the reverse order Ensure that the Clutch Cam Ring B i...

Страница 55: ...ers D must rotate easily by hand to allow the netting to feed onto the turf roll when the Solenoid is not activated Initially the netting must be manually inserted into the rollers Top Netting Roller Drive Solenoid Adjust the Yoke E so that the Drive Belt F is tightened when the Solenoid G is activated This drives the Roller Shaft Pulley H To allow the Rollers to turn freely and the netting to fee...

Страница 56: ...ay in the linkage and no drag on the Brake J when the solenoid is de activated When both Solenoids are activated the Netting Clamp and the Brake are On the Roll Up Unit will swing around and cut the netting Lower Netting Feed Path Before operating the netting must be manually fed through the Rollers as illustrated Installing new Lower Reel of Netting Loosen the Lock bolt K Lift the Reel Shaft L ou...

Страница 57: ...LUBRICATION SCHEDULE SECTION 4 General Information 4 01 Lubrication Charts 4 02 4 03 ...

Страница 58: ......

Страница 59: ... Blade Frame Shaft Cut Off Blade Support Shaft RollMax Conveyor Pivot Points RollMax Frame Pivot Points Sealed Type Bearings should be greased sparingly every 150 hours of operation this period should be reduced when operating in sandy abrasive environments IMPORTANT To avoid damage to the bearing seals do not grease excessively Locations of Sealed Type Bearings Crankshaft 8 inch Roller Conveyor D...

Страница 60: ...LUBRICATION 4 02 CUTTER HEAD LUBE POINTS NOTE Please check for additional lube points on cutter head when equipped with RollMax attachment 1 1 1 2 2 2 2 CHECK BOTH SIDES OF THE UNIT CONVEYOR ...

Страница 61: ...LUBRICATION 4 03 AUTO STEER ...

Страница 62: ......

Страница 63: ...02 Sensor Valve Stop Pin and Roller Arm setting 5 02 Actuator Spring Column Spring Tension setting 5 03 Shoe Arm Adjustment 5 03 Fine Adjust Control adjustment 5 03 Fine Adjust Cable Arm setting 5 04 Guide Shoe Adjustment 5 04 Tracking Adjustment 5 04 Sensitivity Adjustment 5 05 ...

Страница 64: ......

Страница 65: ...ing Strip has been cut Position the Harvester parallel to the Starting Strip with the Side Blade aligned to the cut edge of the turf Engage the Auto Steer with Control Lever C CAUTION To avoid accidents or injuries the Auto Steer must be engaged only when harvesting NOTE If the Guide Shoe lowers onto the uncut turf when the Auto Steer is engaged disengage the Auto Steer the Re set Cylinder will li...

Страница 66: ... position Sensor Valve Stop Pin and Roller Arm setting Back off the clamp Set Screw in the Roller Arm Bottom Illustration Use a flat blade screwdriver to turn the Stop Pin to its mid point of travel in the cavity and hold it in this position The Sensor Valve Internal Spool will now be in the NEUTRAL position Adjust the Roller Arm up or down until there is maximum surface contact between the Roller...

Страница 67: ...m B and rotate the Lever Arm back against spring pressure sufficient to re attach the Clevis End Shoe Arm Adjustment The Guide Shoe Arm E should be approximately at a 45 degree angle to the ground To set the correct angle Loosen two Clamp Bolts F in the Mounting Pivot Rotate the Shoe Arm E to the correct angle Re tighten the Clamp Bolts IMPORTANT The Guide Shoe Lift Chain should be adjusted to all...

Страница 68: ... The recommended method of setting the Tracking is Position the harvester ready to cut With the Auto Steer OFF cut a strip of turf for a minimum distance of 20 feet It must be cut straight The harvester will be parallel to the cut edge the steering wheels straight ahead and the Cutter Head down Engage the Auto Steer the Guide Shoe will drop Set the Fine Adjust Control to its Mid Point as shown on ...

Страница 69: ...midway in the slot in the Lever Arm B To increase the sensitivity faster response Loosen the Rod End Locknut C and move the Rod End toward the end of the Lever Arm To decrease the sensitivity slower response Move the Rod End toward the Spring Column After adjustment tighten the Rod End Locknut 5 05 ...

Страница 70: ......

Страница 71: ...ELECTRICAL SECTION 6 Electrical Control Box 6 01 Electrical Schematic 6 02 6 06 ...

Страница 72: ......

Страница 73: ... Control Box Fig 6 01 Main Electrical Control Box Internal Wiring Connections and Components Relays 1 Net Start 2 Net Clamp 3 Cut Off 4 Clutch 5 Tube Up 6 Tube Down 7 Flasher 8 Canopy 9 Seat Switch 10 Start 11 Fuel Fig 6 01 6 01 ...

Страница 74: ... RED RED RED WHITE BLACK WHITE BLACK YELLOW YELLOW BLACK BLACK BLACK BLACK BLACK RED RED To Beam Brace WHITE BLACK WHITE RED WHITE BLACK WHITE RED GROUND BUS E STOP RELAY RELAY ROCKER SWITCH K1 RELAY 80 amp BREAKER ELECTRICAL SCHEMATIC MAIN 6 02 ...

Страница 75: ...R BLACK BLACK BLACK BLACK BLACK DARK BLUE DARK BLUE WHITE BLACK WHITE DARK BLUE RED ORANGE DARK BLUE WHITE DARK BLUE WHITE GROUND BUS CLUTCH SWITCH E STOP RELAY RED RED RED K1 RELAY 80 amp BREAKER ELECTRICAL SCHEMATIC CLUTCH 6 03 ...

Страница 76: ...IN E STOP ROCKER SWITCH BEEPER SOLENOID MODULE 40 amp BREAKER 4 amp BREAKER 14 RED WHITE BLACK WHITE BLACK RED RED K1 RELAY 80 amp BREAKER RED BLACK Durant BROWN BLACK BLUE WHITE BROWN BLUE BLACK BROWN GND HOT AUX RED WHT BLK RED RED WHITE BLACK ORANGE BLACK BLACK BLACK BROWN BROWN BLACK BLACK RED RED To Ground Bus ...

Страница 77: ...W 4 amp BREAKER 40 amp BREAKER WHITE RED WHITE RED WHITE BLACK WHITE YELLOW WHITE BLACK WHITE YELLOW BLACK BLACK BLACK ORANGE BLACK RED 5 9 10 7 8 6 11 13 12 RED RED RED K1 RELAY 80 amp BREAKER 14 GROUND BUS ROCKER SWITCH LINEAR ACTUATOR E STOP RELAY RELAY To Ground Bus ...

Страница 78: ...R SWITCH ROCKER SWITCH CLAMP SWITCH RED RED RED RED K1 RELAY 80 amp BREAKER GND HOT AUX RED WHT BLK GND HOT AUX RED WHT BLK RED WHITE BLACK WHITE BLACK WHITE BLACK RED BLACK RED BLACK Bottom Net Clamp Top Net Start BLUE BLACK BLACK BLACK BLACK ORANGE ORANGE BLACK RED BLUE RED BLACK BLACK RED WHITE BLACK RED WHITE To Ground Bus ...

Страница 79: ......

Страница 80: ...Kesmac Inc 23324 Woodbine Avenue Keswick Ontario Canada L4P 3E9 Tel 905 476 6222 Fax 905 476 6744 Web Site www brouwerturf com Email info kesmac com ...

Отзывы: