83
Arranging Embroidery Designs (Layout & Editing)
A
rr
a
ng
in
g Embr
oide
ry
D
e
s
igns
(
L
a
y
out
& E
d
iting)
■
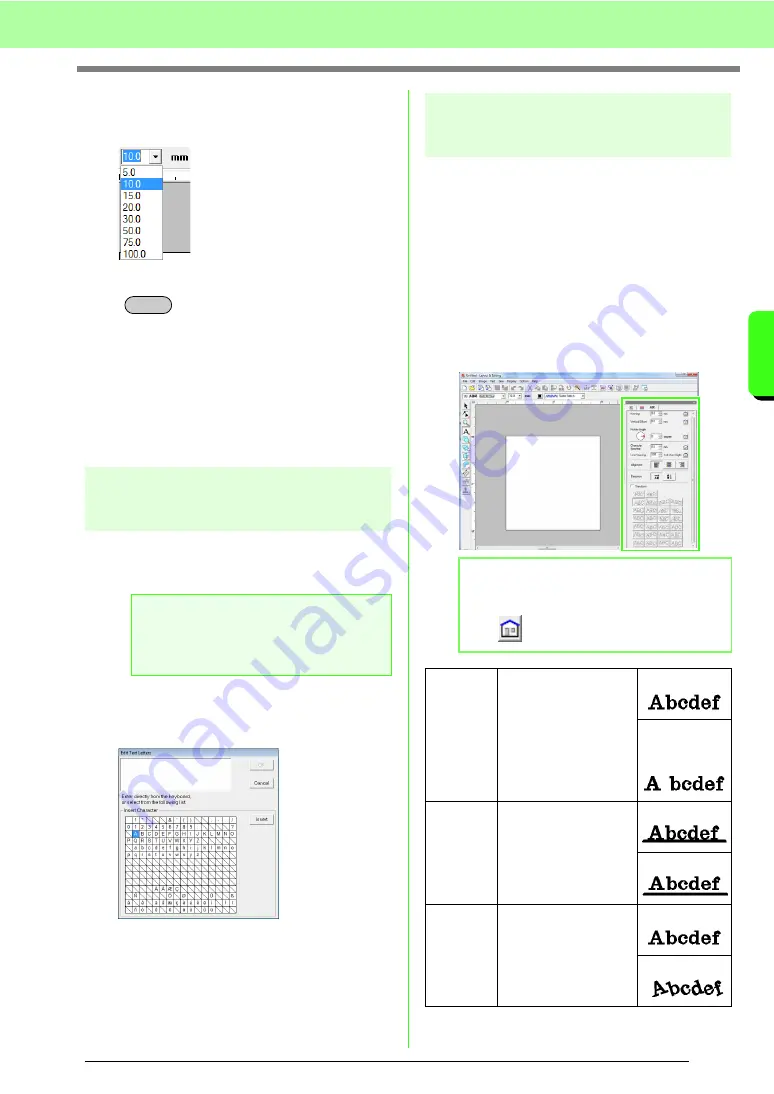
Text Size
1.
Click in the
Text Size
selector.
2.
Type the desired height and press the
key, or click the desired value.
→
The setting is applied to all text patterns
that you will create, until the setting is
changed.
→
If text patterns or characters in a text
pattern were selected, the setting is also
applied to the selected text.
c
“Entering text/Small text” on page 80.
Editing entered text
Text that has been entered can easily be edited.
1.
Select the text or small text.
2.
Click
Text
, then
Edit Letters
.
3.
The selected text is displayed in the text field.
4.
Edit the text as needed.
5.
Click
OK
.
→
The edited text is displayed in the Design
Page.
c
“Entering text/Small text” on page 80.
Specifying text attributes
Various character attributes for text can be set in the
Text Attribute Setting
dialog box.
The settings are applied to the text pattern each
time the settings are changed.
1.
Select the text or small text.
2.
Click
Text
, then
Text Attribute Setting
.
c
“Thread colors, sewing attributes and text
attributes” on page 47.
3.
If necessary, change the text attributes.
a
Note:
You cannot edit more than one text pattern
at a time. If you select more than one text
pattern, this menu command is not available.
Enter
b
Memo:
To return a parameter to its default setting,
click
beside
it.
Kerning
Sets the spacing
between individual
characters.
0.0 mm
5.0 mm
(between “A”
and “b”)
Vertical
Offset
Moves the text vertically.
0.0 mm
2.0 mm
Rotate
angle
Rotates the characters.
0 degree
20 degrees
Содержание PE-Design 8
Страница 1: ...Instruction Manual ...
Страница 146: ...144 Arranging Embroidery Designs Layout Editing ...
Страница 200: ...198 Managing Embroidery Design Files Design Database ...
Страница 218: ...216 Creating Custom Stitch Patterns Programmable Stitch Creator ...
Страница 244: ...242 Tips and Techniques ...
Страница 269: ...English ...

