9-42
Confidential
9.4.19 Travel Check of the Head/Carriage Unit and Initial Setup Mode
(Function code 63)
Function
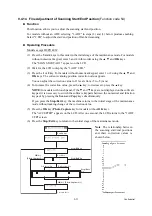
This procedure moves the head/carriage unit to the center of its travel (Function code 63 + *).
NOTE:
In models with touch panel, press the
Black Start
(
Mono Start
) key, press the
Scan
and
Copy
keys simultaneously, and then press the
*
key.
It can also enable or disable the initial setup mode when the power is applied at the next time
(Function code 63 + 1 or Function code 63 +3).
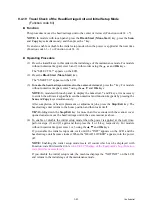
Operating Procedure
(1) Press the
6
and
3
keys in this order in the initial stage of the maintenance mode. For models
without numerical keypad, enter 6 and 3 in this order using the , and
OK
keys.
The "SELECT 63?" appears on the LCD.
(2) Press the
Black Start
(
Mono Start
) key.
The "START 63?" appears on the LCD.
(3) To make the head/carriage unit travel to the center of its travel, press the
*
key. For models
without numerical keypad, enter * using the , and
OK
keys.
NOTE:
In models with touch panel, to display the numerical,
*
and
#
keys, it is necessary
to switch the software keypad between the numerical and function keypads by pressing the
Scan
and
Copy
keys simultaneously.
After completion of head replacement or adjustment jobs, press the
Stop/Exit
key. The
head/carriage unit returns to the home position and then locks itself.
TIP:
Holding down the
Stop/Exit
key for more than five seconds with the scanner cover
opened can also move the head/carriage unit in the same manner as above.
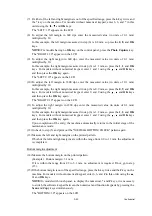
(4) To enable or disable the initial setup mode when the power is applied at the next time,
perform steps (1) and (2) again and then press the
1
or
3
key, respectively. For models
without numerical keypad, enter 1 or 3 using the , and
OK
keys.
If you enable the initial setup mode, wait until the "INIT" appears on the LCD and the
head/carriage unit becomes locked. When the "HEAD LOCKED" appears, turn the power
off.
NOTE:
Enabling the initial setup mode resets all counts which can be displayed with
Function code 80 (described in
Section 9.4.29 "Display of the Equipment's Log (Function
).
If you disable the initial setup mode, the machine displays the "NOT INIT" on the LCD
and returns to the initial stage of the maintenance mode.
Содержание MFC-J220
Страница 8: ...vi Confidential SAFETY PRECAUTIONS Symbols used in the documentation ...
Страница 9: ...vii Confidential ...
Страница 10: ...viii Confidential ...
Страница 11: ...ix Confidential ...
Страница 12: ...x Confidential ...
Страница 13: ...xi Confidential ...
Страница 14: ...xii Confidential ...
Страница 15: ...xiii Confidential ...
Страница 16: ...Confidential CHAPTER 1 PARTS NAMES AND FUNCTIONS ...
Страница 20: ...1 3 Confidential 1 2 CONTROL PANEL DCP375CW ...
Страница 21: ...1 4 Confidential ...
Страница 22: ...1 5 Confidential DCP395CN ...
Страница 23: ...1 6 Confidential ...
Страница 24: ...1 7 Confidential MFC255CW 295CN ...
Страница 25: ...1 8 Confidential ...
Страница 26: ...1 9 Confidential MFC495CW ...
Страница 27: ...1 10 Confidential ...
Страница 28: ...1 11 Confidential MFC795CW ...
Страница 29: ...1 12 Confidential ...
Страница 30: ...1 13 Confidential DCPJ125 J315W J515W J715W 8 7 6 5 1 2 4 3 ...
Страница 31: ...1 14 Confidential ...
Страница 32: ...1 15 Confidential MFCJ220 J265W J270W J410 J410W J415W J615W J630W 6 7 8 5 2 4 3 1 ...
Страница 33: ...1 16 Confidential Mono Start Colour Start ...
Страница 34: ...1 17 Confidential DCPJ140W 6 7 8 5 2 4 3 1 ...
Страница 37: ...Confidential CHAPTER 2 SPECIFICATIONS ...
Страница 39: ...Confidential 2 12 PAPER 2 42 2 12 1 Paper Specifications 2 42 2 12 2 Printable Area 2 44 ...
Страница 84: ...Confidential CHAPTER 3 THEORY OF OPERATION ...
Страница 130: ...Confidential CHAPTER 4 ERROR INDICATION AND TROUBLESHOOTING ...
Страница 135: ...4 3 Confidential For MFC only Replace Ink ...
Страница 137: ...4 5 Confidential For MFC only If you want to use the caller ID feature call your telephone company No Ink Cartridge ...
Страница 187: ...Confidential CHAPTER 5 HANDLING DATA HELD IN THE MACHINE PRIOR TO REPAIR ...
Страница 191: ...Confidential CHAPTER 6 DISASSEMBLY REASSEMBLY AND LUBRICATION ...
Страница 193: ...Confidential 6 2 LUBRICATION 6 103 ...
Страница 302: ...Confidential CHAPTER 7 ADJUSTMENTS AND UPDATING OF SETTINGS REQUIRED AFTER PARTS REPLACEMENT ...
Страница 309: ...7 5 Confidential 8 Alert warning message of WHQL appears Click Continue Anyway to proceed ...
Страница 318: ...7 14 Confidential Head Positioning Test Pattern ...
Страница 322: ...7 18 Confidential Paper Feeding Check Pattern for the Paper Feed Roller and Paper Ejection Roller ...
Страница 325: ...7 21 Confidential Vertical Alignment Check Pattern A 1 2 ...
Страница 326: ...7 22 Confidential Vertical Alignment Check Pattern A 2 2 ...
Страница 327: ...7 23 Confidential Vertical Alignment Check Pattern B ...
Страница 331: ...7 27 Confidential Left Right and Bottom Margins Check Pattern ...
Страница 342: ...7 38 Confidential ADF Copy Chart A B C D ...
Страница 345: ...Confidential CHAPTER 8 CLEANING ...
Страница 349: ...8 3 Confidential Maintenance unit Head wiper Head cap unit cleaning_duplex Rubycel stick ...
Страница 350: ...Confidential CHAPTER 9 MAINTENANCE MODE ...
Страница 359: ...9 7 Confidential Scanning Compensation Data List Models except DCPJ140W DCPJ140W ...
Страница 362: ...9 10 Confidential Test Pattern ...
Страница 367: ...9 15 Confidential Configuration List ...
Страница 372: ...9 20 Confidential MFC255CW 295CN MFC495CW MFC795CW DCPJ125 J315W J515W J715W Key Entry Order ...
Страница 373: ...9 21 Confidential DCPJ140W MFCJ220 J265W J270W J410 J410W J415W J615W J630W Key Entry Order ...
Страница 388: ...9 36 Confidential Paper Feeding Check Pattern for the Paper Feed Roller and Paper Ejection Roller ...
Страница 397: ...9 45 Confidential Vertical Alignment Check Pattern A 1 2 ...
Страница 398: ...9 46 Confidential Vertical Alignment Check Pattern A 2 2 ...
Страница 399: ...9 47 Confidential Vertical Alignment Check Pattern B ...
Страница 403: ...9 51 Confidential Left Right and Bottom Margins Check Pattern ...
Страница 439: ...App 2 3 Confidential 8 Alert warning message of WHQL appears Click Continue Anyway to proceed ...
Страница 521: ...App 5 3 Confidential DCPJ515W ...
Страница 522: ...App 5 4 Confidential DCPJ715W MFCJ615W J630W ...
Страница 523: ...App 5 5 Confidential DCPJ125 J315W MFCJ220 J265W J270W J410 J410W J415W ...
Страница 524: ...App 5 6 Confidential DCPJ140W ...
Страница 532: ...App 6 7 Confidential B Power supply PCB 100 V series DCP375CW 395CN and MFC255CW 295CN 495CW 795CW ...
Страница 533: ...App 6 8 Confidential DCPJ125 J315W J515W J715W J140W and MFCJ220 J265W J270W J410 J410W J415W J615W J630W ...
Страница 534: ...App 6 9 Confidential B Power supply PCB 200 V series ...


