


4 - 11
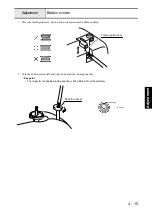
Adjustment
Adjustment
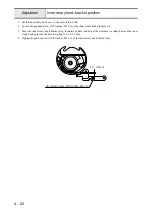
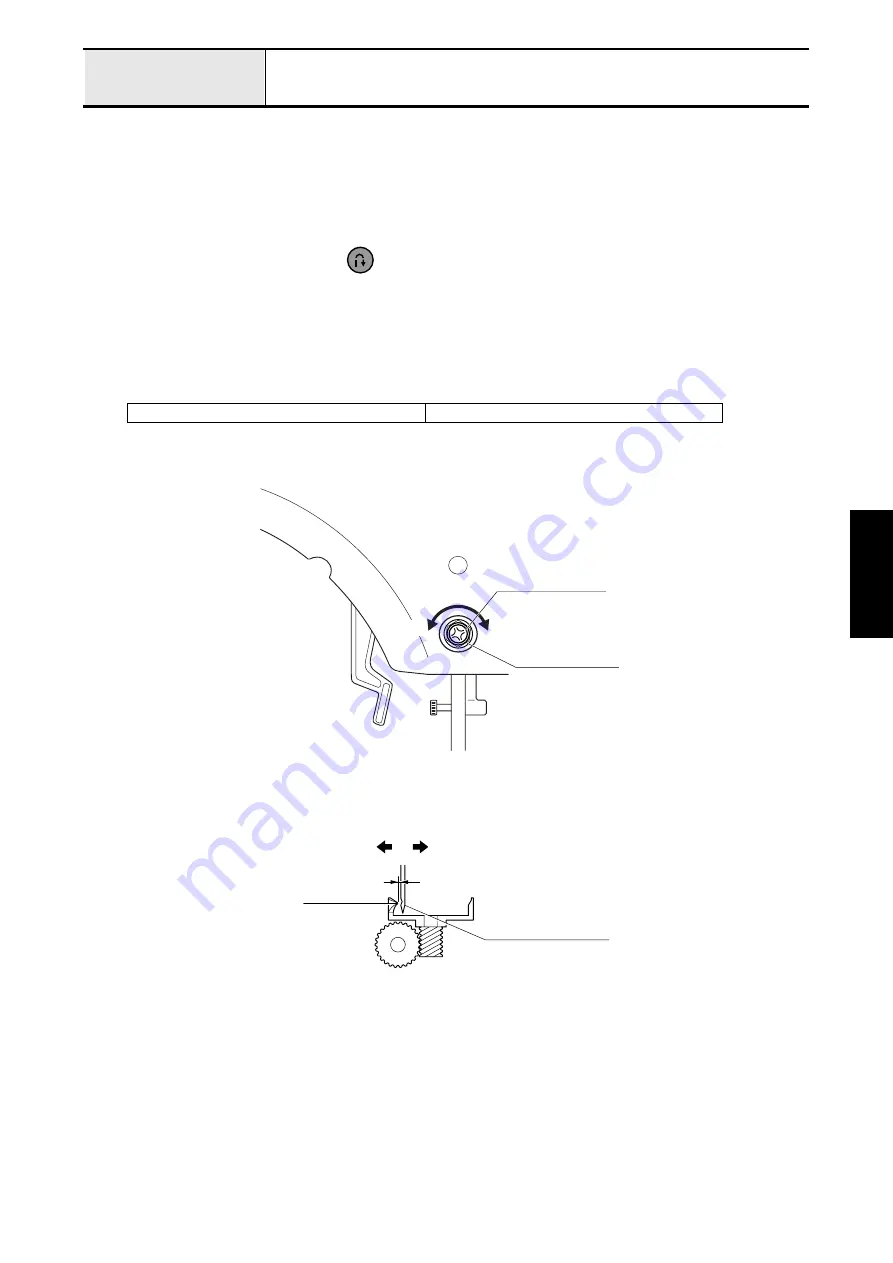
Clearance between needle and rotary hook point
1. Attach the front cover assy..
2. Remove the presser foot, the needle plate B and the needle plate A, and then remove the inner rotary hook.
3. Remove the label.
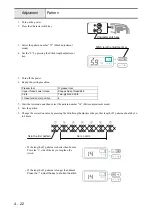
4. Start the test mode.
5. Select the pattern number “02” (3-point needle drop mode).
6. Move the needle to the left with the
(Reverse stitch button), and then turn the power off.
7. Loosen the screw (bind M3 x 25).
8. Turn the pulley by hand until the right edge of the needle aligns with the outer rotary hook point.
9. Turning the adjusting screw, adjust clearance between the needle and the outer rotary hook point (front and back)
to 0.1mm or less.
10. Tighten the screw (bind M3 x 25).
XE2396001
Box driver 7
Screw
(bind M3 x 25)
Adjusting screw
Rear cover
Hook point
0.1mm or less
Back
Front
Front
Size 75/11 needle
Back
Содержание HS-3000
Страница 1: ......
Страница 2: ......
Страница 3: ......
Страница 9: ...vi ...
Страница 16: ...2 1 2 Disassembly Main parts 2 2 Feed unit 2 22 Needle presser unit 2 30 ...
Страница 17: ...2 2 Main parts Main parts location diagram Main unit ...
Страница 37: ...2 22 Feed unit location diagram Main unit ...
Страница 45: ...2 30 Needle presser unit location diagram Main unit ...
Страница 55: ...3 2 Main parts Main parts location diagram Main unit ...
Страница 77: ...3 24 Main unit Main parts 36 Accessory table attachment 1 Attach the accessory table 1 1 ...
Страница 78: ...3 25 Assembly Feed unit Feed unit location diagram Main unit ...
Страница 90: ...3 37 Assembly Needle presser unit Needle presser unit location diagram Main unit ...
Страница 163: ...7 12 ...
Страница 164: ......