background image

Chapter 7

42

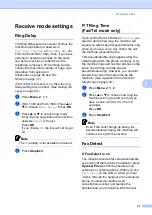
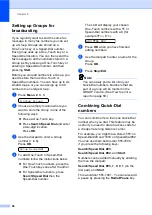
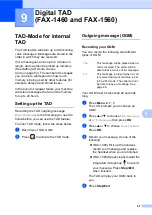
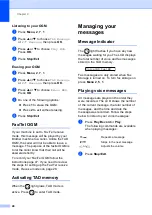
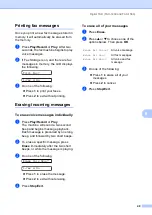
Using a cordless external 
telephone
(Not for FAX-1560)

7

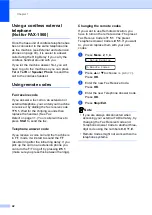
Once the base unit of cordless telephone has 
been connected to the same telephone line 
as the machine (see 

External and extension 

phones

on page 40), it is easier to answer 

calls during the Ring Delay if you carry the 
cordless handset around with you.

If you let the machine answer first, you will 
have to go to the machine so you can press 

Tel

 or 

Tel/R

 or 

Speaker Phone

 to send the 

call to the cordless handset.

Using remote codes

7

Fax receive code

7

If you answer a fax call on an extension or 
external telephone, you can tell your machine 
to receive it by dialling the fax receive code 

l

5 1

. Wait for the chirping sounds then 

replace the handset. (See 

Fax 

Detect

on page 31.) Your caller will have to 

press 

Start

 to send the fax.

Telephone answer code

7

If you receive a voice call and the machine is 
in F/T mode, it will start to sound the F/T 
(double) ring after the initial ring delay. If you 
pick up the call on an extension phone you 
can turn the F/T ring off by pressing 

# 5 1


(make sure you press this 

between

 the rings).

Changing the remote codes

7

If you want to use Remote Activation, you 
have to turn on the remote codes. The preset 
Fax Receive Code is 

l

5 1

. The preset 

Telephone Answer Code is 

# 5 1

. If you want 

to, you can replace them with your own 
codes.

a

Press 

Menu

2

1

4

.


1.Setup Receive


4.Remote Codes

b

Press 

a

 or 

b

 to choose 

On

 (or 

Off

).

Press 

OK

.

c

Enter the new Fax Receive Code.
Press 

OK

.

d

Enter the new Telephone Answer Code.
Press 

OK

.

e

Press 

Stop/Exit

.

Note

• If you are always disconnected when 

accessing your external TAD remotely, try 
changing the Fax Receive Code and 
Telephone Answer Code to another three-
digit code using the numbers 

0

-

9

l

#

.

• Remote Codes might not work with some 

telephone systems.


Содержание FAX-1355

Страница 1: ...USER S GUIDE FAX 1355 FAX 1360 FAX 1460 FAX 1560 ...

Страница 2: ...r sales receipt as a permanent record of your purchase in the event of theft fire or warranty service Register your product on line at http www brother com registration By registering your product with Brother you will be recorded as the original owner of the product Your registration with Brother may serve as confirmation of the purchase date of your product should you lose your receipt and may s...

Страница 3: ...another country Compilation and Publication Notice Under the supervision of Brother Industries Ltd this manual has been compiled and published covering the latest product descriptions and specifications The contents of this manual and the specifications of this product are subject to change without notice Brother reserves the right to make changes without notice in the specifications and materials...

Страница 4: ...ii EC Declaration of Conformity under the R TTE Directive ...

Страница 5: ... setup 13 Power Save mode 13 Putting your machine in Power Save mode 13 Bringing your machine out of Power Save mode 13 Power Save setting 13 Mode Timer 14 Paper settings 15 Paper Size 15 Volume Settings 15 Ring Volume 15 Beeper Volume 15 Speaker Volume 16 Automatic Daylight Savings Time 16 LCD display 16 LCD Contrast 16 4 Security features 17 TX Lock FAX 1355 and FAX 1360 17 Setting and changing ...

Страница 6: ...d cancelling waiting jobs 26 Sending a fax manually 26 Sending a fax at the end of a conversation 27 Out of Memory message 27 6 Receiving a Fax 28 Receive modes 28 Choosing the Receive Mode 28 Using receive modes 30 Fax only 30 Fax Tel 30 Manual 30 TAD TAD Msg Mgr FAX 1460 and FAX 1560 30 External TAD FAX 1355 and FAX 1360 30 Receive mode settings 31 Ring Delay 31 F T Ring Time Fax Tel mode only 3...

Страница 7: ... an outgoing message OGM on an external TAD 39 Multi line connections PBX 39 External and extension phones 40 Connecting an external or extension telephone 40 Operation from extension telephones 40 Using extension telephones For U K only 41 Using a cordless external telephone Not for FAX 1560 42 Using remote codes 42 8 Dialling and storing numbers 43 How to Dial 43 Manual dialling 43 One Touch Dia...

Страница 8: ...ax Forwarding 51 Fax Storage 51 Changing Remote Fax Options 52 Turning off Remote Fax Options 52 Remote Retrieval 52 Setting a Remote Access Code 52 Using your Remote Access Code 53 Retrieving fax messages 53 Changing your Fax Forwarding number 54 Remote fax commands 55 11 Printing Reports 57 Fax reports 57 Transmission Verification Report 57 Fax Journal activity report 57 Reports 58 How to print ...

Страница 9: ...ive 2002 96 EC and EN50419 76 Trademarks 76 B Troubleshooting and Routine Maintenance 77 Troubleshooting 77 If you are having difficulty with your machine 77 Error messages 80 Transferring your faxes or Fax Journal report 82 Document jam 83 Printer jam or paper jam 84 Dial Tone detection 86 Phone line interference 86 Routine maintenance 86 Replacing the ink cartridge 86 Cleaning the outside of the...

Страница 10: ...ge 95 Menu keys 96 Menu Table 97 Entering Text 103 D Specifications 104 General 104 Print media 106 Fax 107 Digital TAD FAX 1460 and FAX 1560 108 Digital Cordless Handset FAX 1560 108 Cordless handset BCL D20 108 Battery 108 Copy 109 Consumable items 109 E Glossary 110 F Index 113 ...

Страница 11: ...Section I General I General Information 2 Loading documents and paper 7 General setup 13 Security features 17 ...

Страница 12: ...n important point or refers you to a related topic Courier New Text in the Courier New font identifies messages on the LCD of the machine Warnings tell you what to do to prevent possible personal injury Electrical Hazard icons alert you to possible electrical shock Cautions specify procedures you must follow or avoid to prevent possible damage to the machine or other objects Notes tell you how you...

Страница 13: ...General Information 3 1 Control panel overview 1 FAX 1355 1 FAX 1360 1 2 10 6 1 7 8 9 11 3 5 4 2 10 6 1 7 8 9 11 3 5 4 ...

Страница 14: ...Chapter 1 4 FAX 1460 1 FAX 1560 1 2 10 6 1 7 8 9 11 13 12 3 5 4 2 10 6 1 7 8 9 11 13 12 3 5 4 ...

Страница 15: ...s this key to speak on the intercom or to transfer an incoming call to the cordless handset 4 Ink Management Lets you clean the print head check the print quality and check the available ink volume 5 Copy key Copy Options Lets you temporarily change multiple copy settings when in copy mode 6 Dial Pad Use these keys to dial telephone and fax numbers and as a keyboard for entering information into t...

Страница 16: ...he Speaker Phone feature and to record messages 13 TAD keys FAX 1460 and FAX 1560 On Off Turns the Telephone Answering Device TAD on or off Will also flash if you have new messages Erase Deletes voice fax messages Play Record FAX 1460 Plays voice messages stored in the memory Play FAX 1560 Plays voice messages stored in the memory ...

Страница 17: ...olded ripped stapled paper clipped pasted or taped DO NOT use cardboard newspaper or fabric Make sure documents written with ink are completely dry a Open the document support 1 and the document tray 2 and then pull out the extension 3 b Fan the pages well Make sure you put the documents face down top edge first in the ADF until you feel them touch the feed roller c Adjust the paper guides 1 to fi...

Страница 18: ...aging and keep it sealed Keep the paper flat and away from moisture direct sunlight and heat Improper Setup DO NOT use the following kinds of paper Damaged curled wrinkled or irregularly shaped paper 1 2 mm 0 08 in or longer Extremely shiny or highly textured paper Paper already printed on by a printer Paper that cannot be arranged uniformly when stacked Paper made with a short grain Paper capacit...

Страница 19: ...or Legal size paper 80 g m2 20 lb Up to 100 sheets of 80 g m2 20 lb paper Paper Type Paper Size Usage Fax Copy Cut Sheet Letter 216 279 mm 8 1 2 11 in Yes Yes A4 210 297 mm 8 3 11 7 in Yes Yes Legal 216 356 mm 8 1 2 14 in Yes Yes Paper Type Weight Thickness No of sheets Cut Sheet Plain Paper 64 to 120 g m2 17 to 32 lb 0 08 to 0 15 mm 0 003 to 0 006 in 100 1 ...

Страница 20: ...lease button 1 as you slide out the front of the paper tray to match the paper size you are using c Press and slide the paper side guides 1 and paper length guide 2 to fit the paper size d Fan the stack of paper well to avoid paper jams and misfeeds Note Always make sure the paper is not curled e Gently put the paper into the paper tray print side down and top edge first Check that the paper is fl...

Страница 21: ...eful that you do not push the paper in too far it may lift at the back of the tray and cause feed problems g Close the output paper tray cover 1 and slide it forward h Slowly push the paper tray completely into the machine i While holding the paper tray in place pull out the paper support 1 until it clicks and unfold the paper support flap 2 Note Do not use the paper support flap for Legal paper 1...

Страница 22: ...a 2 The figure below shows the unprintable areas on cut sheet paper The machine cannot print in the shaded areas Cut Sheet Paper Top 1 Bottom 2 Left 3 Right 4 Cut Sheet 3 mm 0 12 in 3 mm 0 12 in 4 mm 0 16 in 4 mm 0 16 in 3 4 1 2 ...

Страница 23: ...cleaning no machine operations are available See Power Save setting on page 13 Power Save setting 3 You can customize the machine s Power Save key The default mode is Fax Receive On Your machine can receive faxes or calls even when the machine is in Power Save mode If you do not want your machine to receive faxes or calls turn this setting to Fax Receive Off See Power Save mode on page 13 a Press ...

Страница 24: ...efore it returns to Fax mode If you choose Off the machine stays in the mode you used last a Press Menu 1 1 b Press a or b to choose 0 Sec 30 Secs 1 Min 2 Mins 5 Mins or Off Press OK c Press Stop Exit FAX 1460 and FAX 1560 On Off setting Receive mode Available operations Fax Receive On 1 2 factory setting Fax Only Fax Tel 3 Fax Receive Fax Detect Delayed Fax 5 Fax Forward 5 Fax Storage 5 Remote Re...

Страница 25: ...n Fax mode press d or c to adjust the volume level The LCD shows the current setting and each key press will change the volume to the next level The machine will keep the new setting until you change it You can also change the volume through the menu by following the instructions below Setting the Ring Volume from the menu 3 a Press Menu 1 3 1 b Press a or b to choose Low Med High or Off Press OK ...

Страница 26: ...2 7 3 the Speaker for screening calls will be disabled and you won t hear callers leaving messages The volume for other operations can still be controlled using d or c Automatic Daylight Savings Time 3 You can set the machine to change automatically for daylight savings time It will reset itself forward one hour in the Spring and backward one hour in the Autumn Make sure you have set the correct d...

Страница 27: ... available Sending faxes Copying Note If you forget the TX Lock password please call your Brother dealer for service Setting and changing the TX Lock password 4 Note If you have already set the password you will not need to set it again Setting the password 4 a Press Menu 2 0 1 b Enter the 4 digit number for the password Press OK c When the LCD shows Verify re enter the password Press OK d Press S...

Страница 28: ...le to continue to schedule Delayed Faxes or Polling jobs However any pre scheduled Delayed Faxes will be sent even if you turned on Memory Security so they will not be lost While memory security is On only the following operations are available Receiving faxes into memory limited by memory capacity Fax Forwarding if Fax forwarding was already On Remote Retrieval if Fax storage was already On Cordl...

Страница 29: ...word Press OK f Press Stop Exit Turning Memory Security on off 4 If you enter the wrong password when following the instructions below the LCD will show Wrong Password Re enter the correct password Turning Memory Security on 4 a Press Menu 2 0 1 b Press a or b to choose Set Security Press OK c Enter a 4 digit number for the current password Press OK d The machine goes offline and the LCD shows Sec...

Страница 30: ...Chapter 4 20 ...

Страница 31: ...ion II Fax II Sending a fax 22 Receiving a Fax 28 Telephone and External devices 34 Dialling and storing numbers 43 Digital TAD FAX 1460 and FAX 1560 47 Remote fax options 51 Printing Reports 57 Polling 59 ...

Страница 32: ...ialled numbers in the same broadcast After the broadcast is finished a Broadcast Report will be printed a Make sure you are in Fax mode b Load your document c Enter a number Press OK You can use either a One Touch a Speed Dial a Group or a manually entered number d Repeat c until you have entered all the fax numbers you wish to broadcast to e Press Start Note If you did not use up any of the numbe...

Страница 33: ...and real time transmission a Make sure you are in Fax mode b Load your document c Choose a setting you want to change Press OK d Choose one of the options below Next 1 Yes 2 No Press 1 to change another setting Press 2 when you have finished choosing your settings e Send the fax as usual Contrast 5 If your document is very light or very dark you may want to change the contrast For most documents t...

Страница 34: ...ress OK Note You can choose four different resolution settings for faxes Dual access 5 You can dial a number and start scanning the fax into memory even when the machine is sending from memory or receiving faxes The LCD shows the new job number and available memory The number of pages you can scan into the memory will vary depending on the data that is printed on them Note If the Out of Memory mes...

Страница 35: ... 2 2 5 d Press a or b to choose Next Fax Only Press OK e Press a or b to choose Next Fax On or Next Fax Off Press OK Overseas Mode 5 If you are having difficulty sending a fax overseas due to possible interference on the phone line we recommend that you turn on the Overseas mode After you send a fax using this feature the feature will turn itself off a Make sure you are in Fax mode b Load your doc...

Страница 36: ... No Jobs Waiting a Press Menu 2 6 Any waiting jobs appear on the LCD b Press a or b to scroll through the jobs and choose the job you want to cancel Press OK c Do one of the following Press 1 to cancel the selected job Press 2 to exit without cancelling d When you have finished press Stop Exit Sending a fax manually 5 Manual transmission lets you hear the dialling ringing and fax receiving tones w...

Страница 37: ...ked up the handset replace it Out of Memory message 5 If you get an Out of Memory message while scanning the first page of a fax press Stop Exit to cancel the fax If you get an Out of Memory message while scanning a subsequent page you will have the option to press Start to send the pages scanned so far or to press Stop Exit to cancel the operation Note If you get an Out of Memory message while fa...

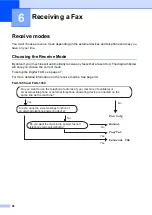
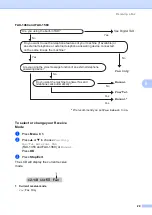
Страница 38: ...tal TAD see page 47 For more detailed information on the receive modes See page 30 FAX 1355 and FAX 1360 6 Receiving a Fax 6 Do you want to use the telephone features of your machine if available or an external telephone or external telephone answering device connected on the same line as the machine Yes Fax Only No No No Manual Yes External TAD Fax Tel Are you using the voice message function of ...

Страница 39: ...u want to use the telephone features of your machine if available or an external telephone or external telephone answering device connected on the same line as the machine Yes Fax Only No Yes No No Manual Yes Fax Tel Are you using the voice message function of an external telephone answering device Do you want the machine to answer fax and telephone calls automatically Are you using the built in T...

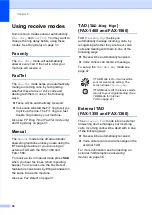
Страница 40: ...x in manual mode press Start when you hear fax tones short repeating beeps You can also use the Fax Detect feature to receive faxes by lifting a handset on the same line as the machine Also see Fax Detect on page 31 TAD TAD Msg Mgr FAX 1460 and FAX 1560 6 TAD TAD Msg Mgr helps you automatically manage incoming calls by recognising whether they are fax or voice calls and dealing with them in one of...

Страница 41: ...cide how long the machine will signal you with its special pseudo double ring when you have a voice call If it s a fax call the machine receives the fax This pseudo double ring happens after the initial ringing from the phone company Only the machine rings and no other phones on the same line will ring with the special pseudo double ring However you can still answer the call on the same line as th...

Страница 42: ... go to the machine and press Start a Press Menu 2 1 3 b Press a or b to choose On Semi Not for FAX 1355 or Off Press OK c Press Stop Exit Additional receiving operations 6 Printing a reduced incoming fax 6 If you choose On the machine automatically reduces each page of an incoming fax to fit on one page of A4 Letter or Legal size paper The machine calculates the reduction ratio by using the page s...

Страница 43: ...ess OK d Press Stop Exit Receiving a fax at the end of a conversation 6 At the end of a conversation you can ask the other party to send you a fax before you both hang up a Ask the other person to place the document in their machine and to press the Start or Send key b When you hear the CNG tones slowly repeating beeps press Start c Replace the handset Printing a fax from the memory 6 If you are u...

Страница 44: ...you pressed Speaker Phone speak clearly toward the microphone d To hang up choose one of options below Replace the handset Press Speaker Phone Answering calls with the Speaker Phone FAX 1460 and FAX 1560 7 When the machine rings instead of lifting the handset press Speaker Phone Speak clearly toward the microphone To end the call press Speaker Phone Mute Not for FAX 1355 7 FAX 1360 and FAX 1460 a ...

Страница 45: ...ne you can lift the handset or Speaker Phone to answer If you are at an extension phone you ll need to lift the handset during the F T Ring Time and then press 5 1 between the pseudo double rings If no one is on the line or if someone wants to send you a fax send the call back to the machine by pressing l 5 1 Fax Tel mode in Power Save condition 7 FAX 1355 only Fax Tel mode does not work when in t...

Страница 46: ...u can print a list of the Caller ID information received by your machine See Printing Caller ID List on page 37 Note Caller ID service varies with different carriers Call your local telephone company to find out about the kind of service available in your area Setting the Caller ID to ON 7 If you have Caller ID on your line then this function should be set to On to display the caller s phone numbe...

Страница 47: ...ogramming the Speed Dial number Menu 2 3 1 or 2 3 2 press R or Tel R first the screen displays then enter the telephone number If you do this you do not need to press R or Tel R each time before you dial using a Speed Dial location See Storing numbers on page 44 However if PBX is not selected in the Phone Line Type setting you cannot use the Speed Dial number that R or Tel R press is programmed in...

Страница 48: ... the fax If it does not hear CNG tones the machine lets the TAD continue playing your outgoing message so your caller can leave you a voice message The TAD must answer within four rings the recommended setting is two rings The machine cannot hear CNG tones until the TAD has answered the call and with four rings there are only 8 to 10 seconds of CNG tones left for the fax handshake Make sure you ca...

Страница 49: ...s before they stop b Limit your speaking to 20 seconds Note We recommend beginning your OGM with an initial 5 second silence because the machine cannot hear fax tones over a resonant or loud voice You may try omitting this pause but if your machine has trouble receiving then you must re record the OGM to include it Multi line connections PBX 7 We suggest you ask the company who installed your PBX ...

Страница 50: ...on the machine you can make your machine take the call by using the Fax Receive Code When you press the Fax Receive Code l 5 1 the machine starts to receive the fax If the machine answers a voice call and pseudo double rings for you to take over use the Telephone Answer Code 5 1 to take the call at an extension phone See F T Ring Time Fax Tel mode only on page 31 If you answer a call and no one is...

Страница 51: ...configuration the machine can always detect whether a telephone is in use Thus it will not attempt to seize the line during that time This is known as telephone off hook detection The inadvisable configuration is shown in figure 1 on page 41 and the recommended master slave configuration is shown in figure 2 This new connection configuration can be arranged by contacting BT Kingston upon Hull Tele...

Страница 52: ...d the fax Telephone answer code 7 If you receive a voice call and the machine is in F T mode it will start to sound the F T double ring after the initial ring delay If you pick up the call on an extension phone you can turn the F T ring off by pressing 5 1 make sure you press this between the rings Changing the remote codes 7 If you want to use Remote Activation you have to turn on the remote code...

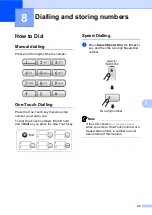
Страница 53: ... To dial One Touch numbers 6 to 10 hold down Shift as you press the One Touch key Speed Dialling 8 a Press Search Speed Dial the hash key and then the two digit Speed Dial number Note If the LCD shows Not Registered when you enter a One Touch number or a Speed Dial number a number has not been stored at this location Dialling and storing numbers 8 Two digit number ...

Страница 54: ...me by pressing Redial Pause and Start Redial Pause only works if you dialled from the control panel If you are sending a fax automatically and the line is busy the machine will automatically redial up to three times at five minute intervals Storing numbers 8 You can set up your machine to do the following types of easy dialling One Touch Speed Dial and Groups for broadcasting faxes When you dial a...

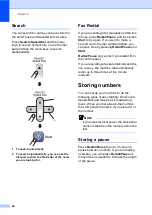
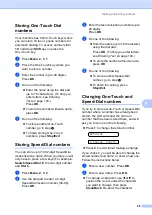
Страница 55: ...2 b Use the dial pad to enter a 2 digit Speed Dial location number 00 99 Press OK c Enter the fax or telephone number up to 20 digits Press OK d Do one of the following Enter the name up to 16 characters using the dial pad Press OK To help you enter letters see Entering Text on page 103 To store the number without a name press OK e Do one of the following To store another Speed Dial number go to s...

Страница 56: ... below For One Touch numbers press the One Touch keys one after the other For Speed Dial numbers press Search Speed Dial then the Speed Dial number The LCD will display your chosen One Touch numbers with a l or Speed Dial numbers with a for example l06 09 G01 l06 09 e Press OK when you have finished adding numbers f Use the dial pad to enter a name for the Group Press OK g Press Stop Exit Note You...

Страница 57: ...to activate the TAD mode Outgoing message OGM 9 Recording your OGM 9 You can record the following two different types of OGM Your OGM must be less than 20 seconds long a Press Menu 2 7 1 The LCD prompts you to choose an OGM b Press a or b to choose TAD Message or F T Message then press OK c Press a or b to choose Record MSG Press OK d Record your message do one of the following FAX 1460 Pick up th...

Страница 58: ...follow the instructions page 47 If you need to review the steps for setting up the Fax Tel receive mode Receive modes on page 28 Activating TAD memory 9 When the light glows TAD mode is active Press to enter TAD mode Managing your messages 9 Message Indicator 9 The light flashes if you have any new messages waiting for you The LCD displays the total number of voice and fax messages stored in the T...

Страница 59: ...ess Play Record or Play The machine will sound a two second beep and begins message playback Each message is preceded by one long beep and followed by two short beeps b To erase a specific message press Erase immediately after the two short beeps or while the message is playing c Do one of the following Erase this Msg 1 Yes 2 No Press 1 to erase the message Press 2 to exit without erasing d Press ...

Страница 60: ...ode is on When toll saver is On it overrides your ring delay setting If you are using BT Call Sign do not use the Toll Saver feature a Make sure you are in fax mode If not then press Fax b Press Menu 2 1 1 1 Setup Receive 1 Ring Delay c Press a or b to choose Toll Saver Press OK d Press a or b to choose On or Off Press OK e Press Stop Exit ICM Recording Monitor 9 This feature lets you turn the spe...

Страница 61: ...mber you want your faxes to be forwarded to c Enter the forwarding number up to 20 digits Press OK d Press a or b to choose Backup Print On or Backup Print Off Press OK e Press Stop Exit Fax Storage 10 The fax storage feature lets you store your received faxes in the machine s memory You can retrieve stored fax messages from a fax machine at another location using the remote retrieval commands See...

Страница 62: ...ging Remote Fax Options on page 52 Remote Retrieval 10 You can call your machine from any touch tone telephone or fax machine then use the remote access code and remote commands to retrieve fax messages Setting a Remote Access Code 10 The remote access code lets you access the remote retrieval features when you are away from your machine Before you use the remote access and retrieval features you ...

Страница 63: ...have finished f Hang up Note If your machine is set to Manual mode and you want to use the remote retrieval features wait about 2 minutes after it starts ringing and then enter the remote access code within 30 seconds Retrieving fax messages 10 a Dial your fax number b When your machine answers enter your remote access code 3 digits followed by l If you hear one long beep you have messages c When ...

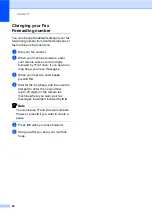
Страница 64: ... 3 digits followed by l at once If you hear one long beep you have messages c When you hear two short beeps press 9 5 4 d Wait for the long beep and then use the dial pad to enter the new number up to 20 digits of the remote fax machine where you want your fax messages forwarded followed by Note You cannot use l and as dial numbers However press if you want to create a pause e Press 9 0 when you h...

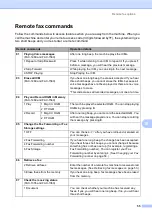
Страница 65: ...lay 1 Msg Ctr OGM The machine plays the selected OGM You can stop playing OGMs by pressing 9 2 F T OGM 2 Record 1 Msg Ctr OGM After one long beep you can record the selected OGM You will hear the message played once You can stop recording the message by pressing 9 2 F T OGM 95 Change the Fax Forwarding or Fax Storage settings 1 OFF You can choose Off after you have retrieved or erased all your mes...

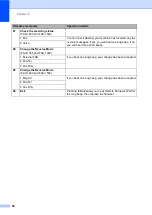
Страница 66: ...oice 98 Change the Receive Mode FAX 1355 and FAX 1360 1 External TAD If you hear one long beep your change has been accepted 2 Fax Tel 3 Fax Only 98 Change the Receive Mode FAX 1460 and FAX 1560 1 Msg Ctr If you hear one long beep your change has been accepted 2 Fax Tel 3 Fax Only 90 Exit Pressing 9 0 will allow you to exit Remote Retrieval Wait for the long beep then replace the handset Remote co...

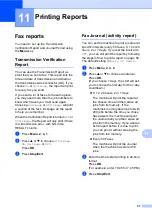
Страница 67: ...ax Journal activity report 11 You can set the machine to print a journal at specific intervals every 50 faxes 6 12 or 24 hours 2 or 7 days If you set the interval to Off you can still print the report by following the steps in How to print a report on page 58 The default setting is Every 50 Faxes a Press Menu 2 4 2 b Press a or b to choose an interval Press OK If you choose 7 days the LCD will ask...

Страница 68: ...r example press 2 to print the Help List c Press Start 1 XMIT Verify Prints a Transmission Verification Report for your last transmission 2 Help List A help list about how to quickly program your machine 3 Quick Dial Lists names and numbers stored in the One Touch and Speed Dial memory in numerical order 4 Fax Journal Lists information about the last incoming and outgoing faxes TX Transmit RX Rece...

Страница 69: ...b Press Menu 2 1 7 7 Polling RX c Press a or b to choose Standard Press OK d Enter the fax number you are polling e Press Start Setup to receive polling with a secure code 12 Secure Polling restricts who can retrieve the documents you set up to be polled Secure Polling only works with Brother fax machines If you want to retrieve a fax from a secured Brother machine you have to enter the secure cod...

Страница 70: ...es in one operation a Make sure you are in Fax mode b Press Menu 2 1 7 7 Polling RX c Press a or b to choose Standard Secure or Timer Press OK d Do one of the following If you chose Standard go to step e If you chose Secure enter a four digit number press OK go to step e If you chose Timer enter the time 24 hour format you want to begin polling and press OK go to step e e Specify the destination f...

Страница 71: ... Yes 2 No g Press 2 and press Start Setup for polled transmit with secure code 12 Secure Polling restricts who can retrieve the documents you set up to be polled Secure Polling only works with Brother fax machines If another person wants to retrieve a fax from your machine they will have to enter the secure code a Make sure you are in Fax mode b Load your document c Press Menu 2 2 6 6 Polled TX d ...

Страница 72: ...Chapter 12 62 ...

Страница 73: ...Section III Copy III Making copies 64 ...

Страница 74: ...ting 1 Copy Ratio 2 Quality 3 No of Copies Making a single copy 13 a Make sure you are in Copy mode b Load your document c Press Start Making multiple copies 13 a Make sure you are in Copy mode b Load your document c Use the dial pad to enter the number of copies up to 99 d Press Start Note To sort your copies press Copy Options See Sorting copies using the ADF on page 67 Stop copying 13 To stop c...

Страница 75: ...dial pad to enter the number of copies up to 99 d Do one of the following Press Copy Options and a or b to choose Quality Press OK e Press a or b to choose Normal Fast or Best Press OK f Press Start Press Menu selection Options Page Press Quality Normal Fast Best 65 Enlarge Reduce 50 78 83 93 97 100 104 142 186 198 200 Custom 25 400 66 Paper Size Letter Legal A4 68 Brightness nnonn 68 Stack Sort S...

Страница 76: ... dial pad to enter the number of copies up to 99 d Press Copy Options and a or b to choose Enlarge Reduce Press OK e Choose one of the options below Use a or b to choose the enlargement or reduction ratio you want Press OK Use a or b to choose Custom 25 400 Press OK Use the dial pad to enter an enlargement or reduction ratio from 25 to 400 For example press 5 3 to enter 53 Press OK f Press Start N...

Страница 77: ...ss Copy Options and a or b to choose Page Layout Press OK e Press a or b to choose Off 1 in 1 2 in 1 P 2 in 1 L 4 in 1 P or 4 in 1 L Press OK f Press Start to scan the document Place your document face down in the direction shown below 2 in 1 P 2 in 1 L 4 in 1 P 4 in 1 L Sorting copies using the ADF13 You can sort multiple copies Pages will be stacked in the order 1 2 3 1 2 3 1 2 3 and so on a Mak...

Страница 78: ...ess Stop Exit Contrast 13 Adjust the contrast to help an image look sharper and more vivid To change the default setting follow the instructions below a Press Menu 3 3 3 Contrast b Press a or b to change the contrast Press OK c Press Stop Exit Paper options 13 Paper size 13 If copying on paper other than A4 size you will need to change the paper size setting You can copy on Letter Legal or A4 a Ma...

Страница 79: ...Section IV Appendixes IV Safety and Legal 70 Troubleshooting and Routine Maintenance 77 Menu and Features 95 Specifications 104 Glossary 110 ...

Страница 80: ...oners refrigerators medical equipment chemicals or water DO NOT expose the machine to direct sunlight excessive heat moisture or dust DO NOT connect your machine to electrical sockets controlled by wall switches or automatic timers Disruption of power can wipe out information in the machine s memory DO NOT connect your machine to electrical sockets on the same circuit as large appliances or other ...

Страница 81: ...4 hours To print the faxes in memory see Transferring faxes to another fax machine on page 83 WARNING There are high voltage electrodes inside the machine Before you clean the inside of the machine make sure you have unplugged the telephone line cord first and then the power cord from the electrical socket Doing this will prevent an electrical shock DO NOT handle the plug with wet hands Doing this...

Страница 82: ...r the panel cover or touch the document feed rollers Doing this may cause injury DO NOT put your hands on the edge of the paper tray under the output paper tray cover Doing this may cause injury DO NOT touch the paper feed roller Doing this may cause injury ...

Страница 83: ...ng a hand at each side of the unit as shown in the illustration If the machine becomes hot releases smoke or generates any strong smells immediately unplug the machine from the AC power outlet Call your Brother dealer If metal objects water or other liquids get inside the machine immediately unplug the machine from the AC power outlet Call your Brother dealer ...

Страница 84: ...ghtning 3 DO NOT use this product to report a gas leak in the vicinity of the leak Important safety instructions A 1 Read all of these instructions 2 Save them for later reference 3 Follow all warnings and instructions marked on the product 4 Unplug this product from the wall socket before cleaning the inside of the machine Do not use liquid or aerosol cleaners Use a damp cloth for cleaning 5 Do n...

Страница 85: ...amaged If the product exhibits a distinct change in performance indicating a need for service 14 To protect your product against power surges we recommend the use of a power protection device Surge Protector 15 To reduce the risk of fire electric shock and injury to people note the following Do not use this product near appliances that use water a swimming pool or in a wet basement Do not use the ...

Страница 86: ...ollection point and not place it in the normal domestic unsorted waste stream This will benefit the environment for all European Union only Trademarks A The Brother logo is a registered trademark of Brother Industries Ltd Brother is a registered trademark of Brother Industries Ltd Multi Function Link is a registered trademark of Brother International Corporation DECT is a trademark of ETSI 2006 Br...

Страница 87: ...e may not have been stored properly before use The recommended environment for your machine is between 20 C to 33 C 68 F to 91 F White horizontal lines appear in text or graphics Clean the print head See Cleaning the print head on page 91 The machine prints blank pages Clean the print head See Cleaning the print head on page 91 Characters and lines are stacked Check the printing alignment See Chec...

Страница 88: ...ions Difficulty Suggestions Dialling does not work No dial tone Check that the machine is plugged in and switched on Check all line cord connections Change Tone Pulse setting See Quick Setup Guide Lift the either the external phone s handset or the machine s handset or cordless handset if available and then dial the number to send a manual fax The machine does not answer when called Make sure the ...

Страница 89: ...x Detect is set to on your machine is more sensitive to sounds It may mistakenly interpret certain voices or music on the line as a fax machine calling and respond with fax receiving tones Deactivate the machine by pressing Stop Exit Try avoiding this problem by turning Fax Detect to off See Fax Detect on page 31 Sending a fax call to the machine If you answered at the machine press Start and hang...

Страница 90: ...n objects such as a clip or ripped paper is in the machine Open the Upper Jam Clear Cover and remove any foreign objects inside the machine FAX 1355 and FAX 1360 If the error message continues see Transferring your faxes or Fax Journal report on page 82 before disconnecting the machine so you will not lose any important messages Then disconnect the machine from the power for several minutes and th...

Страница 91: ...memory Ink Empty Black The ink cartridge is empty The machine will stop all print operations While memory is available faxes will be stored in the memory Replace the ink cartridge See Replacing the ink cartridge on page 86 Low Temperature The print head is too cold Allow the machine to warm up Near Empty Black The ink cartridge is running out of ink Order a new ink cartridge No Caller ID There is ...

Страница 92: ...and then try again Clear the data in the memory To gain extra memory you can turn off Fax Storage See Turning off Remote Fax Options on page 52 Print the faxes that are in the memory See Printing a fax from the memory on page 33 Paper Jam Paper is jammed in the machine Open the Upper and Lower Jam Clear Covers at back of machine and remove the jammed paper See Printer jam or paper jam on page 84 P...

Страница 93: ...faxes will be forwarded d Press Start Transferring Fax Journal report to another fax machine B If you have not set up your Station ID you cannot enter fax transfer mode a Press Menu 9 0 2 b Enter the fax number to which the Fax Journal report will be forwarded c Press Start Document jam B Documents can jam if they are not inserted or fed properly or if they are too long Follow the steps below to c...

Страница 94: ...inter jam or paper jam B Take out the jammed paper depending on where it is jammed in the machine Open and close the Upper Jam Clear Cover to clear the error a Pull the paper tray 1 out of the machine b Pull out the jammed paper 1 If you cannot remove the jammed paper from the front side or the error message still appears on the LCD after you remove the jammed paper please go to the next step 1 1 ...

Страница 95: ...ake sure that there is no jammed paper left in the corners of the machine Note If the paper is jammed under the print head unplug the machine from the power source and then move the print head to take out the paper f Close the Upper Jam Clear Cover g Push the paper tray firmly back into the machine While holding the paper tray in place pull out the paper support until it clicks and unfold the pape...

Страница 96: ...e modem speed to 9 600 bps Unless interference is a recurring problem on your phone line you may prefer to use it only when needed Normal sets the modem speed at 14 400 bps Default Press OK c Press Stop Exit Note When you change the compatibility to Basic the ECM feature is not available Routine maintenance B Replacing the ink cartridge B Your machine is equipped with an ink dot counter The ink do...

Страница 97: ... the lock release lever gently and push it until it clicks and then close the ink cartridge cover g If you replaced an ink cartridge the LCD may ask you to verify that it was a brand new one For example Did You Change Blck For the new cartridge you installed press 1 Yes to automatically reset the ink dot counter If the ink cartridge you installed is not a brand new one be sure to press 2 No If you...

Страница 98: ...ion machines are designed to work with ink of a particular specification and will work to a level of optimum performance when used with genuine Brother Branded ink cartridges Brother cannot guarantee this optimum performance if ink or ink cartridges of other specifications are used Brother does not therefore recommend the use of cartridges other than genuine Brother Branded cartridges or the refil...

Страница 99: ...e anything that is stuck inside the paper tray d Lift the output paper tray cover and wipe the inside and outside of the paper tray with a soft cloth to remove dust e Close the output paper tray cover and put the paper tray firmly back in the machine Cleaning the scanner B a Unplug the machine open the panel cover 1 Clean the white bar 2 and the glass strip 3 with isopropyl alcohol on a soft lint ...

Страница 100: ...ft dry lint free cloth Cleaning the paper pick up roller B a Pull the paper tray completely out of the machine b Unplug the machine from the electrical socket and remove the Lower Jam Clear Cover 1 c Clean the Paper Pick up Roller 1 with isopropyl alcohol on a cotton swab d Put the Lower Jam Clear Cover back on Make sure the cover is set properly e Put the paper tray firmly back in the machine f R...

Страница 101: ... Note If you clean the print head at least five times and the print has not improved call your Brother dealer for service Checking the print quality B If faded or streaked text appear on your output some of the nozzles may be clogged You can check this by printing the Print Quality Check Sheet and looking at the nozzle check pattern a Press Ink Management b Press a or b to choose Test Print Press ...

Страница 102: ...rinted text becomes blurred or images become faded a Press Ink Management b Press a or b to choose Test Print Press OK c Press a or b to choose Alignment Press OK d Press Start The machine starts printing the Alignment Check Sheet Is Alignment OK 1 Yes 2 No e Check the 600 dpi test print to see if number 5 most closely matches number 0 If the number 5 sample of the 600 dpi is the best match press ...

Страница 103: ...the packing materials that came with your machine If you do not pack the machine properly you could void your warranty CAUTION It is important to allow the machine to park the print head after a print job Listen carefully to the machine before unplugging it to make sure that all mechanical noise has stopped Not allowing the machine to finish this parking process may lead to print problems and poss...

Страница 104: ...he machine from the telephone wall socket and take the telephone line cord out of the machine e Unplug the machine from the electrical socket f If your machine has a handset remove it and the handset curled cord g Wrap the machine in the bag and put it in the original carton with the original packing material h Pack the printed materials and additional parts in the original carton as shown below D...

Страница 105: ...s Menu table C You can program your machine by using the Menu table that begins on page 97 These pages list the menu selections and options Press Menu followed by the menu numbers to program your machine For example to set beeper volume to Low a Press Menu 1 3 2 b Press a or b to choose Low c Press OK Memory storage C Even if there is a power failure you will not lose your menu settings because th...

Страница 106: ... want c Press OK when that option appears on the LCD The LCD will then show the next menu level d Press a or b to scroll to your next menu selection e Press OK When you finish setting an option the LCD shows Accepted Access the menu Go to the next menu level Accept an option Go back to the previous menu level Delete an incorrect letter when you need to enter text into the machine Scroll through th...

Страница 107: ... Sec 30 Secs 1 Min 2 Mins 5 Mins Off Sets the time to return to Fax mode 14 2 Paper Size Letter Legal A4 Sets the size of the paper in the paper tray 15 3 Volume 1 Ring Off Low Med High Adjusts the ring volume 15 2 Beeper Off Low Med High Adjusts the volume level of the beeper 15 3 Speaker Off Low Med High Adjusts the speaker volume 16 4 Auto Daylight On Off Changes for Daylight Savings Time autom...

Страница 108: ...fore the machine answers in Fax Only or Fax Tel mode 31 1 Ring Delay FAX 1460 and FAX 1560 Example for the UK 00 01 02 03 04 05 06 07 08 Sets the number of rings before the machine answers in Fax Only Fax Tel or MC Msg Ctr mode 31 Toll Saver On Off Costs saving feature the machine rings 2 times if there are messages and 4 times if there are no messages so you can hang up and not pay for the call 5...

Страница 109: ...another fax machine 59 2 Setup Send In Fax mode only 1 Contrast Auto Light Dark Changes the lightness or darkness of faxes you send 23 2 Fax Resolution Standard Fine S Fine Photo Sets the default resolution for outgoing faxes 24 3 Delayed Fax Set the time of day in 24 hour format that the delayed faxes will be sent 25 4 Batch TX On Off Combines stored delayed faxes to the same fax number at the sa...

Страница 110: ... Off Fax Forward Fax Storage Sets the machine to forward fax messages or to store incoming faxes in the memory so you can retrieve them while you are away from your machine 51 2 Remote Access l You must set your own code for Remote Retrieval 52 3 Print Document Prints incoming faxes stored in the memory 33 6 Remaining Jobs Checks which jobs are in the memory and lets you cancel chosen jobs 26 7 Se...

Страница 111: ...Fast Normal Chooses the Copy resolution for your type of document 65 2 Brightness nnnno nnnon nnonn nonnn onnnn Adjusts the brightness for copies 68 3 Contrast nnnno nnnon nnonn nonnn onnnn Adjusts the contrast for copies 68 4 Print Reports 1 XMIT Verify Prints a Transmission Verification Report for your last transmission 58 2 Help List Prints the Help List so you can see at a glance how to quickl...

Страница 112: ...ds 28 2 Date Time Puts the date and time on the LCD and in headings of faxes you send See Quick Setup Guide 3 Station ID Fax Name Set your name and fax number to appear on each page you fax 4 Tone Pulse Tone Pulse Choose the dialling mode 5 Dial Tone Detection No Detection Turns Dial Tone Detection on or off 86 6 Phone Line Set Normal PBX ISDN Select the phone line type 37 7 Register HS FAX 1560 S...

Страница 113: ...ctions C If you entered an incorrect letter and want to change it press d to move the cursor under the incorrect character Then press Clear Back Re enter the correct character You can also back up and insert letters Repeating letters C If you need to enter a letter that is on the same key as the letter before press c to move the cursor to the right before you press the key again Special characters...

Страница 114: ...er 80 g m2 20 lb A4 size Paper Tray 100 Sheets 80 g m2 20 lb Printer Type Ink Jet Print Method Mono Piezo with 94 1 nozzles LCD liquid crystal display 16 characters 1 line Power Source AC 220 to 240V 50 60Hz Power Consumption FAX 1355 FAX 1360 FAX 1460 Power Save Mode Standby Operating Average 4 W Average 6 W Average 26 W FAX 1560 Power Save Mode Standby Operating Average 6 W Average 8 W Average 2...

Страница 115: ... 50 dB 1 Temperature Operating Best Print Quality 5 to 40 C 41 F to 104 F 18 to 33 C 64 F to 91 F Humidity Operating Best Print Quality 20 to 80 without condensation 20 to 80 without condensation 202 mm 8 0 in 325 mm 12 8 in 292 mm 11 5 in 490 mm 19 3 in 407 mm 16 0 in 407 mm 16 0 in 325 mm 12 8 in 292 mm 11 5 in 490 mm 19 3 in 214 mm 8 4 in 292 mm 11 5 in 490 mm 19 3 in 422 mm 16 6 in 202 mm 8 0 ...

Страница 116: ... 3 5 in 216 mm 8 5 in Height 127 mm 5 0 in 356 mm 14 0 in For more details see Paper weight thickness and capacity on page 9 Maximum paper tray capacity Up to 100 sheets of 80 g m2 20 lb plain paper Paper Output Up to 50 sheets of 80 g m2 20 lb plain paper Face up print delivery to the output paper tray ...

Страница 117: ...in ADF Height 127 mm to 355 6 mm 5 in to 14 in Scanning Width 208 mm 8 2 in Printing Width 204 mm 8 03 in Grey Scale 64 levels Polling Types Standard Secure Timer Sequential Contrast Control Automatic Light Dark manual setting Resolution Horizontal 8 dot mm 203 dot in Vertical Standard 3 85 line mm 98 line in Fine 7 7 line mm 196 line in Photo 7 7 line mm 196 line in Superfine 15 4 line mm 392 lin...

Страница 118: ... Recording Time 20 Secs Frequency 1 9 GHz Standard DECT Multi Handset Capability Up to 4 handsets Dimensions Weight including battery 149 g 5 26 oz LCD liquid crystal display 16 Digit 3 Line 1 Line for Pict Backlit Orange Charge Indicator Yes LED Full Charge Time 12 hours While in Use TALK 10 hours While Not in Use Standby 200 hours Type BCL BT20 Rating Ni MH 3 6 V 730 mAh 6 06 in 154 mm 31 6 mm 1...

Страница 119: ...e Life of Ink Cartridge Black Approximately 500 pages at 5 coverage The first time you install an ink cartridge the machine will use an amount of ink to fill the ink delivery tubes for high quality print outs This process will only happen once With all following ink cartridge you can print the specified number of pages The number of pages a cartridge will print may change depending on how often yo...

Страница 120: ...bility to send the same fax message to more than one location Caller ID A service purchased from the telephone company that lets you see the number or name of the party calling you Cancel Job Cancels a programmed job like Delayed Fax or Polling CNG tones The special tones beeps sent by fax machines during automatic transmission to tell the receiving machine that a fax machine is calling Coding met...

Страница 121: ...are using a telephone answering device TAD Fine resolution Resolution is 203 196 dpi It is used for small print and graphs Grey scale The shades of grey available for copying and faxing photographs Group number A combination of One Touch and Speed Dial numbers that are stored on a One Touch key or a Speed Dial location for Broadcasting Help list A printout of the complete Menu table that you can u...

Страница 122: ...Delay The number of rings before the machine answers in Fax Only and Fax Tel modes Ring Volume Volume setting for the machine s ring Search An electronic alphabetical listing of stored One Touch Speed Dial and Group numbers Speed Dial A pre programmed number for easy dialling You must press Search Speed Dial the two digit code and Start to start the dialling process Standard resolution 203 97 dpi ...

Страница 123: ... using ADF 64 Copy Options key copying paper size 68 Cordless Handset See DECT Handset User s Guide Cordless phone non Brother 42 Custom telephone features on a single line 79 D Dialing a pause 44 Groups 22 manual 43 Dual Access 24 E Error messages on LCD 80 Change Unable 80 Clean Unable 80 Comm Error 80 Init Unable 81 Ink Empty 81 Near Empty 81 No Paper Fed 81 Not Registered 43 Out of Memory 82 P...

Страница 124: ...olution 24 Fax Tel mode answering at extension phones 40 42 double ringing voice calls 31 F T Ring Time 31 Fax Receive Code 40 42 Ring Delay 31 Telephone Answer Code 40 42 G Gray scale 107 Groups for Broadcasting 46 H HELP LCD messages 95 using menu keys 96 Menu Table 95 97 Help List 58 I Ink cartridge checking ink volume 93 ink dot counter 86 87 replacing 86 J Jacks EXT external telephone 38 TAD ...

Страница 125: ...h 44 Speed Dial changing 45 setting up 45 using 43 R Receive Mode 28 External TAD 28 Fax Only 28 Fax Tel 28 Manual 28 Redial Pause key 44 Reducing copies 66 incoming faxes 32 Remote Retrieval 52 access code 52 53 commands 55 getting your faxes 33 53 Reports 57 Caller ID List 37 Fax Journal 58 Journal Period 57 Help List 58 how to print 58 Quick Dial List 58 Transmission Verification 57 58 User Set...

Страница 126: ...ry copy settings 65 Text entering 103 special characters 103 Transferring your faxes or Fax Journal 82 Troubleshooting 77 checking ink volume 93 document jam 83 error messages on LCD 80 if you are having difficulty copying 80 document jam 83 incoming calls 79 phone line or connections 78 printing 77 printing receiving faxes 78 receiving faxes 78 sending faxes 79 paper jam 84 print quality 91 TX Lo...

Страница 127: ...he World Wide Web http www brother com This machine is approved for use in the country of purchase only Local Brother companies or their dealers will only support machines purchased in their own countries UK IRE GEN ...

Отзывы: