background image

6-1

Confidential

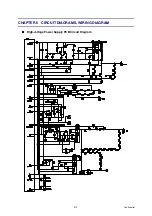
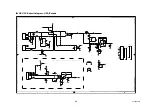
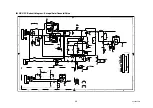
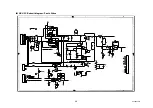
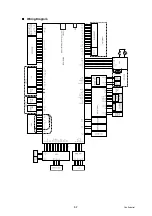
CHAPTER 6 CIRCUIT DIAGRAMS, WIRING DIAGRAM

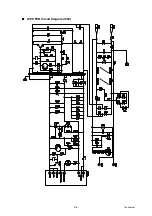
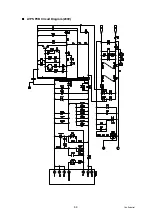
High-voltage Power Supply PCB Circuit Diagram

Содержание DCP-7030

Страница 1: ...CE MANUAL Read this manual thoroughly before carrying out any maintenance work Keep this manual in a convenient place for quick and easy reference at all times Jan 2008 SM FAX088 8C5C 2 MODEL DCP 7030 7040 7045N MFC 7320 7340 7440N 7450 7840N 7840W ...

Страница 2: ...ual and the specifications of this product are subject to change without notice Brother reserves the right to make changes without notice in the specifications and materials contained herein and shall not be responsible for any damages including consequential caused by reliance on the materials presented including but not limited to typographical and other errors relating to the publication This p...

Страница 3: ...bling periodical maintenance parts CHAPTER 3 DISASSEMBLY AND ASSEMBLY Details of procedures for disassembling and assembling of the machine together with related notes The disassembly order flow provided enables you to see at a glance the quickest way to get to parts involved At the start of a disassembly job you can check the disassembly order flow that guides you through a shortcut to get to the...

Страница 4: ...ation in such cases will be supplied in service information bulletins Technical Information A thorough understanding of this machine based on information in this service manual and service information bulletins is required for maintaining its print quality performance and for improving the practical ability to find the cause of problems There is the service reference manual as well This service re...

Страница 5: ...er at the eject roller 2 1 25 3 7 Curl in the paper 1 26 4 TROUBLESHOOTING OF DOCUMENT FEEDING 1 27 4 1 No Feeding 1 27 4 2 Double feeding 1 27 4 3 Paper Jam 1 28 5 IMAGE DEFECT TROUBLESHOOTING Defect Of the Print 1 29 5 1 Image Defect Examples 1 29 5 2 Diameter of Rollers 1 29 5 3 Troubleshooting Image Defect 1 30 6 TROUBLESHOOTING OF SCANNIG 1 43 6 1 Cannot scan the document in the FB unit If sc...

Страница 6: ... OF GEARS 3 8 6 HARNESS ROUTING 3 9 7 DISASSEMBLY FLOW 3 15 8 DISASSEMBLY PROCEDURE 3 16 8 1 SEPARATION PAD ASSY 3 17 8 2 FRONT COVER ASSY 3 18 8 2 1 FRONT COVER ASSY 3 18 8 2 2 PAPER STOPPER L PAPER STOPPER S 3 20 8 3 BACK COVER OUTER CHUTE ASSY 3 21 8 3 1 BACK COVER 3 21 8 3 2 OUTER CHUTE ASSY 3 22 8 4 FUSER COVER ASSY 3 23 8 4 1 FUSER COVER ASSY 3 23 8 4 2 EJECT ACTUATOR EJECT ACTUATOR SPRING 3...

Страница 7: ...NNER UNIT 3 50 8 12 2 CORD HOOK 3 52 8 12 3 PANEL UNIT 3 52 8 12 4 PANEL PCB ASSY 3 53 8 12 5 RUBBER KEYS L R 3 53 8 12 6 LCD 3 54 8 12 7 PANEL DRESS COVER 3 54 8 12 8 ADDRESS LABEL 3 55 8 13 PULL ARM L R 3 56 8 14 PULL ARM GUIDE 3 57 8 15 NCU PCB 3 58 8 16 SPEAKER UNIT 3 59 8 17 BATTERY ASSY 3 61 8 18 SIDE COVER R ASSY 3 62 8 19 REGISTRATION GROUNDING SPRING 3 63 8 20 ROLLER HOLDER ASSY 3 64 8 21...

Страница 8: ...OU REPLACE THE LASER UNIT 4 12 4 IF YOU REPLACE THE FB UNIT 4 13 CHAPTER 5 SERVICE FUNCTIONS 5 1 1 MAINTENANCE MODE 5 1 1 1 How to Enter the Maintenance Mode 5 1 1 2 How to Enter the End User accessible Maintenance Mode 5 1 1 3 List of Maintenance mode Functions 5 2 1 4 Detailed Description of Maintenance mode Functions 5 3 1 4 1 EEPROM Parameter Initialization Function code 01 91 5 3 1 4 2 Printo...

Страница 9: ...formation Function code 80 5 31 1 4 19 Error Code Indication Function code 82 5 33 1 4 20 Output of Transmission Log to the Telephone Line Function code 87 only MFC7840W 7840N 7450 7440N 7340 7320 5 33 1 4 21 Exit from the Maintenance Mode Function code 99 5 34 2 OTHER SERVICE FUNCTIONS 5 35 2 1 User Maintenance Mode 5 35 2 2 Resetting the developing bias voltage counter 5 36 CHAPTER 6 CIRCUIT DIA...

Страница 10: ...en the laser unit under any circumstances Caution Use of controls or adjustments or performance of procedures other than those specified in this manual may result in hazardous radiation exposure For Finland and Sweden LUOKAN 1 LASERLAITE KLASS 1 LASER APPARAT Varoitus Laitteen käyttäminen muulla kuin tässä käyttöohjeessa mainitulla tavalla saattaa altistaa käyttäjän turvallisuusluokan 1 ylittäväll...

Страница 11: ...EC and EN50419 European Union only This equipment is marked with the recycling symbol below It means that at the end of the life of the equipment you must dispose of it separately at an appropriate collection point and not place it in the normal domestic unsorted waste stream This will benefit the environment for all European Union only ...

Страница 12: ...ential installation This equipment generates uses and can radiate radio frequency energy and if not installed and used in accordance with the instructions may cause harmful interference to radio communications However there is no guarantee that interference will not occur in a particular installation If this equipment does cause harmful interference to radio or television reception which can be de...

Страница 13: ...al covers the laser beam cannot escape from the machine during any phase of user operation FDA Regulations 110 to 120 volt model only The U S Food and Drug Administration FDA has implemented regulations for laser products manufactured on and after August 2 1976 Compliance is mandatory for products marketed in the United States The following label on the back of the machine indicates compliance wit...

Страница 14: ...of the laser unit ACHTUNG Im Falle von Störungen der Lasereinheit muß diese ersetzt werden Das Gehäuse der Lasereinheit darf nicht geöffnet werden da sonst Laserstrahlen austreten können Additional Information When servicing the optical system of the machine be careful not to place a screwdriver or other reflective object in the path of the laser beam Be sure to take off any personal accessories s...

Страница 15: ...sonal injury Electrical Hazard icons alert you to a possible electrical shock Hot Surface icons warn you not to touch machine parts that are hot Cautions specify procedures you must follow or avoid to prevent possible damage to the machine or other objects Note Notes tell you useful tips when servicing the machine Memo Memo tells you bits of knowledge to help understand the machine ...

Страница 16: ...bstances or any type of spray to clean the inside or outside of the machine Doing this may cause a fire or electrical shock Refer to Routine maintenance on page 115 for how to clean the machine DO NOT handle the plug with wet hands Doing this might cause an electrical shock Always make sure the plug is fully inserted After you have just used the machine some internal parts of the machine will be e...

Страница 17: ...cal regulations When you move the machine grasp the side hand holds that are under the scanner Use caution when installing or modifying telephone lines Never touch telephone wires or terminals that are not insulated unless the telephone line has been unplugged at the wall jack Never install telephone wiring during a lightning storm Never install a telephone wall jack in a wet location This product...

Страница 18: ...c shock and injury to people including the following 1 DO NOT use this product near water for example near a bath tub wash bowl kitchen sink washing machine or in a wet basement or near a swimming pool 2 Avoid using this product during an electrical storm There may be a remote risk of electric shock from lightning 3 DO NOT use this product to report a gas leak in the vicinity of the leak 4 Use onl...

Страница 19: ...power and unplug the power cable before removing any covers or PCBs adjusting the machine and so on If you need to take voltage measurements with the power switched on take the greatest of care not to receive an electric shock 2 When connecting or disconnecting cable connectors make sure that you hold the connector body and not the cables 3 Electronic devices are sensitive to static build up make ...

Страница 20: ... 60 unit Registration front sensor PCB ASSY Registration rear sensor PCB ASSY Filter ASSY Side cover R ASSY Roller holder ASSY Front cover ASSY Rubber foot Corner cover Side cover sub L Paper stopper L Paper stopper S Side cover L ASSY Drive sub ASSY Registration solenoid Registration solenoid lever T1 solenoid T1 solenoid lever New toner sensor harness ASSY Toner sensor PCB unit ASSY DEV joint DE...

Страница 21: ...e ASSY Document stopper Rubber key R Panel unit LCD Diffusion film Back light guide Document cover sub ASSY Cord hook Pressure roller ASSY Pressure roller spring Drive frame ASSY ADF harness unit ADF motor harness holder Lower document chute ASSY Ejection roller ASSY LF roller bushing LF roller ASSY Actuator R Actuator L Hinge ASSY L Hinge R Hinge arm Rubber key L Panel PCB ASSY ADF sensor PCB ASS...

Страница 22: ...r is not short grained paper or acid paper Consumable Parts 1 The drum unit including the toner cartridge is installed correctly Others 1 Condensation When the machine is moved from a cold place into a warm room condensation may occur inside the machine causing various problems as listed below Condensation on the optical surfaces such as the scanner window lenses the reflection mirror and the prot...

Страница 23: ... 5 Confidential 2 Cleaning Use a soft dry cloth CAUTION DO NOT use flammable substances or any type of spray to clean the inside or outside of the machine Doing this may cause a fire or electrical shock ...

Страница 24: ...10 8A Paper jam in Tray 1 T1 1 17 67 Toner of the toner cartridge is low 1 7 8D Paper jam near paper eject tray 1 17 68 Fuser unit failure 1 11 9F Paper empty 1 18 69 Fuser unit failure 1 11 A1 Front cover open 1 18 6A Fuser unit failure 1 11 A2 Document is too long 1 18 6B Fuser unit failure 1 11 A3 Document rear sensor is not turned on when feeding the document 1 19 6C Fuser unit failure 1 11 A5...

Страница 25: ...r are at different temperatures 3 The paper media is replaced with different Paper size media 2 2 2 Service Call Error Check the User Check items first If the same problem occurs follow each procedure in the order of the number described in the Step column in the table below Error code 50 Replacement time of the drum unit The drum counter reached the upper limit Toner Low Prepare New Toner Cartrid...

Страница 26: ... eject actuator 3 Eject sensor PCB ASSY failure Replace the eject sensor PCB ASSY 4 Main PCB failure Replace the main PCB ASSY Fuser Error Turn the power off then on again Leave the machine for 15 min Self Diagnostic Will Automatically Restart within 15 minutes Print Unable 6A See Troubleshooting and routine maintenance chapter in User s Guide Step Cause Remedy 1 Harness connection failure between...

Страница 27: ... the HVPS PCB and main PCB Then reconnect them 2 HVPS PCB failure Replace the HVPS PCB ASSY 3 Main PCB failure Replace the main PCB ASSY Cartridge Error Put the Black Toner Cartridge back in User Check Check if the toner cartridge is attached Step Cause Remedy 1 New toner detection switch harness connection failure Check the harness connection of the new toner detection switch Then reconnect it 2 ...

Страница 28: ...llowing the procedure described in Maintenance mode 32 If any problem occurs check the harness connection of the new toner sensor harness ASSY then reconnect it 2 Harness connection failure of toner sensor PCB unit ASSY Check the sensor performance following the procedure described in Maintenance mode 32 If any problem occurs check the harness connection of the toner sensor PCB unit ASSY then reco...

Страница 29: ...e center and side thermistors detect extremely high temperature Print Unable 68 See Troubleshooting and routine maintenance chapter in User s Guide Print Unable 69 See Troubleshooting and routine maintenance chapter in User s Guide Print Unable 6A See Troubleshooting and routine maintenance chapter in User s Guide Print Unable 6B See Troubleshooting and routine maintenance chapter in User s Guide ...

Страница 30: ...intenance chapter in User s Guide Step Cause Remedy 1 Laser unit harness connection failure Check the two harness connections of the laser unit and reconnect them 2 Laser unit failure Replace the laser unit 3 Main PCB failure Replace the main PCB ASSY Print Unable 76 See Troubleshooting and routine maintenance chapter in User s Guide Step Cause Remedy 1 Fuser unit harness connection failure Check ...

Страница 31: ...d routine maintenance chapter in User s Guide Step Cause Remedy 1 Harness connection failure of internal temperature thermistor Check the harness connection of the internal temperature thermistor and reconnect it 2 Internal temperature thermistor failure Replace the internal temperature thermistor 3 Main PCB failure Replace the main PCB ASSY Print Unable 7A See Troubleshooting and routine maintena...

Страница 32: ...e Remedy 1 Dirt or dust on drum unit electrodes Clean the electrodes on the drum unit Refer to Fig 1 1 2 HVPS PCB failure Replace the HVPS PCB ASSY 3 Main PCB failure Replace the main PCB ASSY Size mismatch Fax received Set correct paper size in menu User Check Set the A4 Letter Legal Folio using the paper size setting in menu Step Cause Remedy 1 Main PCB failure Replace the main PCB ASSY Size mis...

Страница 33: ...1 1 Electrodes location on the machine Fig 1 2 Side surface of Drum unit Charged electrode Grid Cleaner Transfer roller Exposure drum Develop roller Side surface of Frame L ASSY inside Grid Cleaner Transfer roller Exposure drum Develop roller Charged electrode ...

Страница 34: ... rear actuator or paper eject actuator not operating smoothly or catching in some position Ensure smooth operation of the registration front actuator registration rear actuator or paper eject actuator and ensure they are not catching in any positions 3 Paper eject sensor PCB failure Check the sensor performance following the procedure described in Maintenance mode 32 If any problem occurs replace ...

Страница 35: ...y and reconnect it 2 Paper feed roller worn out Replace the paper feed roller 3 Registration front sensor PCB failure Check the sensor performance following the procedure described in Maintenance mode 32 If any problem occurs replace the registration front sensor PCB ASSY 4 Main PCB failure Replace the main PCB ASSY Cover is open Open the Back cover and remove the jammed paper or close the Fuser C...

Страница 36: ...tration front sensor PCB failure Replace the registration front sensor PCB 4 Main PCB failure Replace the main PCB ASSY Cover is open Close the Front Cover User Check Close the front cover Step Cause Remedy 1 Harness connection failure of cover sensor harness ASSY Check the harness connection of the cover sensor harness ASSY and reconnect it 2 Cover sensor harness ASSY failure Replace the cover se...

Страница 37: ...in some position Ensure smooth operation and that there is no catching of document rear actuator 2 Document rear sensor failure Replace the document rear sensor 3 ADF motor failure Replace the ADF motor Scan Unable A5 Remove the original document Turn the power off then on again Step Cause Remedy 1 Scanning failure Turn the power switch off and on Then try scanning again Scan Unable A6 Remove the ...

Страница 38: ...he maintenance mode Scan Unable AF Remove the original document Turn the power off then on again Step Cause Remedy 1 FB unit failure Replace the FB unit 2 Main PCB failure Replace the main PCB ASSY Scanner Error Step Cause Remedy 1 Scanner harness not connected correctly Reconnect the scanner harness correctly 2 Scanner harness broken Replace the FB unit 3 Main PCB failure Replace the main PCB ASS...

Страница 39: ...d routine maintenance chapter in User s Guide Step Cause Remedy 1 Main PCB failure Replace the main PCB ASSY Print Unable EC See Troubleshooting and routine maintenance chapter in User s Guide Step Cause Remedy 1 Harness connection failure of fan motor Check the harness connection of the fan motor and reconnect it 2 Fan motor failure Replace the fan motor 3 Main PCB failure Replace the main PCB AS...

Страница 40: ... code F9 Maintenance mode 74 Non decision Inputting omission of the customizing code Machine Error F9 Step Cause Remedy 1 Turn the power off when the Maintenance mode 74 is in progress Implement the Maintenance mode 74 again ...

Страница 41: ...tion front sensor PCB ASSY 4 Paper feeding kit failure Is the surface of the separation pad or the pickup roller dirty or worn out Yes 1 Clean the surface of the separation pad or pickup roller 2 Replace the separation pad or pickup roller 5 Pressure plate gear damage Is the pressure plate gear damaged Yes Replace the paper tray 6 T1 solenoid failure Does the T1 solenoid work correctly No Replace ...

Страница 42: ... the problem solved after replacing the High voltage power supply PCB ASSY Yes Replace the High voltage power supply PCB ASSY 6 Registration ground spring loose Is the registration ground spring fitted correctly No Fit the registration ground spring correctly Refer to Fig 1 3 7 Main PCB failure Is the problem solved after replacing the Main PCB ASSY Yes Replace the Main PCB ASSY Step Cause Check R...

Страница 43: ... the paper is loaded into the paper tray correctly Turn over the stack of paper in the paper tray or try rotating the paper 180 in the paper tray Step Cause Check Result Remedy 1 Fuser unit dirty Is there dirt around the entrance of the fuser unit Yes Clean the entrance of the fuser unit 2 Fuser unit failure Is the problem solved if new fuser unit is replaced Yes Replace the fuser unit User Check ...

Страница 44: ...heck that the curl in the paper occurs 4 When there seems to be still the curl replace the position of the pressure roller again Fig 1 4 Step Cause Check Result Remedy 1 Fuser unit pressure is high Is the problem solved by changing the position of the pressure roller Yes Change the position of the pressure roller NIP RELEASE LEVER NIP RELEASE LEVER PR STOPPER PLATE PRESSURE ROLLER 2 2 1 1 1 1 ...

Страница 45: ...front actuator 2 Foreign object around paper feed roller Is there a foreign object around the paper feed roller Yes Remove the foreign object 3 Paper feed roller failure Is the surface of the paper feed roller worn out Yes Replace the separate roller shaft ASSY 4 ADF sensor PCB Is the problem solved by replacing the ADF sensor PCB Yes Replace the ADF sensor PCB 5 ADF motor failure Is the problem s...

Страница 46: ...r of feed roller remove Yes Re assemble the pinch roller of the feed roller 4 Pinch roller of paper eject roller failure Is pinch roller of paper eject roller remove Yes Re assemble the pinch roller of the paper eject roller 5 Pressure roller film unstick Does pressure roller film unstick Yes Replace the pressure roller film 6 ADF sensor PCB Is the problem solved by replacing the ADF sensor PCB Ye...

Страница 47: ...lers or pitch which appears in the image as shown in the table below No Parts name Diameter The pitch which appears in the image 1 Develop roller Ø20 0 mm 40 6 mm 2 Exposure drum Ø24 0 mm 75 0 mm 3 Heat roller in the fuser unit Ø25 0 mm 78 5 mm 4 Pressure roller ASSY in the fuser unit Ø25 0 mm 78 5 mm Light Poor fixing Dirt on the back of paper White vertical streaks Faint print Black spots Downwa...

Страница 48: ... a soft clean lint free cloth Refer to Fig 1 6 3 Toner sensor failure After replacing the toner cartridge with a new one does the same problem occur even after printing several pages Yes Replace the toner cartridge 4 Does the machine start printing even after removing the toner cartridge from the drum unit Yes Clean the toner sensor receiving light side Check the harness connection of the toner LE...

Страница 49: ...vironment High temperature and high humidity conditions can cause this problem Replace the drum unit with a new one Replace the toner cartridge with a new one Step Cause Check Result Remedy 1 The developing bias voltage failure Is the problem solved after resetting the developing bias counter Yes Reset the developing bias counter Refer to 2 2 Resetting the developing bias voltage counter in Chapte...

Страница 50: ...in PCB failure Is the problem solved after replacing the main PCB ASSY Yes Replace the main PCB ASSY User Check Replace the drum unit with a new one Replace the toner cartridge with a new one Step Cause Check Result Remedy 1 Developing bias voltage conduction failure Are the electrodes on the drum unit and machine body dirty Yes Clean both electrodes Refer to Fig 1 1 Fig 1 2 2 Scanner harness of t...

Страница 51: ... Check if there is no gap No Assemble the laser unit correctly and secure the screw 2 Incorrect radiation angle of scanner diode of laser unit Scanner motor rotation failure Is the problem solved after replacing the laser unit Yes Replace the laser unit 3 Main PCB failure Is the problem solved after replacing the main PCB ASSY Yes Replace the main PCB ASSY ...

Страница 52: ...he scanner harness of the laser unit connected securely No Reconnect the scanner harness of the laser unit 5 FG harness ASSYconnection failure Is the FG harness ASSY between the laser unit and main PCB ASSY connected securely No Reconnect the FG harness ASSY between the laser unit and main PCB ASSY securely 6 HVPS PCB failure Is the problem solved after replacing the HVPS PCB ASSY Yes Replace the ...

Страница 53: ...ise which is caused by dirt on the corona wire in the drum unit In this case clean the corona wire with the wire cleaner Replace the drum unit with a new one Replace the toner cartridge with a new one Step Cause Check Result Remedy 1 Scratch or Dirt in the paper feed system Is the paper feed system dirty Yes Wipe dirt off 2 Scratch or Dirt on the exposure drum Are there scratch and dirt on the sur...

Страница 54: ...n the develop roller Are the horizontal stripes at 40 6 mm develop roller circumference intervals Yes This problem will disappear by printing approximate 10 pages If the same problem occurs replace the toner cartridge 4 Scratch and Dirt on the exposure drum Are the horizontal stripes at 75 0 mm exposure drum circumference intervals Yes Replace the drum unit 5 Scratch and Dirt on the heat roller Ar...

Страница 55: ...ner windows dirty Yes Clean the scanner windows 3 Transfer failure Is the transfer roller scratched Yes Replace the drum unit 4 Scanner window of laser unit failure Is the problem solved after replacing the laser unit Yes Replace the laser unit User Check Check that the appropriate media type is selected in the printer driver The problem may disappear by itself Try printing multiple pages to clear...

Страница 56: ...rinting a few pages the drum unit may have glue from label stuck on the exposure drum surface Refer to the next page and wipe it off gently with a cotton swab The drum unit may be damaged Replace the drum unit with a new one Step Cause Check Result Remedy 1 Toner attached on the develop roller Are the white spots at 40 6 mm develop roller circumference intervals Yes This problem will disappear by ...

Страница 57: ...t Fig 1 8 2 Turn the drum unit gear to the direction of the arrow of the figure by hand while looking at the surface of the exposure drum Fig 1 9 3 When you have found the mark on the drum that matches the print sample wipe the surface of the exposure drum with a dry cotton swab until the dust or glue on the surface comes off Fig 1 10 CAUTION DO NOT clean the surface of the exposure drum with a sh...

Страница 58: ...er cartridge 2 Scratch and Dirt on the exposure drum Are the black spots at 75 0 mm exposure drum circumference intervals Yes Replace the drum unit 3 Drum unit connection failure Are the electrodes on the drum unit and machine body dirty Yes Clean both electrodes Refer to Fig 1 1 Fig 1 2 4 Scratch and Dirt on the heat roller Are the black spots at 78 5 mm heat roller circumference intervals Yes Re...

Страница 59: ...B ASSY User Check The paper tray ground terminal located in the machine body may be dirty Clean the contact with a dry cloth Step Cause Check Result Remedy 1 Dirt on charge electrode Are the electrodes on the drum unit and machine body dirty Yes Clean both electrodes Refer to Fig 1 1 Fig 1 2 2 Paper tray ground terminal located in machine body Is the paper tray ground terminal bent which is locate...

Страница 60: ... 1 Fig 1 2 2 HVPS PCB failure Is the problem solved after replacing the HVPS PCB ASSY Yes Replace the HVPS PCB ASSY User Check Replace the toner cartridge with a new one Replace the drum unit with a new one Do not use acid paper Check if there is dust or paper powder in the machine Step Cause Check Result Remedy 1 Toner sensor failure Machine body Is the toner sensor performed normally by followin...

Страница 61: ...n failure Is the each harnesses of FB unit connected securely Yes Reconnect the each harnesses of FB unit 3 FB unit failure Is the problem solved by replacing the FB unit Yes Replace the FB unit 4 Main PCB failure Is the problem solved after replacing the main PCB ASSY Yes Replace the main PCB ASSY User Check Check if there is the scanning surface of the ADF unit document in the upper side Step Ca...

Страница 62: ...Is the problem solved after replacing the main PCB ASSY Yes Replace the main PCB ASSY User Check Check if the ADF or FB glass is not stained Step Cause Check Result Remedy 1 Setting of white level scanning area malfunction Is the problem solved after setting the white level of scanning Yes Set the white level scanning area Function code 55 2 FB unit failure Is the problem solved by replacing the F...

Страница 63: ...ide Try resetting the factory settings Step Cause Check Result Remedy 1 Failure inside the machine Does the machine print Test Pattern Function code 09 No Identify the error type and then refer to the specified section of this chapter 2 Machine connection For Macintosh has the product ID been verified No Verify the product ID Product ID DCP7030 01EA DCP7040 01E9 DCP7045N 01E8 MFC7320 01EB MFC7340 ...

Страница 64: ...resetting the factory settings Step Cause Check Result Remedy 1 Wireless LAN PCB failure MFC7840W Is the problem solved after replacing the wireless LAN PCB ASSY Yes Replace the wireless LAN PCB ASSY 2 Main PCB failure Is the problem solved after replacing the main PCB ASSY Yes Replace the main PCB ASSY ...

Страница 65: ... 05 No loop current detected 11 06 Busy tone detected after dialing or called 11 07 No response from the remote station in sending 11 10 Unobtainable tone detected after dialing 17 07 No response from the calling station in receiving Available in German models only Code 1 Code 2 Causes 20 01 Unable to detect a flag field 20 02 Carrier was OFF for 200 ms or longer 20 03 Abort detected 1 in successi...

Страница 66: ...dy for relay broadcasting function 32 13 No confidential mail in the remote terminal 32 14 The available memory space of the remote terminal is less than that required for reception of the confidential or relay broad casting instruction 32 18 Remote terminal not equipped with color function Code 1 Code 2 Causes 40 02 Invalid coding system requested 40 03 Invalid recording width requested 40 05 ECM...

Страница 67: ...Code 2 Causes A0 03 Error correction sequence not terminated even at the final transmission speed for fallback A0 11 Receive buffer empty 5 second time out A0 12 Receive buffer full during operation except receiving into memory A0 13 Decoding error continued on 500 lines or more A0 14 Decoding error continued for 10 seconds or more A0 15 Time out 13 seconds or more for one line transmission A0 16 ...

Страница 68: ...stablishment of FAX communication BF 03 Transmission canceled due to a scanning error caused by no document or document feed problem in ADF scanning in real time transmission Establishment of FAX communication FAX communication is established when the calling station receives a DIS reception capability signal from the called station and the called station receives a NSS or DCS communications test ...

Страница 69: ... Connection between main PCB and LVPS PCB unit Are the main PCB and LVPS PCB unit connected properly No Reconnect the connector properly 3 LCD Is the problem solved after replacing the LCD Yes Replace the LCD 4 Control panel PCB Is the problem solved after replacing the control panel PCB Yes Replace the control panel PCB 5 LVPS PCB unit Is the problem solved after replacing the LVPS PCB unit Yes R...

Страница 70: ... control panel PCB connected properly No Reconnect the connector correctly 3 Harness between main PCB and control panel PCB Is the harness damaged Yes Replace the harness with a normal one 4 Rubber Key Is the problem solved after replacing the rubber key Yes Replace the rubber Key 5 Control panel PCB Is the problem solved after replacing the control panel PCB Yes Replace the control panel PCB 6 Ma...

Страница 71: ...in PCB and NCU PCB Are the main PCB and NCU PCB connected correctly No Reconnect the connector 3 Connection between main PCB and control panel PCB Are the main PCB and control panel PCB connected correctly No Reconnect the connector 4 Contact of rubber keys Does the rubber keys work correctly No Replace the rubber Keys 5 NCU PCB Is the problem solved after replacing the NCU PCB ASSY Yes Replace th...

Страница 72: ...PCB and control panel PCB Are the main PCB and control panel PCB connected correctly No Reconnect the connector 5 Contact of rubber keys Is the problem solved after replacing the rubber keys No Replace the rubber Keys 6 NCU PCB Is the problem solved after replacing the NCU PCB ASSY Yes Replace the NCU PCB ASSY 7 Control panel PCB Is the problem solved after replacing the control panel PCB Yes Repl...

Страница 73: ...me setting to another value 3 Connection between main PCB and NCU PCB Are the main PCB and NCU PCB connected correctly No Reconnect the connector 4 Speaker Is the problem solved after replacing the speaker Yes Replace the Speaker 5 NCU PCB Is the problem solved after replacing the NCU PCB ASSY Yes Replace the NCU PCB ASSY 6 Main PCB Is the problem solved after replacing the main PCB ASSY Yes Repla...

Страница 74: ...4 Connection between main PCB and control panel PCB Are the main PCB and control panel PCB connected correctly No Reconnect the connector 5 NCU PCB Is the problem solved after replacing the NCU PCB ASSY Yes Replace the NCU PCB ASSY 6 Main PCB Is the problem solved after replacing the main PCB ASSY Yes Replace the main PCB ASSY Step Cause Check Result Remedy 1 Connection between main PCB and NCU PC...

Страница 75: ... Yes Replace the LCD 4 LVPS PCB failure Is the problem solved after replacing the LVPS PCB unit Yes Replace the LVPS PCB unit 5 Main PCB failure Is the problem solved after replacing the main PCB ASSY Yes Replace the main PCB ASSY Step Cause Check Result Remedy 1 Harness connection failure of the fan motor 60 ASSY Is the harness of the fan motor 60 ASSY connected correctly No Reconnect the harness...

Страница 76: ...e pickup roller holder ASSY 3 Roller holder ASSY failure Replace the roller holder ASSY 4 Main motor failure Replace the main motor 5 Main PCB failure Replace the main PCB ASSY Step Cause Remedy 1 New toner actuator does not operate smoothly or is catching Make sure correct movement of the new toner actuator 2 New toner actuator damaged Replace the new toner actuator 3 Main PCB failure Replace the...

Страница 77: ...dge yield is declared in accordance with ISO IEC 19752 Letter A4 WARNING Always turn off the power switch and unplug the power cord from the power outlet before accessing any parts inside the machine When opening the front cover or back cover to access any parts inside the machine never touch the shaded parts shown in the following figures Parts Name Approximate Life Toner Cartridge Starter cartri...

Страница 78: ...2 2 Confidential 2 PERIODICAL PEPLACEMENT PARTS There are no parts to be replaced periodically ...

Страница 79: ...c mat Also take care not to touch the conductor sections on the flat cables or on the wire harness When connecting or disconnecting cable connectors hold the connector body not the cables If the connector has a lock release the connector lock first to release it After a repair check not only the repaired portion but also all connectors Also check that other related portions are functioning properl...

Страница 80: ... 2 Confidential 2 PACKING Fig 3 1 Carton Pad Pad DEMO Insertion Set guide AC cord Line cord Option carton Printed panel cover Printed panel cover Printed panel cover Drum Toner assy Accessory bag Machine ...

Страница 81: ...x6 SR 1 0 8 0 1 8 1 ADF MOTOR Taptite bind B M3x6 1 0 8 0 1 8 1 DOCUMENT DRESS COVER Taptite cup B M3x8 1 0 5 0 1 5 1 CORD HOOK Taptite cup B M3x8 2 0 5 0 1 5 1 PANEL UNIT Taptite cup B M3x10 4 0 5 0 1 5 1 PRINTED PANEL COVER Taptite cup B M3x8 4 0 4 0 1 4 1 NCU SHIELD Taptite bind B M4x12 2 0 8 0 1 8 1 Screw pan S P washer M3 5x6 1 0 5 0 05 5 0 5 NCU PCB Taptite cup S M3x6 SR 2 0 5 0 1 5 1 SPEARK...

Страница 82: ...5 1 REGISTRATION REAR SENSOR PCB ASSY Taptite bind B M3x10 1 0 5 0 1 5 1 UNDER FG WIRE Taptite bind B M4x12 1 0 8 0 1 8 1 Taptite cup S M3x6 SR 1 0 8 0 05 8 0 5 DRIVE SUB ASSY Taptite cup S M3x6 SR 1 0 6 0 1 6 1 Taptite bind B M4x12 9 0 8 0 1 8 1 TONER SENSOR HARNESS ASSY Taptite bind B M3x10 1 0 5 0 1 5 1 REGISTRATION SOLENOID Taptite bind B M3x10 1 0 5 0 1 5 1 T1 SOLENOID Taptite bind B M3x10 1 ...

Страница 83: ... 25L 139L 2mm dia ball MOLYKOTE EM D110 Dow Corning Toray Separation pad ASSY 2mm dia ball BDX313 A Kanto Kasei Hinge ASSY L 2mm dia ball FLOIL GE 676 Kanto Kasei LF roller ASSY Ejection roller ASSY Drive frame ASSY 2mm dia ball BG2 EM2 BD2 GE2 DEV gear joint 53R BG2 2 places BG2 4 places BG2 2 places Drive sub ASSY BG2 KLOIL BG MU 2mm dia ball Drum gear 25L 139L BG2 4 places BG2 24 places ...

Страница 84: ...t to let lubricants touch the opposite side of the Separation pad ASSY EM2 MOLYKOTE EM D110 2mm dia ball BD2 BDX313 A 2mm dia ball EM2 MOLYKOTE EM D110 2mm dia ball CAUTION Be careful not to put lubricants on the surface through which papers are fed Hinge ASSY L BD2 8 places CAUTION Apply to all surfaces of part by the brush ...

Страница 85: ... Confidential Fig 3 4 GE2 2 places LF roller ASSY Conductive bushing Conductive bushing Ejection roller ASSY Drive frame ASSY GE2 1 place GE2 1 place GE2 2 places GE2 2 places GE2 FLOIL GE 676 2mm dia ball ...

Страница 86: ...AR 17 LU2016001 EJECTOR GEAR 15 25 LU2018001 EJECTOR GEAR 26 LU2017001 FUSER GEAR 22 37 LU2015001 DEV GEAR 17 33L LU2054001 REGISTRATION GEAR 27 PENDULUM LU2048001 REGISTRATION DIFFERENTIAL GEAR ASSY LU2049001 FEEDER GEAR 17 22 LU2043001 FEEDER GEAR 26 20 LU2042001 DEV GEAR 17 18R 47R LU2053001 REGISTRATION GEAR 19 LU2047001 P P GEAR 29 SECTOR LU2045001 T1 GEAR 38 31 SECTOR LU2044001 is part code ...

Страница 87: ...3 9 Confidential 6 HARNESS ROUTING 1 ADF motor ADF sensor PCB ASSY to Main PCB ASSY Main PCB Shield plate ADF sensor PCB ASSY Main PCB ASSY Back Side ADF motor ...

Страница 88: ...NCU PCB Battery ASSY Speaker unit ASSY to MAIN PCB ASSY 3 Document scanner unit Panel PCB ASSY NCU PCB Speaker unit ASSY Battery ASSY Main PCB ASSY Panel PCB ASSY Main shield cover plate Main PCB ASSY Document scanner unit ...

Страница 89: ...3 11 Confidential 4 FUSER UNIT 5 FG HARNESS PS PCB unit Fuser unit Eject sensor PCB ASSY Laser unit FG harness Main PCB ASSY Left side Back side ...

Страница 90: ...ONT SENSOR PCB ASSY REGISTRATION REAR SENSOR PCB ASSY Front cover sensor PS PCB unit SW holder Inlet harness ASSY Toner LED PCB ASSY Fan motor 60 unit PS PCB unit Toner LED PCB ASSY Wireless LAN PCB ASSY only MFC7840W Main PCB ASSY Main Frame L ASSY Back side Right side Registration rear sensor PCB ASSY Registration front sensor PCB ASSY ...

Страница 91: ...3 13 Confidential 8 TONER SENSOR PCB UNIT ASSY NEW TONER SENSOR HARNESS ASSY Toner sensor PCB unit ASSY New toner sensor harness ASSY Main PCB ASSY Left side Front side ...

Страница 92: ...H VOLTAGE PS PCB REGISTRATION SOLENOID T1 SOLENOID High voltage PS PCB ASSY T1 solenoid Registration solenoid Drive sub ASSY T1 solenoid Registration solenoid Left side Left side Front side Bottom side Bottom side Bottom side ...

Страница 93: ...OR 60 UNIT 10s 10s WIRELESS PCB ASSY 40s 40s PS PCB UNIT LVPS 20s 20s LV SHIELD PLATE 15s 15s REGISTRATION FRONT PCB ASSY SIDE COVER L ASSY 15s 15s CORNER COVER 15s 15s REGISTRATION REAR PCB ASSY RUBBER FOOT 05s 05s 30s 30s SCANNER UNIT 05s 05s BUSH R BUSH L 10s 10s EJECT ROLLER ASSY 2 10s 10s NEW TONER SENSOR 10s 10s TONER LED PCB ASSY LED HOLDER NCU PCB 20s 20s ADF UNIT 40s 45s MAIN PCB ASSY 25s...

Страница 94: ... the AC cord the modular jack of the telephone line the USB cable if connected the LAN cable if connected the modular jack of the external telephone set if connected 2 Remove the Paper tray the Toner cartridge and Drum unit Fig 3 7 Paper tray unit AC cord Telephone line cord USB I F cable LAN cable Drum Toner unit ...

Страница 95: ...on pad ASSY 2 Release the Boss to remove the Separation pad ASSY from the Paper tray unit 3 Remove the Separation pad spring from the Paper tray unit Fig 3 8 Separation pad ASSY Paper tray ASSY Paper tray ASSY 1 2b 2a 2a Boss Separation pad spring Paper tray ASSY 3 ...

Страница 96: ...Confidential 8 2 FRONT COVER ASSY 8 2 1 FRONT COVER ASSY 1 Open the Front cover ASSY 2 Release the Hook to remove the DEV joint link from the Front cover ASSY Fig 3 9 Front cover ASSY DEV joint link 1 Hook 2 ...

Страница 97: ...r top 4 Remove the Boss of the Front chute ASSY and then remove the Front cover ASSY from the Main body Fig 3 10 3a 3b 4a Boss Front chute ASSY Front cover top Hook Front cover ASSY Front cover top Front cover ASSY Front chute ASSY Boss Front chute ASSY Boss Front chute ASSY 4a 4b ...

Страница 98: ...Boss to remove the Paper stopper L from the Front cover ASSY 2 Release the Boss to remove the Paper stopper S from the Paper stopper L Fig 3 11 Front cover ASSY Paper stopper S Paper stopper S Paper stopper L Paper stopper L Paper stopper L 1a 1c 2a 2a 2b 1b 1b Boss Boss ...

Страница 99: ... Release the Boss of the Outer chute ASSY from the Back cover 3 Release the Hook from the Side cover R ASSY 4 Slide the Back cover from the Main body and remove it Fig 3 12 Boss Back cover Back cover Hook Boss Boss Side cover R ASSY Back cover Boss Outer chute ASSY Outer chute ASSY 1 2 3 2 4 ...

Страница 100: ...ntial 8 3 2 OUTER CHUTE ASSY 1 Release the Boss to remove the Outer chute ASSY from the Main body Fig 3 13 Boss Fuser cover ASSY Boss Fuser cover ASSY Outer chute ASSY Outer chute ASSY Outer chute ASSY 1a 1a 1a 1b ...

Страница 101: ... 23 Confidential 8 4 FUSER COVER ASSY 8 4 1 FUSER COVER ASSY 1 Pull down the Fuser cover ASSY 2 Remove the Fuser cover ASSY from the Main body Fig 3 14 Boss Boss Fuser cover ASSY Fuser cover ASSY 2 2 2 1 ...

Страница 102: ...Hook to slide the Eject actuator and then remove the Eject actuator from the Fuser cover ASSY 2 Remove the Eject actuator spring from the Eject actuator Fig 3 15 1a 1b 1c 2 Eject actuator Eject actuator Eject actuator Fuser cover ASSY Hook Eject actuator spring 1a 1a 1a 1b 1b ...

Страница 103: ...the Bush C from the Fuser cover ASSY 2 Remove the Eject roller ASSY 1 from the Fuser cover ASSY Fig 3 16 3 Remove the Bush C the Bush R and the Bush L from the Eject roller ASSY 1 Fig 3 17 Eject roller ASSY 1 Bush C Hook Fuser cover ASSY Boss Boss Bush L Bush R Bush C Eject roller ASSY 1 ...

Страница 104: ...nfidential 8 5 JOINT COVER SUB CHUTE ASSY 1 Remove the two Taptite bind B M4x12 screws and then remove the Joint cover sub chute ASSY from the Main body Fig 3 18 Taptite bind B M4x12 Joint cover sub chute ASSY ...

Страница 105: ...3 27 Confidential 8 6 INNER CHUTE ASSY 1 Remove the two Taptite bind B M4x12 screws and then remove the Inner chute ASSY from the Main body Fig 3 19 Taptite bind B M4x12 Inner chute ASSY ...

Страница 106: ...e Connector Fig 3 20 CAUTION Pull out the Connector from the Housing part of the Main body left side 2 Disconnect the two Connectors from the Eject sensor PCB ASSY Fig 3 21 Fuser unit Connector Housing part Fuser unit Eject sensor PCB ASSY Connector ...

Страница 107: ...3 29 Confidential 3 Remove the two Taptite pan B M4x14 screws and then remove the Fuser unit from the Main body Fig 3 22 Taptite pan B M4x14 Fuser unit ...

Страница 108: ...3 30 Confidential 8 8 CORNER COVER 1 Remove the Taptite bind B M4x12 screw 2 Release the Hook to remove the Corner cover from the Main body Fig 3 23 Corner cover Hook Taptite bind B M4x12 ...

Страница 109: ... SIDE COVER SUB L 8 9 1 SIDE COVER L ASSY 1 Remove the two Taptite bind B M4x12 screws 2 Release the Hook to remove Side cover L ASSY from the Main body Fig 3 24 Side cover L ASSY Taptite bind B M4x12 Taptite bind B M4x12 Hook Hook Hook Hook ...

Страница 110: ...D COVER PLATE 1 Remove the two Taptite cup S M3x6 SR screws and then remove the two FG harness from the Main body 2 Remove the Taptite cup S M3x6 SR screw and then remove the Main shield cover plate from the Main body Fig 3 26 Taptite bind B M4x12 Side cover sub L Hook Hook Side cover L Taptite cup S M3x6 SR Taptite cup S M3x6 SR FG harness ADF FG harness FB Main shield cover plate ...

Страница 111: ...3 33 Confidential 8 11 ADF UNIT 8 11 1 ADF UNIT 1 Remove the two Connectors from the Main PCB ASSY Fig 3 27 Connector Main PCB ASSY Back Side ...

Страница 112: ...ADF unit 3 Remove the Taptite bind B M4x12 screw from the Hinge ASSY L 4 Release the Hook of the Hinge R to remove the ADF unit from the Main body Fig 3 28 Scanner unit Hook Hinge ASSY L Hinge R ADF unit 2 4 4 Taptite bind B M4x12 ...

Страница 113: ...ite bind B M4x12 screw and then remove the Hinge arm from the ADF unit 3 Remove the two Taptite cup B M3x10 screws and the Taptite cup S M3x12 screw and then remove the Hinge ASSY L from the ADF unit Fig 3 29 Hinge ASSY L Hinge arm Hinge R ADF unit Taptite bind B M4x12 Taptite cup B M3x10 Taptite cup S M3x12 1 2 3 ...

Страница 114: ...over from the ADF unit Fig 3 30 8 11 4 GEAR COVER 1 Release the Hook to remove the Gear cover from the ADF unit Fig 3 31 ADF unit ADF cover ADF cover ADF cover ADF unit ADF unit Boss Boss Boss Boss 1 2b 2a 2a 2a 2a 2a 2a 2a ADF unit ADF unit Gear cover Gear cover Hook Hook Hook Back side 1a 1b 1c 1a ...

Страница 115: ... ROLLER SHAFT ASSY 1 Remove the Separator roller shaft ASSY from the ADF unit 2 Remove the Separator roller bushing from the Separator roller shaft ASSY Fig 3 32 Separator roller shaft ASSY Rib ADF unit Separator roller bushing 1a 1b 1c 1d 2 1a ...

Страница 116: ...PER DOCUMENT CHUTE ASSY 1 Remove the four Taptite cup B M3x10 screws 2 Release the Hook to remove the Upper document chute ASSY from the ADF unit Fig 3 33 Upper document chute ASSY ADF unit Taptite cup B M3x10 Hook Hook Hook Hook ...

Страница 117: ...the Hook to remove the ADF plate spring and the Separation rubber ASSY from the Upper document chute ASSY Fig 3 34 Separation rubber ASSY ADF plate spring ADF plate spring Separation rubber ASSY Upper document chute ASSY 3c 3b 3a ...

Страница 118: ...HUTE ASSY 1 Remove the two Taptite cup B M3x10 screws and then remove the Lower document chute ASSY from the Document cover sub ASSY Fig 3 35 Lower document chute ASSY Taptite cup B M3x10 Rib Document cover sub ASSY Rib Taptite cup B M3x10 Rib ...

Страница 119: ...the Document front actuator from the Lower document chute ASSY 3 Pull the Hook to slide the Document rear actuator 4 Remove the Document rear actuator from the Lower document chute ASSY Fig 3 36 Document front actuator Document rear actuator Lower document chute ASSY Hook Hook 1a 1b 2 3a 3b 4 1a 1b 2 3a 3b 4 ...

Страница 120: ... Hook to remove the ADF sensor PCB ASSY from the Lower document chute ASSY 6 Disconnect the Connector from the ADF sensor PCB ASSY Fig 3 37 Connector ADF sensor PCB ASSY Lower document chute ASSY Hook Hook 6 5c 5a 5a 5b 6 5c 5a 5a 5b ...

Страница 121: ...emove the LF roller bushing from the Lower document chute ASSY 2 Remove the LF roller ASSY from the Lower document chute ASSY Fig 3 38 CAUTION Be careful not to get grease on the roller LF roller ASSY LF roller bushing Lower document chute ASSY Hook 1a 1a 1b 2a 2b ...

Страница 122: ...er bushing and then slide the Ejection roller ASSY to remove the Ejection roller ASSY from the Lower document chute ASSY Fig 3 39 CAUTION Be careful not to get grease on the roller Ejection roller ASSY Lower document chute ASSY Ejection roller bushing Hook Hook Hook 1a 1a 1b 1c 1d 1a 1a ...

Страница 123: ... Taptite cup B M3x10 screws and then remove the Drive frame ASSY from the Lower document chute ASSY 3 Remove the Harness holder from the Lower document chute ASSY Fig 3 40 Drive frame ASSY Lower document chute ASSY Lower document chute ASSY FG harness ADF harness unit ADF harness unit Taptite cup B M3x10 Harness holder Taptite cup S M3x6 SR Harness holder 1 2 3 3 3 ...

Страница 124: ...he Taptite bind S M3x6 screw and then remove the ADF motor from the Drive frame ASSY 2 Remove the ADF harness unit from the ADF motor Fig 3 41 Drive frame ASSY Drive frame ASSY ADF motor ADF harness unit ADF motor Hook Taptite bind S M3x6 1a 1b 2 ...

Страница 125: ...2 Remove the two Pressure rollers from the Pressure roller shaft 3 Remove the Pressure roller spring from the Document cover sub ASSY Fig 3 42 CAUTION Be careful not to get grease on the roller Document cover sub ASSY Pressure roller Pressure roller shaft Pressure roller Hook Pressure roller spring Pressure roller ASSY 1b 1a 2 2 1c 3 ...

Страница 126: ...48 Confidential 8 11 14DOCUMENT STOPPER 1 Open the Document stopper 2 Release the Boss to remove the Document stopper from the Document dress cover Fig 3 43 Boss Document dress cover Document stopper 1 2 ...

Страница 127: ... 2 Release the Boss of the Document dress cover from the Document cover sub ASSY 3 Release the Hook to remove the Document dress cover from the Document cover sub ASSY Fig 3 44 Hook Hook Hook Boss Taptite cup B M3x8 2 3 3 3 3 3 3 3 3 Document dress cover Document cover sub ASSY ...

Страница 128: ...s and FFC from the Main PCB ASSY Fig 3 45 Note After disconnecting the flat cable s check that each cable is not damaged at its end or short circuited When connecting the flat cable s do not insert it at an angle After insertion check that the cable is not at an angle Connector FFC Main PCB ASSY Back side ...

Страница 129: ...ull arm L and the Pull arm R from the Boss of the Document scanner unit 4 Remove the Document scanner unit from the Main body Fig 3 46 2 3a 3b 3b 3a 3a 3a 4b 4b Document scanner unit Scanner unit Document scanner unit Pull arm R Pull arm L Boss Boss 4a 4a 3a 3a 3a 3a ...

Страница 130: ... PANEL UNIT 1 Remove the four Taptite cup B M3x10 screws 2 Release the Hook to remove the Panel unit from the Document scanner unit 3 Disconnect the connector from the Panel PCB ASSY Fig 3 48 Document scanner unit Cord hook Cord hook Taptite cup B M3x8 Document scanner unit Connector Panel unit Hook Hook Taptite cup B M3x10 Taptite cup B M3x10 2 3 Bottom side ...

Страница 131: ...the flat cable s check that each cable is not damaged at its end or short circuited When connecting the flat cable s do not insert it at an angle After insertion check that the cable is not at an angle 8 12 5 RUBBER KEYS L R 1 Remove the Rubber keys R and the Rubber keys L from the Panel unit Fig 3 50 Panel PCB ASSY Panel PCB ASSY Lock Panel unit Hook FFC FFC 1 2 Rubber keys L Rubber keys R Panel ...

Страница 132: ...om the Panel unit 3 Remove the LCD from the Panel unit Fig 3 51 8 12 7 PANEL DRESS COVER 1 Remove the four Taptite cup B M3x8 screws and then remove the Panel dress cover from the Panel unit Fig 3 52 Diffusion film Hook Back light guide Panel unit LCD 1a 1a 3 2 1b Panel dress cover Panel unit Taptite cup B M3x8 Taptite cup B M3x8 ...

Страница 133: ...3 55 Confidential 8 12 8 ADDRESS LABEL 1 Remove the Address label from the Panel unit Fig 3 53 Address label Panel unit ...

Страница 134: ... L and the Pull arm L from the Joint cover 2 Remove the Pull arm spring ADF R and the Pull arm R from the Joint cover Fig 3 54 Joint cover Pull arm R Pull arm spring ADF R Pull arm spring ADF L Pull arm L Pull arm R Pull arm spring ADF R Pull arm spring ADF L Pull arm L ...

Страница 135: ... Confidential 8 14 PULL ARM GUIDE 1 Remove the two Lock claws to remove the two Pull arm guides from the Joint cover Fig 3 55 Joint cover Pull arm Guide Pull arm Guide Lock claw Lock claw 1a 1a 1b 1b 1b 1b ...

Страница 136: ...oint cover Fig 3 56 3 Turn over the NCU housing 4 Remove the two Taptite cup S M3x6 SR screws and then remove the NCU PCB from the NCU housing 5 Disconnect the Connector from the NCU PCB and then pull out the Connector from the NCU housing Fig 3 57 NCU shield FG harness 1 2 Joint cover Taptite bind B M4x12 Taptite bind B M4x12 Screw pan S P washer M3 5x6 NCU housing NCU PCB 4 3 5a 5b Connector Tap...

Страница 137: ...3 59 Confidential 8 16 SPEAKER UNIT 1 Disconnect the Connector of the Speaker unit from the Main PCB ASSY Fig 3 58 Connector Main PCB ASSY ...

Страница 138: ...peaker cover from the Joint cover 3 Release the Hook to remove the Speaker hold spring from the Joint cover 4 Remove the Speaker unit from the Joint cover Fig 3 59 Taptite bind B M4x12 Speaker cover Speaker hold spring Speaker hold spring Hook Speaker unit Joint cover 2 4 3b 3a 3a ...

Страница 139: ... from the Joint cover Fig 3 60 CAUTION There is a danger of explosion if the battery is incorrectly replaced Do not disassemble or recharge the battery Do not dispose of the battery in fire Used batteries should be disposed of according to the local regulations Battery ASSY Joint cover Connector ...

Страница 140: ...IDE COVER R ASSY 1 Remove the two Taptite bind B M4x12 screws 2 Release the Hook to remove the Side cover R ASSY from the Main body Fig 3 61 Hook Hook Hook Taptite bind B M4x12 Taptite bind B M4x12 Side cover R ASSY Hook Hook ...

Страница 141: ...3 63 Confidential 8 19 REGISTRATION GROUNDING SPRING 1 Remove the Registration grounding spring from the Main body Fig 3 62 Registration grounding spring Left side ...

Страница 142: ...2 Press the Rib of the Paper feed frame then slide the Separation R shaft bush 3 Remove the Roller holder ASSY from the Main body Fig 3 63 Roller holder ASSY Roller holder ASSY Separation R shaft bush Paper feed frame ASSY Boss Rib Paper feed frame ASSY Link arm 1a 1b 2b 2b 1a 2a 2a 1b 2b 2b Bottom side 3 ...

Страница 143: ...mbling method referring to the figure below Fig 3 64 CAUTION When the Separation R shaft bush does not slide across correctly place the Rib of the Bush 6 while aligning with the Groove of the Main body shaft hole from the Main frame L ASSY side Groove Rib Bush 6 Separation R shaft bush b a b Bottom side ...

Страница 144: ...Y only MFC7840W 1 Disconnect the Connector from the Wireless LAN PCB ASSY 2 Release the Hook to remove the Wireless LAN PCB ASSY from the Main body Fig 3 65 Connector Hook Wireless LAN PCB ASSY Wireless LAN PCB ASSY Hook 1a 2a 1 1a 2b Right side ...

Страница 145: ... When connecting the flat cable s do not insert it at an angle After insertion check that the cable is not at an angle Assembling Note If the FG harness ASSY which comes from the Laser unit is not connected the Laser unit may break down or not function correctly Replacement Main PCB Note When replace the main PCB the function of the I FAX disappears Contact the customer to download the I FAX again...

Страница 146: ...he five Taptite bind B M4x12 screws 2 Release the Hook to remove the Joint cover ASSY from the Main body Fig 3 67 Taptite bind B M4x12 Taptite bind B M4x12 Taptite bind B M4x12 Hook Hook Hook Taptite bind B M4x12 Taptite bind B M4x12 Hook Joint cover 2a 2b Front side ...

Страница 147: ...t cover ASSY Fig 3 68 8 24 EJECT ROLLER ASSY 2 1 Remove the Eject roller ASSY 2 from the Joint cover ASSY 2 Remove the Bush R and the Bush L from the Eject roller ASSY 2 Fig 3 69 Joint cover Paper supporter Boss Eject roller ASSY 2 Bottom side Bush L Bush R Joint cover 2a 1 2b 2b 1 ...

Страница 148: ...screws and the two Taptite bind B M4x12 screws 3 Release the Hook to remove the High voltage PS PCB ASSY from the Drive sub ASSY Fig 3 70 Note There are procedures for disassembling Main frame L ASSY after this procedure 8 40 MAIN FRAME L ASSY High voltage PS PCB ASSY Drive sub ASSY Hook Taptite bind B M4x12 Taptite cup S M3x6 SR Connector 3 1 Left side ...

Страница 149: ... 1 Release the Hook to remove the New toner sensor harness ASSY from the Main body Fig 3 71 CAUTION Be careful not to damage the Hook of the New toner sensor harness ASSY New toner sensor harness ASSY New toner sensor harness ASSY Hook 1b 1a 1a Left side ...

Страница 150: ...3 72 Confidential 8 27 FILTER ASSY 1 Remove the Filter ASSY from the Main body Fig 3 72 Filter ASSY Front side ...

Страница 151: ...he Taptite pan S P washer S M3x8 screw and then remove the Laser unit from the Main body Memo Ensure when you remove the Laser unit that the DEV joint link is pulled out Fig 3 73 Taptite cup S M3x6 SR Taptite cup S M3x6 SR DEV joint link Laser unit Taptite pan S P washer S M3x8 Right side ...

Страница 152: ...l attached on the Drive sub ASSY with the new one supplied with a new Laser unit If an extra Serial label is supplied with a new unit as spare Make sure to throw the spare label away after replacing the Laser unit it is necessary to input the new Laser unit characteristics information Refer to 3 IF YOU REPLACE THE LASER UNIT in Chapter 4 Fig 3 75 Air duct Laser unit FG harness ASSY Taptite cup S M...

Страница 153: ...OTOR 60 UNIT 1 Disconnect the Connector from the Toner LED PCB ASSY 2 Remove the Fan motor 60 unit from the Main body Fig 3 76 Assembling Note When assembling the Fan motor 60 unit place it so that the attached Label faces outwards Fan motor 60 unit Label Connector Toner LED PCB ASSY 2 1 Right side ...

Страница 154: ... Hook to remove the Cover sensor harness ASSY from the Main body Fig 3 77 CAUTION When removing the Cover sensor harness ASSY remove it as shown in the direction of the allow 2b Be careful not to damage the Hook Hook Connector Toner LED PCB ASSY Cover sensor harness ASSY Cover sensor harness ASSY 2a 2a 1a 2b Right side ...

Страница 155: ...ner LED PCB ASSY 2 Release the Hook to remove the Toner LED PCB ASSY from the Main body Fig 3 78 3 Release the Hook to remove the LED holder from the Toner LED PCB ASSY Fig 3 79 Hook Connector Toner LED PCB ASSY Connector 1a 2b 2a 1 1 1 2a 1 1 1 Right side Hook Toner LED PCB ASSY LED holder ...

Страница 156: ...M3 5x6 screw and the two Taptite cup S M3x6 SR screws and then remove the LV shield plate cover and the LV insulation sheet from the LV Shield plate 2 Fig 3 80 Taptite cup S M3x6 SR Taptite cup S M3x6 SR Taptite pan S P washer M3 5x6 LV shield plate cover LV insulation sheet Right side ...

Страница 157: ... from the Main body 5 Remove the two Taptite cup S M3x6 SR screws and then remove the LVPS PCB unit from the LV shield plate 2 6 Remove the two Edge holder 3 from the LV shield plate 2 7 Disconnect the Connector from the LVPS PCB unit Fig 3 81 Taptite pan S P washer M3 5x6 Taptite bind B M4x12 Taptite flat B M3x10 Inlet harness ASSY FG harness ASSY Inlet harness ASSY LV shield plate 2 SW holder LV...

Страница 158: ... PLATE 2 1 Remove the two Taptite bind B M4x12 screws and the two Taptite cup S M3x6 SR screws and then remove the LV shield plate 2 Fig 3 82 Taptite cup S M3x6 SR Taptite cup S M3x6 SR Taptite bind B M4x12 LV shield plate 2 Right side ...

Страница 159: ...EGISTRATION FRONT SENSOR PCB ASSY 1 Remove the Harness of the Registration front sensor PCB ASSY and the Registration rear sensor PCB ASSY from the Guide part of the Main body Fig 3 83 Harness Guide part Right side Front side ...

Страница 160: ...3 82 Confidential 2 Remove the two Taptite bind B M3x10 screws and then remove the Actuator holder ASSY from the Main body Fig 3 84 Actuator holder ASSY Taptite bind B M3x10 Bottom side ...

Страница 161: ...90 degrees in the direction of counterclockwise as the arrow 4 shown below 5 Slide the Registration front actuator to remove the Registration front actuator from the Actuator holder ASSY Fig 3 85 5d 3 5a 4 3 Registration front actuator Hook part Registration front actuator Actuator holder ASSY Registration actuator spring ...

Страница 162: ...he Edge actuator from the Actuator holder ASSY Fig 3 86 8 Remove the Taptite bind B M3x10 screw and then remove the Registration front sensor PCB ASSY from the Actuator holder ASSY Fig 3 87 Edge actuator Edge actuator spring Edge actuator Actuator holder ASSY Hook 7c 7b 7a 6 Taptite bind B M3x10 Registration front sensor PCB ASSY Actuator holder ASSY ...

Страница 163: ...85 Confidential 8 32 REGISTRATION REAR SENSOR PCB ASSY 1 Remove the Harness of the Registration rear sensor PCB ASSY from the Guide part of the Main body Fig 3 88 Harness Guide part Right side Front side ...

Страница 164: ...3 86 Confidential 2 Remove the two Taptite bind B M3x10 screws and then remove the Rear actuator holder ASSY from the Main body Fig 3 89 Rear actuator holder ASSY Taptite bind B M3x10 Bottom side ...

Страница 165: ...r from the Rear actuator holder ASSY Fig 3 90 6 Remove the Taptite bind B M3x10 screw and then remove the Registration rear sensor PCB ASSY from the Rear actuator holder ASSY Fig 3 91 5b 5a 4 5a Rear actuator holder ASSY Actuator spring rear Registration actuator rear Registration actuator rear Hook part 3 Taptite bind B M3x10 Rear actuator holder ASSY Registration rear sensor PCB ASSY ...

Страница 166: ...SUB ASSY 1 Remove the Taptite cup S M3x6 SR screw and the Taptite bind B M4x12 screw and then remove the Under FG wire from the Main body Fig 3 92 Main frame L ASSY Taptite cup S M3x6 SR Taptite bind B M4x12 Under FG wire Left side ...

Страница 167: ...SY from the Main body Fig 3 93 CAUTION When removing the Drive sub ASSY Ensure the left side of the Main body is at the top as shown in the above figure because there is the risk of the gears falling off Taptite bind B M4x12 Taptite bind B M4x12 Taptite bind B M4x12 Taptite cup S M3x6 SR Taptite bind B M4x12 Drive sub ASSY Left side ...

Страница 168: ... DEV joint and the DEV joint spring from the DEV gear joint 53R 2 Remove the DEV gear joint 53R from the Drive sub ASSY 3 Remove the Registration pendulum gear spring from the Drive sub ASSY Fig 3 94 DEV gear joint 53R Registration pendulum gear spring DEV joint spring DEV joint Drive sub ASSY 1 2 3 ...

Страница 169: ...3 91 Confidential 8 35 THERMISTOR HARNESS UNIT 1 Remove the Thermistor harness unit from the Main body Fig 3 95 Thermistor harness unit Left side ...

Страница 170: ...ew and then remove the Link stopper and the Toner sensor PCB unit ASSY from the Main body 2 Remove the PT sensor holder from the Toner sensor PCB unit ASSY Fig 3 96 1 2 Toner sensor PCB unit ASSY Link stopper Taptite bind B M3x10 PT sensor holder Toner sensor PCB unit ASSY Left side Hook ...

Страница 171: ...y 3 Release the Hook to remove the Registration gear 25 terminal from the Main body 4 Remove the Registration differential gear ASSY from the Main body Fig 3 97 CAUTION Be careful as the inside gear of the Registration differential gear ASSY is easy to fall out Registration gear 25 terminal Hook Registration differential gear ASSY T1 sector gear spring T1 gear 38 31 sector 1 2 3a 4a 2 3 3 4 Left s...

Страница 172: ...de part of the Main body 7 Remove the Taptite bind B M3x10 screw and then remove the Registration solenoid from the Main body 8 Remove the Registration solenoid lever from the Registration solenoid Fig 3 98 Left side 6 7 5 8 5 Hook Registration solenoid lever Registration solenoid Taptite bind B M3x10 Registration solenoid lever spring Harness Guide part ...

Страница 173: ...move the Harness from the Guide part of the Main body 3 Remove the Taptite bind B M3x10 screw and then remove the T1 solenoid from the Main body 4 Remove the T1 solenoid lever from the T1 solenoid Fig 3 99 T1 solenoid lever T1 solenoid lever spring T1 solenoid Hook Taptite bind B M3x10 Harness Guide part 1 3 3 4 2 Left side ...

Страница 174: ...al 8 38 MAIN SHIELD PLATE EJECT SENSOR PCB ASSY 1 Remove the three Taptite bind B M3x10 screws and then remove the FU front paper guide from the Main body Fig 3 100 Taptite bind B M3x10 FU front paper guide Back side ...

Страница 175: ... 97 Confidential 2 Remove the two Taptite cup S M3x6 SR screws and then remove the Chute ground plate from the Main body Fig 3 101 Taptite cup S M3x6 SR Taptite cup S M3x6 SR Chute ground plate Back side ...

Страница 176: ...eet from the Main shield plate 4 Remove the three Taptite bind B M4x12 screws and then remove the Main shield plate from the Main body Fig 3 102 Taptite bind B M4x12 Taptite bind B M4x12 Main shield plate Main PCB sheet 3 4 Left side Left side ...

Страница 177: ...3 99 Confidential 5 Release the Hook to remove the Eject sensor PCB ASSY from the Main body Fig 3 103 Eject sensor PCB ASSY Hook Left side Left side ...

Страница 178: ...3 100 Confidential 8 39 RUBBER FOOT 1 Remove the two Rubber feet from the Main body Fig 3 104 Rubber foot Front side ...

Страница 179: ... bind B M3x10 screws and then remove the FU front paper guide from the Main body Fig 3 105 Note The procedure for disassembling the Main frame L ASSY as mentioned after 8 25 HIGH VOLTAGE PS PCB ASSY is described below Taptite bind B M3x10 FU front paper guide Back side ...

Страница 180: ...3 102 Confidential 2 Remove the two Taptite cup S M3x6 SR screws and then remove the Chute ground plate from the Main body Fig 3 106 Taptite cup S M3x6 SR Chute ground plate Back side ...

Страница 181: ...l 3 Release the Hook to remove the Registration gear 25 terminal the two Feeder gear 17 terminals and the Bush 6 Fig 3 107 Registration gear 25 terminal Bush 6 Feeder gear 17 terminal Hook 3a 3b 3c 3b 3c 3d 3a Left side ...

Страница 182: ... Remove the Taptite cup S M3x6 SR screw and the Taptite bind B M4x12 screw and then remove the Under FG wire from the Main body Fig 3 108 Main frame L ASSY Taptite cup S M3x6 SR Taptite bind B M4x12 Under FG wire Left side ...

Страница 183: ... from the Main body Memo Ensure you remove the Main frame L ASSY with the DEV joint link pulled out as shown Fig 3 109 Taptite bind B M4x12 Taptite cup S M3x6 SR Upper surface of Main frame L ASSY Drive sub ASSY Main frame L ASSY Taptite bind B M4x12 Taptite bind B M4x12 Taptite cup S M3x6 SR Taptite bind B M4x12 Taptite bind B M4x12 Left side ...

Страница 184: ...d value of the laser scanner Setting the toner cartridge type Backup to the Main PCB of the Wireless LAN PCB Information MFC7840W only What you need to prepare 1 Computer Windows XP or later Create folder for example ALL2 folder on the C drive 2 Firmware 3 Maintenance Tool MAINTE zip Copy it into the ALL2 folder that has been created on the C drive Extract the copied file and run brmainte exe file...

Страница 185: ...rried out for the PC no more driver installations will be required for that PC to identify machines If BHL2 Maintenance Driver is already installed to your PC fully uninstall the BHL2 Maintenance Driver before installing Brother Maintenance USB Printer Driver 1 Check that the power switch of the machine is turned off Disconnect the USB cable that connects the machine with PC 2 Turn on your PC and ...

Страница 186: ...mes Click Continue Anyway to proceed 7 If the device driver is successfully installed the following message screen appears Click Finish to return 8 Connect the machine to your PC using the USB cable 9 Select Install the software automatically Recommended and click Next ...

Страница 187: ...ial 10 An alert warning message of WHQL appears Click Continue Anyway to proceed 11 If the Brother Maintenance USB Printer driver is successfully installed the following message screen appears Click Finish to return ...

Страница 188: ...n four times to make the machine enter the maintenance mode Refer to 1 1 How to Enter the Maintenance Mode in Chapter 5 TIP FAX models equipped with numerical keypads can enter the maintenance mode in the same way as conventional models that is by pressing the Menu 2 8 6 and 4 buttons in this sequence 2 Connect the computer to the machine with the USB cable 3 Double click the FILEDG32 EXE to start...

Страница 189: ...E icon to start Make sure that there is the printer icon of the connected machine and that no error occurs 6 Click the Brother Maintenance USB printer driver in FILEDG32 to select 7 Drag the firmware LZXXXX_ upd in the same folder and drop it onto the icon of the Brother maintenance USB printer driver in FILEDG32 The firmware files are sent to the machine and they are written into the flash ROM au...

Страница 190: ...e Code 13 Refer to 1 4 8 Operational Check of Control Panel Button Function code 13 in Chapter 5 and perform the operational check of control panel PCB Operational Check of Sensors Maintenance Mode Code 32 Refer to 1 4 10 Operational Check of Sensors Function code 32 in Chapter 5 and perform the operational check of sensors Acquisition of White Level Data and Set the CIS Scanner Area Maintenance M...

Страница 191: ...al No in the lower box Enter the serial number the last nine digits of the machine into the box at the right hand side and click the OK button The serial number is shown in the window and check that it is correct CAUTION Refer to APPENDIX 3 to know how to read the serial number of the machine ...

Страница 192: ...pplicable model name 2 Select Adjust Scanner from Menu 3 Check the port USB that the machine is connected through 4 Enter the figures the last four digits shown on the label attached on the chassis at the right hand side of the main PCB into the box at the right hand side 5 Click the OK button Fig 4 1 Serial label Drive sub ASSY Drive sub ASSY Serial label Serial label Laser unit 2 to 10mm ...

Страница 193: ...et more than two types of the toner cartridge If selecting more than two types the NG message is displayed 2 Check ON in the check box at the right hand side Click the OK button All of the settings are completed Turn off the power supply of the machine Backup to the Main PCB of the Wireless LAN PCB Information MFC7840W only 1 Turn the power supply of the machine on while pressing the and OK button...

Страница 194: ... EEPROM on the wireless LAN PCB It is necessary to write the information of EEPROM on the wireless LAN PCB 1 Turn the power supply of the machine on while pressing the and OK button at the same time Hold on the and OK button while pressing it PLEASE WAIT is displayed on the LCD When continue pressing the and OK button CHECK START is displayed on the LCD AT this time release the two buttons 2 After...

Страница 195: ...the provided the new laser unit Fig 4 2 1 Double click the brmainte EXE file maintenance utility 2 Select Input Information from Menu Select the applicable model name 3 Check the port USB that the machine is connected through 4 Select Adjust Scanner from Menu Enter the serial number the last four digits which is affixed to chassis of the right side of the Main PCB into the box on the right hand si...

Страница 196: ...How to Enter the Maintenance Mode in Chapter 5 2 MFC 7840W 7840N 7450 7440N 7340 7320 Press the 5 button twice DCP 7045N 7040 7030 Press the or button several times MAINTENANCE 55 appears on the LCD and then press the OK button Press START appears on the LCD 3 Press the Start button The white level data will be acquired automatically 4 If the procedure is completed the machine will automatically r...

Страница 197: ...he LCD Then press the OK button and the machine returns to the standby state Pressing the Stop Exit button after entering only one digit restores the machine to the initial stage of the maintenance mode If an invalid function code is entered the machine beeps for one second and returns to the initial stage of the maintenance mode 1 2 How to Enter the End User accessible Maintenance Mode The mainte...

Страница 198: ...5 ROM Version Check 1 4 9 5 15 32 Operational Check of Sensors 1 4 10 5 16 43 PC print function setting PCL PS 1 4 11 5 18 53 Received Data Transfer Function 1 4 12 5 22 54 Fine Adjustment of Scan Start End Positions 1 4 13 5 24 55 Acquisition of White Level Data 1 4 14 5 26 67 Paper Feeding and Ejecting Test 1 4 15 5 26 74 EEPROM Customizing 1 4 16 5 27 78 Operational Check of Fans 1 4 17 5 29 80...

Страница 199: ...045N 7040 7030 Press the or button MAINTENANCE 01 or MAINTENANCE 91 appears on the LCD and then press the OK button The PARAMETER INIT will appear on the LCD 2 Upon completion of parameter initialization the machine beeps for one second and returns to the initial stage of the maintenance mode Note When turn power supply of the machine off after upon completion of EEPROM parameter initialization tu...

Страница 200: ...340 7320 Press in order the 0 and 5 buttons in the initial stage of the maintenance mode DCP7045N 7040 7030 Press the or button MAINTENANCE 05 appears on the LCD and then press the OK button The PRINTING will appear on the LCD 3 The machine prints out the scanning compensation data list containing the following Black and white scanning 4 Upon completion of recording of the compensation data list t...

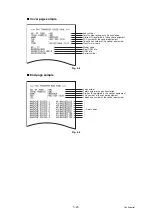
Страница 201: ...5 5 Confidential Print sample Fig 5 1 ...

Страница 202: ...il the CIS unit is placed in position When the scanner unit is placed in the position the SCAN LOCK appears on the LCD 2 Press the Stop Exit button The machine beeps for one second and returns to the initial stage of the maintenance mode Note If it is impossible to move the CIS unit in position for transportation or if this function is performed while a scanning error is occurring the SCAN LOCK ER...

Страница 203: ...cording side or the reading side Operating Procedure 1 MFC7840W 7840N 7450 7440N 7340 7320 Press in order the 0 and 9 buttons in the initial stage of the maintenance mode DCP7045N 7040 7030 Press the or button MAINTENANCE 09 appears on the LCD and then press the OK button 2 The machine starts printing a test pattern Upon completion of printing the machine beeps for one second and returns to the in...

Страница 204: ...e signal setting App 1 5 WSW03 PABX mode setting App 1 6 WSW04 TRANSFER facility setting App 1 8 WSW05 1st dial tone and busy tone detection App 1 9 WSW06 Redial Pause button setting and 2nd dial tone detection App 1 10 WSW07 Dial tone setting 1 App 1 12 WSW08 Dial tone setting 2 App 1 13 WSW09 Protocol definition 1 App 1 14 WSW10 Protocol definition 2 App 1 15 WSW11 Busy tone setting App 1 16 WSW...

Страница 205: ...up scanning 1 App 1 49 WSW45 Speeding up scanning 2 App 1 50 WSW46 Monitor of power ON OFF state and parallel port kept at high App 1 51 WSW47 Switching between high and full speed USB App 1 52 WSW48 USB setup latency App 1 53 WSW49 End of copying beep and print in black App 1 54 WSW50 SDAA settings App 1 55 WSW51 Function setting 16 App 1 56 WSW52 Function setting 17 App 1 57 WSW53 Function setti...

Страница 206: ... operation saves the newly entered selector values onto the EEPROM and readies the machine for accepting a firmware switch number 6 Repeat steps 2 through 5 until the modification for the desired firmware switches is completed 7 Press the Stop Exit button to return the machine to the initial stage of the maintenance mode Note To cancel this operation and return the machine to the initial stage of ...

Страница 207: ...in the arbitrary value by this method 4 If enter all selectors press the OK button This operation saves the newly entered selector values onto the EEPROM and readies the machine for accepting a firmware switch number 5 Repeat steps 2 through 4 until the modification for the desired firmware switches is completed 6 Press the Stop Exit button to return the machine to the initial stage of the mainten...

Страница 208: ...340 7320 Press the 1 button twice in the initial stage of the maintenance mode DCP7045N 7040 7030 Press the or button MAINTENANCE 11 appears on the LCD and then press the OK button PRINTING will appear on the LCD 2 The machine prints out the configuration list as shown in the figure below 3 Upon completion of printing the machine beeps for one second and returns to the initial stage of the mainten...

Страница 209: ...ial stage of the maintenance mode DCP7045N 7040 7030 Press the or button MAINTENANCE 12 appears on the LCD and then press the OK button The LCD shows 2 Press the Start button Each time you press the Start button the LCD cycles through the displays shown below 3 Press the Stop Exit button in any process of the above display cycle The machine beeps for one second and returns to the initial stage of ...

Страница 210: ... each time a button is pressed Check that the displayed number is correct by referring to the illustration below If a button is pressed out of order the machine displays the INVALID OPERATE on the LCD To return to the status ready to accept button entry for operational check press the Stop Exit button 3 After the last number button is pressed the machine beeps for one second and returns to the ini...

Страница 211: ...s displayed with have the checksum information as well Press the OK button when its version information is displayed on the LCD Press the OK button again to go back to the version information display Press the or buttons to check the next term Note If you press the OK button when each version information of Network is displayed on the LCD you cannot check the checksum information 3 To terminate th...

Страница 212: ...enu button or OK button If the sensing status are as listed below the LCD will show the following DFDRCV and NTMNRSTNKOFU which can be switched by pressing the Start button for machines Given below is the relationship between the LCD indication sensor names and sensor status LCD Sensors Sensing status DF Document front sensor No document detected DR Document rear sensor No document detected CV Cov...

Страница 213: ...Y New toner sensor New toner sensor harness ASSY Eject actuator Registration front sensor Tail edge sensor Registration front sensor PCB ASSY Registration rear sensor Registration rear sensor PCB ASSY Toner sensor Toner sensor PCB unit ASSY Registration front actuator Edge actuator Registration rear actuator ADF sensor PCB ASSY ADF front sensor rear sensor ...

Страница 214: ...o function explanation Plain 1 Paper Size Switching of the area of develop the image Refer to function explanation Letter 2 Copies Switching of the print copies 1 to 99 pages 1 Orientation Switching of the print direction PortLait Landscape Portlait P Pos X Offset Switching of the offset print position of the landscape orientation 500 to 500 1 300dpi 0 P Pos Y Offset Switching of the offset print ...

Страница 215: ...300dpi 0 Function Set value Problem MANUAL FEED ON OFF Configure the setting for the ON OFF of the manual paper feed Effective for the print from the PC or for the print of the NetWorkConfig TestPrint Fontlist Configuration from the panel When select the tray on the PC the setting becomes effective And this setting is ignored Default OFF RESOLUTION 300 600 1200 Configure the setting for the Resolu...

Страница 216: ... default value in JPN CHN Default Plain Thin change in each country PAPER SIZE Letter Legal A4 Executive B5 JISB5 A5 B6 A6 Monarch C5 COM10 DL DLL A4Long PostCard Folio Configure the setting for the size of the recording paper Does not set the Paper Size of the Menu set the drawing size of the PC Print When set the size of the recording paper on the PC the setting becomes effective And this settin...

Страница 217: ... setting for the auto WRAP auto CRLF at the print width Default OFF AUTO SKIP ON OFF Configure the setting for the skip at the back end tip of the recording paper and add the blank space Default ON LEFT MARGIN 0 to 145 Configure the setting for the Left Margin column space at the left end Default 0 RIGHT MARGIN 10 to 155 Configure the setting for the Right Margin column space at the right end Defa...

Страница 218: ...eport only press the 2 button The 2 ACTIVITY appears To transfer received files together with the activity report press the 3 button The 3 DOCUMENTS appears Note that if there is no received file the NO DOCUMENTS appears 4 To transfer the communication list for the latest communication press the 4 button The 4 COM LIST NEW appears To transfer the communication list for last three errors press the ...

Страница 219: ...pages to be transferred Station ID registered in the sender equipment FAX number of the sender equipment Telephone number of the sender equipment Transfer start date Job number Total number of pages transferred Station ID registered in the sender equipment FAX number of the sender equipment Telephone number of the sender equipment Error codes ...

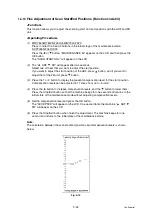
Страница 220: ...f you want to adjust that of the FB unit press button 3 Press the 1 or 2 button to display the present compensation level for the start position Compensation levels can be adjusted in 11 steps from 5 to 5 mm 4 Press the button to increase compensation levels and the button to lower them Press the Stop Exit button so that the machine beeps for one second and returns to the initial state of the main...

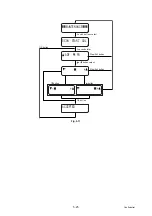
Страница 221: ...5 25 Confidential Fig 5 11 MAINTENANCE ACCEPTED ADF FB SCAN START ADJ 5 and 4 buttons select Stop Exit button Stop Exit button or button select OK button OK button 2 seconds later button button ...

Страница 222: ...intenance mode 1 4 15 Paper Feeding and Ejecting Test Function code 67 Function This function allows you to check that a sheet of paper is fed and ejected correctly by printing the grid pattern on a page whose interval is 1cm Operating Procedure 1 MFC7840W 7840N 7450 7440N 7340 7320 Press in order the 6 and 7 buttons in the initial stage of the maintenance mode DCP7045N 7040 7030 Press the or butt...

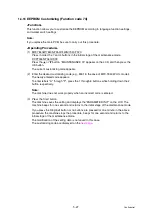
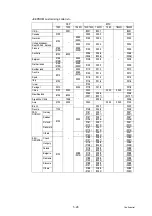
Страница 223: ...code e g 8001 in the case of MFC 7840W U S model The newly entered code appears To enter letters A through F press the 1 through 6 buttons while holding down the button respectively Note The machine does not work properly when an incorrect code is entered 3 Press the Start button The machine saves the setting and displays the PARAMETER INIT on the LCD The machine beeps for one second and returns t...

Страница 224: ...016 2016 Israel 2104 Portugal 3014 3004 2118 2018 2018 China 2120 2020 2020 0040 0040 0140 New Zealand 6104 6004 2056 2027 2056 2027 2056 20127 Argentina Chilly 1036 0036 0036 Asia 4104 4004 0040 0040 0040 0140 Brazil 0042 0042 Russia 7104 3004 2148 2048 2048 PAN NORDIC Norway 3104 2157 2107 2057 2007 2057 2007 Sweden 2157 2126 2057 2026 2057 2026 Finland 2157 2112 2057 2012 2057 2012 Denmark 2157...

Страница 225: ...ar on the LCD as shown in the figure below DCP7045N 7040 7030 Press the or button MAINTENANCE 78 appears on the LCD and then press the OK button Fig 5 12 2 Press the Start button so that the LCD indication is changed in the order shown in the figure above The fan operation is also changed as indicated on the LCD 3 Press the Stop Exit button so that the machine stops checking the fans beeps for one...

Страница 226: ...5 30 Confidential Location of fans Fig 5 13 Fan motor 60 unit Right side ...

Страница 227: ... date and time when the error occurs are indicated on the LCD USB Serial number DRUM Drum count COVERAGE Average Coverage 1 TTL_PG Total number of printed pages COPY Number of copies made PCPRINT Number of PC prints made FAX Number of FAX outputs made 2 LIST Number of list page printed pages TR1_PG Number of pages picked up from the T1 MN_PAGE Number of pages picked up from manual tray A4 LTR Numb...

Страница 228: ...PG Number of printed pages with the drum unit TNER_CH Number of times the toner cartridge has been replaced TNER_PG1 Number of pages printed with the current toner cartridge TNER_PG2 Number of pages printed with the previous toner cartridge DEV_BIAS Developing bias voltage HODN_ER Number of electric discharge error FUSR_ER Number of fuser error MTLK_ER Number of motor lock error MACHINE ERR_01 to ...

Страница 229: ... 7320 Function This function outputs the transmission log that the machine has stored about the latest transmission to the telephone line It allows the service personnel to receive the transmission log of the user s machine at a remote location and use it for analyzing problems arising in the user s machine Operating Procedure 1 If the user s machine has a transmission related problem call the use...

Страница 230: ...ode Operating Procedure 1 MFC7840W 7840N 7450 7440N 7340 7320 Press the 9 button twice in the initial stage of the maintenance mode DCP7045N 7040 7030 Press the or button MAINTENANCE 99 appears on the LCD and then press the OK button 2 The machine exits from the maintenance mode and returns to the ready state ...

Страница 231: ...tomatically when the drum unit is replaced with a new one If replacing the drum unit with a new one without resetting the drum counter the counted value of the old drum unit is used continuously and remain appears on the LCD When replacing the drum unit with a new one it is required to reset the drum counter following the steps below Procedure 1 Open the front cover while the power supply of the m...

Страница 232: ...ginning to the end The developing bias voltage can be verified in the display of log information Function code 80 Procedure 1 Open the front cover 2 MFC7840W 7840N 7450 7440N 7340 7320 Press the Clear Back button DCP7045N 7040 7030 Press the Clear Back button Replace Drum 1 Yes 2 No appears on the LCD 3 MFC7840W 7840N 7450 7440N 7340 7320 Press the button in order of 0 0 DCP7045N 7040 7030 Press t...

Страница 233: ...6 1 Confidential CHAPTER 6 CIRCUIT DIAGRAMS WIRING DIAGRAM High voltage Power Supply PCB Circuit Diagram ...

Страница 234: ...6 2 Confidential LVPS PCB Circuit Diagram 100V ...

Страница 235: ...6 3 Confidential LVPS PCB Circuit Diagram 200V ...

Страница 236: ...RA 242M C6 R6 6 2k D1 ERA15 04 D4 RA 351M V6 2 D2 S1ZB60 A1 A2 R1 120 2W R2 24k FG 6B CI GND 24V R5 6 2k C1 C474 250V PH3 TLP421 A K E C T1 BT 17 GND R4 6 2k 6B SL R11 4 3k 5A SL GND 2C TELRL 2A CML 2B PLS 5B RL1 24V 3D TELSL 2C TELOFF 4B CI 5V J3 285D D440J 111 1 XX 2 XX 3 XX 4 XX 5 GND 6 GND 5V Q1 C5395 C B E 6B TELOFF 6B CML GND 6B TELRL R20 100 C13 C470 10V GND 5V GND FG 6C PLS J2 R41 4910 A 3...

Страница 237: ...0 16V C14 C822 R22 68k 4C CI GND 6B RL1 3C TELOFF 24V 5V 2C TELRL 2A CML 6B SL 3D TELSL 1B PLS 4B CHRG 2B RDPS R25 820 C8 C470 6 3V GND R27 1k 5V REF C13 C101 GND C5 C10 6C TELSL C12 C102 R28 2 7k D7 1SS120 C20 C104 R21 120k D8 1SS120 R15 120k NC R10 150 GND REF C6 C100 16V NC C17 C102 GND 6C TELRL R29 100 GND U1 BA10358 6 5 7 C16 C101 R24 2 7k R20 12k C15 C104 Q2 C5395 C B E J3 285D D440J 111 1 X...

Страница 238: ...00k U1 BA10358 4 2 3 1 8 C18 C561 R16 100k GND C10 C104 5V C11 C561 C22 C563 6C RL1 REF C9 C10 16V C14 C822 R22 68k 4C CI GND 6B RL1 3C TELOFF 24V 5V 2C TELRL 2A CML 6B SL 3D TELSL 1B PLS 4B CHRG 2B RDPS R25 820 C8 C470 6 3V GND R27 1k 5V REF C13 C101 GND C5 C10 6C TELSL C12 C102 R28 2 7k D7 1SS120 C20 C104 R21 0 D8 1SS120 R15 0 NC R10 150 GND REF C6 C470 10V NC C17 C102 GND 6C TELRL R29 100 GND U...

Страница 239: ...6 7 Confidential Wiring Diagram ...

Страница 240: ...pulse setting App 1 3 WSW02 Tone signal setting App 1 5 WSW03 PABX mode setting App 1 6 WSW04 Transfer facility setting App 1 8 WSW05 1st dial tone and busy tone detection App 1 9 WSW06 Redial Pause button setting and 2nd dial tone detection App 1 10 WSW07 Dial tone setting 1 App 1 12 WSW08 Dial tone setting 2 App 1 13 WSW09 Protocol definition 1 App 1 14 WSW10 Protocol definition 2 App 1 15 WSW11...

Страница 241: ...g up scanning 1 App 1 49 WSW45 Speeding up scanning 2 App 1 50 WSW46 Monitor of power ON OFF state and parallel port kept at high App 1 51 WSW47 Switching between high and full speed USB App 1 52 WSW48 USB setup latency App 1 53 WSW49 End of copying beep and print in black App 1 54 WSW50 SDAA settings App 1 55 WSW51 Function setting 17 App 1 56 WSW52 Function setting 18 App 1 57 WSW53 Function set...

Страница 242: ...ctors set the break time length in pulse dialing Example If 1 2 and 3 are dialed when N is set by selectors 1 and 2 Selector No Function Setting and Specifications 1 2 Dial pulse generation mode No 1 2 0 0 N 0 1 N 1 1 0 10 N 1 1 N 3 4 Break time length in pulse dialing No 3 4 0 0 60 ms 0 1 67 ms 1 0 40 ms 1 1 64 ms for 16 PPS 5 6 Inter digit pause No 5 6 0 0 800 ms 0 1 850 ms 1 0 950 ms for 16 PPS...

Страница 243: ...r or not the dialing mode can be switched between the pulse DP and tone PB dialing by using the function switch Selector 8 Default dialing mode pulse DP or tone PB dialing This selector sets the default dialing mode pulse dialing or tone dialing which can be changed by the function switch If the user switches it with the function switch when selector 7 is set to 0 the setting specified by this sel...

Страница 244: ... as a signal during remote control operation or at the start of ICM recording The larger the value specified by these selectors the greater the attenuation Selector No Function Setting and Specifications 1 2 Tone signal transmission time length No 1 2 0 0 70 ms 0 1 80 ms 1 0 90 ms 1 1 100 ms 3 4 Min pause in tone dialing No 3 4 0 0 70 ms 0 1 80 ms 1 0 90 ms 1 1 140 ms 5 I 8 Attenuator for pseudo r...

Страница 245: ...g Upon detection of the PABX dial tone for the time length set by these selectors the machine starts dialing These selectors are effective only when both selectors 6 and 7 are set to 1 Detection Selector No Function Setting and Specifications 1 CNG detection when sharing a modular wall socket with a telephone 0 A 1 B 2 I 4 Detection time length of PABX dial tone required for starting dialing No 2 ...

Страница 246: ... to the PABX Setting both of these selectors to 1 activates the dial tone detection function so that the machine starts dialing upon detection of a dial tone when a line is connected Other setting combinations deactivate the dial tone detection function so that the machine starts dialing after the specified WAIT 3 5 5 0 or 7 0 sec without detection of a dial tone when a line is connected ...

Страница 247: ...g Setting this selector to 1 increases the tone detection sensitivity in ICM recording Selectors 6 and 8 Break time length for flash function These selectors set the break time length This setting is effective only when the flash function is selected for the Search Speed Dial button by using the function switch Selector No Function Setting and Specifications 1 Earth function in transfer facility N...

Страница 248: ...0 10 5 14 0 17 5 21 0 or 24 5 seconds without detection of a dial tone when a line is connected to the PSTN Selector 4 Max pause time allowable for remote ID code detection This selector sets the maximum pause time allowable for detecting the second digit of a remote ID code after detection of the first digit in remote reception If selector 4 is set to 0 2 seconds for instance only a remote ID cod...

Страница 249: ...ects the line upon detection of a busy tone in automatic receiving mode WSW06 Note Selectors 4 through 8 are not applicable in those countries where no dial tone detection is supported e g U S A Selector No Function Setting and Specifications 1 I 3 Redial Pause button setting and 2nd dial tone detection No 1 2 3 0 0 0 No pause 0 0 1 3 5 sec wait 0 1 0 7 sec wait 0 1 1 10 5 sec wait 1 0 0 2 8 sec w...

Страница 250: ...it as defined in the above table If the Redial Pause button is pressed repeatedly the machine inserts the specified wait multiplied by the number of depressions It applies also in hook up dialing 1 0 1 1 1 0 1 1 1 When these selectors are set to 1 0 1 Each time you press the Redial Pause button in dialing the machine will wait for the 2nd dial tone to be sent via the communications line regardless...

Страница 251: ...re starting dialing Selectors 4 through 6 2nd dial tone detection level These selectors set the detection level of the 2nd dial tone Selector 7 Allowable instantaneous interrupt during reception of 1st dial tone This selector sets the allowable instantaneous interrupt period that should be ignored during reception of the 1st dial tone Selector No Function Setting and Specifications 1 2 Dial tone f...

Страница 252: ...ut length for the 1st and 2nd dial tone detection so that the machine waits dial tone input for the specified time length and disconnects itself from the line when no dial tone is inputted Selector No Function Setting and Specifications 1 I 3 1st dial tone detection time length No 1 2 3 0 0 0 50 ms 0 0 1 250 ms 0 1 0 500 ms 0 1 1 620 ms 1 0 0 800 ms 1 0 1 1 5 sec 1 1 0 2 0 sec 1 1 1 2 5 sec 4 5 Ti...

Страница 253: ...ne will use standard commands only Selectors 3 and 4 No of retries These selectors set the number of retries in each specified modem transmission speed Selector 5 T5 timer This selector sets the time length for the T5 timer Selector 6 T1 timer This selector sets the time length for the T1 timer Selectors 7 and 8 Timeout for response from the called station in automatic sending mode If the machine ...

Страница 254: ...nd telephone Selectors 5 and 6 No of training retries These selectors set the number of training retries to be repeated before automatic fallback Selectors 7 and 8 Encoding system Compression This selector determines whether or not to allow the use of the MR MMR coding system Selector No Function Setting and Specifications 1 DPS switching interfacing with CML 0 No 1 Yes 2 Time length from transmis...

Страница 255: ...selectors set the ON and OFF time length ranges for busy tone to be detected If more than one selector is set to 1 the ranges become wider For example if selectors 4 and 5 are set to 1 the ON and OFF time length ranges are from 175 to 600 ms Selector No Function Setting and Specifications 1 2 Busy tone frequency band control No 1 2 0 0 Narrows by 10 Hz 0 1 Initial value 1 0 Widens by 10 Hz 1 1 Wid...

Страница 256: ...rs 1 through 4 on WSW14 during the period set by these selectors 5 and 6 then it acknowledges the call Selector 7 Line connection timing If a line is connected in a ringer ON period FAX models equipped with SDAA circuits may malfunction due to the ringer voltage To make the line connection stable this selector should be set to 0 so that a line is connected in a ringer OFF period Selector No Functi...

Страница 257: ... attenuation of the modem when the reception level at the remote station is improper due to line loss This function applies for G3 protocol signals Setting two or more selectors to 1 produces addition of attenuation assigned to each selector If selector 8 on WSW23 is set to 0 this setting is so limited that 10 dB 1 dB in France or higher setting only is effective Note that in Japan and China 9 dB ...

Страница 258: ... These selectors set the number of rings to initiate the AUTO ANS facility Selector No Function Setting and Specifications 1 2 Frequency band selection lower limit for incoming calling signal CI No 1 2 0 0 13 Hz 0 1 15 Hz 1 0 23 Hz 1 1 20 Hz 3 4 Frequency band selection upper limit for incoming calling signal CI No 3 4 0 0 30 Hz 0 1 55 Hz 1 0 70 Hz 1 1 200 Hz 5 I 8 No of rings in AUTO ANS mode No ...

Страница 259: ...ually waits for three seconds and then makes a retry three times This CRP option is a request command that can be sent from the called station for requesting the calling station to retry the failed command immediately Selector No Function Setting and Specifications 1 2 Redial interval No 1 2 0 0 5 min 0 1 1 min 1 0 2 min 1 1 3 min 3 I 6 No of redialings No 3 4 5 6 0 0 0 0 16 times 0 0 0 1 1 times ...

Страница 260: ...ment length limitation This selector is used to select the maximum length of a document to be sent Selector 8 Stop Exit button pressed during reception If this selector is set to 1 pressing the Stop Exit button can stop the current receiving operation The received data will be lost Selector No Function Setting and Specifications 1 Not used 2 ITU T CCITT superfine recommendation 0 OFF 1 ON 3 I 6 No...

Страница 261: ...s DD is the day MM is the month YY is the last two digits of the year hh is the hour and mm is the minute Selector 7 Non ring reception Setting this selector to 1 makes the machine receive calls without ringer sound if the Ring Delay is set to 0 Selector No Function Setting and Specifications 1 2 Off hook alarm No 1 2 0 0 No alarm 0 1 Always valid 1 0 Valid except when call reservation is selected...

Страница 262: ...or 6 Registration of station ID Setting this selector to 0 permits the registration of station ID for Austrian and Czech models Selectors 7 and 8 Tone sound monitoring These selectors set monitoring specifications of the tone sound inputted from the line Selector No Function Setting and Specifications 1 Header for fax 0 With header 1 Without header 2 3 Detection enabled time for CNG and no tone No...

Страница 263: ... falls back to a low transmission speed e g 4 800 bps set the first transmission speed choice to the lower one e g modify it from 12 000 bps to 7 200 bps in order to deactivate the high speed MODEM function and reduce the training time for shorter transmission time Generally to save the transmission time set the last transmission speed choice to a higher one Selector 7 V 34 mode If this selector i...

Страница 264: ...al does Setting selector 3 to 1 allows the machine to ignore a DIS signal sent from the called station once in sending operation This operation suppresses echoes since the first DIS signal immediately follows a 2100 Hz CED which disables the ES so that it is likely to be affected by echoes in the disabled ES state However such a disabled ES state will be removed soon so that the second and the fol...

Страница 265: ...s the line Selectors 6 and 7 Taping the call Not used These selectors select whether or not to tape the call Setting them to 1 0 enables taping the call without signaling to the calling station that the call is being taped Selector 8 Erasure of message stored in the memory after the message transfer Setting this selector to 0 will erase the message recorded in the memory after the document retriev...

Страница 266: ... area and the user subscribes to it he she can see information about his her incoming call on the LCD Selectors 5 through 8 Acceptable TCF bit error rate Not used Setting two or more selectors to 1 produces addition of percent assigned to each selector If you set selectors 7 and 8 to 1 the acceptable TCF bit error rate will be 3 Selector No Function Setting and Specifications 1 ECM in sending 0 Va...

Страница 267: ...rs 2 and 3 Allowable training error rate The called station checks a series of zeros gathered in training as described in Selector 1 according to the allowable training error rate set by these selectors If the called station judges the line condition to be accepted it responds with CFR if not it responds with FTT Selectors 4 and 5 Decoding error rate for transmission of RTN The machine checks the ...

Страница 268: ...om CML ON up to the start of OGM transmission Selectors 5 through 8 Attenuator for playback of ICM OGM to the line Not used Setting two or more selectors to 1 produces addition of attenuation assigned to each selector This setting is not limited by selector 8 on WSW23 Selector No Function Setting and Specifications 1 2 Maximum OGM recording time No 1 2 0 0 15 sec 0 1 20 sec 1 0 30 sec 1 1 50 sec 3...

Страница 269: ...g by selectors 1 through 5 of WSW21 must be within 40 seconds or less Selectors 3 and 4 External TAD no tone detection level Not used These selectors set the no tone detection level in the external TAD mode Selectors 5 through 7 Pause between paging number and PIN These selectors set the pause time between a telephone number being paged and PIN personal identification number for the paging feature...

Страница 270: ...in the TAD mode or via the machine in the automatic reception of the F T mode The machine interprets a CNG as an effective signal if it detects the CNG by the number of cycles specified by these selectors when the line is connected via the external telephone in the external TAD mode via the built in telephone in the TAD mode or via the machine in the automatic reception of the F T mode Selector No...

Страница 271: ...cting 1 High increases the quality sacrificing the recording time Selector 7 Recording time for high recording quality Not used This setting takes effect when selector 6 is set to 1 High Setting this selector to 0 Short further increases the recording quality sacrificing the recording time The recording quality and time to be applied when this selector is set to 1 Long are higher and shorter than ...

Страница 272: ...ard Never access them Selector No Function Setting and Specifications 1 I 3 Transmission level of DTMF high band frequency signal No 1 2 3 0 0 0 0 dB 0 0 1 1 dB 0 1 0 2 dB 0 1 1 3 dB 1 0 0 0 dB 1 0 1 1 dB 1 1 0 2 dB 1 1 1 3 dB 4 I 6 Transmission level of DTMF low band frequency signal No 4 5 6 0 0 0 0 dB 0 0 1 1 dB 0 1 0 2 dB 0 1 1 3 dB 1 0 0 0 dB 1 0 1 1 dB 1 1 0 2 dB 1 1 1 3 dB 7 8 Not used ...

Страница 273: ... activity report becomes full for prompting you to print out the report Printing it out will clear the memory area Selector No Function Setting and Specifications 1 I 3 Compression threshold level for voice signals inputted via the telephone line in the built in TAD operation Not used No 1 2 3 0 0 0 47 0 dBm A 0 0 1 48 5 dBm B 0 1 0 50 0 dBm C 0 1 1 51 5 dBm D 1 0 0 53 0 dBm E 1 0 1 54 5 dBm F 1 1...

Страница 274: ...as being disconnected The machine stops TAD recording and disconnects the line Selector 8 Density adjustment of the copy for text mode When copy the thin document thicken the contrast and print it Selector No Function Setting and Specifications 1 I 3 Dial tone busy tone detection level during recording of ICM Not used No 1 2 3 0 0 0 38 0 dBm A 0 0 1 39 5 dBm B 0 1 0 41 0 dBm C 0 1 1 42 5 dBm D 1 0...

Страница 275: ...t are required for the machine to interpret ringer signals as being ON or OFF This is to prevent components of a ringer pattern from being misinterpreted due to chattering in distinctive ringing The machine monitors ringer signals at 10 ms intervals If the signal is ON the machine counts 1 if it is OFF it counts 1 If the counter increments up to 5 or 13 when this selector is set to 1 90 ms or 0 13...

Страница 276: ...ion Selectors 7 and 8 Default contrast These selectors set the default contrast which applies when the machine is turned on or completes a transaction Selector No Function Setting and Specifications 1 I 4 Not used 5 6 Default resolution No 5 6 0 0 Standard 0 1 Fine 1 0 Super fine 1 1 Photo 7 8 Default contrast No 7 8 0 0 Automatic 0 1 Automatic 1 0 Super light 1 1 Super dark ...

Страница 277: ... an initial negotiation sequence for transmission the machine responds to the calling station with the allowable FAX receiving speed specified by these selectors Selectors 7 and 8 Comfortable noise level Not used These selectors set the level of noise to be added during playing back of voice signals recorded with no signal compression If they are set to 0 0 no noise will be added Selector No Funct...

Страница 278: ... telephone in the external TAD mode or via the machine in F T mode Selectors 6 and 7 Number of DTMF tone signals for inhibiting the detection of CNG during external TAD operation If the machine receives this specified number of DTMF tone signals during external TAD operation it will not detect CNG afterwards If these selectors are set to 1 1 the CNG detection will not be inhibited Selector No Func...

Страница 279: ...r the PC power ON OFF state Selector No Function Setting and Specifications 1 I 4 Max detection period of dial tone busy tone during recording of ICM Not used No 1 2 3 4 0 0 0 0 No detection 0 0 0 1 1 sec 0 0 1 0 2 sec 0 1 0 0 4 sec 1 1 1 1 15 sec 5 I 8 Not used Selector No Function Setting and Specifications 1 ECP mode Not used 0 ON 1 OFF 2 Recovery from Inactive PC Interface Not used 0 Disable 1...

Страница 280: ...ed that selector 3 be set to 1 otherwise the machine may mistakenly detect PC powered off Selector 5 Escape from phase C This selector determines whether or not the machine will escape from phase C when it detects an RTC Return to Control in non ECM mode or an RCP Return to Control Partial page in ECM mode Selectors 6 through 8 Extension of incoming calling signal CI frequency band specified by se...

Страница 281: ...transmission If in memory message transmission fails repeatedly when selector 1 is set to 1 the temporary memory will be occupied with image data Setting selector 2 to 1 will automatically erase the stored 1st page image data of an unsent document at the time of the subsequent in memory message transmission only when recording paper or toner runs out Selector No Function Setting and Specifications...

Страница 282: ...per transmission speed choice These selectors determine how the modem controls the EQM Eye Quality Monitor gain for proper choice of the transmission speed which applies if the modem selects higher transmission speed than the possible speed so that it always repeats falling back Selector 8 Detection of CED for stopping CNG If this selector is set to 0 the detection time of CED specified by WSW43 s...

Страница 283: ...transmission speed to the last choice specified by selectors 5 through 8 If the modem always falls back to a low transmission speed e g 24 000 bps set the first transmission speed choice to the lower one e g modify it from 31 200 bps to 26 400 bps in order to deactivate the high speed modem function and reduce the training time for shorter transmission time WSW39 will be limited by selectors 3 thr...

Страница 284: ...ugh 4 of WSW39 for example then the allowable maximum transmission speed will be limited to 31200 bps If selector 8 is set to 1 to mask the 2400 symbols second when the first transmission speed choice is 33600 bps then the allowable maximum transmission speed remains 33600 bps If selector 8 is set to 1 to mask the 2400 symbols second when the first transmission speed choice is 21600 bps specified ...

Страница 285: ...12 000 14 400 16 800 19 200 21 600 3000 4 800 7 200 9 600 12 000 14 400 16 800 19 200 21 600 24 000 26 400 28 800 3429 4 800 7 200 9 600 12 000 14 400 16 800 19 200 21 600 24 000 28 800 31 200 33 600 2800 4 800 7 200 9 600 12 000 14 400 16 800 19 200 21 600 24 000 24 600 3200 4 800 7 200 9 600 12 000 14 400 16 800 19 200 21 600 24 000 26 400 28 800 31 200 ...

Страница 286: ...ttenuator Not used These selectors are used to adjust the transmitting level of the modem when the reception level at the remote station is improper due to line loss This function applies to super G3 protocol signals Selector No Function Setting and Specifications 1 I 3 ON duration of the scanning light source at room temperature Not used No 1 2 3 0 0 0 16 hours 0 0 1 24 hours 0 1 0 12 hours 0 1 1...

Страница 287: ...Periodical or on demand Not used 0 OFF 1 ON 2 Access to the outgoing mail SMTP server 0 OFF 1 ON 3 I FAX relay Not used 0 OFF 1 ON 4 JBIG encoding system 0 Not allowed 1 Allowed 5 Discharge detection Not used 0 ON 1 OFF 6 I 8 Not used Selector No Function Setting and Specifications 1 Header for sent mail 0 Yes 1 No 2 3 Wait time for PC Fax reception Class 2 and FPTS command transmission No 2 3 0 0...

Страница 288: ...long compensation data obtained beforehand will keep effective Selector No Function Setting and Specifications 1 I 5 Copying speed control Not used No 1 2 3 4 5 0 0 0 0 0 Max 0 0 0 0 1 1cpm 1 1 1 1 1 31cpm 6 I 8 Effective time length of the white level compensation data obtained beforehand Not used No 6 7 8 0 0 0 Obtained compensation data ineffective 0 0 1 1 min 0 1 0 3 min 0 1 1 5 min 1 0 0 10 m...

Страница 289: ...oltage correction during standby Conventionally the correction has been made immediately before the start of actual scanning This function takes effect in copying Making the correction during standby may shorten the preparation time for copying Note Do not access these selectors Selector No Function Setting and Specifications 1 I 3 Delay time from when documents are set until the ADF starts drawin...

Страница 290: ...Setting this selector to 0 will keep all parallel output pins of the machine at high level Use this setting if Resource Manager bundled with MFC models installed to WindowsNT running on the connected PC fails to monitor the power ON OFF state of the machine Selector 4 Previous filtering parameters for white level compensation Not used At the start of scanning operation the machine usually initiali...

Страница 291: ...ing if you pick up the handset of the external telephone the line might be disconnected due to cut off of the line current To hold the line the machine may supply line current by making use of the pulse generator circuit that forms a parallel loop This way the FAX line disconnection may be delayed These selectors determine the delay period Selector No Function Setting and Specifications 1 Handling...

Страница 292: ...r of network TWAIN PCs registered for each application Not used No 3 4 5 0 0 0 25 PCs 0 0 1 50 PCs 0 1 0 75 PCs 0 1 1 100 PCs 1 0 0 125 PCs 1 0 1 150 PCs 1 1 0 175 PCs 1 1 1 200 PCs 6 I 8 USB setup latency Not used No 6 7 8 0 0 0 Default period default period without change 0 0 1 Shorten 1 0 1 0 Lengthen 1 0 1 1 Lengthen 2 1 0 0 Lengthen 3 1 0 1 Lengthen 4 1 1 0 Shorten 2 1 1 1 Shorten 3 ...

Страница 293: ...default If this selector is set to 1 in cases of out of ink data will be printed only in black ink However in such circumstances no color data will be printed Selector No Function Setting and Specifications 1 2 RAM disc size in PCL PS No 1 2 0 0 None 0 1 1MB 1 0 2MB 1 1 4MB 3 End of copying beep 0 Yes 1 No 4 5 Command flag detection time No 4 5 0 0 150 ms 0 1 350 ms 1 0 550 ms 1 1 750 ms 6 7 CCD u...

Страница 294: ... to approach nearer to the specified DC curve that specifies the current vs voltage characteristics of the network termination Selecting either control may solve an unstable connection problem Selector No Function Setting and Specifications 1 2 Percentage voltage for interpreting the external telephone as being hooked up based on the network s standard voltage Not used No 1 2 0 0 50 0 1 80 1 0 30 ...

Страница 295: ...aking and hearing Selector 8 Support between nearly empty empty with main unit cover open after nearly empty detection Not used If this selector is set to 0 the nearly empty ink state if detected will be replaced by the empty ink state when the main unit cover is opened thus prompting the user to replace the ink cartridge immediately Selector No Function Setting and Specifications 1 Output of comm...

Страница 296: ...l be displayed until such time as the fax transmission has been completed Selector No Function Setting and Specifications 1 I 3 Cordless handset microphone level and echo cancellation ON OFF Not used No 1 2 3 0 0 0 Microphone level 0 with echo cancellation OFF 0 0 1 Microphone level 1 with echo cancellation ON 0 1 0 Microphone level 2 with echo cancellation ON 0 1 1 Microphone level 3 with echo ca...

Страница 297: ...ssed files stored on the inserted memory card ASIC application specified integrated circuit JPEG compressed files can be decompressed with an ASIC If an image fails to be replayed correctly due to a decompression error set this selector to 1 and use other proven decompression software instead Selector No Function Setting and Specifications 1 2 Not used 3 4 Caller ID number display FSK receiving ti...

Страница 298: ...s handset ID number registered on the main board does not match that registered on the cordless board the cordless handset ID number registered on the main board will be automatically written onto the cordless board Selectors 5 and 6 Caller ID tone alert detection time length In the event of a false detection of a caller ID tone alert adjust the detection time length Selector 7 Caller ID mild puls...

Страница 299: ...e required for the developing bias voltage correction To keep the density of four colors evenly the developing bias voltage correction is performed when a print job occurs at specified time or later WSW56 Selector 3 Last Job Reprint function setting Setting this selector to 0 makes the machine not to reprint the Last Job Print data such as confidential document in order to prevent the misuse Selec...

Страница 300: ...ver do make sure that the voltage value set by selectors 1 through 3 of this switch is equal to or greater than the value set by selectors 4 through 6 of the same switch Selector 8 Base unit start button after cordless handset dialing Not used Even if the base unit start button is pressed to start a FAX transmission during calling when this selector is in its default state no FAX transmission will...

Страница 301: ... setting for the ratio of guard tone response time to the call end tone ON detection time If the actual percentage of guard tone response time is greater than the percentage set by selectors 1 through 3 this machine will judge that the call end tone has not yet been detected and will continue ICM recording Selector No Function Setting and Specifications 1 I 3 Prevention of line interrupt during IC...

Страница 302: ...NSam DIS When send from the G3 to the FAX machine of the G4 extend the waiting time between the ANSam DIS from 75ms to 450ms in expectation of the switching time of the echo canceller of sending side its default setting is 0 Valid WSW60 Selector No Function Setting and Specifications 1 USB serial number SN transmission enabled disabled 0 USB serial number transmitted USB serial number not transmit...

Страница 303: ...n the long and short time modes depending on the scanning resolution and black and white or color mode The long time mode is selected in color scanning at 600dpi or more or in black and white scanning at 1200dpi The short time mode is selected in other scanning conditions than the above Selector No Function Setting and Specifications 1 I 4 Change rate of the CCD scanning light intensity to judge t...

Страница 304: ... for regular compensation Change rate when compensating the pages with moving the CCD unit to the designated position for scanning of the compensation data and obtaining the data actually For duplex scanning this setting is not used since the machine takes the compensation data of every page again Selector No Function Setting and Specifications 1 I 4 Change rate of the CCD light intensity for scan...

Страница 305: ...losses occur in the control of the compensation If you want to start scanning immediately even if the image quality is not good set to 01 Not discriminates If you want to give priority to the image quality even though losses are increased select one of others 00 Discriminates depending on the rate of change or 10 Discriminates every page WSW63 Selector No Function Setting and Specifications 1 I 8 ...

Страница 306: ...y as conventional models that is by pressing in order the Menu 2 8 6 4 buttons with in 2 seconds 2 MFC7840W 7840N 7450 7440N 7340 7320 Press in order the 0 and 1 buttons in the initial stage of the maintenance mode DCP7045N 7040 7030 Press the or button MAINTENANCE 01 appears on the LCD and then press the OK button Parameter initialization starts and the PARAMETER INIT appears on the LCD 3 Upon co...

Страница 307: ... select LAN Press the OK button 2 Press the or button to select Factory Reset Press the OK button 3 MFC7840W 7840N 7450 7440N 7340 7320 Press the 1 button select Reset DCP7045N 7040 7030 Press the or button 1 appears on the LCD and then press the OK button 4 MFC7840W 7840N 7450 7440N 7340 7320 Press the 1 button select Yes DCP7045N 7040 7030 Press the or button Yes appears on the LCD and then pres...

Страница 308: ...er and property codes and the location of each label Serial number labels for the machine itself How to Read Fig App 3 1 Serial number Serial number 6 digit Manufacturing factory No A January B February C March D April Year of manufacture 7 2007 8 2008 Month of manufacture A 7 J 1 1 1 1 0 1 Model number Back side of Main body Inner side of Front cover E May F June G July H August J September K Oct...

Страница 309: ...App 3 2 Confidential Location Fig App 3 2 Fig App 3 3 The back surface of the machine Serial label Serial label The inside surface of the Front cover ...

Страница 310: ...ig App 3 5 LUS Model distinction Y delay X delay Serial number Frame manufacturer and mold distinction T1 the 1st mold Y3 the 3rd mold Polygon motor distinction Inspection machine Serial label Drive sub ASSY Front side Drive sub ASSY Serial label Serial label Laser unit 2 to 10mm ...

Страница 311: ... App 3 8 Year of manufacture 7 2007 8 2008 Assembly line number Serial number 6 digit Toner filling amount A to D 5 Manufacturing factory No A January B February C March D April Month of manufacture E May F June G July H August J September K October L November M December Serial label Toner cartridge Drum unit Serial label ...

Страница 312: ...ptite bind B M4x12 Taptite cup B Taptite cup S Taptite bind B M3x10 Taptite cup B M3x8 Taptite cup B M4x12 Screw pan S P washer M3 5x6 Taptite flat B M3x10 Taptite cup S M3x6 SR Taptite cup S M3x12 Taptite pan S P washer Taptite pan S P washer S M3x8 Taptite pan Taptite pan B M4x14 Taptite cup B M3x10 ...

Страница 313: ...ual Inline Memory Module dpi dots per inch EEPROM Electronically Erasable and Programmable Read Only Memory FR Feed Roller FU Fuser HEX Hexadecimal HV High Voltage HVPS High Voltage Power Supply IEEE 1284 Institute of Electrical and Electronic Engineers 1284 IF Interface IPv4 Internet Protocol Version 4 IPv6 Internet Protocol Version 6 LCD Liquid Crystal Display LD Laser Diode LED Light Emitting D...

Страница 314: ...App 5 2 Confidential Excluding the acronym shown on the wiring diagram or circuit diagram TE Toner Empty TN Toner TR Transfer ...

Страница 315: ...Manual 2 Diameter of rollers Refer to 5 2 Diameter of Rollers Chapter 1 of the Service Manual 3 Machine specification Refer to 2 SPECIFICATIONS LIST Reference 1 of the Service Reference Manual 4 Paper specification Refer to 2 6 Paper Reference 1 of the Service Reference Manual 5 Toner cartridge weight information Refer to APPENDIX 1 TONER CARTRIDGE WEIGHT INFORMATION of the Service Reference Manua...

Отзывы: