5-47
Confidential
1.3.24 Margin Adjustment in Borderless Printing
(Maintenance mode 66)
< Function >
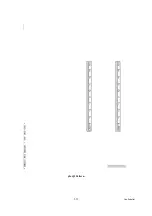
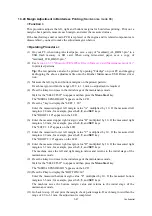
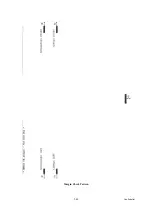
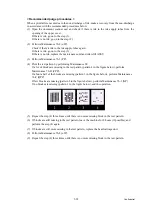
This procedure adjusts the left, right and bottom margins for borderless printing. Print out a
margin check pattern, measure each margin, and enter the measured values.
If the head/carriage unit or main PCB is replaced or the engine and its related components are
disassembled, you need to make the adjustment given below.
< Operating Procedure >
(1) On your PC, when using A4-sized paper, save a copy of "mediaadj_A4_BHS13.prn" to a
USB flash memory or SD card. When using letter-sized paper, save a copy of
"mediaadj_LTR_BHS13.prn."
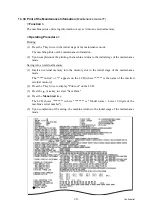
(2) Use
Section 1.3.21 "Printout of PRN/JPEG Files in Memory Card (Maintenance mode 61)"
to print test patterns.
Tip:
The test patterns can also be printed by opening "Filedrgs" on your PC and dragging
& dropping the above adjustment file onto the Brother Maintenance USB Printer driver
icon.
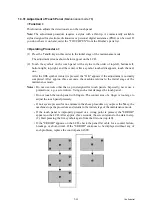
(3) Measure the left, right, and bottom margins on the printed pattern.
If each margin is within the range of 2.9 to 3.1 mm, no adjustment is required.
(4) Press the
6
key two times in the initial stage of the maintenance mode.
Wait for the "SELECT66?" to appear and then press the
Mono
Start
key.
The "MEDIA SENSOR ADJ" appears on the LCD.
(5) Press the
*
key to display the "LEFT 1 :30."
Enter the measured upper left margin value "A" multiplied by 10. If the measured left
margin is 2.8 mm, for example, press the
2
,
8
, and
SET
keys.
The "RIGHT1 :10" appears on the LCD.
(6) Enter the measured upper right margin value "B" multiplied by 10. If the measured right
margin is 3.0 mm, for example, press the
3
,
0
, and
SET
keys.
The "LEFT 2 :30" appears on the LCD.
(7) Enter the measured lower left margin value "C" multiplied by 10. If the measured left
margin is 2.9 mm, for example, press the
2
,
9
, and
SET
key
The "RIGHT 2 :10" appears on the LCD.
(8) Enter the measured lower right margin value "D" multiplied by 10. If the measured right
margin is 3.1 mm, for example, press the
3
,
1
, and
SET
keys.
The machine saves the left and right margin values and returns to the initial stage of the
maintenance mode.
(9) Press the
6
key two times in the initial stage of the maintenance mode.
Wait for the "SELECT66?" to appear and then press the
Mono
Start
key.
The "MEDIA SENSOR ADJ" appears on the LCD.
(10) Press the
#
key to display the "BOTTOM :30."
Enter the measured bottom margin value "E" multiplied by 10. If the measured bottom
margin is 3.5 mm, for example, press the
3
,
5
, and
SET
keys.
The machine saves the bottom margin value and returns to the initial stage of the
maintenance mode.
(11) Go back to step (2) and print the margin check pattern again. If each margin is within the
range of 2.9 to 3.1 mm, the adjustment is completed.
Содержание Business Smart MFC-J4510dw
Страница 18: ...xv Confidential ...
Страница 19: ...xvi Confidential ...
Страница 20: ...xvii Confidential ...
Страница 22: ...xix Confidential ...
Страница 23: ...xx Confidential ...
Страница 24: ...xxi Confidential ...
Страница 51: ...Confidential 2 14 Error Code Contents Refer to page FE ROM data acquisition error 2 57 ...
Страница 130: ...3 3 Confidential 2 PACKING 3_131_E ...
Страница 153: ...3 26 Confidential 3 Set the protective part 3_002_E Protective part ...
Страница 265: ...4 11 Confidential ADF Copy Chart A B C ...
Страница 292: ...5 13 Confidential Scanning Compensation Data List ...
Страница 294: ...5 15 Confidential Test Pattern ...
Страница 317: ...5 38 Confidential pfadj1 Pattern ...
Страница 318: ...5 39 Confidential pfadj2 Pattern ...
Страница 324: ...5 45 Confidential Vertical Lines Check Pattern ...
Страница 325: ...5 46 Confidential Software Correction for Inclination Corrugation Ruled Lines Check Pattern ...
Страница 327: ...5 48 Confidential Margin Check Pattern ...


